 by
by 🧶 Materials
- A light-weight yarn (DK, sport weight, or cotton lace) so the lace shows nicely
- Crochet hook to match yarn (for example 4.0 mm for DK yarn)
- Scissors and tapestry needle for weaving in ends
- Stitch marker (optional) for keeping track of row beginnings
✏️ Abbreviations (US Terms)
- ch = chain
- sl st = slip stitch
- sc = single crochet
- hdc = half-double crochet
- dc = double crochet
- tr = treble crochet (if used)
- st(s) = stitch(es)
- rep = repeat
- … * = repeat instructions inside
- ( … ) = work all inside the same stitch or space
🌿 Pattern Overview
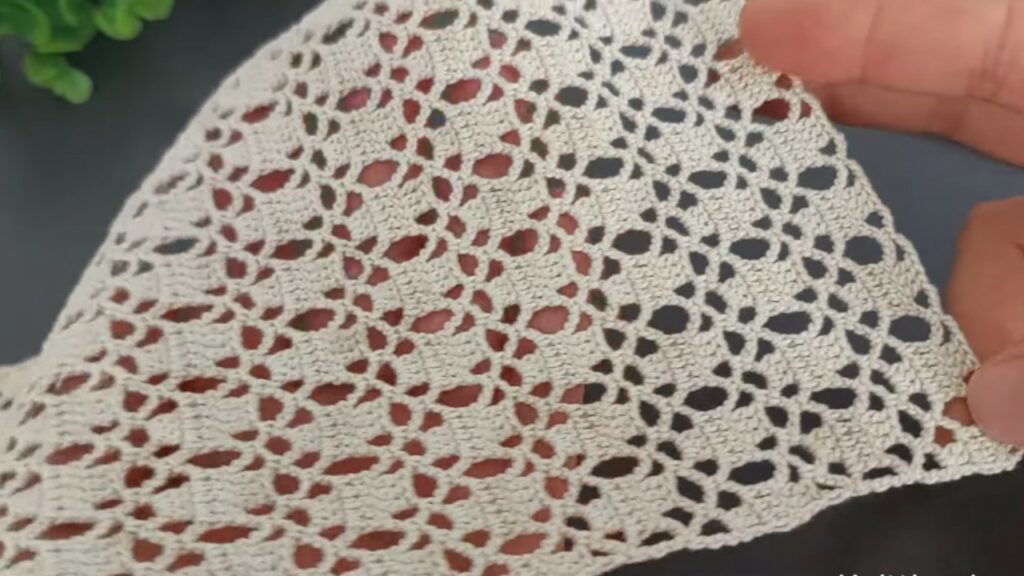
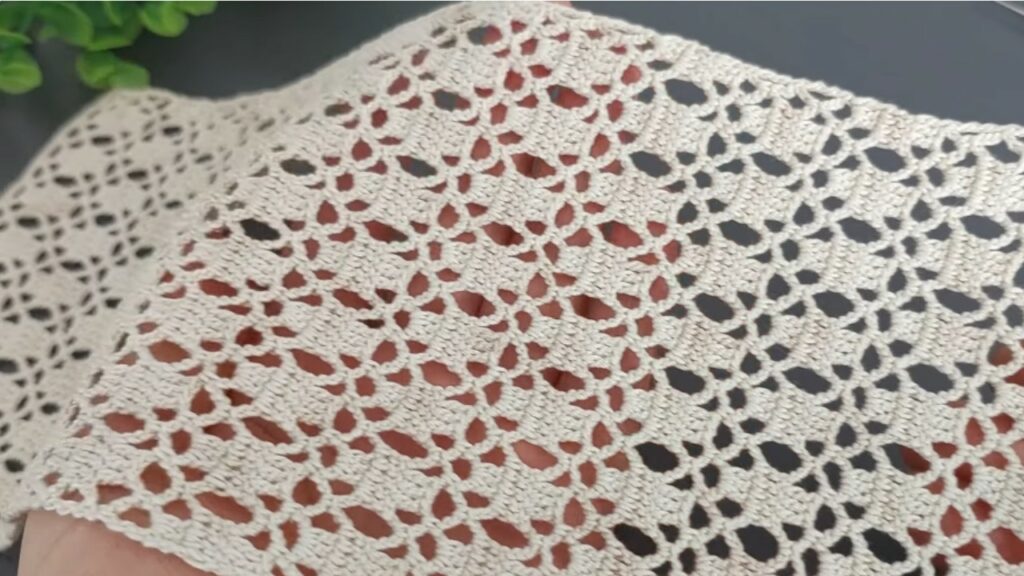
This lace pattern is built on a repeating motif of open spaces (chain loops) and solid stitch clusters, producing a beautifully airy fabric suitable for scarves, shawls, blankets, or lace-edged garments. Because it’s “easy and beautiful for beginners”, the stitch combination stays within basic stitches (sc, dc, chains) but the design gives elegant lace effect.
✅ Step-by-Step Instructions
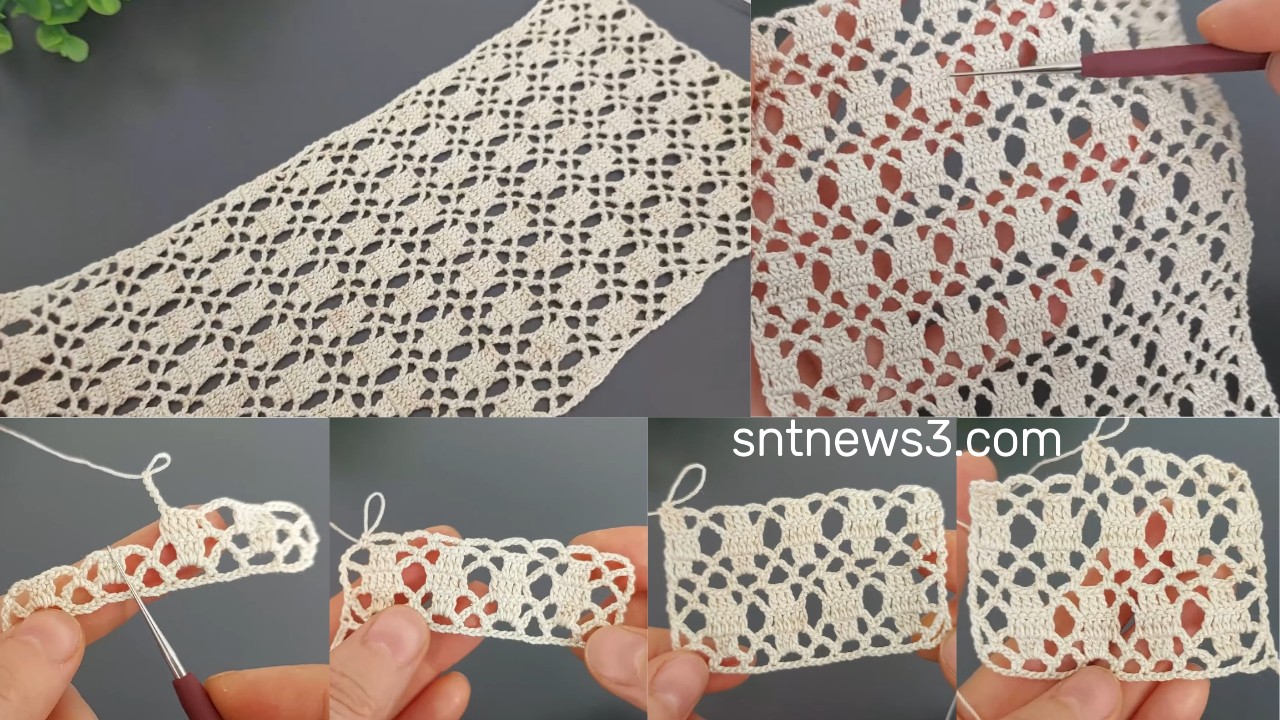
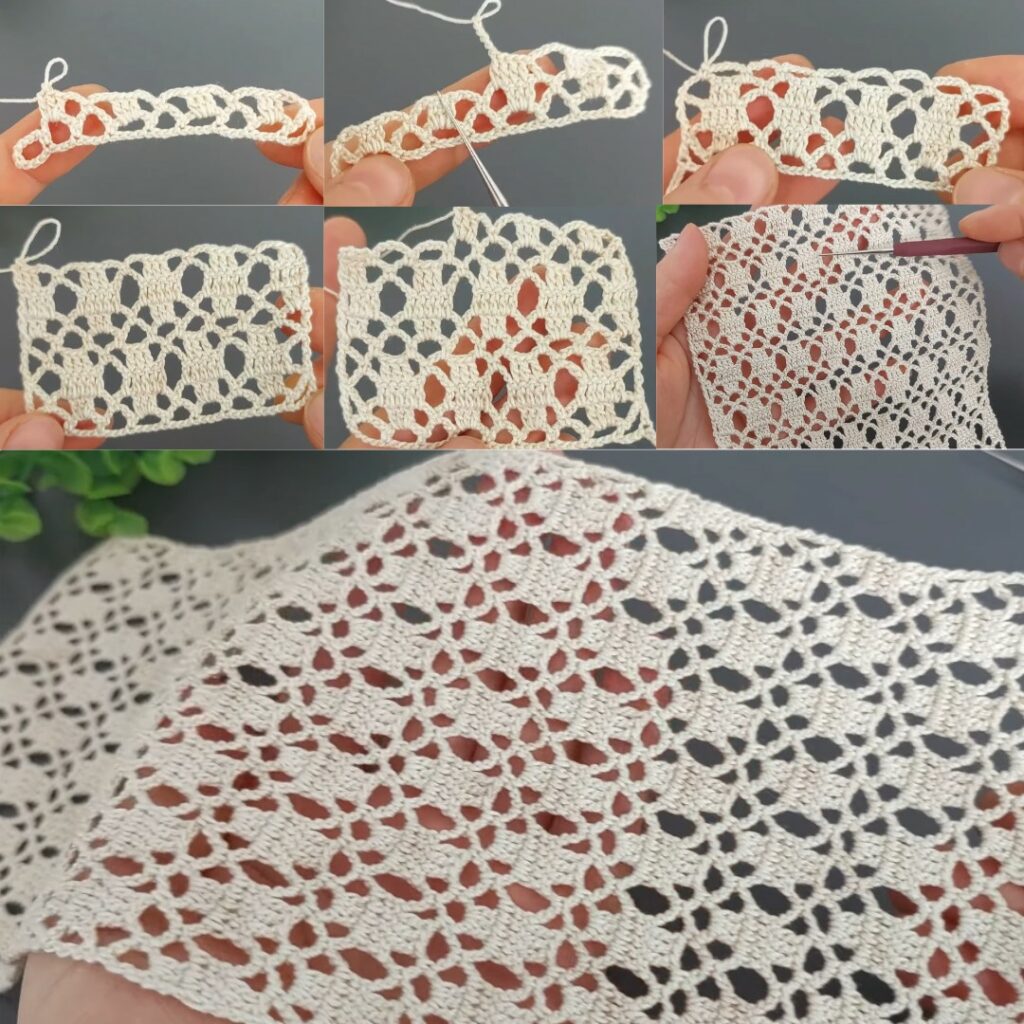
1. Foundation Chain
- Decide width of your piece (e.g., 50 cm for a scarf, 30 cm for a panel).
- Chain a multiple suitable for the repeat. Let’s assume a multiple of 6 + 2.
- Example: ch (6 × 10) + 2 = ch 62.
- Turn, and ch 1 (does not count as a stitch) if needed.
2. Row 1 – Base Row
- Starting in the 2nd chain from hook, work sc in each chain across.
- At the end of the row, ch 1 and turn.
- This flat base row sets the width.
3. Row 2 – Begin Lace Pattern
- Dc in next 2 sts.
- Ch 2, skip 2 sts.
- Dc in next 2 sts, ch 2, skip 2 sts.
- Repeat from * across the row until you reach last 2 sts; dc in last 2 sts.
- Ch 1, turn.
- The ch-2 skip spaces create open lace windows.
4. Row 3 – Alternate / Anchoring Row
- Sc in first stitch.
- Ch 2, skip next 2 sts (the skip from previous row), dc in next 2 sts.
- Sc in the next stitch (to anchor).
- Repeat across: ch 2, skip 2, dc x2, sc until the end.
- Ch 1, turn.
- This row offsets the open windows and anchors the motif.
5. Rows 4+ – Repeat for Length
- Repeat Row 2 and Row 3 alternately until your piece reaches the desired length.
- Because the pattern is a two-row repeat, you’ll build the lace evenly and quickly.
6. Border / Finish Edge
- Once piece is at length, work 1 row of sc across for a clean top edge.
- Optionally add a decorative border: sc in each stitch, picot (ch 3, sl st in first chain of ch3) every few stitches.
- Fasten off yarn, cut the tail, and weave in all loose ends with tapestry needle.
📋 Quick Reference Table
| Row # | Stitch Pattern |
|---|---|
| Row 1 | sc across foundation chain; ch 1, turn |
| Row 2 | dc x2, ch 2 skip 2, dc x2, rep across; ch 1, turn |
| Row 3 | sc in first; ch 2 skip 2, dc x2, sc across; ch 1, turn |
| Rows 4+ | Repeat Row 2 and Row 3 until length is reached |
| Finish | 1 row sc across + optional border |
✨ Tips & Adaptations
- Use solid or lightly variegated yarn so the lace pattern stands out.
- Adjust hook size: if your fabric is curling, you might be using too small a hook (tight tension); switch to a larger size.
- You can adjust the foundation chain for width: because the repeat is 6 sts, chain in multiples of 6 + 2.
- Want a shawl? Make it wider (e.g., chain 90) and longer (repeat rows more) then add a lightweight border.
- To use as an edging: chain a narrower foundation (e.g., ch 30), repeat fewer rows to reach border width, then sew the finished lace onto fabric edge.
- Keep an eye on edges: if they begin to ripple, you may need to adjust your skip/chains or switch to fewer chains; if they flare, you may be increasing too much.
- Video: