 by
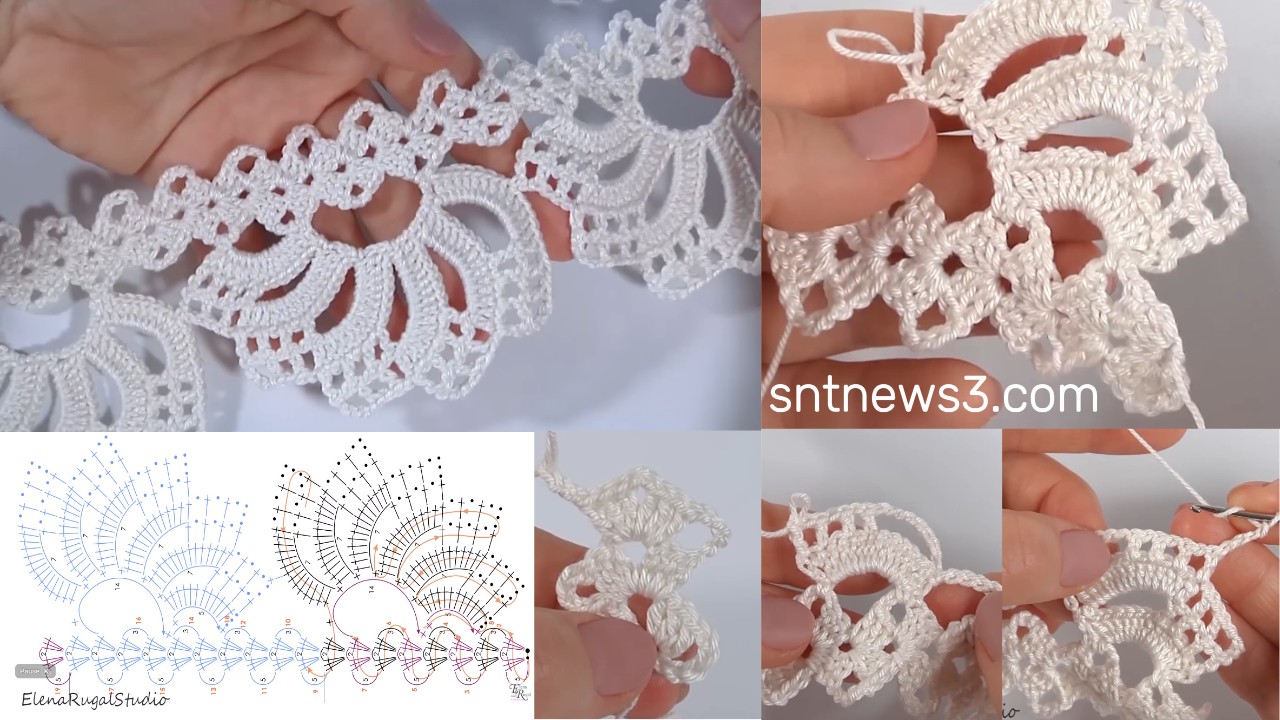
by This pattern works as a beautiful lace trim or narrow panel with floral motifs—nice for edging garments, home décor, or creating a decorative band.
Materials
- Fine or lace-weight cotton yarn (or any light yarn suitable for lace)
- Crochet hook matched to your yarn (for example 1.4 mm–2.5 mm if using very fine cotton) YouTube+1
- Scissors and tapestry needle for weaving in ends
- Stitch marker (optional, helpful for repeats)
Abbreviations (US Terms)
- ch = chain
- sl st = slip stitch
- sc = single crochet
- dc = double crochet
- tr = treble crochet (if used)
- st(s) = stitch(es)
- rep = repeat
- ( … ) = work all inside same stitch or space
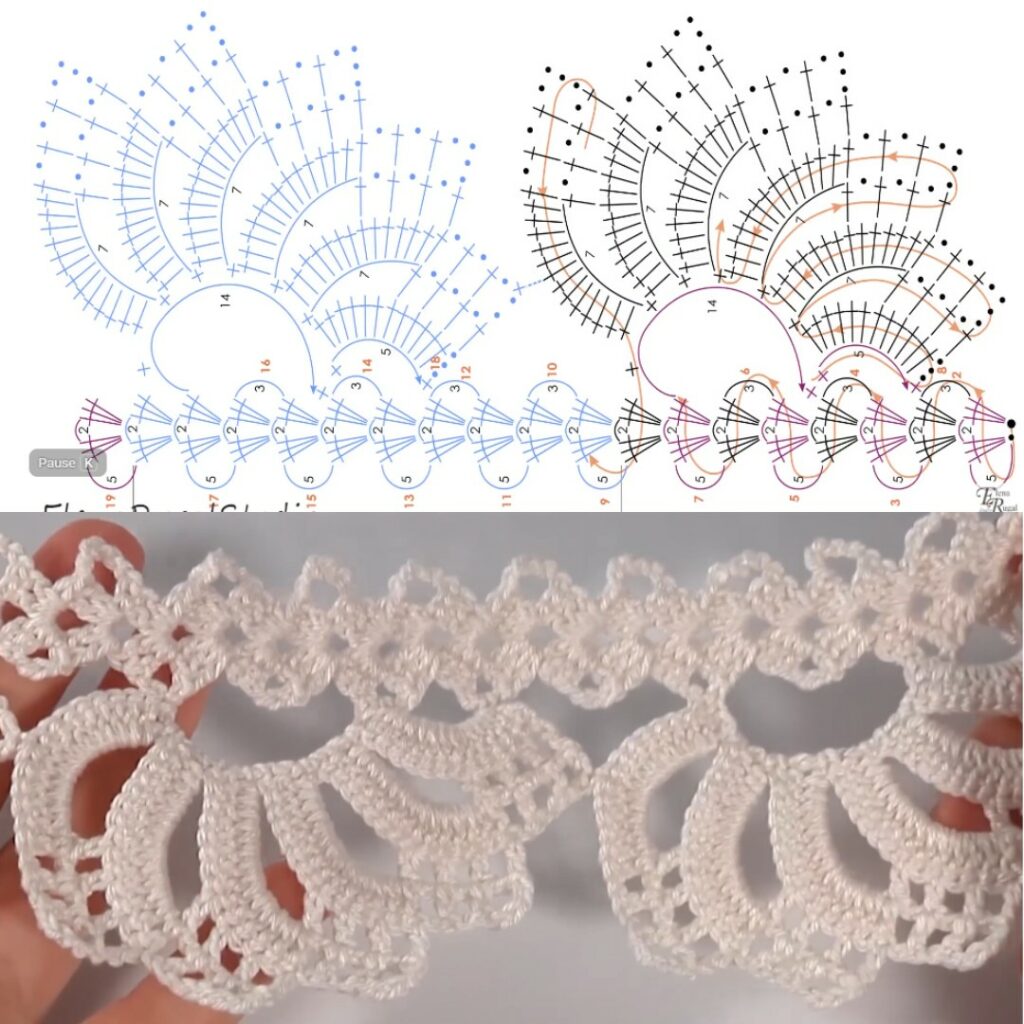
Pattern Overview
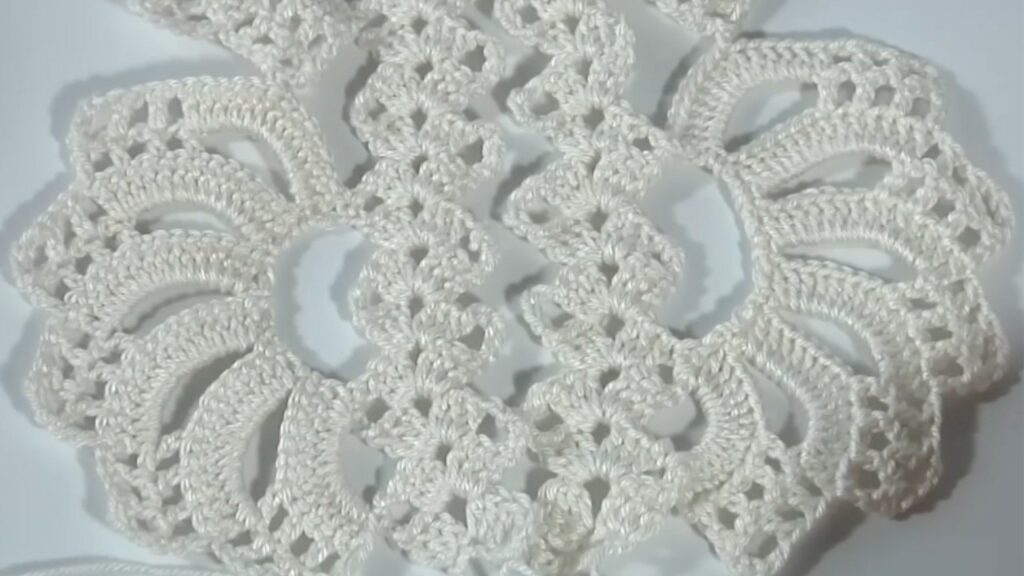
This lace edge/panel alternates open chain spaces and small floral motif clusters, creating a decorative trim. It’s worked in rows (or you could adapt it to rounds) and can be repeated indefinitely for length. The video shows how the motif grows into a tape-like lace featuring small flower shapes.
Step-by-Step Instructions
Step 1 – Foundation Chain
- Decide your desired width for the lace edge (for example: ~4 cm width for trim).
- Chain a number of stitches that fits the repeat multiple and width—let’s use a sample chain of ch 30 for demonstration (you can adjust).
- Turn, ch 1 (if needed for your first row).
Step 2 – Row 1 – Base Row
- Starting in the 2nd chain from hook, work sc in each chain across (so for ch 30, you’ll have 29 sc).
- At the end of the row, ch 1 (doesn’t count as a stitch), turn.
- This gives a stable base row for the lace.
Step 3 – Row 2 – Begin Lace Pattern
- sc in next 2 sts.
- In next stitch, begin the “flower” motif cluster: for example, (dc, ch 2, dc) all into the same stitch (or chain space) to form a small petal loop.
- Skip 1 st, sc in next stitch.
- Repeat * (flower cluster in next st, skip 1 st, sc in next)* across until you finish row.
- At end, sc in last ? (depending on stitch count, make sure row ends evenly).
- Ch 1, turn.
Step 4 – Row 3 – Continue Lace & Branch Motifs
- sc in first stitch.
- Ch 3, skip the base sc of previous flower cluster, sc in next sc.
- Then work the next flower cluster: dc, ch 2, dc into the chain or stitch beneath where the cluster should sit.
- Repeat across: ch 3, skip 1 st, sc, flower cluster, etc.
- At end, sc in last stitch.
- Ch 1, turn.
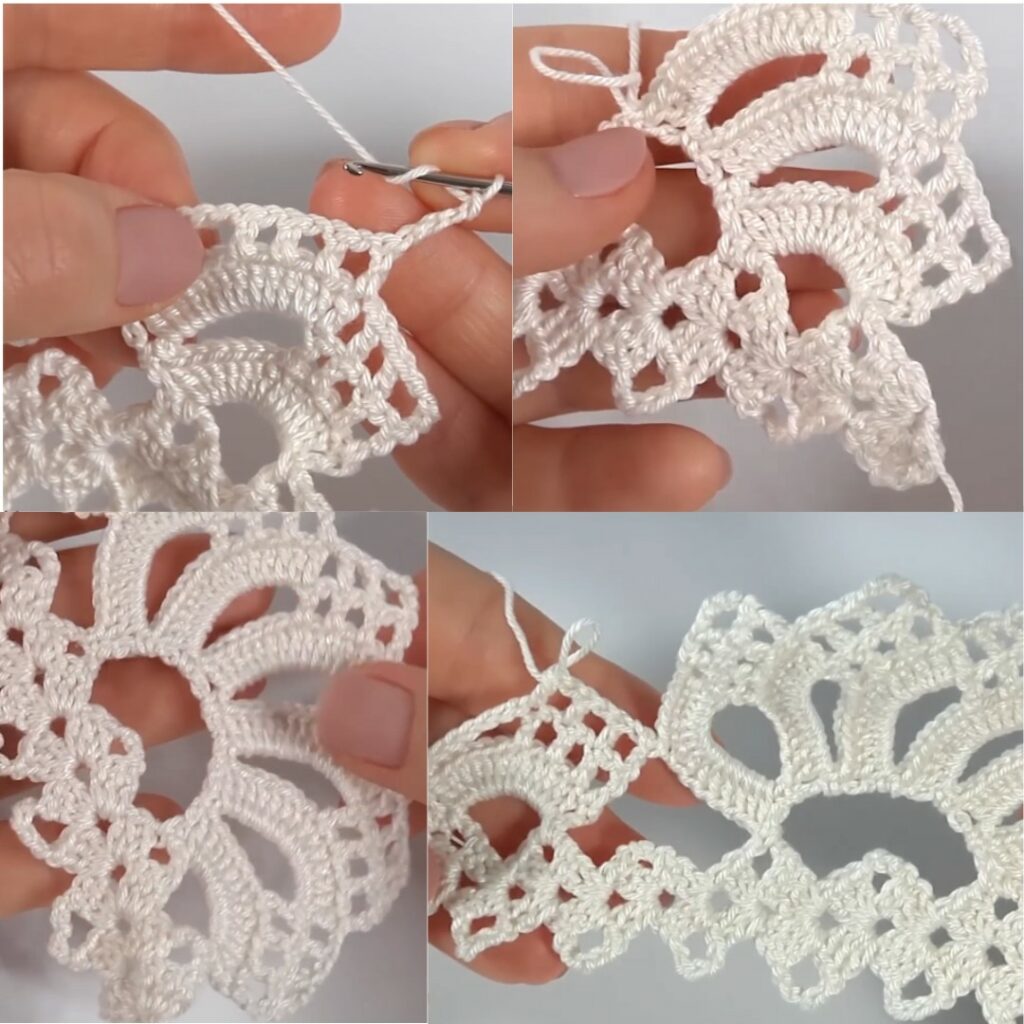
Step 5 – Row 4 and Beyond – Repeat Motif Rows
- The pattern alternates between “flower cluster” rows and “chain-space + sc” rows.
- Repeat Row 2 and Row 3 alternately (or as the video indicates) until you’ve reached the length you want for the lace.
- Each repeat adds more floral motifs and open chain spaces, gradually forming a decorative lace edge.
Step 6 – Finishing Edge
- Once the lace length is complete, work 1 row of sc across the last row to give a clean edge.
- Optional: add a decorative border like a picot edge: (sc, ch 3, sl st in first chain of ch 3), skip 1 st, sc in next st, around.
- Fasten off yarn. Weave in all ends with tapestry needle.
Quick Reference Table
| Row | Action |
|---|---|
| Row 1 | sc across foundation chain; ch 1, turn |
| Row 2 | sc x2, flower cluster (dc, ch 2, dc) in next st, skip 1, sc … repeat; ch 1, turn |
| Row 3 | sc, ch 3 skip, sc, flower cluster … repeat; ch 1, turn |
| Repeat | Alternate Row 2 & Row 3 until desired length |
| Finish | 1 row sc across + optional picot/decorative edge |
Tips & Adaptations
- Use lighter yarn for delicate lace trim; for a wider band you might substitute a thicker yarn and larger hook.
- Adjust the foundation chain to make the lace wider (for a panel) rather than narrow.
- Use contrasting color for the flower clusters so they pop out.
- If you want a round lace version, you could adapt this by working the motif in rounds and placing cluster loops evenly around a center.
- Keep an eye on edge tension—if the lace edge curls or wavy, your chain spaces may be too tight; if it flares, your chain spaces may be too loose.
- Use a stitch marker at start of row if needed to keep alignment of motifs consistent.