 by
by 🧶 Materials
- A fine or light-weight yarn (cotton or acrylic) appropriate for lace edging or use a heavier yarn for a wider lace band.
- Crochet hook matched to your yarn (for example 3.0 mm–4.0 mm if using light yarn).
- Scissors and a tapestry needle for weaving in ends.
- Stitch marker (optional) to mark the ends or repeats.
✏️ Abbreviations (US terms)
- ch = chain
- sl st = slip stitch
- sc = single crochet
- dc = double crochet
- tr = treble crochet (if used)
- st(s) = stitch(es)
- rep = repeat
- … * = repeat instructions inside
- ( … ) = work all inside the same stitch or space
🌿 Pattern Overview
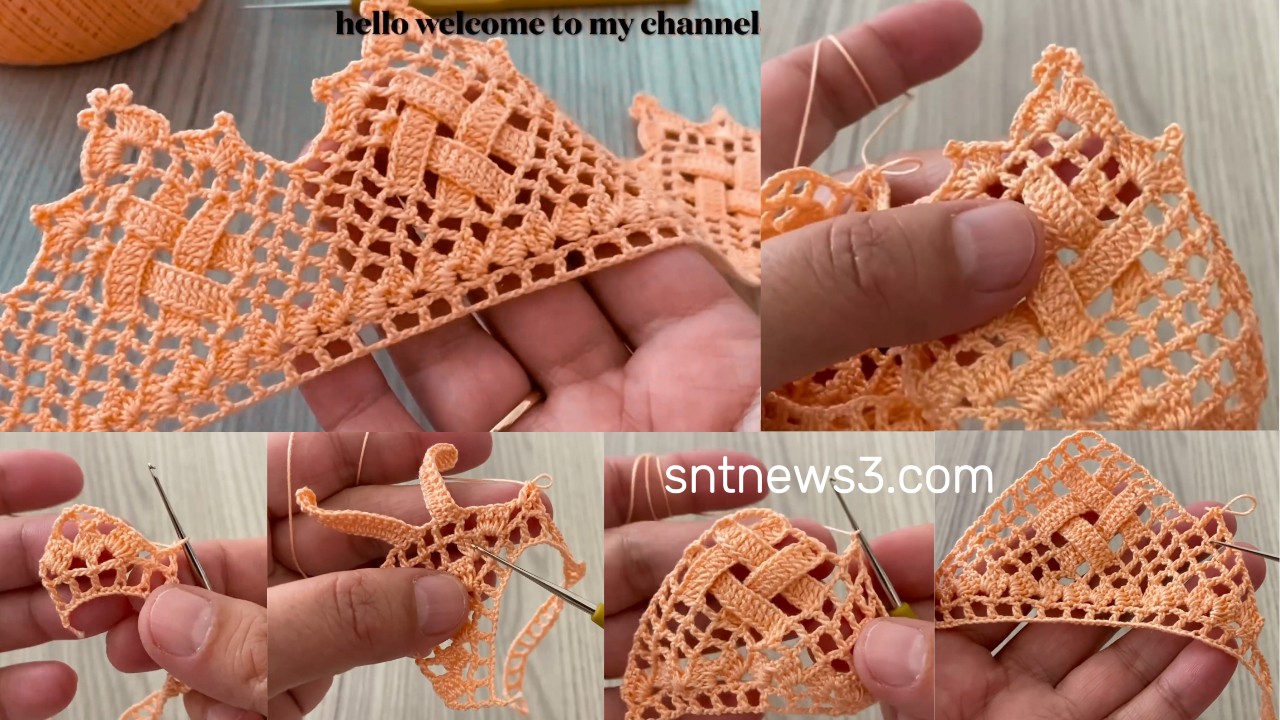
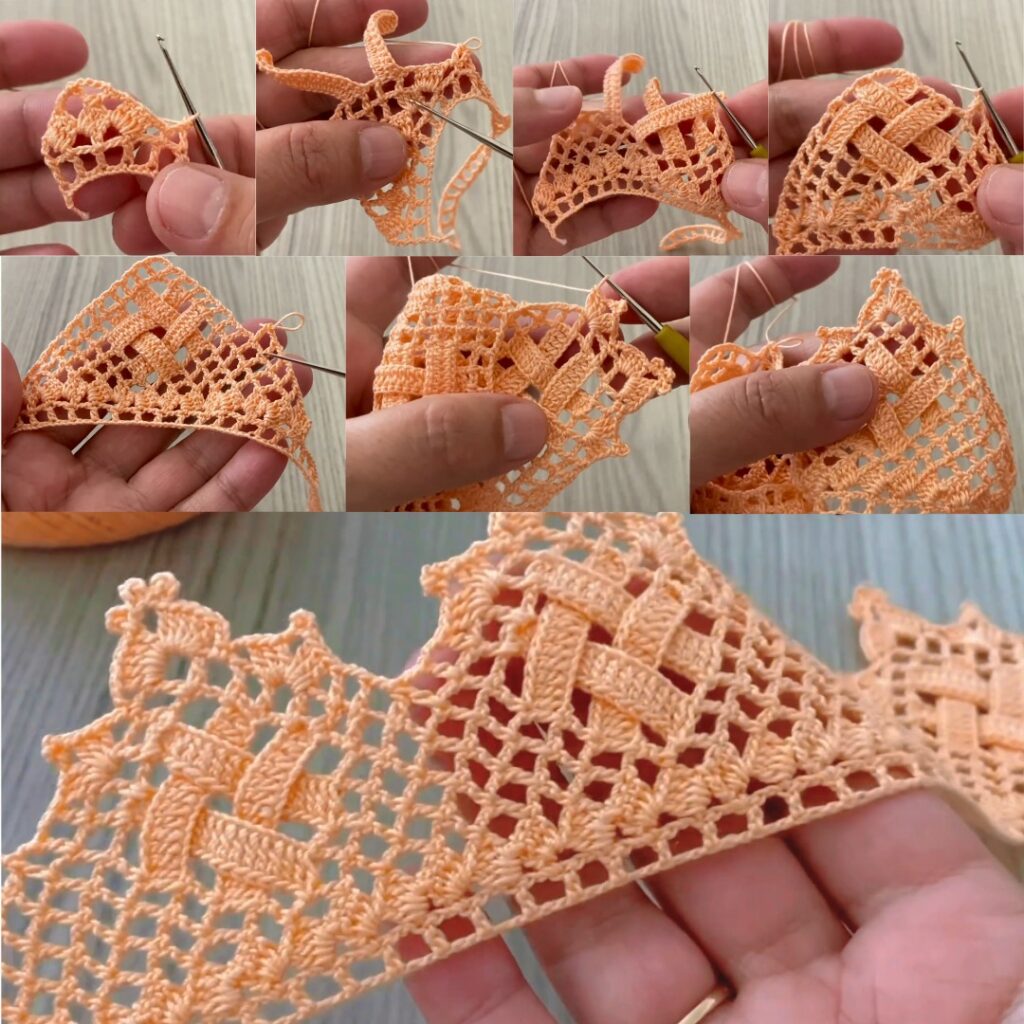
This lace edging uses a foundation of simple stitches, then builds loop-spaces and shell/flower motifs along the edge. It’s worked in rows (turning at each row) and the video describes it as a “gorgeous lace edging pattern for cover, napkins and towels.”
You’ll form: base row → loop/space row → motif row → repeat as needed → finish with a neat border.
✅ Step-by-Step Tutorial
Step 1 – Foundation Chain
- Decide your base width (for example: width of a towel edge or panel length).
- Chain a number of stitches that accommodate the lace repeat + turning chains. For this pattern, chain a multiple of 6 + 1 (for example). A sample: ch 31 (30 +1).
- Turn and begin the first row.
Step 2 – Row 1 – Base Row
- In the 2nd chain from hook, work sc in each chain across. (If ch31: you’ll have 30 sc).
- At the end of the row, ch 1 and turn.
- This gives you a stable base row to build lace on.
Step 3 – Row 2 – Loop/Space Row
- Sc in next 2 sts.
- Ch 4, skip 1 st, sc in next st.
- Sc in next 2 sts, ch 4, skip 1 st, sc in next st.
- Repeat across the row until end.
- At end, sc in the last st.
- Ch 1, turn.
- This row forms chain-4 loop spaces which will anchor motifs.
Step 4 – Row 3 – Motif Row
- Sc in first st.
- In each chain-4 loop from previous row work: (dc 3, ch 2, dc 3) — this forms a fan shell motif.
- Then sc in the next sc (between loops).
- Repeat: shell (dc3-ch2-dc3) in loop, sc in next sc across.
- At the end work shell in final loop, then sc in last st.
- Ch 1, turn.
- Now you have a row of shell motifs anchored by sc between them.
Step 5 – Row 4 – Space Row (Optional)
- Sc in first st.
- Ch 4, skip next dc of shell, sc in next sc between motifs.
- Repeat across: ch4 loops above motifs, sc in anchor stitches.
- At end sc in last st.
- Ch 1, turn.
- This row creates open loops above the motifs for textile interest.
Step 6 – Row 5 – Motif Row Again
- Sc in first st.
- In each chain-4 loop from Row 4, work (dc 3, ch 2, dc 3) (another fan) or sometimes a smaller motif depending on desired width.
- Sc in next anchor st.
- Repeat across.
- At end sc in last st.
- Ch 1, turn.
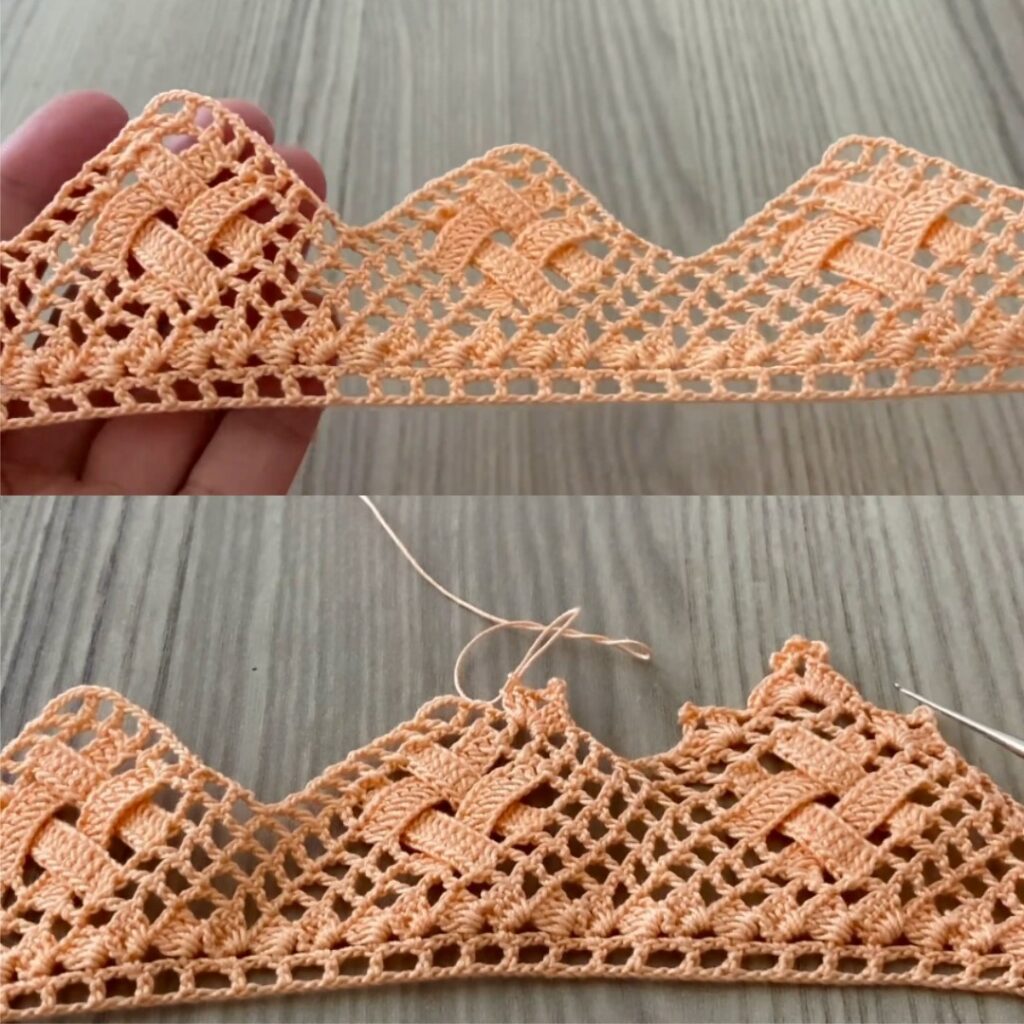
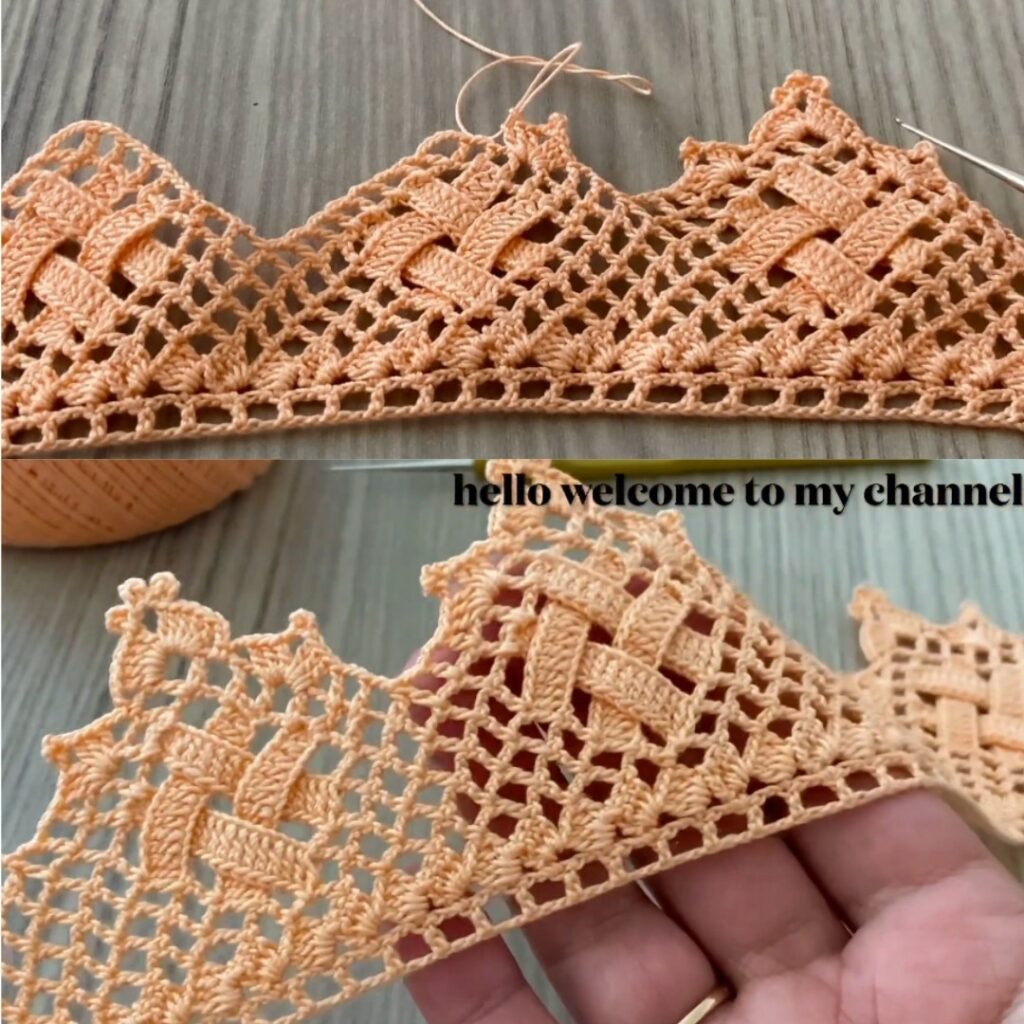
Step 7 – Repeat Motif & Space Rows
- Continue alternating Motif Row and Space/Loop Row (or just repeating motif rows if you prefer less open space) until your edging is the desired length.
- If you’re doing a long trim, you may repeat Row 3 → Row 4 multiple times.
Step 8 – Finishing Border/Edge
- Once done, work one final row of sc across for neat top edge.
- Optionally add a decorative border: e.g., in each shell, 5 sc or picots along upper loops.
- Fasten off yarn and weave in all ends with tapestry needle.
📋 Quick Reference Table
| Row | Action |
|---|---|
| Row 1 | sc across foundation chain; ch1, turn |
| Row 2 | sc x2, ch4 skip1, sc; repeat across; ch1, turn |
| Row 3 | sc first; (dc 3, ch2, dc 3) in each loop, sc next; turn |
| Row 4 | sc first; ch4, skip motif, sc next anchor; turn |
| Row 5 | sc first; (dc 3, ch2, dc 3) in each loop, sc next; turn |
| Repeat | Alternate motif row & loop row until length achieved |
| Finish | 1 row sc across + optional decorative border |
✨ Tips & Variations
- Use lighter yarn and smaller hook for a finer lace edge; a heavier yarn/larger hook gives a bolder trim.
- Change color for the motifs (shell fans) so they “pop” against the base row.
- This edging can be used for towels, blankets, panel trims, or even clothing edges (like sleeves or collars).
- When attaching to fabric (towel/napkin) sew the foundation row (Row 1) along the fabric edge, then build lace outward.
- Keep your chain loops consistent (ch4 or ch5) so the lace edge looks even.
- Use stitch markers at intervals to keep track of loops and motifs — especially helpful for longer trims.