 by
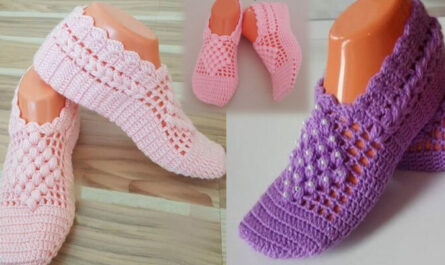
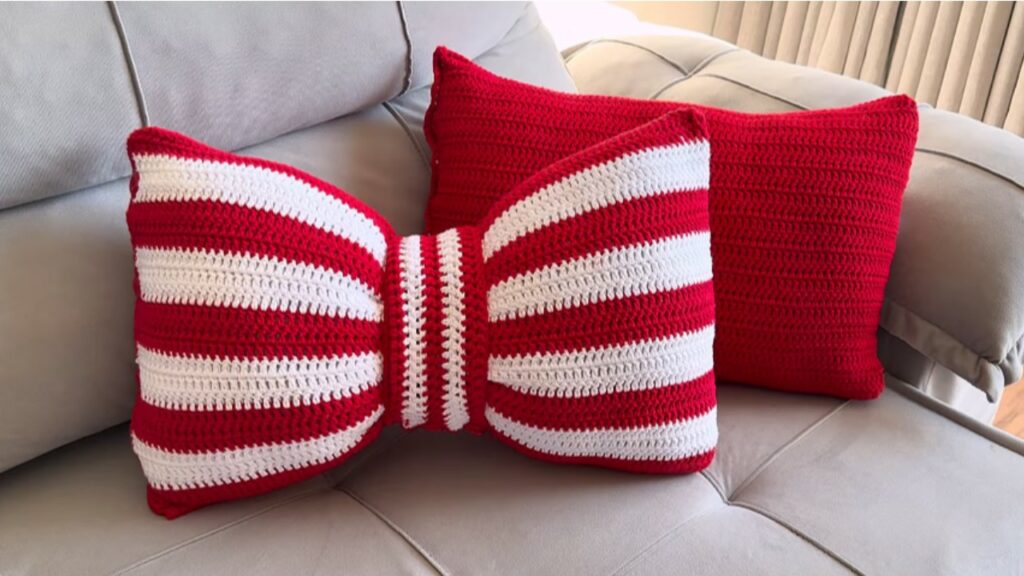
by Crocheted Bow Cushion Cover — Complete step-by-step tutorial (English)
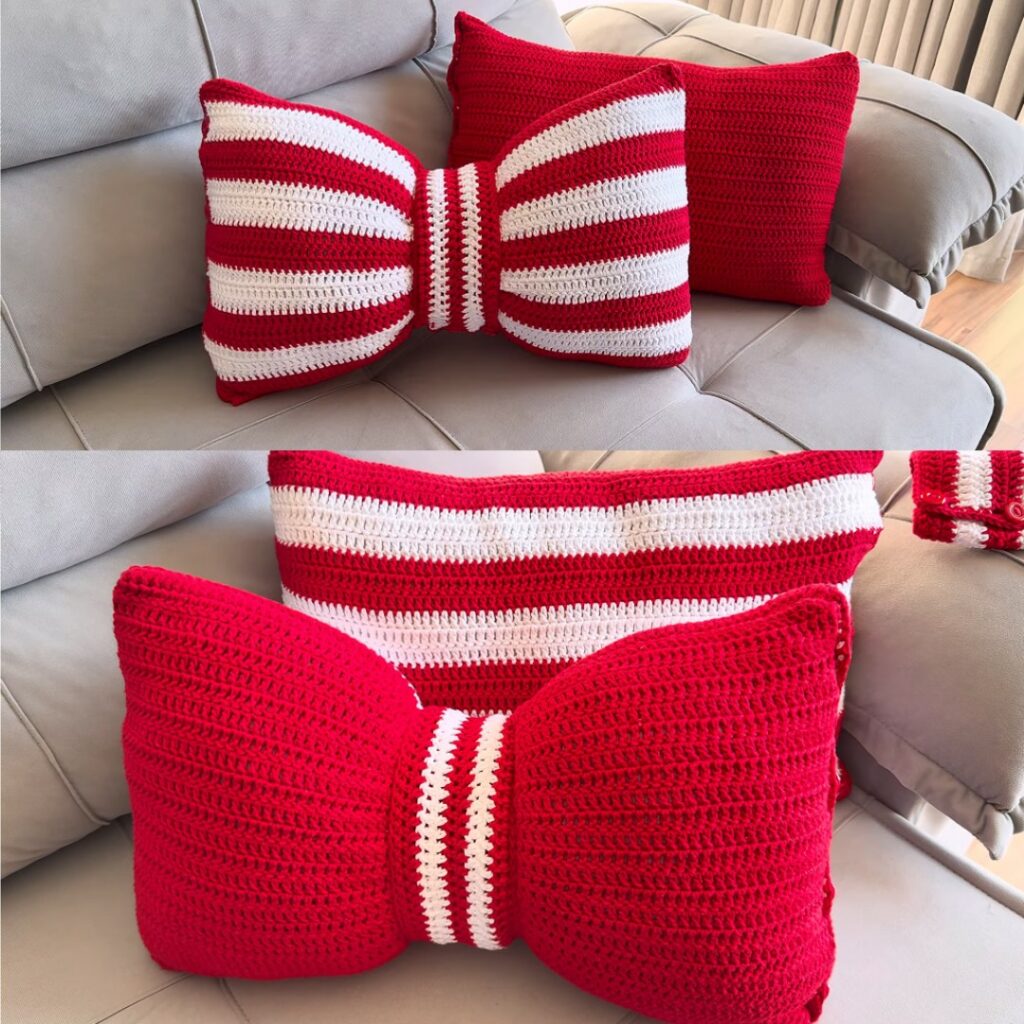
Lovely choice — here’s a clear, ready-to-use written tutorial to make a 16″ / 40 cm square cushion cover with a plush bow. I include materials, gauge, exact stitch counts for a standard 16″ cushion, front-panel puff texture, back panel options (zipper or envelope), full bow construction, assembly and finishing. Follow the swatch advice first so size matches your yarn/hook.
What you’ll make
A textured puff-stitch cushion cover (front panel) with a large decorative bow sewn to the front. Back panel can be envelope style or a zippered panel. Finished size: 16″ (40 cm) square (instructions include scaling tips).
Materials
- Yarn: worsted / aran weight (category 4) — soft acrylic or cotton-acrylic blend recommended for cushion.
- Hook: 4.0 mm (G) — adjust to meet gauge.
- Cushion insert: 16″ / 40 cm.
- Tapestry needle, scissors, stitch markers, tape measure.
- Optional: 40 cm zipper (if making zip closure).
- Optional: small bit of matching scrap yarn for bow center.
Abbreviations (US)
- ch = chain
- sc = single crochet
- dc = double crochet
- sl st = slip stitch
- puff = puff stitch (instructions below)
- st(s) = stitch(es)
- rep = repeat
- RS = right side
Gauge (very important)
Make a swatch in the puff pattern before starting.
Suggested target gauge (puff pattern):
10 cm (4″) = 16 sts × 12 rows (measured after blocking)
→ This equals ~4 stitches per inch and ~3 rows per inch.
If your gauge differs, change hook size until swatch matches. We’ll use this gauge to give stitch/row counts for a 16″ cushion.
Sizing calculation used
For a 16″ (40 cm) cushion:
- Width in stitches = 16″ × 4 sts/in = 64 sts
- Height in rows = 16″ × 3 rows/in = 48 rows
Foundation chain and row counts below are based on that. If your gauge differs, recalc with the formula in the Adjusting size note.
Stitch: Puff stitch (easy version)
Puff stitch = yarn over, insert hook, pull up loop (repeat 3 times), yarn over and pull through all loops on hook, ch 1 to close puff.
A typical 3-loop puff:
- yo, insert hook into indicated stitch, pull up loop (do this 3 times so you have 7 loops on hook).
- yo, pull through all 7 loops, ch 1 to close puff.
- Puff uses the ch-1 after to space; count each puff as one stitch for counts.
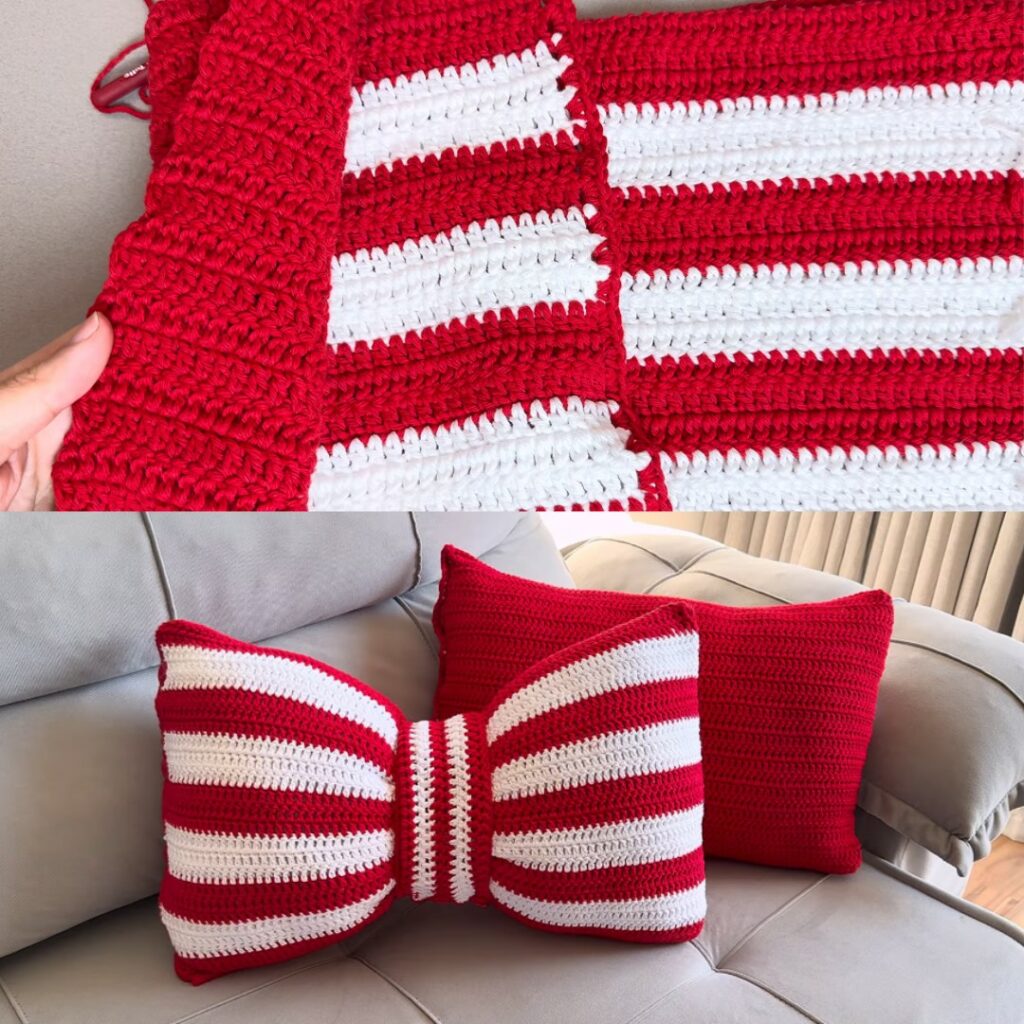
Front panel — textured puff pattern
Foundation chain: multiple of 4 + 1 (we need 64 sts; so ch 65).
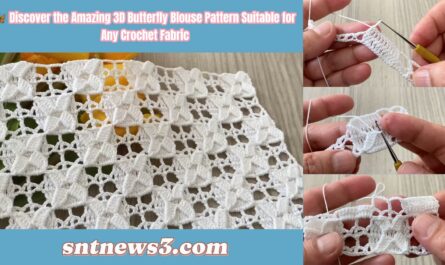
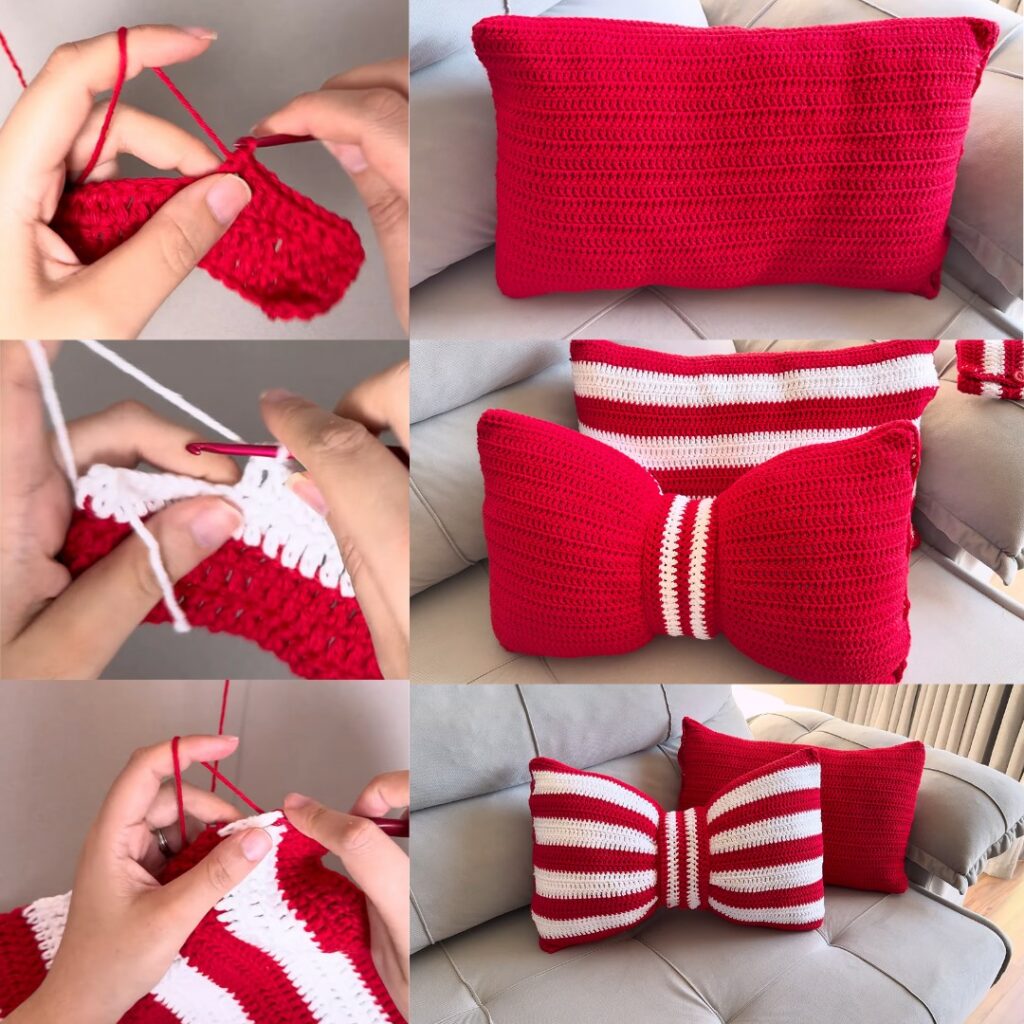
Step-by-step
- Make ch 65.
- Row 1 (RS): dc in 4th ch from hook (counts as dc), dc in each ch across → total 64 dc. Turn.
- Row 2 (start puff pattern): ch 2 (counts as turning + height), skip next dc, puff in next dc, skip next dc, dc in next dc; repeat across. Finish with dc in last st if needed so row ends evenly. Turn.
- Layout per 4-st repeat:
[puff, dc]across the row.
- Layout per 4-st repeat:
- Row 3: ch 2, dc in each stitch and ch-1 spaces across, placing puff stitches again into the same positions as Row 2 (i.e., work puff in top of the puff from previous row’s position). Turn.
- Repeat Rows 2–3 until you reach 48 rows (or measure until panel height = 16″ / 40 cm). End after a Row 3 or a dc row so edge looks neat. Fasten off leaving a long tail for weaving.
Notes / clarity on placement
- The pattern alternates one row where you form the puff stitches and the next row where you secure them. Essentially you create a textured grid: every other row contains puffs spaced evenly.
- If you prefer a denser fabric, replace the dc rows with hdc rows.
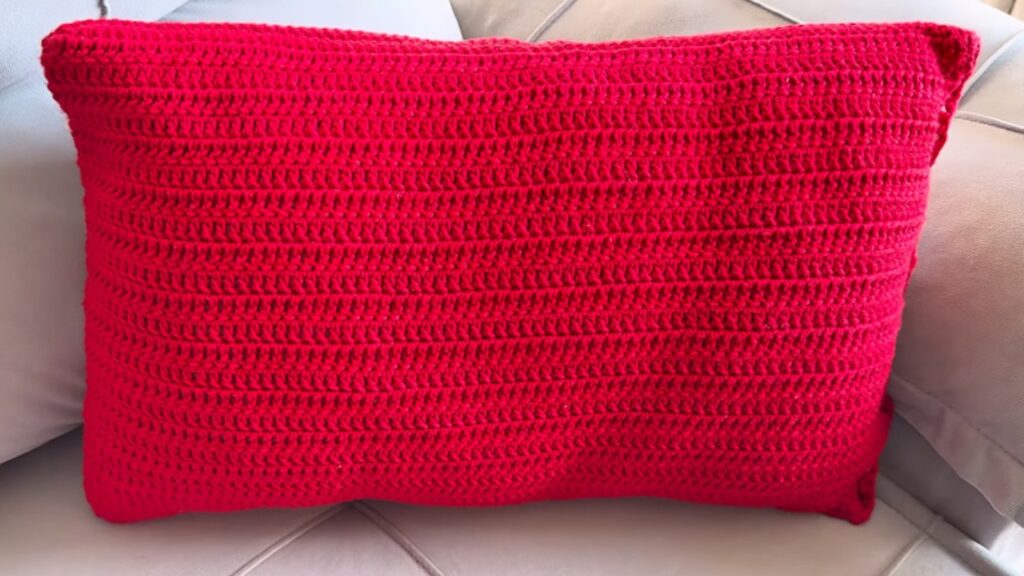
Back panel — two options
Option A — Envelope back (no zipper)
Make two rectangular panels that, when overlapped, create an envelope.
Panel size: Make two panels each the full width (64 sts) and 2/3 of height each so that when overlapped they cover the insert: e.g., for 48 rows total, make one panel 32 rows (bottom) and one panel 24 rows (top) so they overlap 8 rows. Simpler: make both panels height = 2/3 of full height.
Construction (Envelope)
- Chain 65. Work in dc or same puff pattern for neatness. Repeat until both panels measure approx 2/3 of cushion height (measure each).
- Place right sides together on top of each other (one overlaps the other by ~4–6 cm). Sew the three edges (two sides + bottom) with whipstitch through back loops only. Turn RS out and insert cushion.
Option B — Zippered back
Make one full back panel (same size as front: 64 sts × 48 rows), then add zipper.
Construction (Zipper)
- Make chain 65 and work pattern until panel matches front (16″ high).
- Seam three sides with front panel leaving one side open for zipper.
- Attach zipper by hand-stitching it to the open edge or sew a zipper panel separately: sc a neat zipper edging row first (sc around the opening) then sew zipper to folded edge for neat finish.
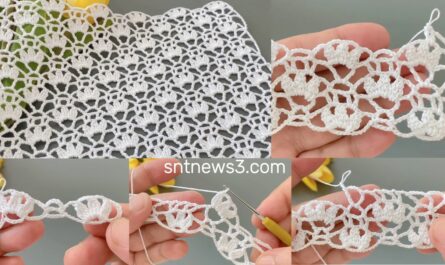
Bow — large plush bow for the front
Bow dimensions for a 16″ cushion: aim for approx 12″ / 30 cm wide × 6″ / 15 cm tall before cinching. (Scale up or down for your taste.)
Bow pieces
- Bow main rectangle: make a rectangle ~30 cm × 15 cm (or in stitches/rows: with gauge above → width 30 cm ≈ 12″ × 4 st/in = 48 sts; height 15 cm ≈ 6″ × 3 rows/in = 18 rows)
- Bow center band: small strip 6 cm × width to wrap (approx 2.5″ × 6″ / 6 cm × 15 cm): i.e., chain 10–12 and work rows until length ~6″ / 15 cm.
Step-by-step Bow
- Main rectangle — chain 49 (48 +1) or chain to desired width (48 sts is example).
- Row 1: dc across. Turn.
- Row 2–18: Repeat puff pattern rows (Row 2–3 sequence) or simple dc rows for a smooth bow. Work until rectangle height is ~6″ (or 18 rows). Fasten off, leave tail.
- Fold rectangle into thirds (or gather center by hand): bring long edges together and wrap center band around and cinch tightly to form bow shape.
- Alternatively, fold the rectangle in half along height and sew ends to make a tube; then flatten and pinch center.
- Center band: chain ~12, dc across for about 6″ (15 cm) long, fasten off.
- Wrap band tightly around bow center and sew ends together on the back. Weave ends.
Optional: make two bow loops (a double-bow) by making two slightly different sized rectangles and stacking.
Assembly — attaching bow to front panel
- Decide placement — usually centered horizontally and slightly above center vertically (or dead center). Mark with pins.
- Position bow on RS of front panel. Using yarn and tapestry needle sew the bow to the front panel via the band on the back of the bow — sew through the front panel across the band area with small whipstitches so bow is secure. If you want removable bow, attach with buttons or tie it on with a loop that can be slipped off.
- Optional: stitch a few stitches through bow loops to secure shape (hidden on back).
Join front & back panels
- Place RS together (if envelope back, align edges so overlap is internal).
- Using tapestry needle and matching yarn, whipstitch or mattress stitch around three edges (or all four for zip closure), leaving the chosen closure method open. For neatness, sew through back loops only.
- Turn RS out, insert cushion, close final edge (zipper, or hand sew with blind stitch / ladder stitch).
Finishing touches
- Weave in all ends neatly on WS.
- Lightly block or steam the cushion to even texture (take care if using acrylic / plush yarn — follow yarn care).
- Add embellishments: sew a decorative button at bow center, or small beads on puff peaks.
Adjusting size (quick formula)
If your swatch gauge differs:
- Stitches needed = (desired width in inches) × (your stitches per inch)
- Rows needed = (desired height in inches) × (your rows per inch)
Round counts to nearest repeat multiple (pattern uses multiples of 4).
Variations & design ideas
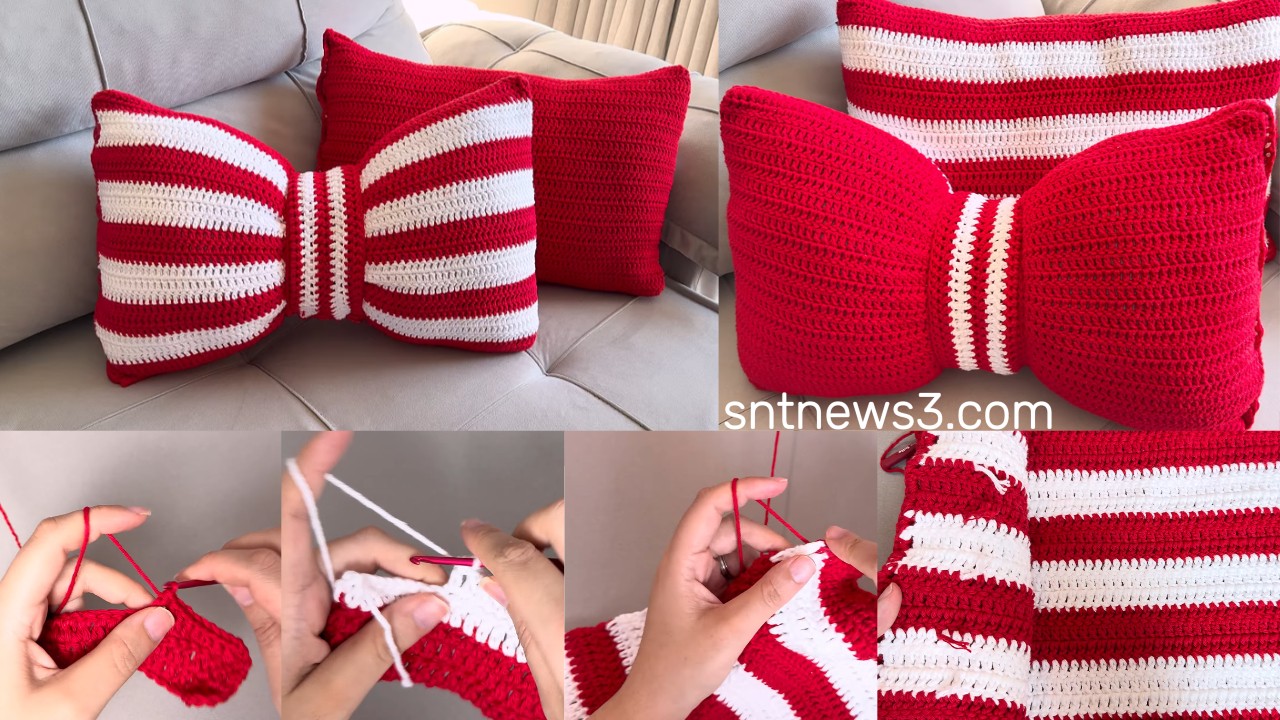
- Use two yarn colors and make stripes across the panel.
- Make the front in plush chenille for a velvet bow and the back in regular acrylic for durability.
- Replace puff texture with bobble stitch for more pronounced bumps.
- Make a smaller bow for a subtler look, or two small bows in opposite corners for asymmetry.
- Make cushion cover reversible by making same bow on both panels or making a simple textured back.
Care instructions
- Wash by hand or gentle cycle depending on yarn; avoid high heat when drying. For chenille/velvet yarn, hand wash and flat dry to preserve fluff.
VIDEO: