by
by Are you looking to add a unique geometric flair to your crochet projects? A crochet pyramid is a fantastic choice! Whether you want to create a decorative piece for your home, a toy, or a learning tool for kids, this 3D shape is both fun to make and visually appealing.
In this guide, we’ll walk you through everything you need to know to crochet a simple four-sided pyramid (tetrahedron) — from materials to step-by-step instructions.
What You Need
Materials:
- Worsted weight yarn (choose any color)
- Size G (4.0 mm) crochet hook
- Yarn needle
- Fiberfill stuffing (for 3D structure)
- Scissors
- Stitch markers (optional)
Understanding the Crochet Pyramid Structure
A basic crochet pyramid consists of four equilateral triangle faces. You will:
- Crochet 4 identical triangle panels.
- Sew or crochet them together along the edges.
- Stuff the pyramid before closing.
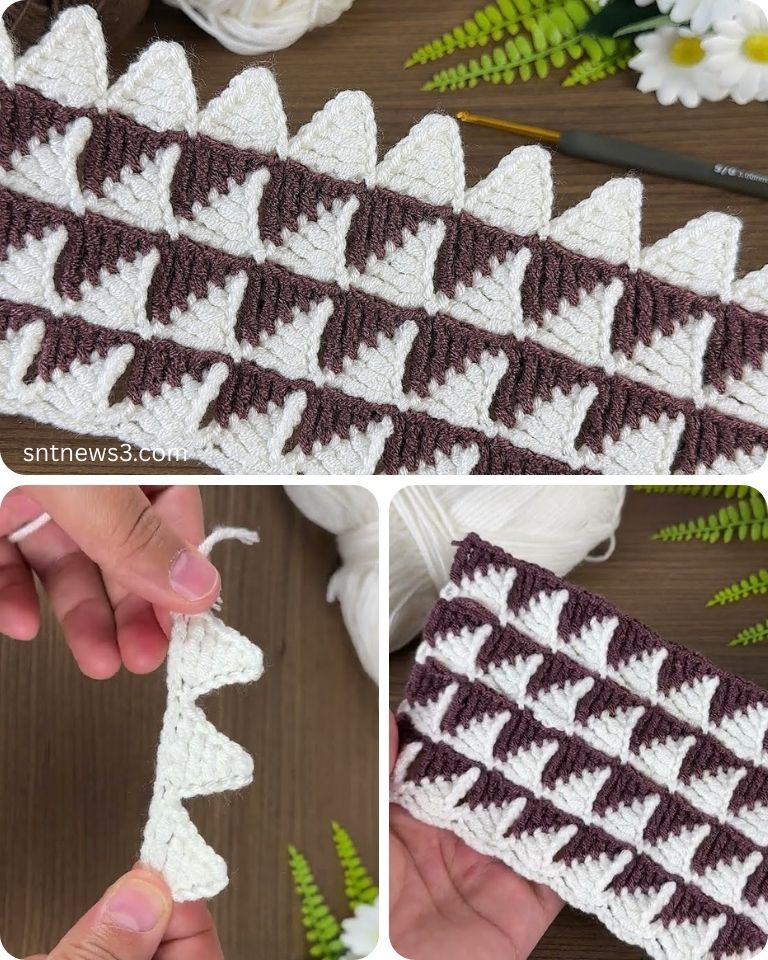
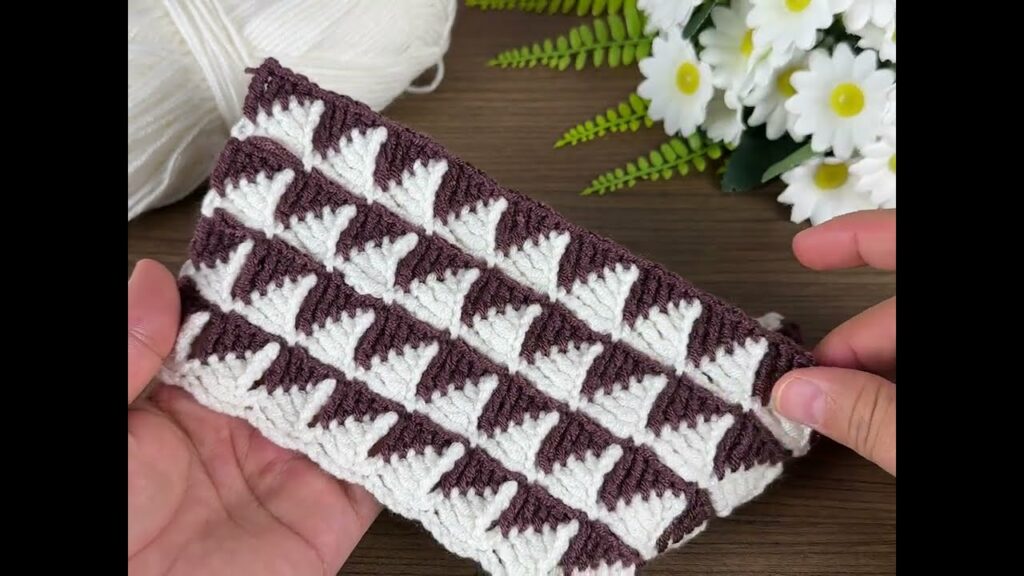
Each triangle is made using single crochet stitches (US terms), increasing to form the triangular shape.
Step-by-Step Pattern
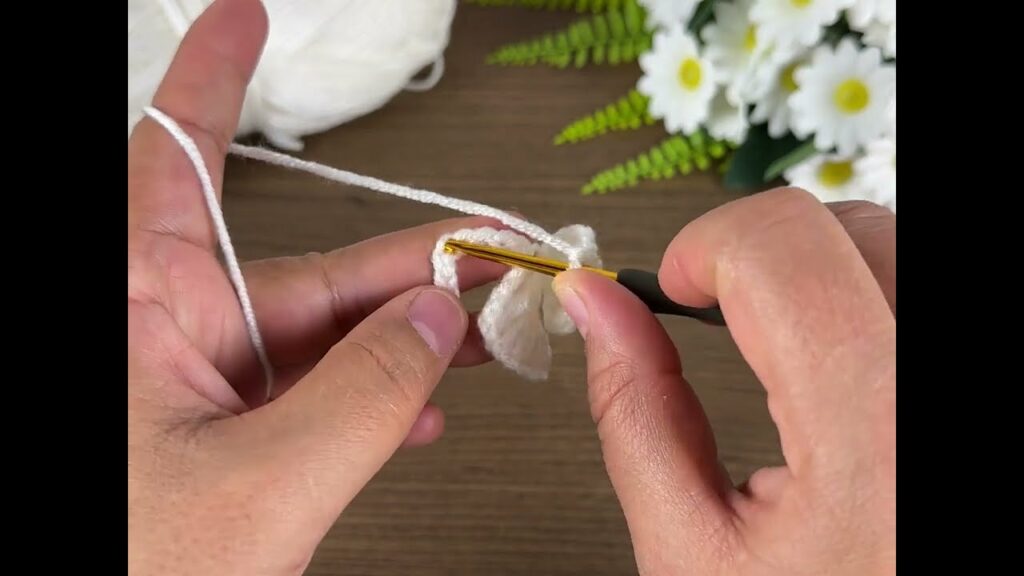
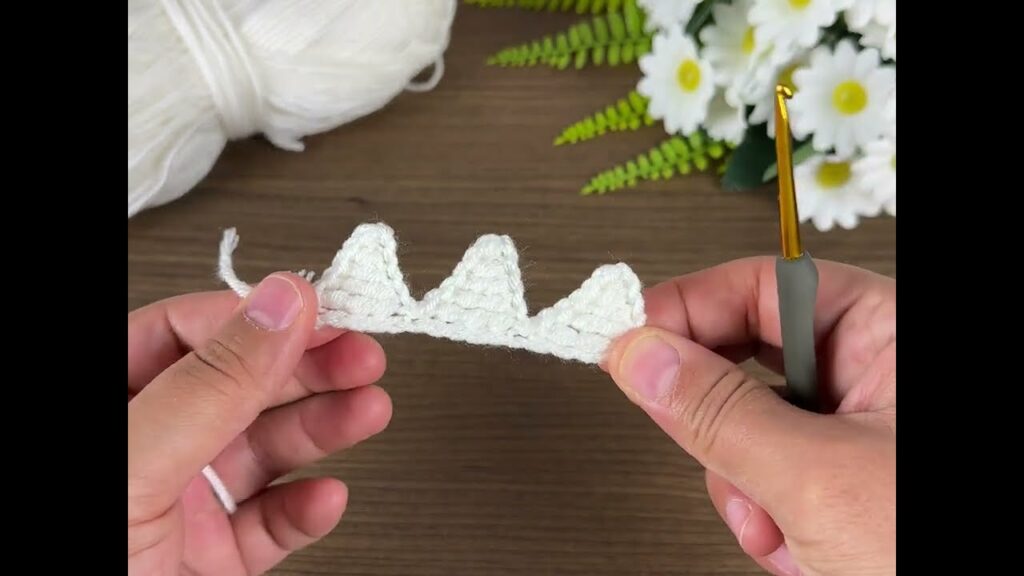
Step 1: Crochet a Triangle (Make 4)
Abbreviations:
- MR = Magic ring
- ch = chain
- sc = single crochet
- inc = increase (2 sc in the same stitch)
- st(s) = stitch(es)
Triangle Panel Pattern:
Row 1: MR, ch 1, 1 sc in magic ring (1 st), pull tight. Turn.
Row 2: ch 1, inc (2 sc) (2 sts). Turn.
Row 3: ch 1, inc in first st, sc in next (3 sts). Turn.
Row 4: ch 1, inc, sc in next 2 sts (4 sts). Turn.
Row 5: ch 1, inc, sc in each st across (5 sts). Turn.
...
Continue increasing 1 stitch each row until you have 15 sts in a row.
Adjust the final row count based on the size you want. 15 rows makes a small to medium pyramid.
Fasten off and leave a long tail for sewing. Make 4 of these triangles.
Step 2: Assemble the Pyramid
Layout:
- Lay out three triangles in a row, touching edge to edge (these form the sides).
- Place the fourth triangle above the middle one (this will be the base).
Sewing Instructions:
- Use the yarn needle and tails to whip stitch or slip stitch the sides together.
- Join the side edges of the base triangle to the side triangles one by one.
- Finally, seam the last two edges together, forming a pyramid.
Pro tip: Leave a small opening at the end to stuff the pyramid before the final closure.
Step 3: Stuff and Finish
- Stuff the pyramid with fiberfill or scrap yarn until it’s firm but not overstuffed.
- Sew the final seam closed.
- Weave in all loose ends neatly.
Optional Embellishments
- Color changes: Use different yarn colors for each triangle.
- Surface crochet: Add decorative designs or names on the pyramid.
- Educational use: Embroider numbers or letters for kids’ toys.
- Weighted version: Add small beads or pebbles for a desk paperweight.
Tips for Success
- Blocking each triangle before sewing helps maintain straight edges.
- Keep your stitch count consistent in each row.
- Use stitch markers to track increases if you’re new to shaping.
Variations
- Larger Pyramid: Use double or bulky yarn and increase rows for bigger triangles.
- Mini Pyramid: Stop at fewer rows for small ornaments or jewelry.
- Textured Triangle: Try different stitches (e.g., half double crochet or bobble) for texture.
Video tutorial:
Final Thoughts
Crocheting a pyramid is an enjoyable and creative way to explore 3D forms in yarn. It’s suitable for beginners who want to learn shaping, and also a satisfying project for advanced crocheters looking for something quick and impactful.
Whether you use it for home decor, education, or just for fun, a crochet pyramid is sure to impress!