 by
by Easy Motif Blanket — Step-by-Step
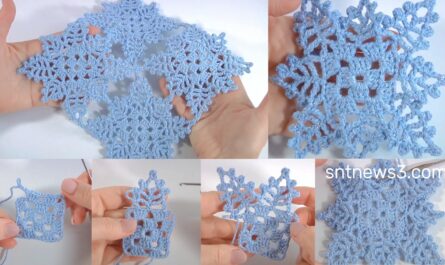
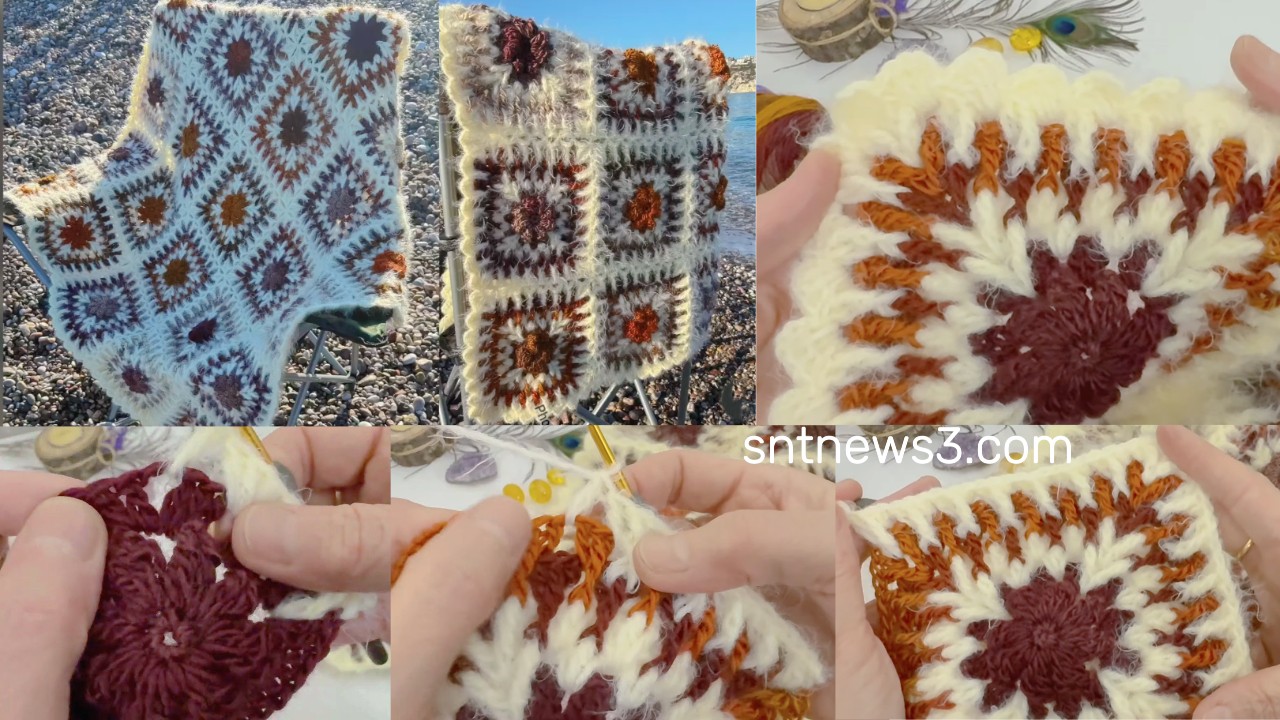
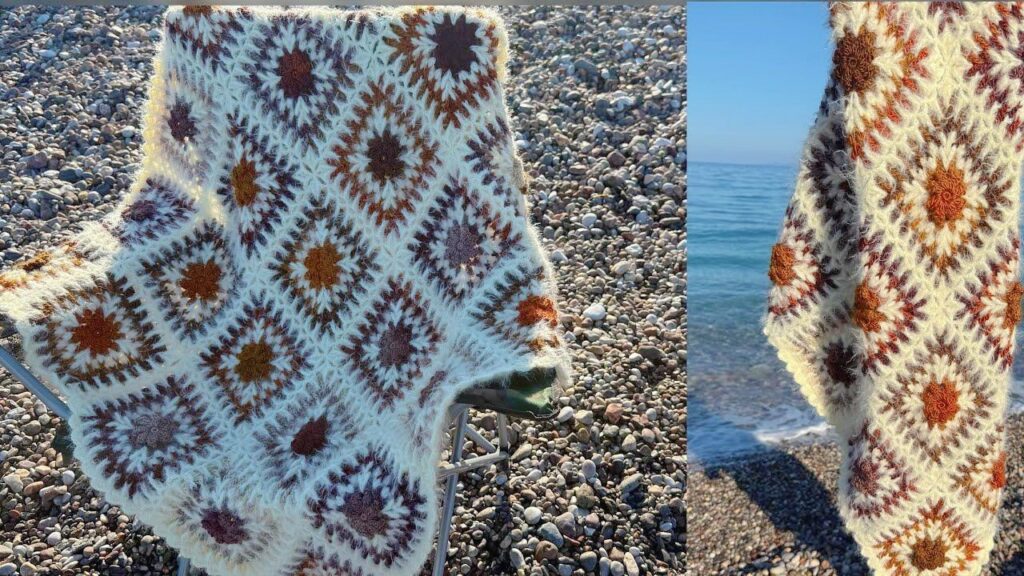
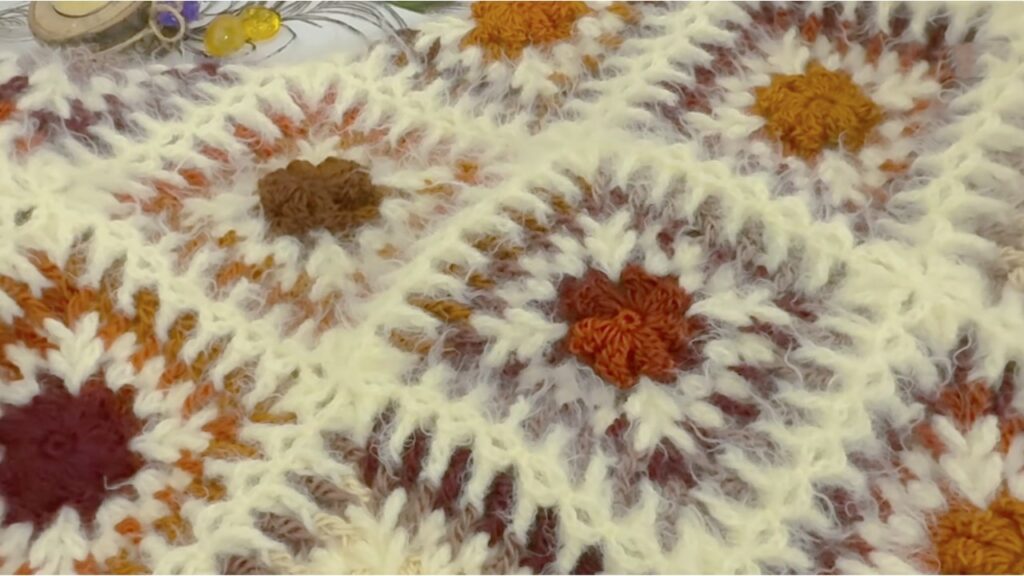
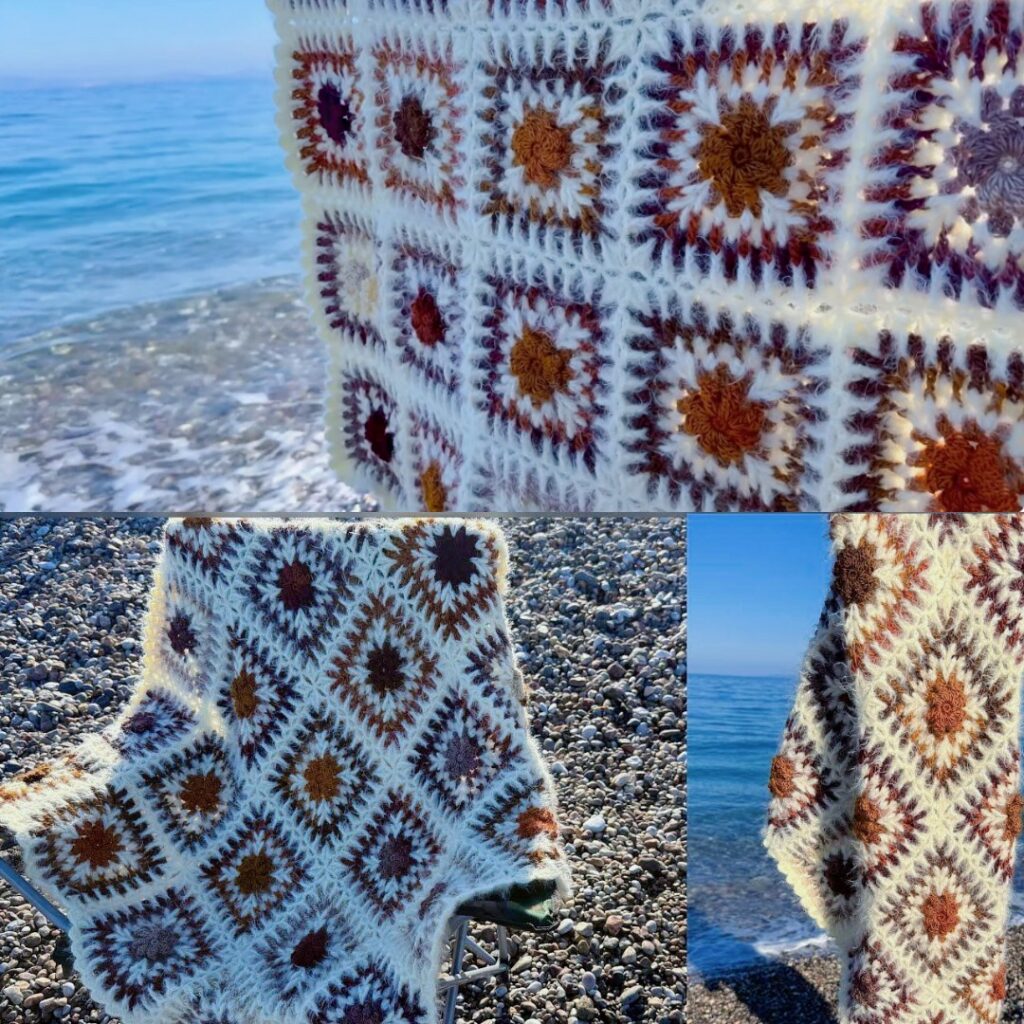
Style: lacy floral/mandala center → squared to tile as motifs → join-as-you-go → scallop border
Skill: beginner → intermediate
Sample finished motif (example): ~10 cm / 4″ blocked using DK yarn + 3.5 mm hook. (Use this as starting assumption; substitute your measured motif size in the calculations below.)
Materials
- Yarn: DK / light worsted (or adjust for heavier/lighter blanket). Choose a soft acrylic/cotton blend for blankets.
- Hook: 3.5 mm (adjust to match yarn & gauge).
- Tapestry needle, scissors, blocking pins/mat, stitch markers (optional).
- Optional: stitch markers or safety pins to align motifs while joining.
Abbreviations (US)
- ch = chain
- sl st = slip stitch
- sc = single crochet
- hdc = half double crochet
- dc = double crochet
- tr = treble crochet
- sp = space
- st = stitch
- rep = repeat
- BLO = back loop only
- JAYG = join-as-you-go
Overview / workflow
- Make 1 motif; block and measure (W = motif width).
- Calculate how many motifs you need for your desired blanket size.
- Crochet motifs in batches (assembly-line) and block them.
- Join motifs row by row using JAYG (or sew afterwards).
- Add border and final block.
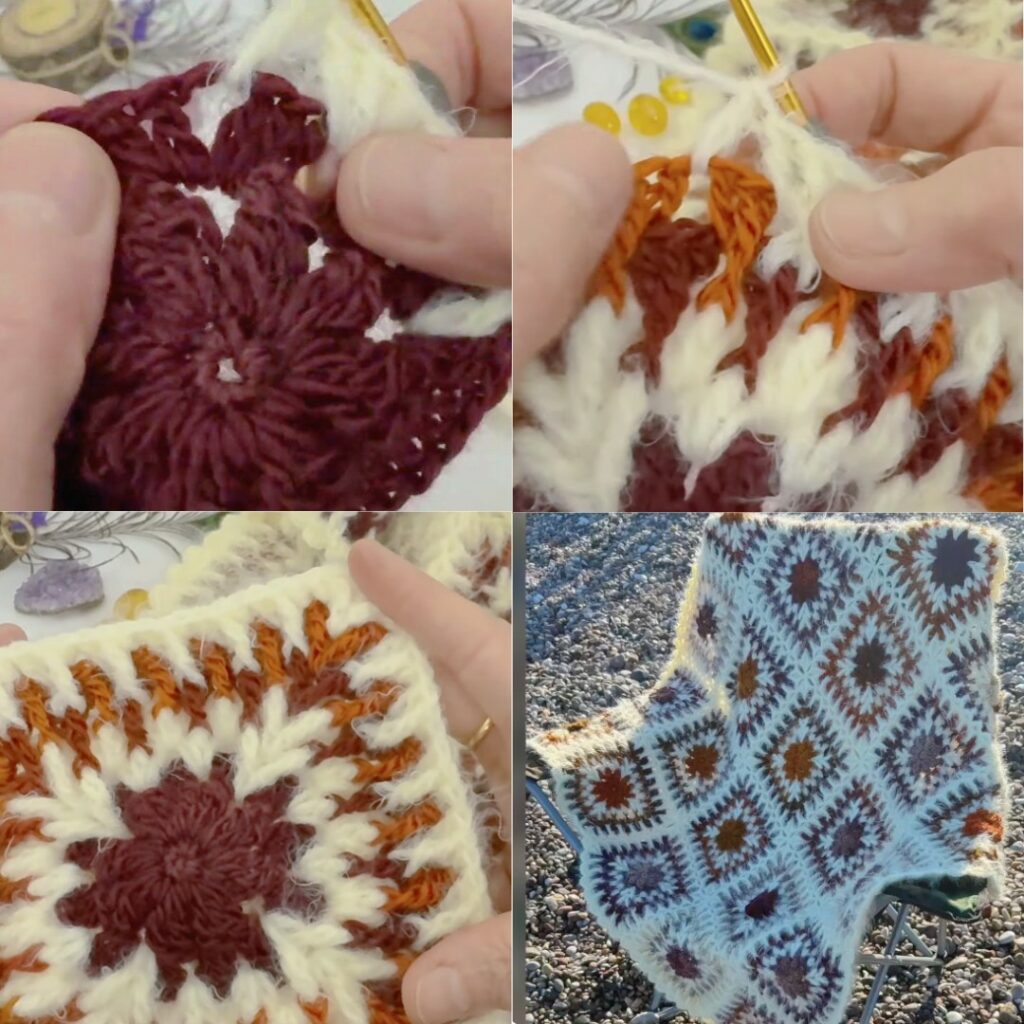
Motif — full round-by-round pattern (one motif)
Work loosely for a soft blanket. The motif below is lacy but stable, and squares easily.
R1 — center ring
- Make a magic ring.
- ch 3 (counts as dc), work 11 dc into ring (12 dc total). Pull ring tight. Join with sl st to top of ch-3.
R2 — anchor loops
- ch 1, sc in next dc, ch 3 — repeat around (12 sc + 12 ch-3 loops). Join with sl st to first sc.
R3 — small petals
- Sl st into first ch-3 loop.
- In each loop work: (sc, ch1, hdc, 3 dc, hdc, ch1, sc). Repeat into all 12 loops. Join.
R4 — arch connectors
- ch 1, sc in outer sc of petal, ch 5 — repeat around to create 12 ch-5 arches. Join.
R5 — larger petals (alternating)
- Into every other ch-5 arch work: (sc, ch1, hdc, 5 dc, hdc, ch1, sc) (big fan).
- Into the remaining arches work (sc, ch 3, sc) (small connector). Repeat. Join.
R6 — tall loop row
- ch 1, sc in first sc, ch 7, sc in next sc — repeat around (12 ch-7 loops). Join.
R7 — top fans
- In each ch-7 loop work: (sc, ch2, 3 dc, ch2, sc). Join.
R8 — squareing round
You now have 12 top fans; convert them into 4 sides (3 fans per side) and create 4 corner ch-3 spaces so motifs tile squarely.
- ch 3 (counts as dc). 3 dc into next top-fan space; 3 dc into next top-fan space; in the third top-fan space of the group work (3 dc, ch 3, 3 dc) (corner).
- Repeat the [3dc, 3dc, corner] sequence 4 times (uses all 12 fan tops). Join with sl st.
R9 — tidy sc round (join round)
- ch 1, sc evenly around motif; work 3 sc into each corner ch-3 to round it. Join. Don’t fasten off yet if JAYGing.
Optional R10 — scallop edge (decorative)
- skip 2 sc, 5 dc in next sc (shell), skip 2 sc, sc in next sc — repeat around for a scalloped edge. Join and fasten off. Block motif.
Make many motifs (assembly strategy)
- Work in batches: make R1–R4 for 20–30 motifs, then R5–R7 for same batch, etc. This pipeline is faster than finishing each motif one by one.
- Block motifs as you finish them; consistent blocking is essential for flat join.
How many motifs? (simple math)
Decide finished blanket size (W_blanket × H_blanket in cm) and measure your blocked motif width W (cm).
- motifs_across = round(W_blanket / W)
- motifs_down = round(H_blanket / W)
- total_motifs = motifs_across × motifs_down
Example: W = 10 cm, desired blanket 120 × 150 cm → motifs_across = 12, motifs_down = 15 → total = 180 motifs.
Join-As-You-Go (JAYG) — practical script (use when working R9)
Strategy: Complete first row of motifs fully (or finish through R8 and do R9 while joining). For subsequent rows, attach new motif to the motif above as you work its R9.
Exact join script (replace some scs on R9):
When you reach a position on the new motif that corresponds to an existing (finished) motif:
- Instead of
scdo:sc in your current motif stitch, ch 1, sl st into corresponding sc (or corner ch-3) of the neighbor, ch 1 - For a plain edge (not corner) the sequence becomes:
... sc, ch1, sl st to neighbor, ch1, sc ... - For corner meeting two neighbors (new motif touching two finished motifs at a corner), do:
sc in current motif, ch1, sl st into neighbor A corner, ch1, sl st into neighbor B corner, ch1
(work carefully so the corner ch-3 remains; you may instead work two separate sl sts spaced by ch-1 each side to avoid tightening the corner.)
Step-by-step joining order:
- Make first motif (motif A) completely and block it.
- Make motif B (next to A) up through R8. Start R9: work scs until you reach the first concept join point; perform the
sc, ch1, sl st into A, ch1instead of plain sc. Continue R9 to finish and join. - Make subsequent motifs left→right to complete the first row (no join on the very first motif of the row).
- For row 2 (motifs below row 1): when you start motif under motif A, during its R9 you will join to motif above (A) and to the left neighbor on the same new row (if it exists). Use the same
sc, ch1, sl st (into above) , ch1for the join to the above motif and alsosc, ch1, sl st (into left)for left neighbor as you reach those points. Pin motifs before joining if alignment is tricky.
Tip: mark the join points on the finished motif (for example, the sc that matches the center of each side) with a removable marker or pin — this makes sl-st location obvious.
Alternative join — sew after blocking
- Block all motifs to the same size. Arrange the grid on blocking mat, pin. Use tapestry needle and yarn to mattress stitch through the back loops only for the flattest seam. Whipstitch is easier but bulkier.
Border options (pick one)
A — Simple cozy scallop (recommended)
- sc evenly around assembled blanket (place 3 sc in each corner). Join.
- Shell round: skip 2 sc, 5 dc in next sc, skip 2 sc, sc in next sc — repeat. Fasten off and block.
B — Wide lacy boho border
- Round 1: sc around.
- Round 2: ch 6, sc in the center of each shell below to make big arches.
- Round 3: Into each arch work
(sc, ch 3, 9 dc, ch 3, sc)for big scallops. Fasten off.
C — Ribbed edge (cozy, warm)
- Round 1: hdc around.
- Rounds 2–5: hdc BLO around (creates a ribbed cuff). Fasten off.
Yarn estimate (accurate method)
- Make one motif and weigh it (grams).
- Multiply grams_per_motif × total_motifs + ~10–15% for joins & border = yarn grams needed.
- Convert to skeins using yarn ball weight on label.
Example: 1 motif = 12 g, total motifs = 180 → 12×180 = 2160 g + 15% ≈ 2484 g → ~2.5 kg yarn.
Blocking & finishing
- Block each motif to exact dimensions. Pin to square, let dry fully.
- After joining entire blanket, do a final wet or steam block to even joins and shape border scallops.
- Weave ends inside seams and trim neatly.
Troubleshooting & fixes
- Motifs different sizes: block them all; if still small add one round of sc to small motifs to match.
- Seams pucker: loosen joins (use ch-2 in JAYG instead of ch-1) or sew with mattress stitch for flatter result.
- Edges ripple: add a stabilizing sc round before scallop border.
- Blanket too open/windy: use smaller hook or add an extra stabilizer round.
- Motif not squaring: adjust Round 8 corner placement so there are exactly 4 corner ch-3 spaces evenly spaced.
Variations & style ideas
- Use two alternating colors per motif (center one color, outer rounds another) for checkerboard or ombré look.
- Add appliqué flowers or bobbles on select motifs for texture.
- Mix this lacy motif with plain solid squares as a modern patchwork.
- Make a baby blanket: use smaller motif (finer yarn) and 7×9 grid.
Quick checklist before you start
- Make 1 motif, block, measure W and weigh it.
- Decide blanket size → compute motifs_across × motifs_down.
- Buy yarn from weight estimate + 10–15% extra.
- Batch-make motifs, block, then join row by row using JAYG.
- Add border, final block, weave ends — done!
VIDEO: