 by
by Making an Embroidered Cardigan from Crocheted Net Hexagonal Motifs — Step-by-step (US terms)
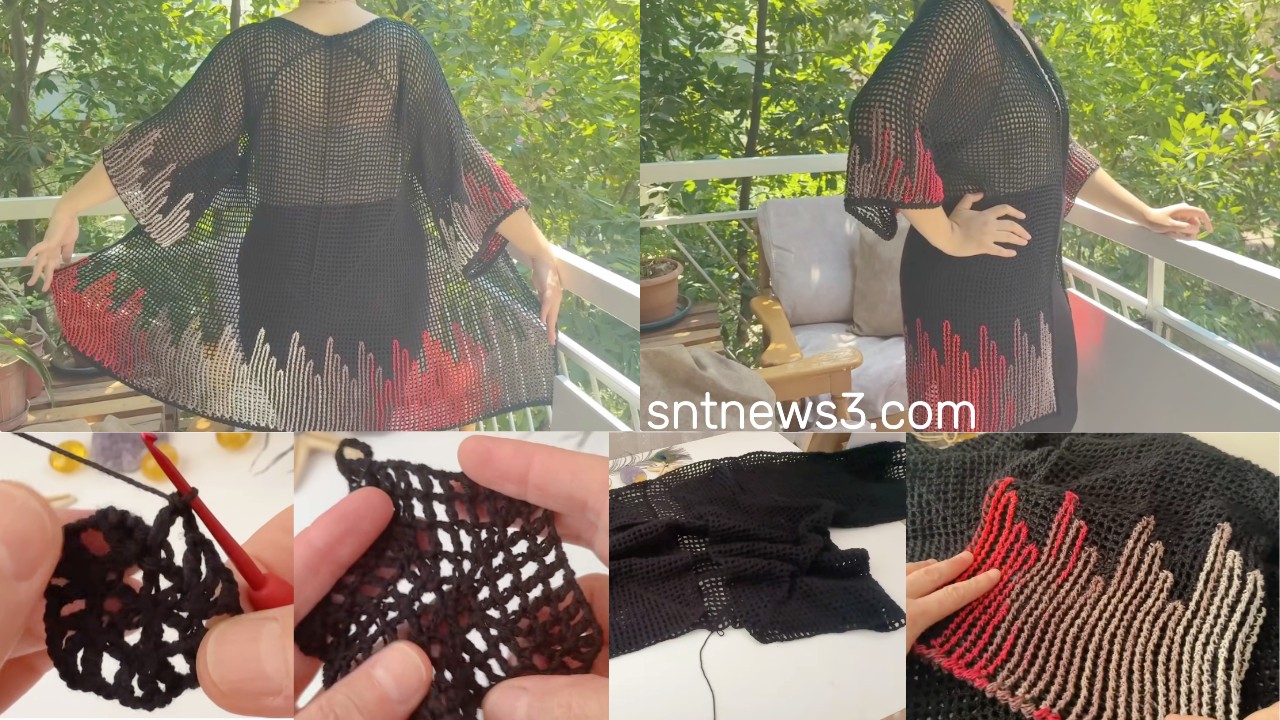
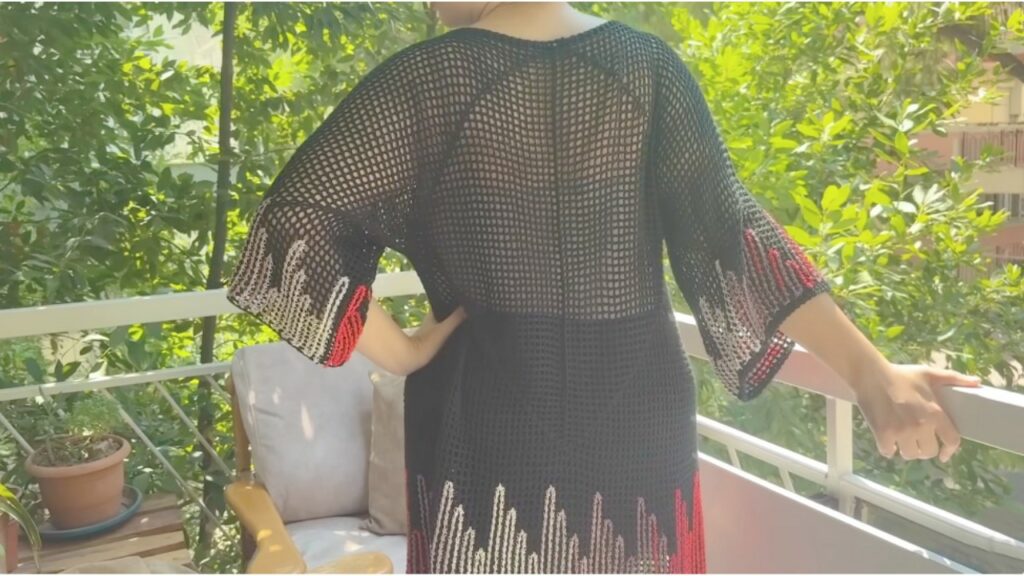
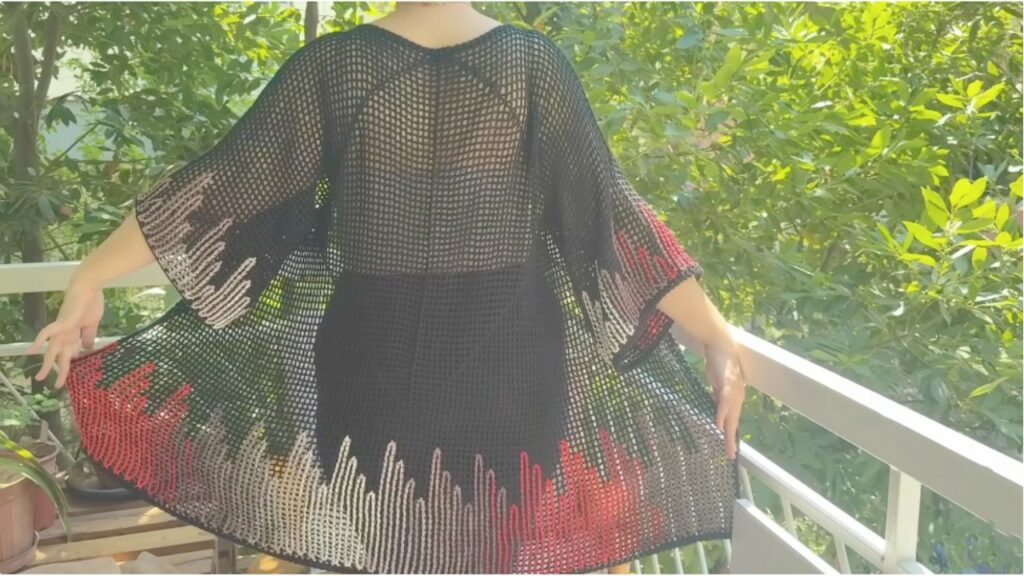
Here’s a complete, ready-to-use written tutorial that recreates a cardigan built from hexagonal open/net motifs (joined into panels) and finished with simple surface embroidery for the decorative look shown in the video. I give materials, an explicit hexagon motif worked in rounds, joining methods (JAYG and sewing), layout/measurements for a cardigan, sleeve options, edging, embroidery suggestions, yarn estimates and troubleshooting. No video required — follow these steps and you’ll get the same kind of finished cardigan.
Quick overview
- Construction: crochet many identical hexagon motifs, join into front/back panels (hex grid), seam shoulders and sides, add sleeves (worked from picked-up sts or separate panels), then embroider floral/line details on the joined fabric.
- Skill: intermediate (round motifs, consistent blocking, sewing/embroidery).
- Finished look: airy, lacy, boho-elegant cardigan.
Materials
- Yarn: DK / light worsted cotton or cotton-blend (good drape and embroidery surface). For a more delicate look, use sport or fingering.
- Hook: 3.0–4.0 mm depending on yarn weight. Use a hook that gives an open lacy fabric but keeps motifs even.
- Tapestry needle for sewing and embroidery; blunt darning needle for ends.
- Blocking pins & mats.
- Embroidery needle + embroidery/floss (or same yarn held single strand) for surface embroidery.
- Scissors, stitch markers.
- Optional: small buttons or ribbon if desired.
Estimated yarn (approx, DK):
- Small (S): 700–900 g
- Medium (M): 900–1100 g
- Large (L): 1100–1400 g
(Exact amount depends on motif size and number; see “Yarn estimate” below.)

Abbreviations (US)
- ch = chain
- sl st = slip stitch
- sc = single crochet
- hdc = half double crochet
- dc = double crochet
- tr = treble crochet
- sp = space
- st = stitch
- rep = repeat
- JAYG = join-as-you-go
Design choices you can make up front
- Motif size: make a test hexagon and block it — typical finished hexagon ≈ 10–12 cm with DK + 3.5 mm.
- Layout: common cardigan layout uses motifs tiled into rectangles for front/back (e.g., 5 motifs across × 4 rows per panel for small). I give layout examples later.
- Embroidery design: floral vines, outlines of hexagon edges, or scattered little flowers on selected motifs. Use embroidery floss for fine lines or single-strand yarn for a chunkier look.
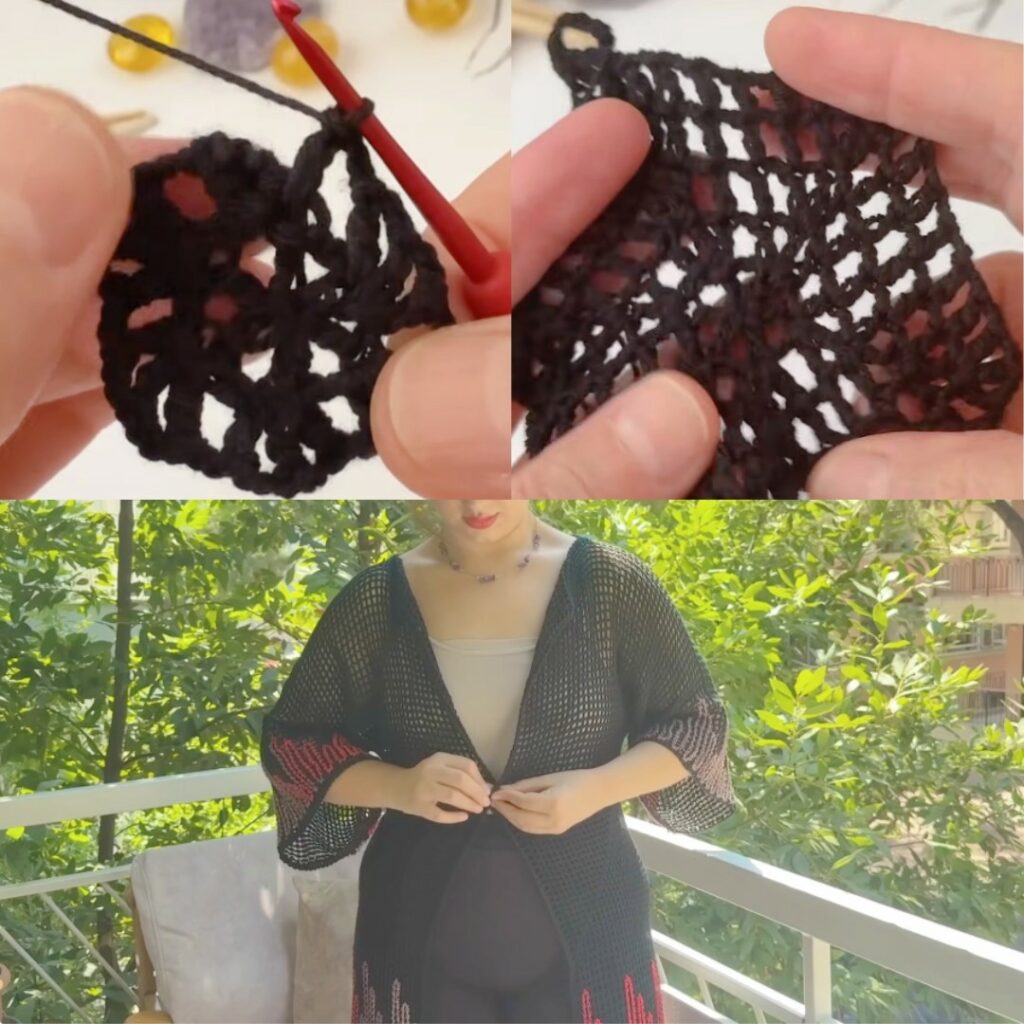
Hexagonal Net Motif — written pattern (one motif)
This hexagon is a lacy “net” — airy center mesh, small picot petals, and an outer round with 6 corner groups so motifs tile as hexes.
Make one motif to test size; block before committing.
Foundation — Round 1 (center)
- Magic ring (or ch 4 and sl st to form ring).
- ch 3 (counts as dc), work 11 dc into ring (12 dc total). Pull tight and join with sl st to top of ch-3.
Round 2 — anchor loops
- ch 1, sc in next dc, ch 3 — repeat around (12 sc + 12 ch-3 loops). Join with sl st.
Round 3 — small fans
- Sl st into first ch-3 loop.
- Into each loop work: (sc, ch1, hdc, 3 dc, hdc, ch1, sc) — tapered fan/petal. (12 petals)
- Join with sl st.
Round 4 — open net (chain arches)
- ch 1, sc in outer sc of petal, ch 5 — repeat around to create 12 ch-5 arches. Join with sl st.
Round 5 — narrow nets / connecting row
- Into each ch-5 arch work: (sc, ch 2, sc) — small connector (12 connectors). Join.
- This produces a spaced hexagon center that will be squared into a hex shape on outer rounds.
Round 6 — create corner groups (form hexagon)
- ch 3 (counts dc), dc in next connector, (dc, ch 2, dc) into the connector that will become a corner, dc in next connector — the goal is to create 6 corner ch-2 spaces evenly placed.
- Practically: group connectors in sets so every second/third connector becomes a corner—aim for 6 corners total. Join.
(If this description feels abstract, think: you want six wider ch-2 corner spaces evenly around the motif; place 3 dc between corners.)
Round 7 — even edging & joinable round
- ch 1, sc evenly around edge; in each corner ch-2 place 3 sc to round the corner. Join with sl st.
- Optional decorative final round: skip 2 sc, 5 dc in next sc, skip 2 sc, sc in next sc — for a scalloped edge. Fasten off and weave ends.
- Block to exact dimensions and to make edges straight.
Tips for consistent hexagons
- Keep the same number of stitches each round; the outer round must create 6 evenly spaced corner groups. If your hexagon looks lopsided, add or remove a dc or ch in Round 6 to rebalance — block frequently while testing.
- If your yarn is stretchier, use a slightly smaller hook.
How to plan your cardigan layout
Measure your body or a garment you like. Decide finished bust (F) and desired ease (e.g., 6–10 cm for an open cardigan). Then:
- Measure blocked motif width (W) and height (H) — for perfect tiling these are same (hexagon measured across flats).
- Compute motifs across for front half:
motifs_across_half = round( (F/2) / W ). - Decide motifs down (length):
motifs_down = desired_length_cm / H(crop vs hip length). - Example (W = 11 cm, F = 100 cm): half = 50 cm → 50/11 ≈ 4.5 → use 4 or 5 motifs across per half. Common layouts: small = 4×3 per panel, medium = 5×3, large = 6×4, etc.
Example layout (Small):
- Front panels each: 4 motifs across × 3 rows = 12 motifs per front.
- Back panel: 8 motifs across × 3 rows = 24 motifs (or construct back as 8 across or join front panels around to make back).
- Total motifs ≈ 48 motifs + extras for sleeves/edging. (Adjust per exact calculation.)
Joining motifs into panels
Two options:
Option A — Join-As-You-Go (JAYG) — recommended for minimal sewing
- Finish motifs up to Round 6 (before sc tidy round). On the 7th round (sc round), when you reach an edge that touches an existing motif, replace the sc with:
sc in your motif, ch 1, sl st into the corresponding sc (or corner) of the neighbor motif, ch 1— continue. - For corners where three motifs meet, sl st into both neighbors’ corners symmetrically.
- Work in rows: make first row of motifs left→right, then start the next row and join each motif to the motif above and to its left as needed. Use pins to line up centers before joining.
Option B — Block then sew (neater for beginners)
- Block all motifs to exact same size and pin on blocking mat.
- Lay them out and sew with tapestry needle using mattress stitch through back loops only — this gives a flatter seam.
- Whipstitch is faster but produces a slightly bulkier seam.

Seaming for cardigan shape
- Join motifs into two front panels and a back panel, or construct a single large rectangle and fold.
- Shoulder seam: join the top row motifs of front & back leaving a neck opening in the center (leave 2–3 motif widths depending on neck width you want).
- Side seams: join motifs vertically from hem up leaving armhole height free (e.g., leave 15–18 cm for small adult). Alternatively, join entire panels then cut armholes and finish edges.
Sleeve options
- Short cap sleeve: add 1–2 motifs around upper arm and seam in.
- Set-in sleeve by pickup: with RS facing, pick up sts around armhole and work in rounds of the motif repeat adapted to circular shaping (or do simple dc rounds) until desired sleeve length; finish with sc cuff.
- Separate motif sleeve: make rectangular sleeve from hexagons (strip of motifs sewn into a tube) and sew into armhole.
Practical: many motif cardigans use a wide short sleeve made from one row of motifs sewn to the armhole edge.
Neckline, edgings & closure
- Work a sc round around neckline/front edges to stabilize. Place 3 sc in corners to keep points round.
- Decorative border: 1–2 rounds of shells: skip 2 sc, 5 dc in next sc, skip 2 sc, sc in next sc.
- Buttons: if you want closure, sew small buttons on one side and make small chain loops on the other side during the border round.
Embroidery — where & how
Embroider after joining and blocking. Use embroidery floss (2–3 strands) or same yarn single strand depending on thickness. Use a blunt tapestry/embroidery needle.
Simple embroidery ideas shown in the video style:
- Outline hex centers: run a chain stitch (or surface sl st) around the inner ring of selected motifs to highlight them.
- Small floral sprigs: single lazy daisy (detached chain) for petals + french knot center on a few motifs to create scattered flowers.
- Vines between hexes: surface chain stitch (or stem stitch) crossing seams to join motifs with a vine look.
- Contrast color lines across rows: outline every other hex edge for stripe effect.
Stitches to use
- Backstitch / stem stitch — for vines/lines.
- Lazy daisy — petals (small petal shape); secure with tiny sc or French knot.
- French knot — small flower centers or dots.
- Surface slip stitch — simple raised line across motif.
Practical embroidery method
- Mark embroidery plan lightly with pins or removable marker.
- Use short stitches; secure floss ends by weaving to the back through a couple of stitches.
- Keep tension even; don’t pull tight (you may pucker the crochet).
- Block again lightly after embroidery if needed.
Blocking & final assembly
- Block each motif to the target size precisely. This is essential for clean joining.
- Join motifs into panels and block the assembled panel to even seams.
- Add edging and sleeves, then block whole cardigan into final shape.
- Embroider on the blocked, assembled garment (pin designs first).
- Weave in ends; sew buttons if used.
Yarn estimate & motif counts (practical example)
- Suppose your blocked motif = 11 cm across flats. For a cardigan with front half ~50 cm and length ~60 cm:
- motifs_across_half ≈ 50/11 ≈ 4.5 → use 5 motifs across per half.
- motifs_down ≈ length/H ≈ 60/11 ≈ 5.5 → use 6 rows for a hip-length cardigan.
- Front panel = 5 × 6 = 30 motifs; back panel = 10 × 6 = 60 motifs → total ~120 motifs. Add ~10–20 motifs for sleeves/edging.
- If each motif uses ~10–12 g of DK, yarn needed ≈ 120 × 11 g = 1320 g → ~1.3 kg (adjust per gauge). This matches the earlier yarn estimates.
Important: make one motif and weigh it to estimate yarn per motif — that’s the most accurate way.
Troubleshooting & tips
- Motifs different sizes: block them all to the same dimensions. If a few are smaller, add a round of sc or a thin outer shell to even them.
- Seams puckering: join more loosely (especially JAYG sl st joins). If seams still pucker, sew through back loops only for less bulk.
- Hexagon edges don’t match: ensure you formed exactly six corner groups in Round 6; recount and rebalance if necessary.
- Embroidery puckers the lace: use thinner floss or single strand of yarn and don’t pull tight; test on a spare motif.
- Armholes too small: leave more motifs unjoined at the side seam or unpick and reseam with larger armhole.
Quick workflow (summary)
- Make one motif → block & measure.
- Calculate motif layout → compute total motifs required.
- Crochet all motifs (or batch them row by row).
- Block motifs.
- Join motifs into panels (JAYG or sew).
- Seam shoulders & sides; add sleeves or pick up stitches.
- Work borders & edging.
- Embroider decorative motifs.
- Final block; weave ends & add closures.
VIDEO: