 by
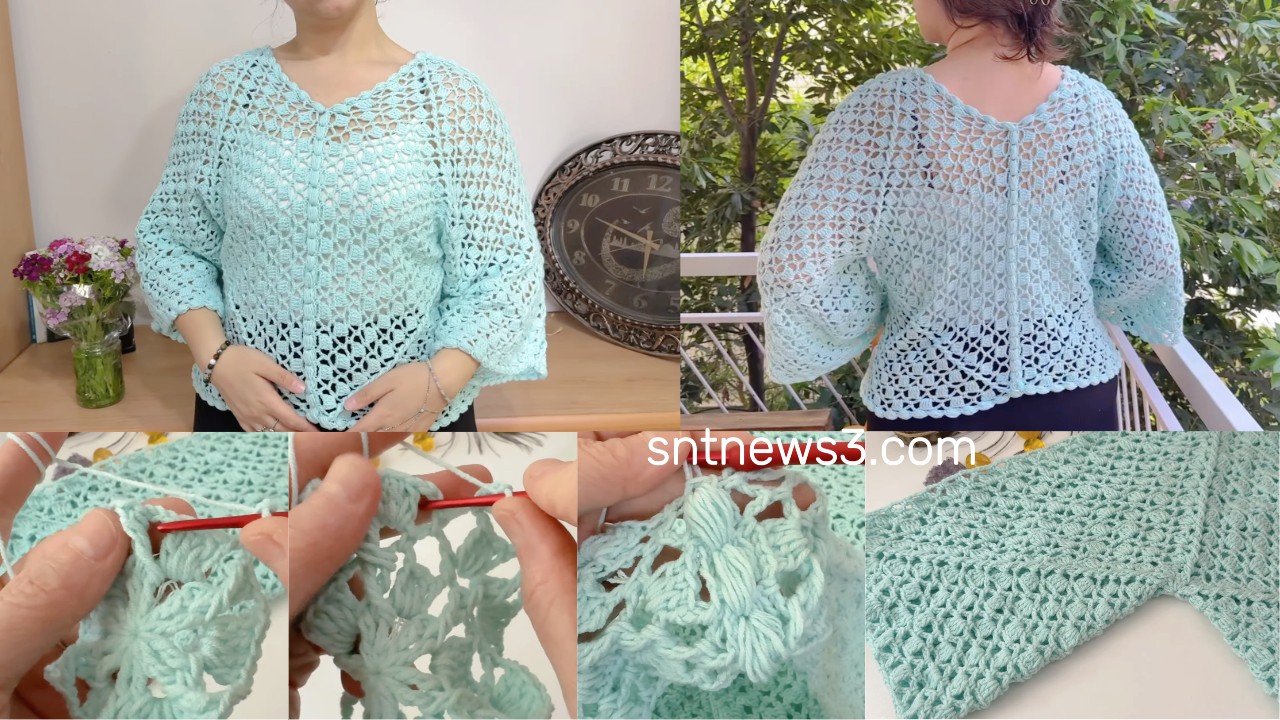
by Great! Below is a clear, practical, step-by-step written tutorial that recreates a crochet hexagon motif crop blouse. It’s written in US terms and designed so you can work straight from the text: make the hexagon motif, block it, join motifs into front/back panels, finish edges, and add straps/sleeves. I include sizing examples (S/M/L), yarn estimates, and troubleshooting tips.
Overview — what you’ll make
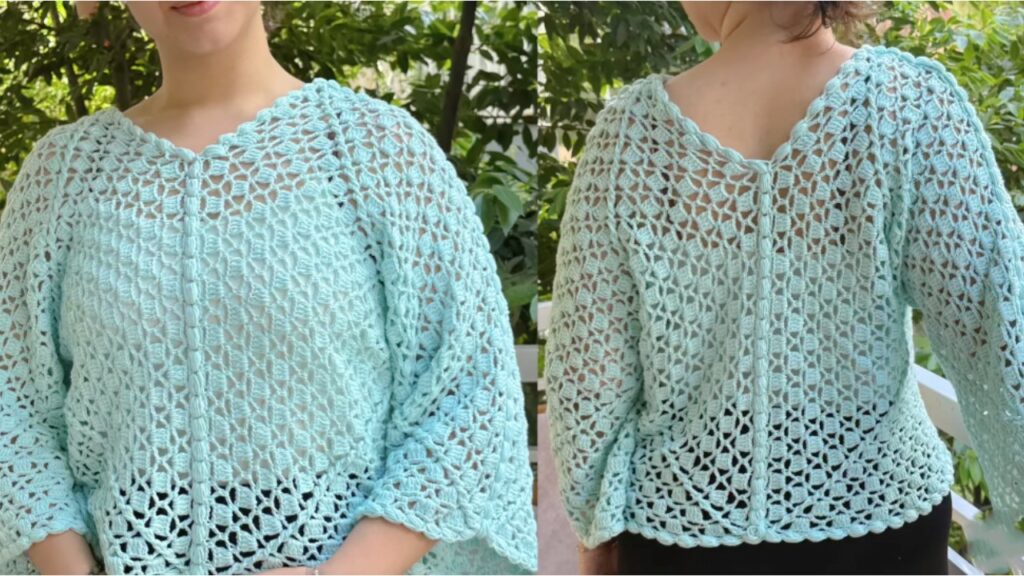
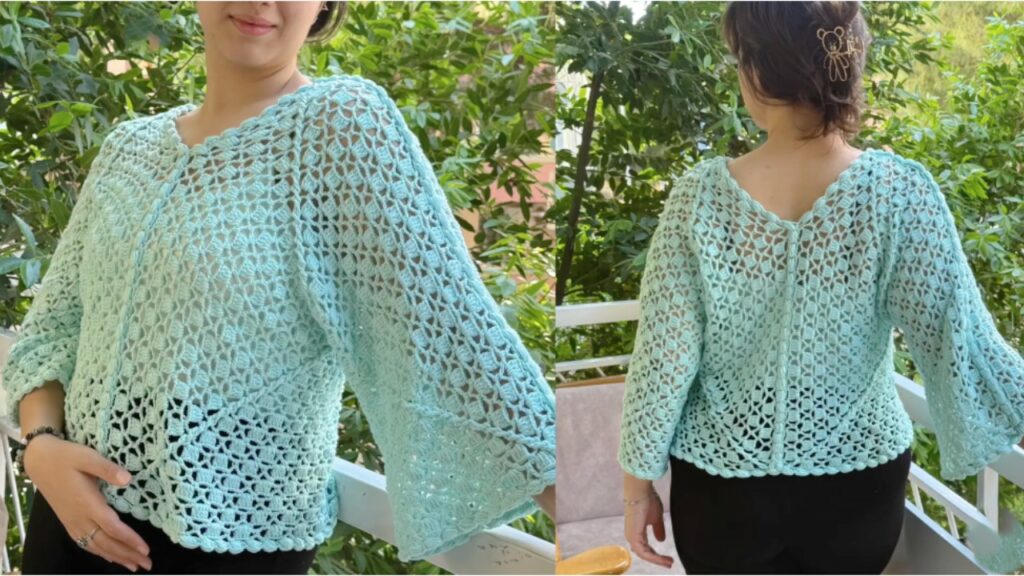
A breezy crop blouse made from hexagon motifs joined in a tiled grid. Finish with a tidy edging and optional straps or short sleeves.
Skill: beginner → intermediate (repeating motif, blocking, joining).
Finished look: lacy, summery, airy.
Materials
- Yarn: cotton or cotton blend (sport / DK recommended).
- Hook: choose to match yarn (example: DK → 3.5 mm; sport → 3.0 mm).
- Tapestry needle, scissors, blocking pins/mat, stitch markers (optional).
- Optional: small buttons or narrow ribbon for ties.
Estimate (approx)
- Small crop blouse (S): 300–400 g DK
- Medium (M): 400–500 g DK
- Large (L): 500–650 g DK
(We’ll give a more precise estimate once you make a motif and weigh it.)
Abbreviations (US)
- ch = chain
- sl st = slip stitch
- sc = single crochet
- hdc = half double crochet
- dc = double crochet
- tr = treble crochet
- sp = space
- st = stitch
- rep = repeat
- JAYG = join-as-you-go
Quick plan
- Make a hexagon motif (worked in rounds).
- Block motifs to identical size.
- Join motifs into two rectangular panels (front & back).
- Seam shoulders and sides, leaving desired neck/arm openings.
- Add edging and straps/tassels as desired.
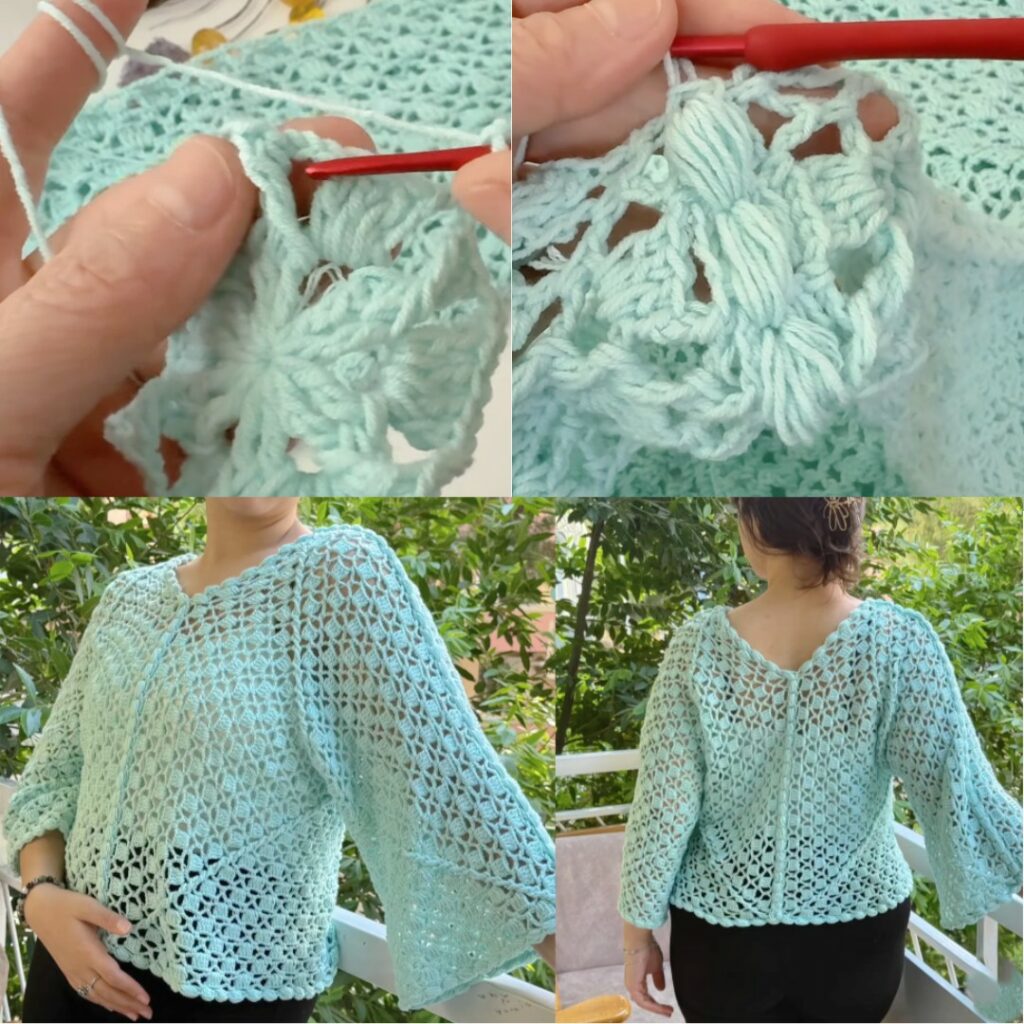
HEXAGON MOTIF — worked in rounds (US terms)
Make one motif, block it, measure width (W). Use W to calculate motif counts for your size.
Notes: counts below give a balanced lacy hexagon that tiles neatly. Work loosely if using cotton to keep lace airy.
Round 1 — center ring
- Make a magic ring.
- ch 3 (counts as dc), work 11 dc into ring. (12 dc total including ch-3.)
- Tighten ring and join with sl st to top of ch-3.
Round 2 — anchor loops
- ch 1, sc in next dc, ch 3 — repeat around (12 sc + 12 ch-3 loops).
- Join with sl st to first sc.
Round 3 — petals
- Sl st into first ch-3 loop.
- In each loop work: (sc, ch1, hdc, 3 dc, hdc, ch1, sc) — tapered petal.
- Repeat into all 12 loops. Join.
Round 4 — arch connectors
- ch 1, sc in outer sc of petal, ch 5 — repeat around to make 12 ch-5 arches.
- Join with sl st.
Round 5 — larger fans (pineapple bodies)
- Into every other ch-5 arch work: (sc, ch1, hdc, 5 dc, hdc, ch1, sc) (big fan).
- Into the remaining arches work (sc, ch3, sc) (connector).
- Repeat alternating big fan / connector around. Join.
Round 6 — tall loop row
- ch 1, sc in first sc, ch 7, sc in next sc — repeat to create 12 ch-7 loops. Join.
Round 7 — top fans
- In each ch-7 loop work: (sc, ch2, 3 dc, ch2, sc) — narrow top fans. Join.
Round 8 — make 6 corners (square/hex shape)
We now form the hexagon by placing 6 corner groups equally around:
- ch 3 (counts as dc), 3 dc in next top-fan space, 3 dc in next top-fan space, in the third top-fan space of the trio work (3 dc, ch 3, 3 dc) (this forms a corner).
- Repeat that sequence twice around so you have 6 groups total (3 groups × 2 = 6? — adjust so you place 6 corner ch-3 spaces evenly). The idea: group the 12 fan tops so every second/third becomes a corner; if the counts feel off, place corners every second top fan (12/6 = 2) — so pattern: [3dc][corner][3dc][corner] — simpler: make corner at every second top fan — do whichever balances to six corners.
- Join with sl st.
(Important: if your hexagon looks lopsided, rebalance by moving corner placement so there are 6 corners evenly spaced; this is normal to tweak on first motif.)
Round 9 — tidy sc round (joinable)
- ch 1, sc evenly around motif; place 3 sc in each corner ch-3 to round them. Join and fasten off. Weave ends.
- Block each motif to exact same size.
Tips: hexagon corner math
If the above Round 8 wording is confusing, here is a simpler reliable method to ensure 6 corners:
- You have 12 top-fan spaces. Place a corner (3dc,ch3,3dc) in every 2nd top-fan space → that yields 6 corners, with one regular 3dc spacer between corners. So sequence around: [corner][3dc][corner][3dc]… etc.
BLOCK & MEASURE
Block one motif to the shape you want. Measure W = width across flats (cm). This W will determine how many motifs you need across and down.
LAYOUT & MOTIF COUNT (SAMPLE)
Decide finished bust and crop length.
Use these sample layouts (assumes W ≈ 10 cm blocked — replace with your actual W):
Small (S) — finished bust ~86 cm (34″)
- motifs across (half front) ≈ 4 motifs across front half → front panel = 4 across × 3 rows = 12 motifs; back panel = 8 across × 3 rows = 24 motifs. Total ~36 motifs (plus a couple for straps).
Medium (M) — finished bust ~96 cm (38″)
- front: 5 across × 3 rows = 15; back: 10 across × 3 rows = 30 → total ~45 motifs.
Large (L) — finished bust ~106 cm (42″)
- front: 5 across × 4 rows = 20; back: 10 across × 4 rows = 40 → total ~60 motifs.
Adjust with your W:motifs_across_half = round((finished_bust_cm / 2) / W)motifs_down = round(crop_height_cm / W) (crop height might be 18–22 cm → 2 rows if W=10 cm)
Add 2–6 spare motifs for adjustments/straps.
JOINING MOTIFS
Two main ways: Join-As-You-Go (JAYG) or Sew after blocking.
Join-As-You-Go (recommended)
- Make first motif fully and block.
- Make the second motif up through Round 9 but stop before finishing Round 9. When working the sc round, when you reach an edge that will touch an existing motif, replace the sc with:
sc in your motif st, ch 1, sl st into corresponding sc (or corner) of neighbor, ch 1.
- Continue sc round and join to neighbors where needed. For corners that touch two neighbors, sl st into both neighbors’ corner ch-3 spaces symmetrically.
- Build the first row left → right, then start the second row joining each motif to the one above and to the left as you go.
Advantages: flat seams, less sewing.
Sew-after-blocking (simple)
- Block all motifs. Lay them out, pin to match. Use a tapestry needle and yarn to mattress stitch through back loops only for a flat seam.
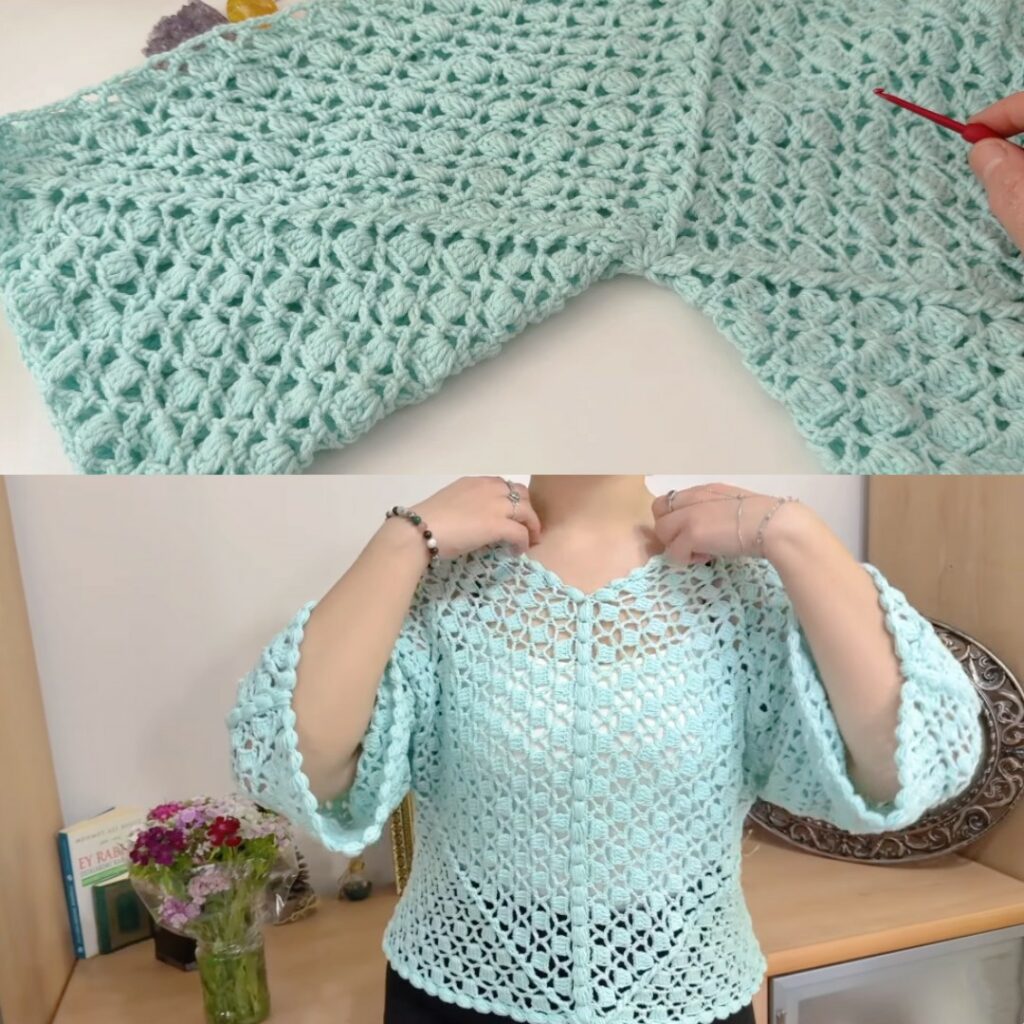
ASSEMBLE PANELS
- Join motifs into front & back panels per your layout.
- Decide neck opening: leave center motifs unjoined at top row or partially unjoin to create a neck hole. Example: leave one motif center unjoined or leave half of two motifs to create wider neck. Pin and try-on before finalizing.
SHOULDER & SIDE SEAMS
- With RS together, seam shoulders using mattress stitch or sc. Leave desired sleeve/armhole opening (for short caps leave ~10–12 cm height; for more, leave 15–18 cm).
- Sew side seams from hem up to where armhole should start. If you want short sleeves made of motifs, add them now.
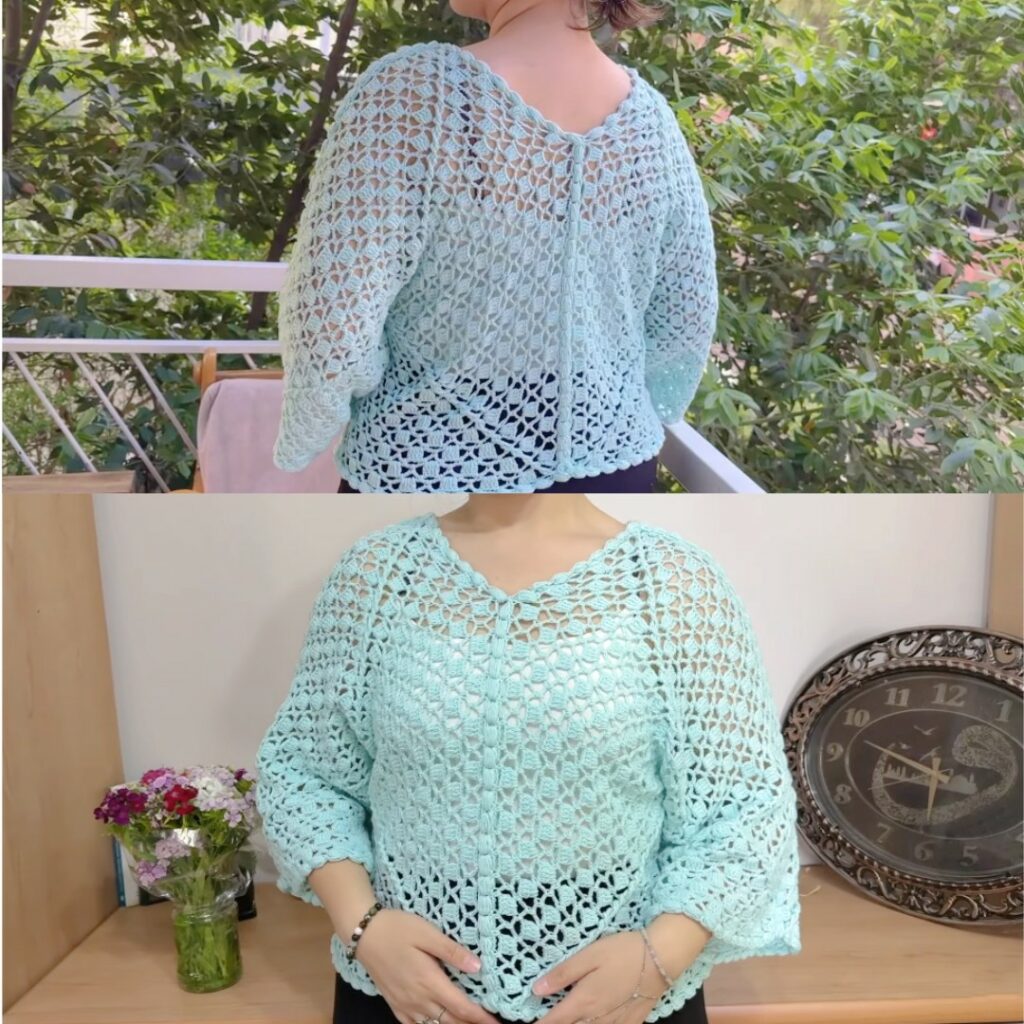
EDGING (NECK, ARMHOLES, HEM)
Work a neat band around open edges:
Simple band
- Join yarn at bottom right front corner. sc evenly around the entire front edge, up neck, down other side and around armholes (work 3 sc in corner ch-3s). Join.
- Do 1–2 more rounds of sc for a neat finish. Fasten off.
Decorative scallop
- After sc rounds, shell round: skip 2 sc, 5 dc in next sc (shell), skip 2 sc, sc in next sc — repeat around. Fasten off and block.
Strap / tie
- For shoulder straps: chain desired length (tie on shoulders or sew ends under top motifs).
- For short sleeves: sew a small motif strip across armhole.
OPTIONAL: STRAPS, BUTTONS, OR TIES
- Straps: chain 60–80 (depending on wearer) or make a narrow strap by crocheting a strip of sc or hdc and sew ends into shoulder seams.
- Button loops: while making the front band, create small ch-3 loops for buttons.
EMBELLISHMENT & VARIATIONS
- Make motifs in two colors and alternate.
- Add a small shell row around motif for a ruffled effect.
- Add tiny tassels or fringe to hem for boho vibe.
- For more coverage, add another row of motifs at bottom.
YARN ESTIMATE (more accurate method)
- Make 1 motif; weigh it (grams).
- Multiply by number of motifs in layout. Add 10% extra for joining/edging.
Example: if 1 motif weighs 12 g and you need 40 motifs → 12×40 = 480 g + 10% ≈ 528 g.
Troubleshooting & Tips
- If hexagons vary in size: block all motifs to same size; if still smaller, add one extra sc round to small motifs to even them.
- If joins pucker: join more loosely or use JAYG through back loops only; or sew with mattress stitch for flatter seams.
- Neck too tight: unpick shoulder joins and leave more motifs unjoined at center.
- Motif looks lopsided: adjust corner placement in Round 8 so corners are evenly spaced (6 corners total). This is normal to tweak on the first motif.
Quick workflow checklist
- Make & block 1 motif; measure W.
- Compute motifs needed: across & down.
- Crochet all motifs (plus extras).
- Block all motifs.
- Join motifs into front & back.
- Seam shoulders & sides, add straps/sleeves.
- Add edging & optional tassels.
- Final block; weave ends.
VIDEO: