 by
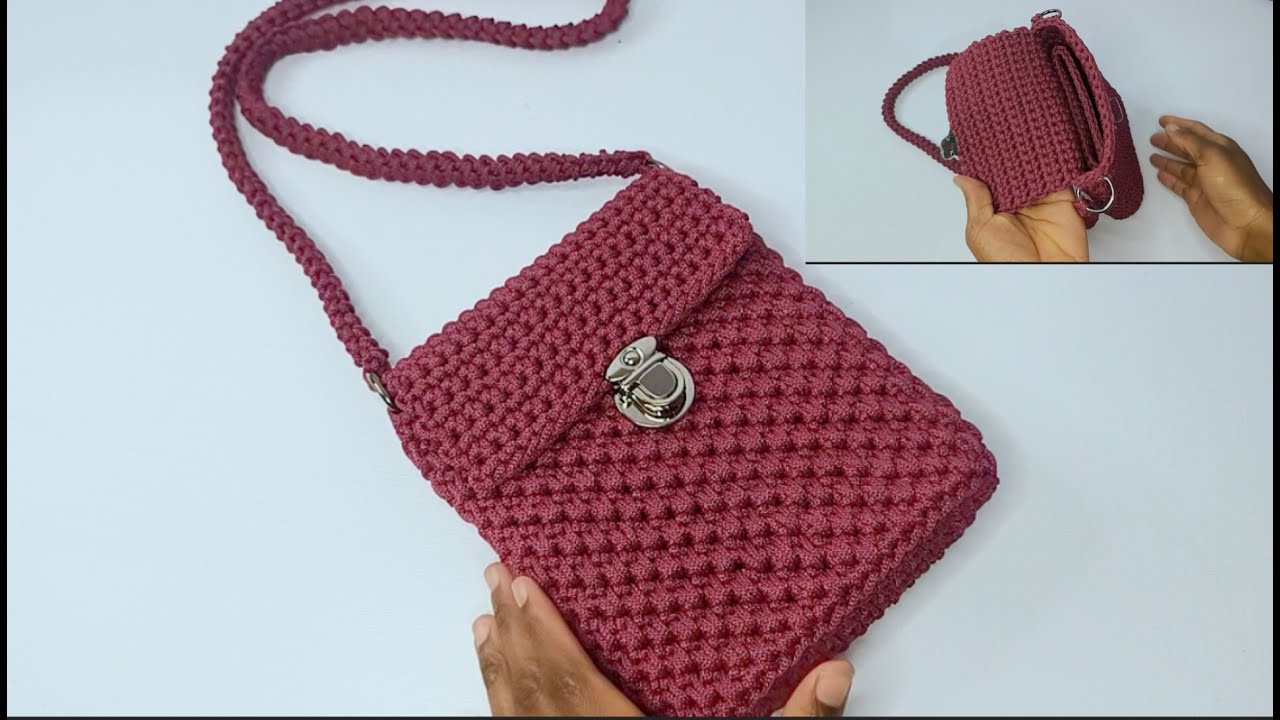
by Learning to crochet can be incredibly rewarding, and there’s no better way to solidify your skills than by making something useful! A Crochet Phone Bag is the perfect beginner project. It’s small enough to be manageable, uses only fundamental stitches, and results in a practical, stylish accessory you can use right away.
This detailed, step-by-step tutorial is specifically designed with the absolute beginner in mind. We’ll walk you through each stitch and technique, ensuring you build confidence as you create a functional and charming bag for your mobile phone. Get ready to impress yourself with your new skills!

Why is a Crochet Phone Bag Perfect for Beginners?
- Uses Basic Stitches: Primarily relies on chain (ch) and single crochet (sc), which are among the first stitches you learn.
- Simple Shaping: The bag is essentially a rectangle formed by working in rounds, with a flat base and straight sides – no complex increases or decreases.
- Quick to Finish: It’s a small project, so you’ll see results quickly, keeping motivation high.
- Practical Outcome: You get a usable item at the end, perfect for carrying your phone, keys, or a small wallet.
- Customizable: Once you get the hang of it, you can easily change colors, add a button, or try different simple stitches.
Key Considerations Before You Start:
- Your Phone’s Size: This is the most crucial step! Measure your phone’s:
- Width: From side to side.
- Height: From top to bottom.
- Thickness/Depth: How deep it is.
- You will use these measurements to determine your starting chain length and how many rows to crochet for the height.
- Rule of Thumb: Add about 0.5 to 1 inch (1-2.5 cm) to your phone’s width and height measurements to ensure the bag isn’t too tight and your phone slides in easily.
- Yarn Choice:
- Fiber: For a durable and easy-to-work-with bag, cotton or cotton blends are highly recommended. They hold their shape well and aren’t too stretchy. Acrylic yarn can also work, but choose a non-stretchy variety.
- Weight: Worsted weight (Category 4) is ideal for beginners. It’s easy to handle, and stitches are visible. DK (Light Worsted/Category 3) can also work for a slightly finer bag.
- Color: Choose any color you like! A solid color is easiest for your first project.
- Quantity: You’ll need very little yarn, typically 50-80 yards (a small skein).
- Hook Size:
- Match your hook size to your yarn weight, but consider going down one size from the yarn label’s recommendation. This will create a denser fabric, which is good for a bag as it provides better protection and helps the bag hold its shape.
- For Worsted weight yarn, a G/6 (4.0 mm) or H/8 (5.0 mm) hook is usually a good starting point.
- Tension: Try to keep your stitches consistent throughout the project. If your fabric feels too loose or gappy, try a smaller hook. If it’s too stiff and hard to work, try a larger hook.
Materials You’ll Need:
- Yarn: 1 skein (approx. 50-80 yards) of Worsted Weight Cotton or Acrylic yarn in your chosen color.
- Crochet Hook: Size G/6 (4.0 mm) or H/8 (5.0 mm) (choose one based on your yarn and desired fabric density).
- Yarn Needle (Tapestry Needle): For weaving in ends.
- Scissors: For cutting yarn.
- Your Mobile Phone: For measuring and checking the fit!
- Optional: A small button (1/2 to 3/4 inch diameter) for the flap closure.
Essential Crochet Abbreviations (Beginner-Friendly):
- ch: chain
- sl st: slip stitch
- sc: single crochet
- st(s): stitch(es)
- ch-sp: chain space
- ***…***: repeat instructions within asterisks
Crochet Phone Bag Tutorial: Step-by-Step for Beginners
This pattern will guide you to create a bag that fits a standard smartphone (approx. 3″ W x 6″ H x 0.3″ D). Remember to adjust your starting chain and round count based on your phone’s dimensions.
Part 1: The Base of the Bag
We start by crocheting a flat rectangle that will form the bottom of your phone bag.
- Starting Chain:
- Chain 15. (This chain determines the length of your bag’s base. To figure out your chain length, place your hook at one end of your phone’s length, and chain until the chain reaches just past the other end of your phone’s length, plus about 2 extra chains for rounding the corners. For example, if your phone is 6 inches long, you might chain 15-20 stitches).
- Count your chains carefully!
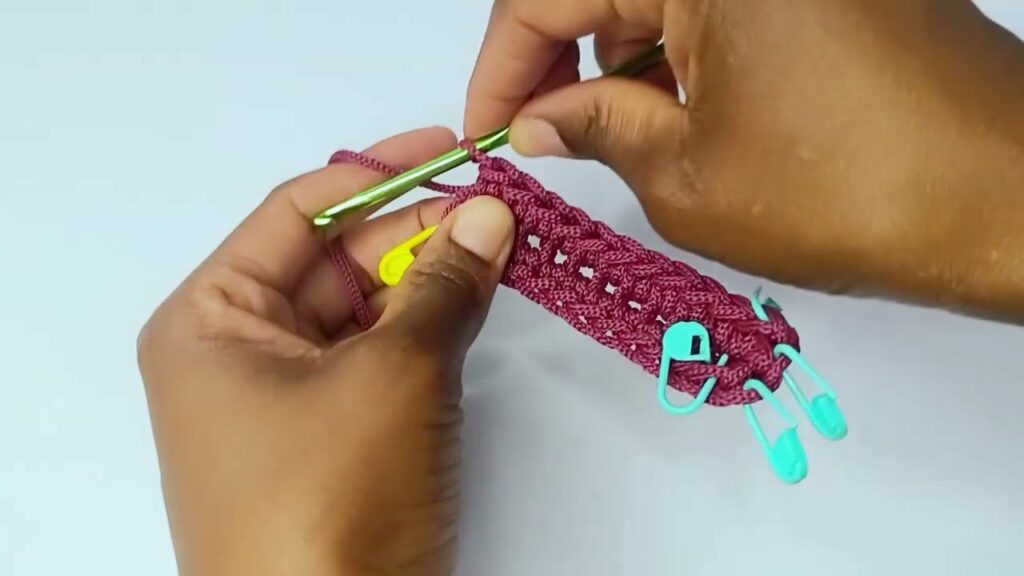
- Round 1 (Working Around the Chain):
- Sc in the 2nd ch from your hook.
- Sc in each chain across until you reach the very last chain stitch.
- In that very last chain stitch, work 3 sc stitches (this creates the curve for one end of the base).
- Now, you’ll be working along the opposite side of your starting chain. Sc in each of the stitches along this side, going back towards where you started (you’ll be working into the bottom loops of the chains).
- In the very first chain stitch where you made your first sc, work 2 sc stitches (this creates the curve for the other end of the base).
- Join with a sl st into the top of your very first sc stitch of this round.
- You have now completed an oval shape. Your stitch count will be (2 x your initial chain length minus 1) + 2 extra stitches. For Ch 15, you’ll have (2 x 14) + 2 = 30 sc. [Approx. 30 sc]
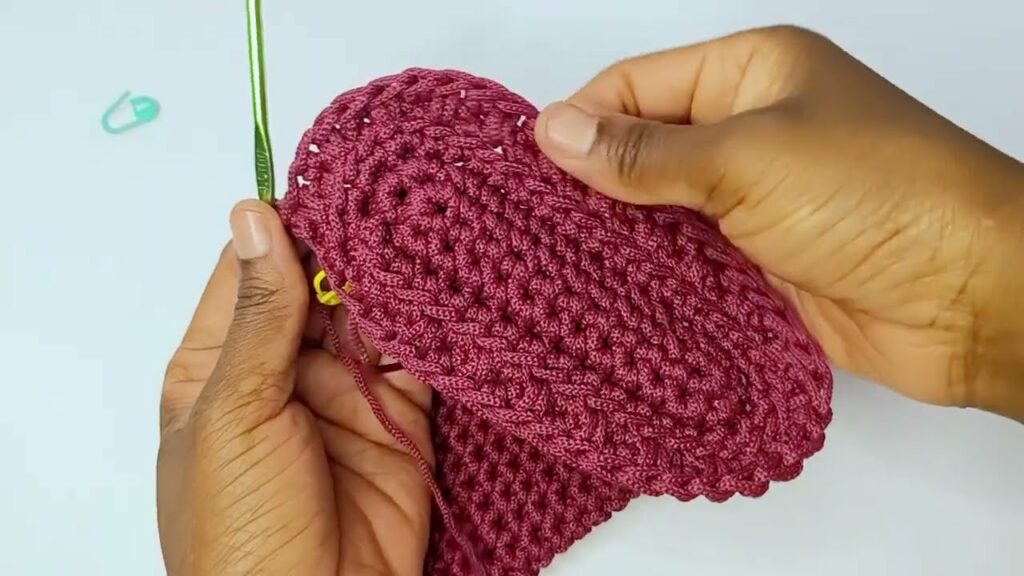
Part 2: Building the Sides of the Bag
Now we’ll work upwards to create the walls of your phone bag. This section is worked in continuous rounds (or joined rounds, your choice) using single crochet.
- Round 2 (Establishing the Wall):
- Ch 1 (this chain does NOT count as a stitch, it just gives height).
- Work a single crochet (sc) in the back loop only (BLO) of each stitch around the entire oval.
- Join with a sl st to the first sc of this round.
- [Approx. 30 sc] (Your stitch count should be the same as Round 1).
- Working in the BLO for this round creates a nice, crisp edge that defines the bottom of your bag.
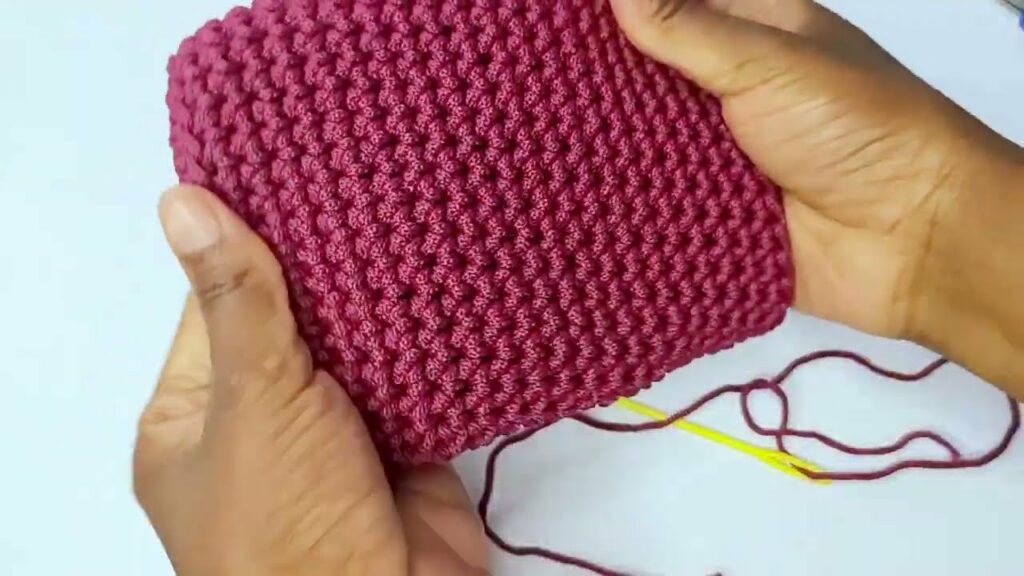
- Rounds 3 – 25 (Building Height):
- Ch 1.
- Work a single crochet (sc) in both loops of each stitch around.
- Join with a sl st to the first sc of this round.
- [Approx. 30 sc] (Maintain the same stitch count).
- Repeat this round until your bag reaches the desired height for your phone. Regularly insert your phone into the bag to check the fit and height. You want the bag to come up to the top of your phone. For a 6-inch tall phone, this might take around 23-25 rounds, but it depends on your tension and yarn.
- Fasten off your yarn, leaving a tail to weave in later.
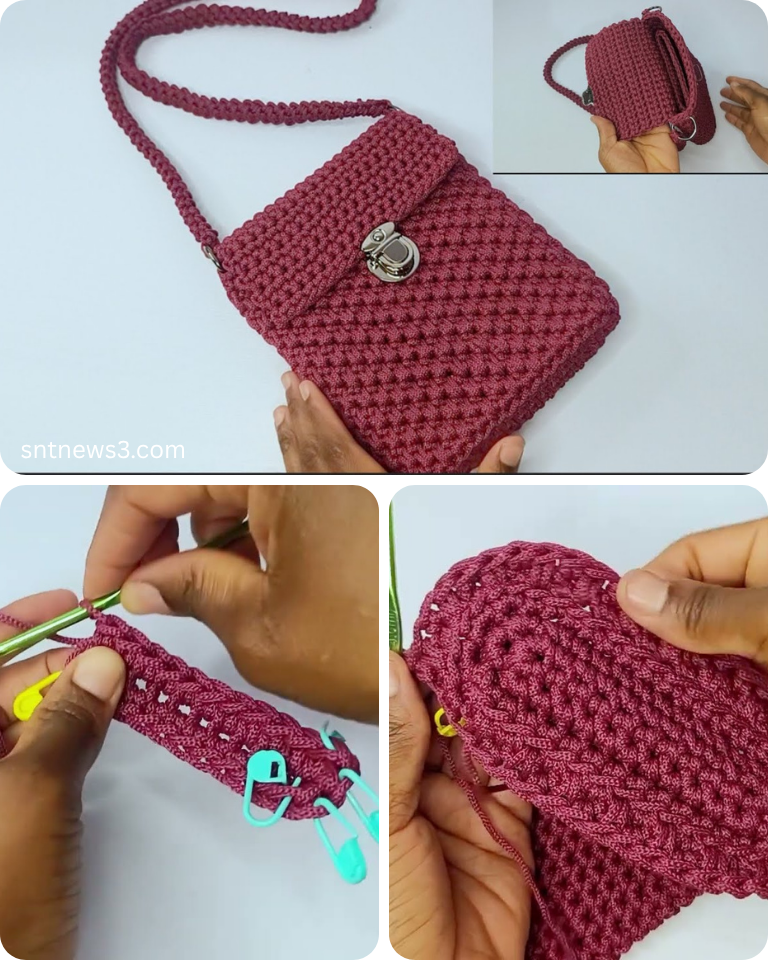
Part 3: The Flap (Optional Closure)
This creates a protective flap to cover the top of your phone.
- Attach Yarn for Flap:
- Hold your bag so the “seam” from joining rounds is at the back. Find the stitch directly at the center-back of the top edge.
- Attach your yarn with a sl st into this center-back stitch.
- Flap Row 1:
- Ch 1 (does NOT count as a stitch).
- Sc in the next 15 stitches (this should be approximately half the circumference of your bag).
- [15 sc]
- Ch 1, turn your work.
- Flap Rows 2 – 6 (or until desired length):
- Sc in each stitch across the row.
- [15 sc]
- Ch 1, turn your work.
- Repeat this row until your flap measures about 2-2.5 inches (5-6 cm) in length.
- Buttonhole Row (Optional): If you want a button closure:
- Ch 1, turn.
- Sc in the first 6 stitches.
- Ch 2, skip the next 2 stitches (this creates the buttonhole opening).
- Sc in the remaining 7 stitches.
- [13 sc, 1 ch-2 sp]
- Ch 1, turn.
- Next Row (if buttonhole made): Sc in each sc and work 2 sc into the ch-2 space.
- Final Flap Row:
- Ch 1, turn.
- Sc in each stitch across.
- [15 sc]
- Fasten off, leaving a tail to weave in.

Part 4: The Strap/Handle
This will allow you to carry your phone bag.
- Option A: Simple Chain Strap (Easiest for Beginners):
- Attach your yarn with a sl st to one of the top corners of your bag (where the flap started).
- Chain 120-150 (or chain until the strap is your desired length for carrying over your shoulder or as a wristlet).
- Sl st into the 2nd chain from your hook, and sl st in each chain back down to the bag.
- Sl st into the other top corner of your bag to secure the strap.
- Fasten off, leaving a tail to weave in.
- This creates a simple, thin chain strap.
- Option B: Simple Sc Strap (More Durable):
- Ch 5 (this will be the width of your strap).
- Row 1: Sc in the 2nd ch from hook. Sc in each of the next 3 chains.
- [4 sc]
- Ch 1, turn.
- Repeat Row 1: Sc in each sc across.
- [4 sc]
- Ch 1, turn.
- Continue repeating this row until your strap reaches your desired length (approx. 24-30 inches for a shoulder bag).
- Fasten off, leaving long tails at both ends.
- Attach to Bag: Use your yarn needle to securely sew one end of the strap to each top corner of your bag. Sew multiple times to make it strong.
Part 5: Finishing Touches
- Weave in All Ends: This is essential for a neat and professional look! Use your yarn needle to carefully weave in all loose yarn tails (from starting the base, finishing rounds, and attaching the strap/flap). Weave them into the stitches of the same color, making them as invisible as possible.
- Attach Button (if applicable): If you made a buttonhole, sew your chosen button onto the front of the bag, directly below the buttonhole on the flap. Make sure it aligns when the flap is closed.
- Optional: Blocking: For a really polished look, you can lightly mist your bag with water and gently shape it with your hands. Let it air dry completely. This helps the stitches even out.
Congratulations! Your First Crochet Phone Bag is Complete!
You’ve just created a functional and beautiful item with your own hands. This is a huge accomplishment for a beginner!

Tips for Continued Success & Customization:
- Practice Makes Perfect: Don’t worry if your first project isn’t absolutely perfect. Every stitch you make helps improve your tension and consistency.
- Try Different Colors: Once you’re comfortable, try making a striped phone bag by changing colors every few rounds.
- Add Embellishments: You can stitch on small crocheted flowers, buttons, or even embroider a simple initial or design onto the front of the bag.
- Different Stitches: Once you master single crochet, try making another phone bag using half double crochet (hdc) for a slightly faster, taller stitch, or even double crochet (dc) for a looser, lacier look.
- Gift It! Your handmade phone bag makes a thoughtful and personal gift for friends and family.
- Care: Refer to your yarn label for specific washing instructions. Most cotton and acrylic yarns are machine washable on a gentle cycle.
Enjoy your new, handmade phone bag and the satisfaction of a project well done!
Video tutorial: