 by
by Daisies symbolize innocence, purity, and new beginnings – and in crochet, they’re simply delightful! Learning how to crochet a daisy flower is a fantastic skill for any crocheter, offering endless possibilities for embellishing blankets, hats, bags, headbands, or even creating standalone floral arrangements. They’re quick, use minimal yarn, and are surprisingly versatile.
This detailed, step-by-step tutorial will walk you through creating a classic, multi-layered crochet daisy, complete with a textured center and crisp petals. Whether you’re a complete beginner or looking to perfect your floral motifs, this guide will help you bloom with confidence!
Why Crochet a Daisy Flower?
- Versatile Embellishment: Perfect for adding a cheerful touch to almost any crochet project or even fabric items.
- Quick & Satisfying: Small motifs work up fast, providing instant gratification.
- Stash Buster: Ideal for using up those small leftover yarn scraps.
- Skill Building: Practices working in the round, color changes, and specific stitch placements (like back loops).
- Decorative & Gifting: Great for garlands, bouquets, hair accessories, or as thoughtful handmade gifts.
- Stress-Relieving: The repetitive nature of creating motifs can be very meditative and calming.
Key Considerations Before You Start:
- Yarn Choice:
- Fiber: Cotton or cotton blends are excellent for flowers as they provide good stitch definition and hold their shape well. Acrylic also works, especially softer varieties.
- Weight: Light Worsted (DK/Category 3) or Worsted (Category 4) are common. DK will create a daintier flower, while worsted will be more substantial. Choose a weight that complements your intended use (e.g., thicker yarn for a blanket appliqué, finer for a delicate brooch).
- Colors:
- Center: Traditionally yellow or orange.
- Petals: Classic white or cream. However, don’t be afraid to experiment with pink, blue, or purple for a whimsical touch!
- Quantity: Very small amounts – a few yards of each color.
- Hook Size:
- Match your hook to your yarn weight. You generally want a hook that creates a firm, not flimsy, fabric for flowers to help them hold their shape.
- For DK yarn: 3.5 mm (US E/4) or 4.0 mm (US G/6).
- For Worsted yarn: 4.0 mm (US G/6) or 5.0 mm (US H/8).
- Tension: Consistent tension will ensure your petals are uniform and your flower lays flat.

Materials You’ll Need:
- Yarn:
- Daisy Center Color (e.g., Yellow): Small amount of DK or Worsted weight yarn.
- Daisy Petal Color (e.g., White/Cream): Small amount of DK or Worsted weight yarn.
- Crochet Hook: Appropriate size for your yarn (e.g., 4.0 mm / G/6).
- Yarn Needle (Tapestry Needle): For weaving in ends.
- Scissors: For cutting yarn.
- Stitch Marker (optional): Helpful if you lose track of the first stitch in a round.
Essential Crochet Abbreviations:
- ch: chain
- sl st: slip stitch
- sc: single crochet
- hdc: half double crochet
- dc: double crochet
- tr: treble crochet (sometimes used for taller petals)
- st(s): stitch(es)
- MR: magic ring (or magic circle)
- BLO: back loop only
- FLO: front loop only
- (): indicates instructions to be worked into the same stitch/space
- ***…***: repeat instructions within asterisks
- []: indicates stitch counts at the end of a round
How To Crochet A Daisy Flower: Step-by-Step Tutorial
We’ll start with the center of the daisy, then add the petals in a separate round.
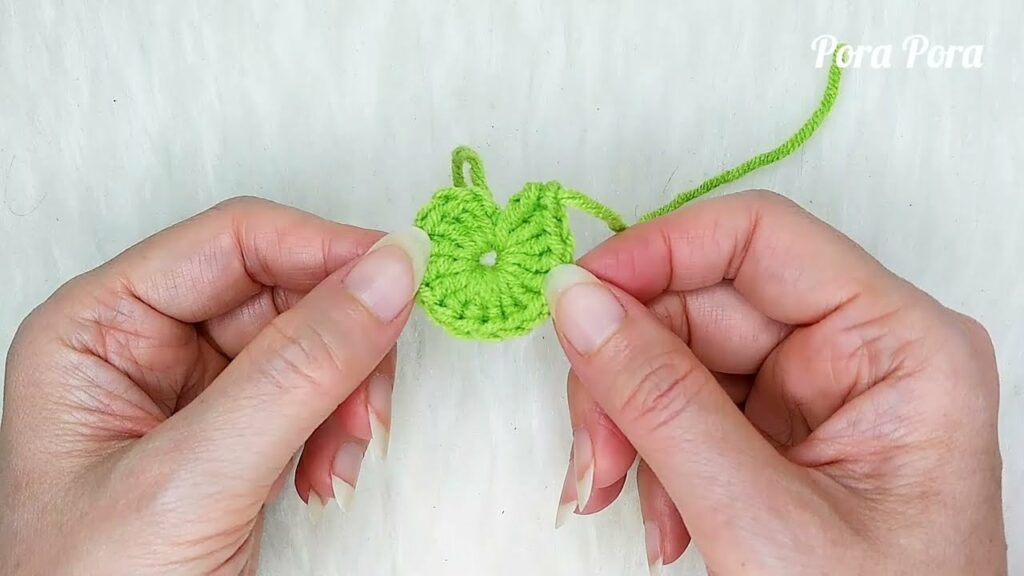
Part 1: The Daisy Center (Yellow Yarn)
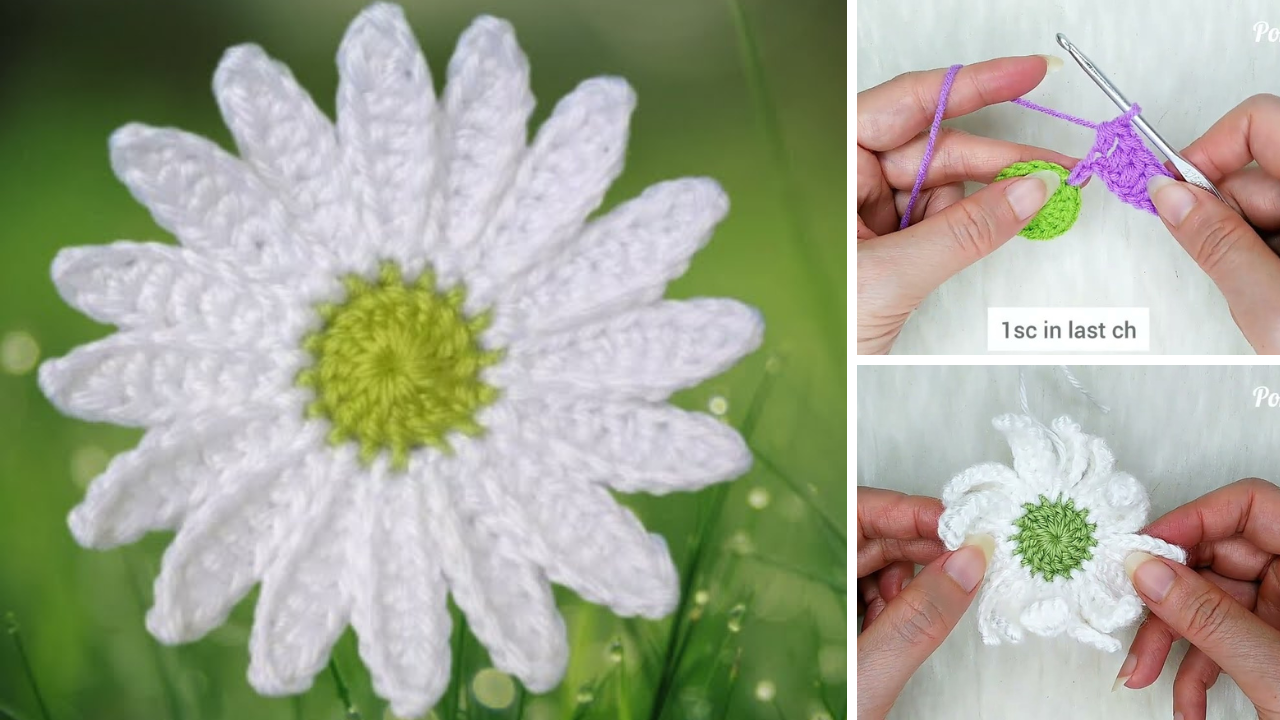
The center of the daisy will be created using a magic ring for a tight, neat start.
- Start with Magic Ring (MR): Using your yellow yarn, create a magic ring.
- If you’re not comfortable with a magic ring, you can chain 4, then sl st into the first chain to form a ring.
- Round 1: Ch 1 (does NOT count as a stitch). Work 8 single crochet (sc) stitches into the magic ring. Pull the tail of the magic ring tight to close the center hole. Sl st into the first sc to join the round.
- [8 sc]
- Fasten off yellow yarn, leaving a short tail for weaving in.
Part 2: The Daisy Petals (White Yarn)
Now, we’ll add the classic white petals around the yellow center. We’ll work into the back loop only (BLO) of the yellow center’s stitches to create a neat separation and allow for a potential second layer of petals or a green leaf base later if desired.
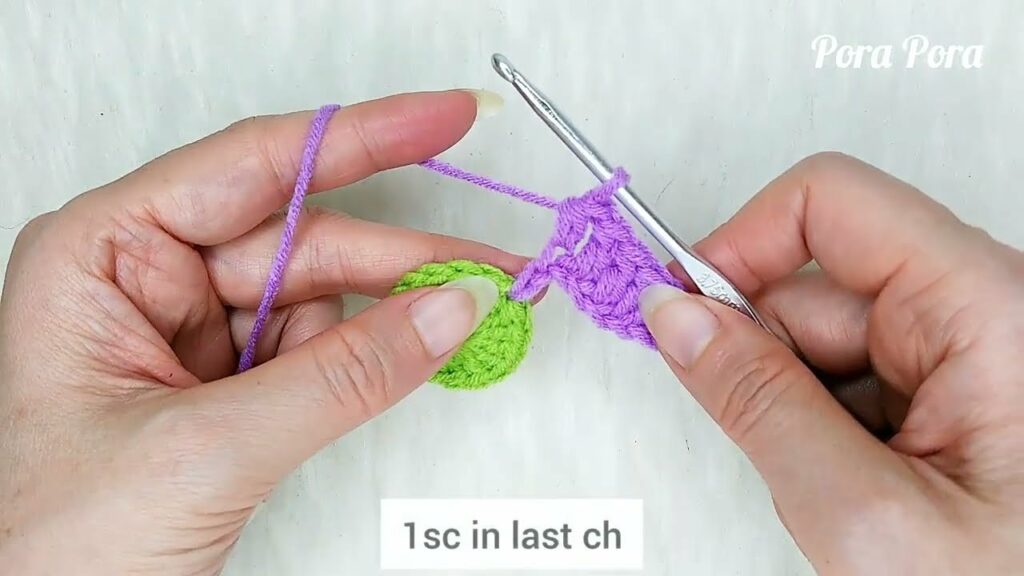
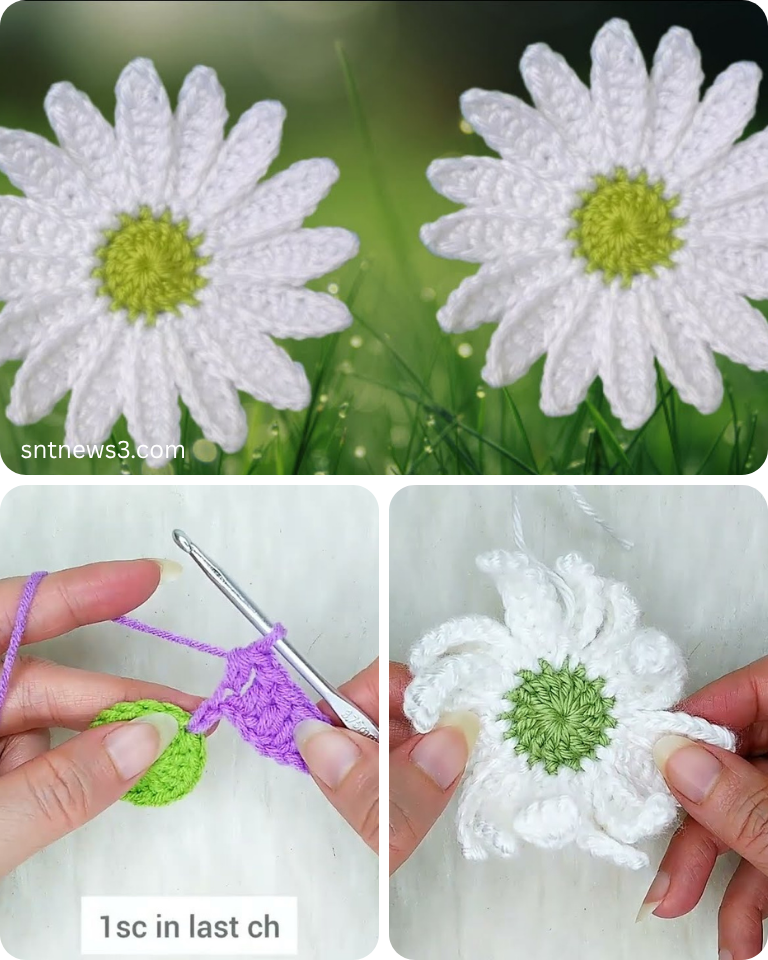
- Attach Petal Color: Join your white (petal) yarn with a sl st into the back loop only (BLO) of any sc stitch from Round 1 of the yellow center.
- First Petal:
- Ch 2 (this counts as your first hdc of the petal).
- Work 1 double crochet (dc) into the same BLO stitch where you joined.
- Work 1 half double crochet (hdc) into the same BLO stitch.
- Sl st into the BLO of the next sc stitch from the yellow center. (This completes the first petal and anchors it).
- [1 petal created]
- Repeat Petals:Ch 2, work 1 dc into the same BLO stitch. Work 1 hdc into the same BLO stitch. Sl st into the BLO of the next sc stitch from the yellow center.
- Repeat from * to * 6 more times around the center. You will work 8 petals in total, using each of the 8 BLO stitches from the yellow center.
- [8 petals]
- Join: After the last petal, sl st into the very first sl st you made when joining the white yarn.
- Fasten off white yarn, leaving a tail long enough for weaving in or sewing the daisy onto your project (approx. 6-8 inches).
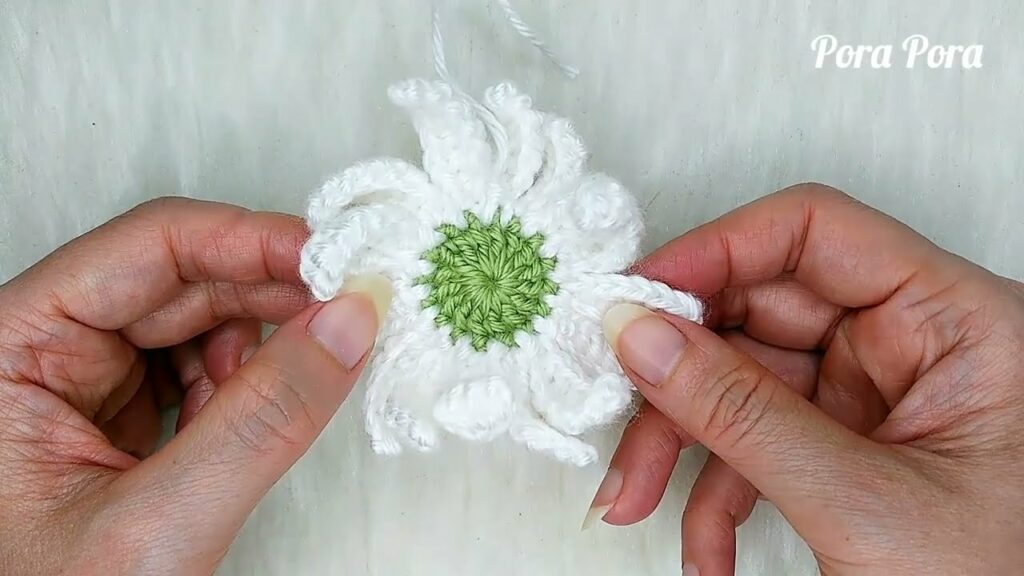
Finishing Your Daisy Flower:
- Weave in Ends: Using your yarn needle, carefully weave in all yarn tails (the starting tail from the yellow center, the ending tail from the yellow center, and the starting/ending tails from the white petals). Weave them into the corresponding color sections, making them invisible. This is crucial for a neat and professional-looking flower.
- Shape: Gently pull and shape your daisy to ensure the petals are even and the flower lays flat.
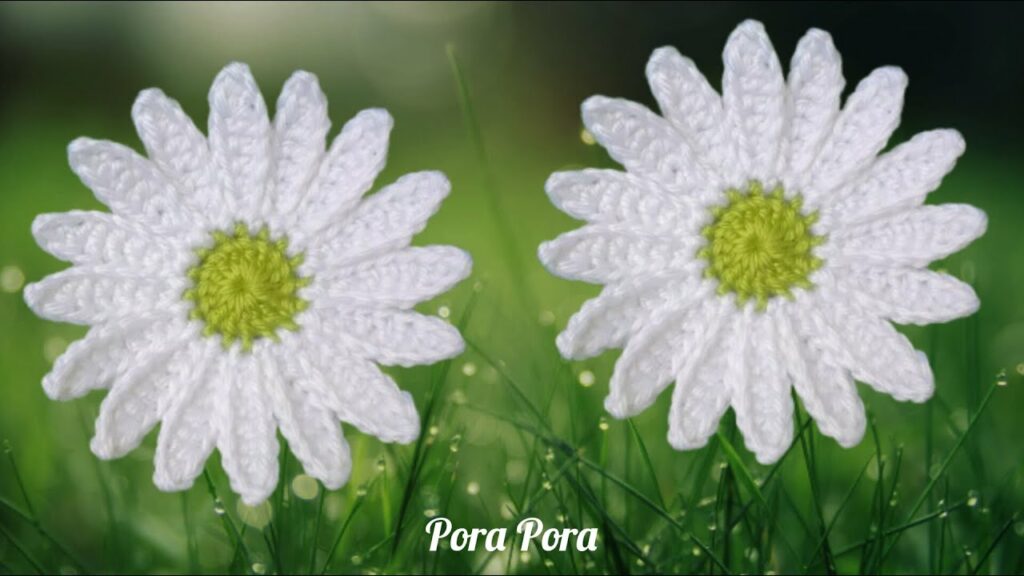
Your Crocheted Daisy Flower is Complete!
You now have a beautiful, cheerful daisy ready to adorn your next project or stand alone as a decorative piece.
Tips for Success & Customization:
- Petal Height:
- For shorter, flatter petals, try using (hdc, hdc, sl st) or (sc, hdc, sc, sl st) within the petal formula instead of (ch 2, dc, hdc, sl st).
- For taller, fuller petals, use (ch 3, tr, dc, sl st) or (ch 3, dc, tr, dc, sl st). Adjust the beginning chain accordingly to match the height of your tallest stitch.
- Petal Count: You can adjust the number of sc stitches in the yellow center (e.g., 10 sc for 10 petals) to create more or fewer petals. Just ensure your petal pattern uses each stitch evenly.
- Layered Daisies: To create a fuller daisy, make a second set of petals in the front loop only (FLO) of the yellow center’s stitches before attaching the white petals. This would give you 16 petals in total, 8 on each layer.
- Green Leaves: Crochet small leaves and sew them behind the daisy for a more realistic look.
- Daisy Chain: Make multiple daisies and join them together with slip stitches or by crocheting a small chain between them to create a garland or a decorative trim.
- Sewing: When sewing your daisy onto a project, use the tail left from the white yarn. Position the daisy, and use small, neat stitches that blend into the petal color. You can also add a few stitches through the yellow center for extra security.
- Blocking (Optional): For a perfectly flat daisy, you can gently mist it with water and lay it flat to dry, shaping the petals as it dries.
Happy crocheting, and may your projects bloom with delightful daisies!
Video tutorial: