by
by Crochet a Dream: The Beautiful Puff Stitch Shawl
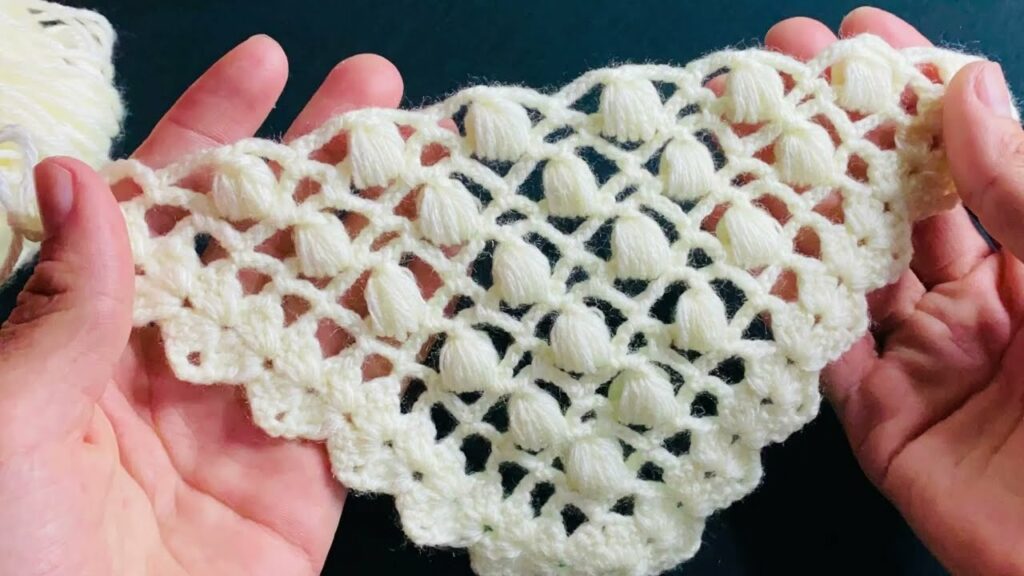
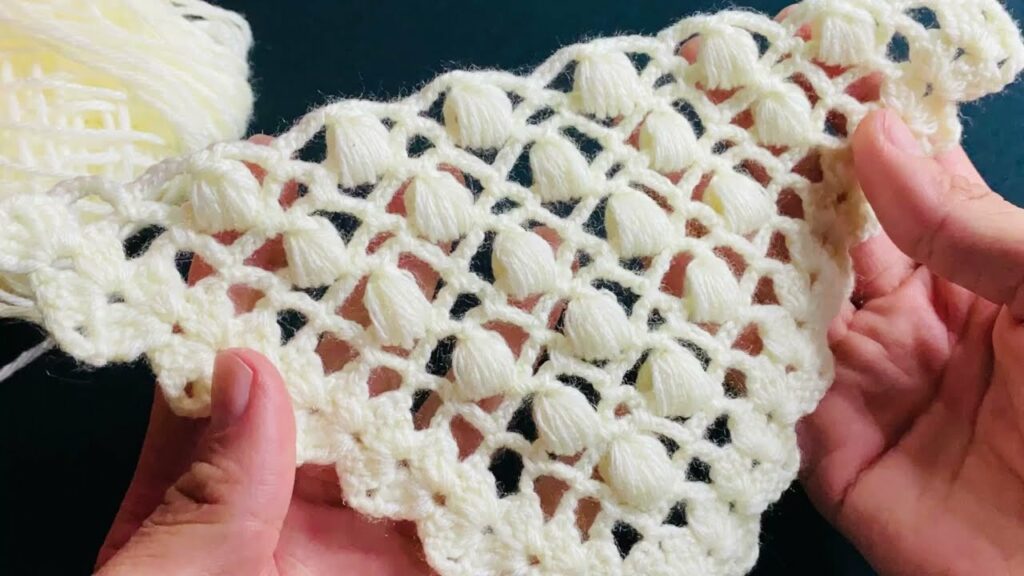
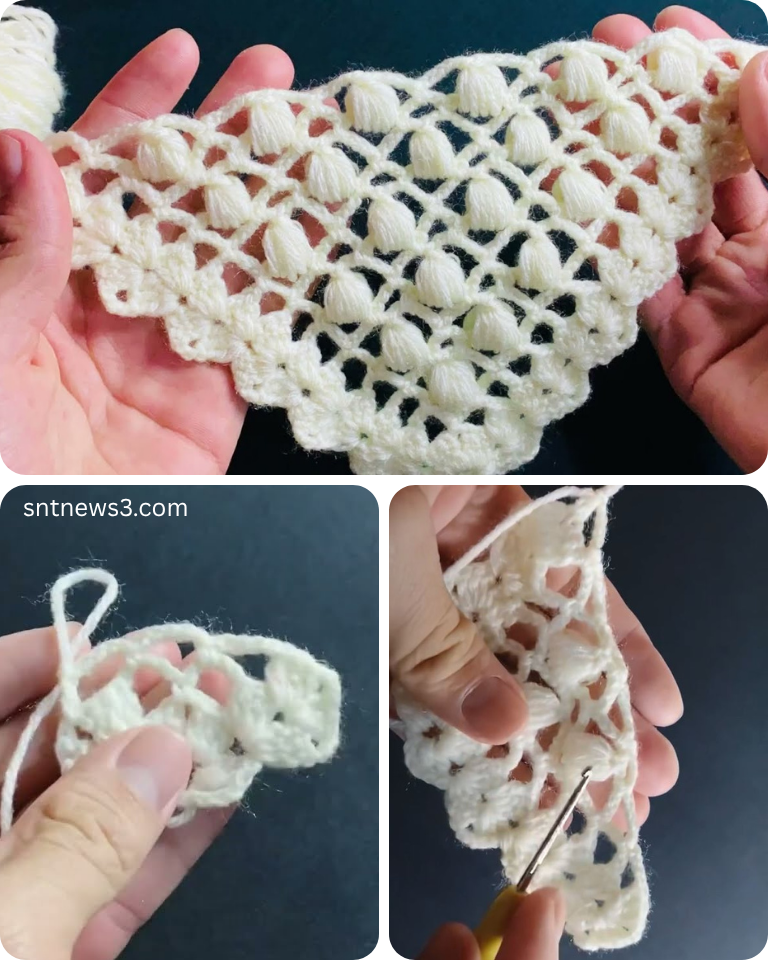
There’s something undeniably captivating about the crochet puff stitch. It creates a wonderfully plush, textured fabric that feels incredibly luxurious and looks far more intricate than it actually is. When applied to a shawl, the puff stitch transforms a simple accessory into a warm, cloud-like wrap that drapes beautifully and feels like a gentle hug. Perfect for adding a touch of elegance to any outfit or gifting to someone special, a puff stitch shawl is a project that truly delights.
This detailed article will guide you step-by-step through crocheting a beautiful puff stitch shawl. We’ll break down the magical puff stitch itself and then show you how to incorporate it into a simple, elegant shawl design, ideal for confident beginners and a meditative make for experienced crocheters.
Why the Puff Stitch for a Shawl?
- Luxurious Texture: The puff stitch creates a dense, squishy, and incredibly tactile fabric that is both visually appealing and wonderfully cozy.
- Warmth Without Weight: The stitch naturally traps air, making it surprisingly warm for its relatively light feel, perfect for a comforting shawl.
- Elegant Drape: Despite its puffiness, when worked correctly, the stitch can create a beautiful, flowing drape, allowing the shawl to sit gracefully on the shoulders.
- Visually Stunning: The raised, rounded texture of the puff stitch gives the shawl a sophisticated and artisanal look that stands out.
- Satisfying to Make: Once you get the rhythm of the puff stitch, it becomes very meditative and satisfying to watch the texture grow.
- Versatile: While this tutorial focuses on a specific shawl, the puff stitch can be adapted to many shapes and sizes.
Key Considerations Before You Start
To ensure your puff stitch shawl turns out beautifully, keep these points in mind:
- Yarn Choice (The Heart of Your Shawl):
- Fiber: For a shawl, softness is paramount. Think merino wool, alpaca, cashmere blends, soft acrylic, or cotton blends. Avoid scratchy fibers. Natural fibers often block better and enhance drape.
- Weight: DK (Light Worsted / Category 3) or Worsted (Category 4) are excellent choices. They provide good stitch definition for the puff stitch and work up to a decent size relatively quickly. Thinner yarns will result in a lacier, less dense shawl, while bulkier yarns will create a very thick and heavy wrap.
- Colors: The puff stitch looks stunning in solid colors, as it allows the texture to truly shine. However, variegated or speckled yarns can also create interesting effects. Consider a color that complements your wardrobe.
- Hook Size: The puff stitch uses a fair amount of yarn, so you’ll generally use a hook size that’s on the larger side for your chosen yarn weight, or even a full size larger than recommended on the yarn label. This helps prevent the fabric from becoming too stiff and gives the puffs room to “puff” without pulling. For DK yarn, try a 5.0 mm (US H/8) or 5.5 mm (US I/9) hook. For Worsted, a 5.5 mm (US I/9) or 6.0 mm (US J/10) hook might be appropriate.
- Gauge (For Size & Drape): While not strictly critical for a shawl (which doesn’t need to fit a specific body part precisely), a small swatch is highly recommended. It will tell you how many chains you need for your desired width and, more importantly, how your puff stitches will look and drape with your chosen yarn and hook. Too tight, and your shawl will be stiff; too loose, and your puffs might look messy.
- Shawl Shape: This tutorial will focus on a simple rectangular shawl, which is straightforward to crochet in rows and allows the puff stitch to repeat beautifully across the fabric.
Materials You’ll Need
- Yarn: Approx. 800-1200 yards (730-1100 meters) of soft DK (Category 3) or Worsted (Category 4) weight yarn. (The exact amount depends on your desired shawl size, hook size, and yarn thickness.)
- Crochet Hook: Appropriate size for your yarn (e.g., 5.0 mm (H/8) to 6.0 mm (J/10)).
- Yarn Needle (Tapestry Needle): For weaving in ends.
- Scissors:
- Stitch Markers (optional): To mark the beginning/end of rows, especially for longer starting chains.
Essential Crochet Abbreviations
- ch: chain
- sl st: slip stitch
- sc: single crochet
- dc: double crochet
- sk: skip
- st(s): stitch(es)
- yo: yarn over
- FO: Fasten off (cut yarn and pull through loop)
- Puff St: Puff Stitch (detailed instructions below)
- (): indicates instructions to be worked into the same stitch/space
- ***…***: repeat instructions within asterisks
- []: indicates stitch counts at the end of a row
The Star of the Show: The Puff Stitch (Step-by-Step)
The puff stitch is essentially a cluster of incomplete stitches worked into the same space, then drawn together. For this tutorial, we’ll use a 5-loop puff stitch, which means you’ll yarn over and pull up a loop 3 times.
How to Make a Puff Stitch:
- Yo, insert hook into indicated stitch or space.
- Yo, pull up a loop. (You now have 3 loops on your hook: the loop you started with, plus the 2 from this step).
- Yo, insert hook into the same stitch or space.
- Yo, pull up a loop. (You now have 5 loops on your hook).
- Yo, insert hook into the same stitch or space.
- Yo, pull up a loop. (You now have 7 loops on your hook).
- Yo, pull through the first 6 loops on your hook. (2 loops remain on hook).
- Yo, pull through the remaining 2 loops on your hook to close the stitch.
- Ch 1 to secure the puff stitch. (This chain is part of the puff stitch itself and will often be skipped in the next row).
Practice this stitch a few times on its own to get a feel for it before starting your shawl!
Beautiful Puff Stitch Shawl Tutorial (Rectangular Shape)
This pattern creates a lovely, textured shawl. The exact size will depend on your yarn, hook, and tension, but you can easily adjust the starting chain for width and the number of rows for length.
Target Size: Approx. 18 inches (46 cm) wide x 60 inches (152 cm) long.
Gauge Swatch: Ch 18. Row 1: Sc in 2nd ch from hook and in each ch across. Turn. [17 sc] Row 2: Ch 1. Sc in first sc. *Puff St in next sc, ch 1, sk 1 sc.* Repeat from * until 2 sc remain. Puff St in next sc, ch 1. Sc in last sc. Turn. Row 3: Ch 1. Sc in first sc. Sc in each Puff St and each ch-1 space across. Sc in last sc. Turn. Repeat Rows 2 and 3 a few times. Measure your swatch. Aim for your Puff Stitches to be about 0.5-0.75 inches (1.25-1.9 cm) tall and wide. Adjust your hook size if your fabric is too stiff or too loose.
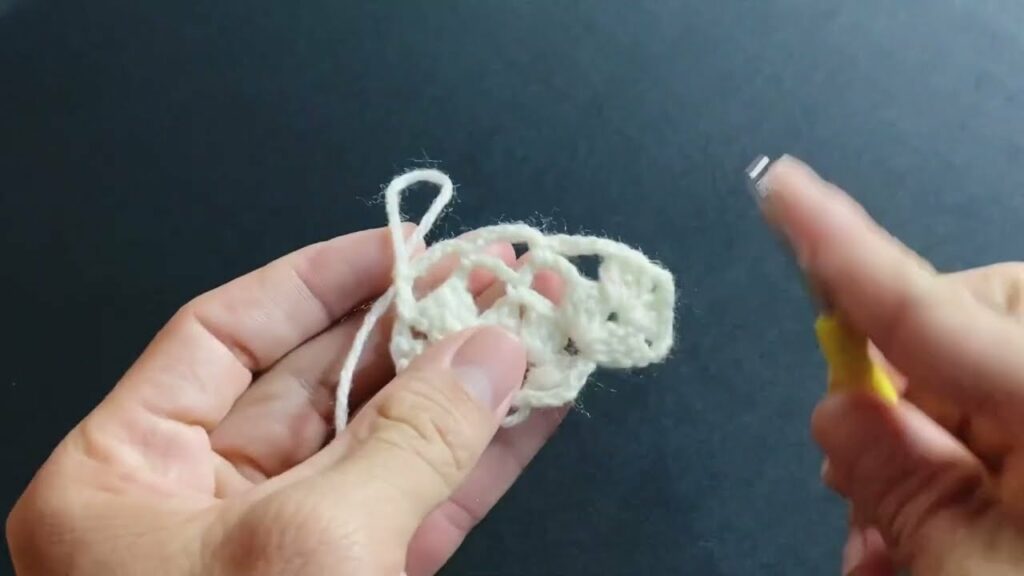
Part 1: Starting the Shawl (Foundation Chain)
- Ch 73. (This will create a shawl approximately 18 inches / 46 cm wide. For a wider shawl, add more chains in multiples of 2. For a narrower shawl, subtract chains in multiples of 2.)
Part 2: The Base Rows (Setting up for Puffs)
We’ll create a foundation of single crochet stitches.
- Row 1: Sc in 2nd ch from hook and in each ch across. Turn. [72 sc]
- Row 2: Ch 1. Sc in each sc across. Turn. [72 sc]
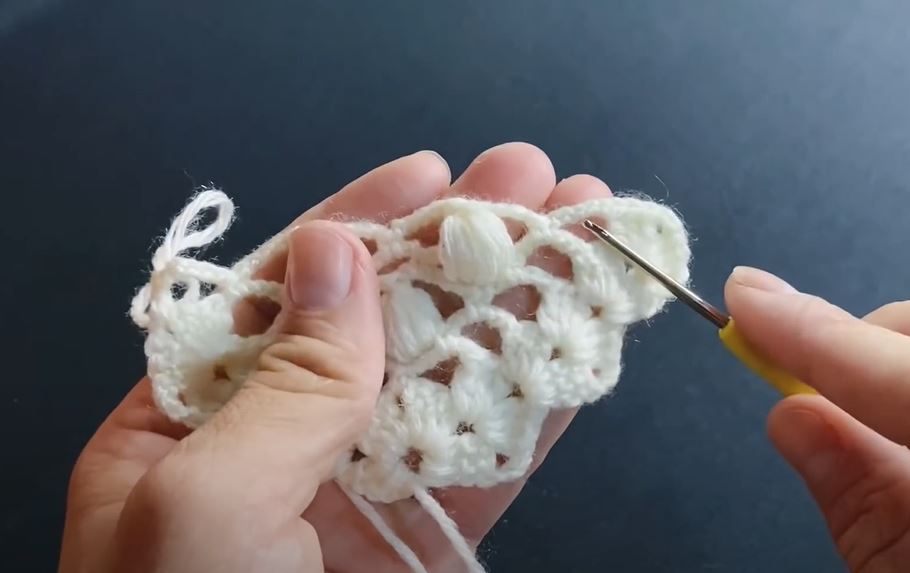
Part 3: Working the Puff Stitch Pattern
This is the main body of your shawl. We’ll alternate puff stitch rows with single crochet rows to create definition.
- Row 3 (Puff Stitch Row):
- Ch 1. Sc in first sc.
- *Skip 1 sc. Puff St (as defined above) in the next sc. Ch 1 to secure.*
- Repeat from * across the row until 1 sc remains.
- Sc in the last sc. Turn. [35 Puff Sts + 2 sc]
- You will have a Puff St, a Ch 1, a skip, and then a Puff St in the next available stitch. The ch 1 after each puff stitch is important!
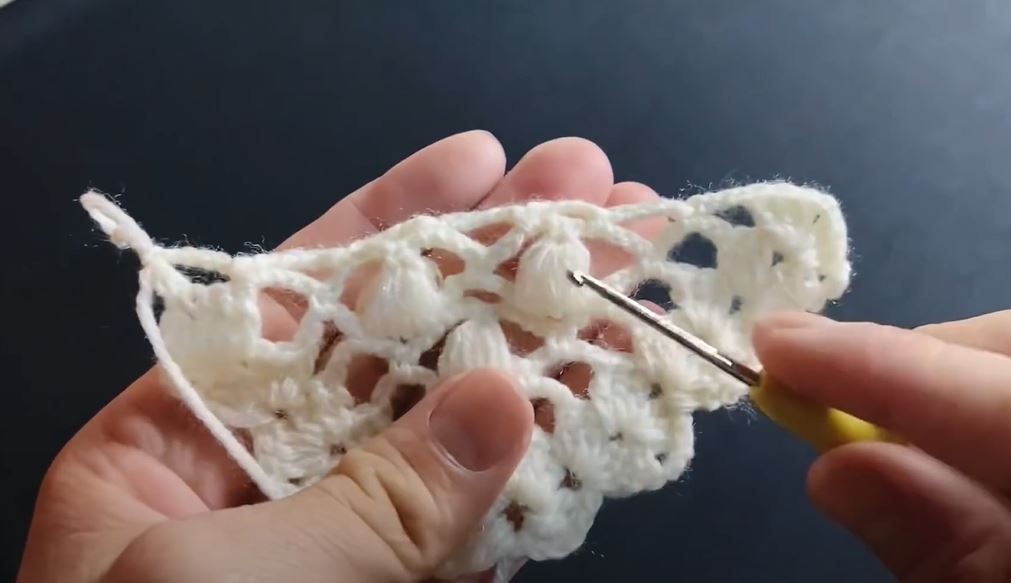
- Row 4 (Single Crochet Return Row):
- Ch 1. Sc in first sc.
- *Sc in the top of the Puff St (the small horizontal bar on top where you closed the puff). Sc in the ch-1 space after the Puff St.*
- Repeat from * across the row.
- Sc in the last sc. Turn. [72 sc]
- This row can feel a little tricky initially. Ensure you’re working into the puff stitch top and the chain-1 space correctly to maintain your stitch count.
- Repeating the Pattern:
- Repeat Row 3 (Puff Stitch Row).
- Repeat Row 4 (Single Crochet Return Row).
- Continue alternating these two rows until your shawl reaches your desired length. For a typical shawl (approx. 60 inches / 152 cm), you’ll likely need to complete anywhere from 80 to 100 rows, depending on your gauge.
Part 4: Finishing the Shawl (Last Rows & Edging)
Once your shawl reaches your desired length, we’ll finish with a couple of neat rows.
- If your last complete row was a Puff Stitch Row (Row 3 repeat), work one more Single Crochet Return Row (Row 4 repeat).
- Final Row: Ch 1. Sc in each sc across. [72 sc]
- FO, leaving a 6-inch (15 cm) tail.
Part 5: Blocking (Highly Recommended!)
Blocking is essential for a puff stitch shawl. It will open up the stitches, allow the puffs to relax and bloom, and give your shawl a beautiful, even drape.
- Wet Blocking: Gently submerge your shawl in lukewarm water with a bit of wool wash (if using wool) for about 20-30 minutes. Gently squeeze out excess water (do not wring or twist!).
- Pinning: Lay the damp shawl flat on a blocking mat or clean towels. Gently stretch and pin the shawl to its desired dimensions, making sure the edges are straight and the fabric is even.
- Drying: Allow the shawl to air dry completely. This can take 24-48 hours. Once dry, carefully remove the pins.
Tips for Success & Making it Even More Beautiful
- Consistent Tension: This is the most crucial factor for a uniform and attractive puff stitch. Try to keep your tension even throughout the puffs themselves and the subsequent single crochet rows.
- Counting Stitches: Always count your stitches, especially in the single crochet return rows, to ensure you maintain a consistent width.
- The Ch 1 after Puff St: Don’t forget this! It’s vital for defining the puff and creating the space for the next row.
- Weave Ends Neatly: For such a textured fabric, neatly woven-in ends are important for a professional finish.
- Experiment with Edging: While the basic finish is clean, you could add a simple sc or hdc border around the entire shawl after blocking for a more defined edge.
- Gift-Ready: Once blocked, fold or roll your shawl beautifully and tie it with a ribbon for a thoughtful, handmade gift.
Creating a puff stitch shawl is a truly rewarding experience. The plush texture and elegant drape make it a joy to wear and a testament to the beauty of handmade crochet. Enjoy your gorgeous new wrap!
Video tutorial: