 by
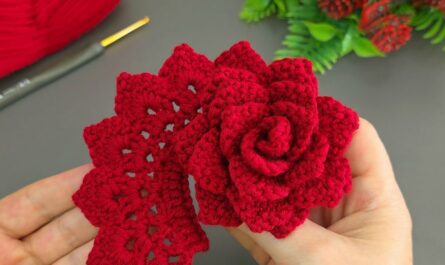
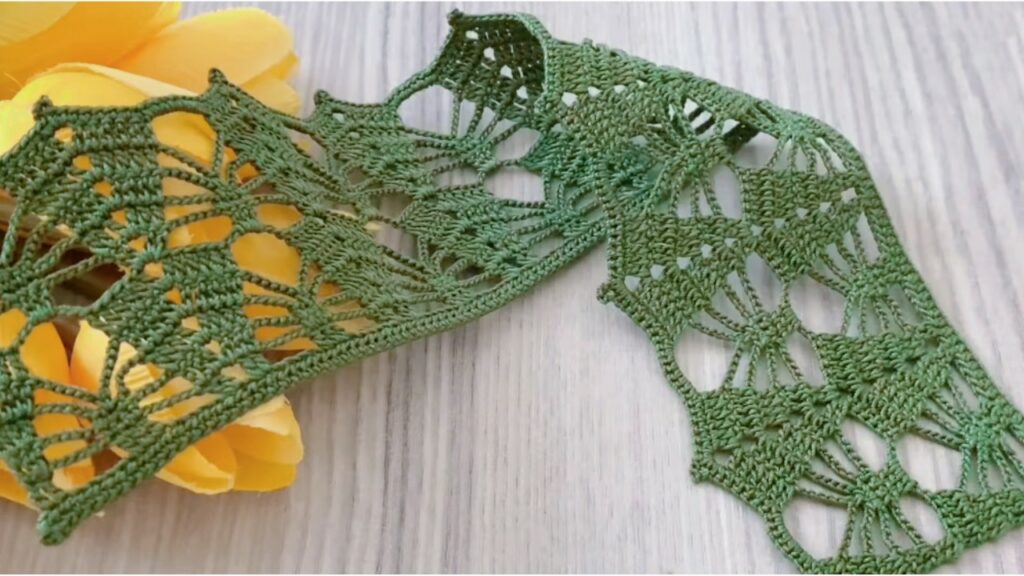
by Lovely! Below is a clear, beginner-friendly step-by-step text tutorial for a versatile lace edge you can use on shawls, blouses, table runners, blankets — or make as a repeating strip and sew it on. It creates a row of pointed leaf-scallops with little picot dots and a tidy base that sits flat. I give exact repeats, a corner method, blocking/finishing, troubleshooting and quick variations so you can start crocheting immediately.
Materials & gauge
- Yarn: fingering → DK (cotton for crisp edge; acrylic/wool for drape).
- Hook: 2.5–4.5 mm depending on yarn (use yarn label as starting point). For lacy look use a slightly larger hook than label; for a firm trim use the label hook or slightly smaller.
- Notions: tapestry needle, blocking pins/towel, scissors.
Suggested test: make 6 repeats and block — adjust hook or spacing until you like the look.
Abbreviations (US terms)
- ch — chain
- sl st — slip stitch
- sc — single crochet
- hdc — half double crochet
- dc — double crochet
- tr — treble crochet
- pic — picot (ch 3, sl st into base)
- sp — space
- st(s) — stitch(es)
- rep — repeat
Pattern concept & repeat
- Repeat multiple: 6 sts (you can change spacing by increasing/decreasing base sc between repeats).
- This edge works best attached to a finished base row of sc (one sc per fabric stitch or spaced to taste). If you’re adding to an existing garment, first work an even row of sc along the edge to create a tidy foundation.
Attachment preparation (two options)
A — Work onto finished fabric: work 1 round of sc evenly along the raw edge (anchor points for lace).
B — Make a border strip from chain: ch a multiple of 6 + 2 (example ch 38 for 6 repeats: 6×6 + 2 = 38). Row 1: sc in 2nd ch from hook and across — now you have a base sc row to work the lace into.
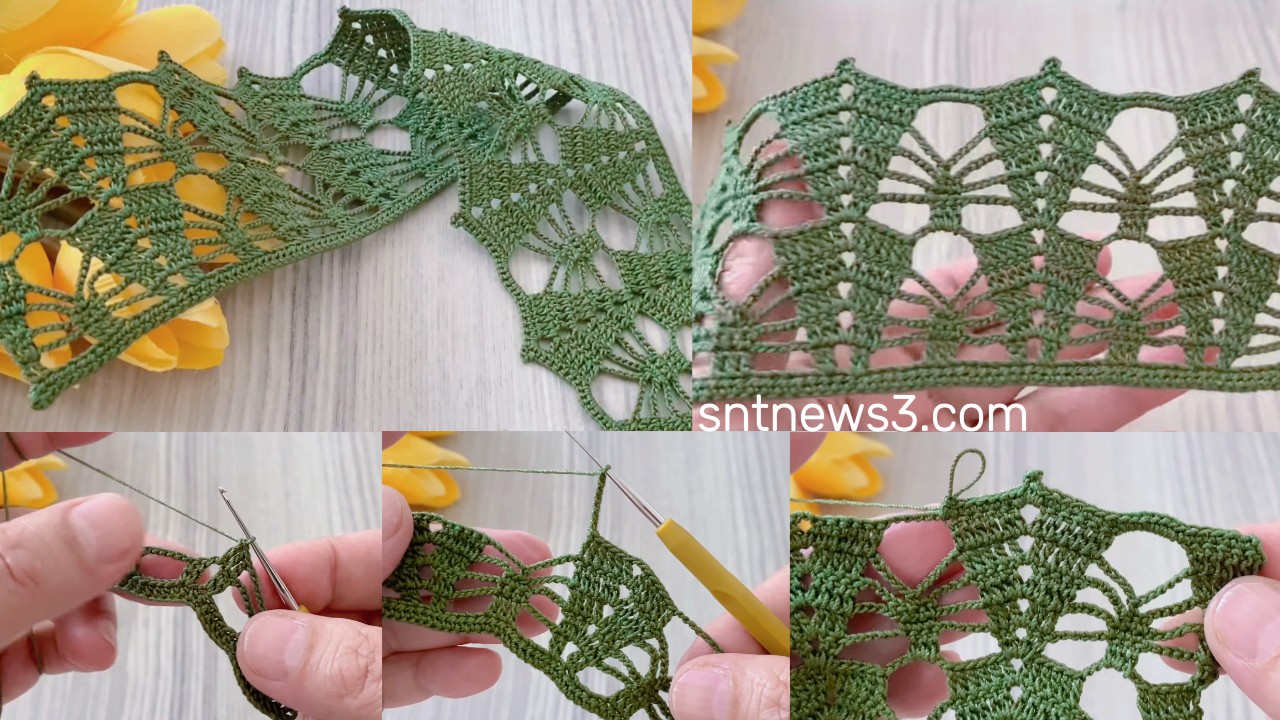
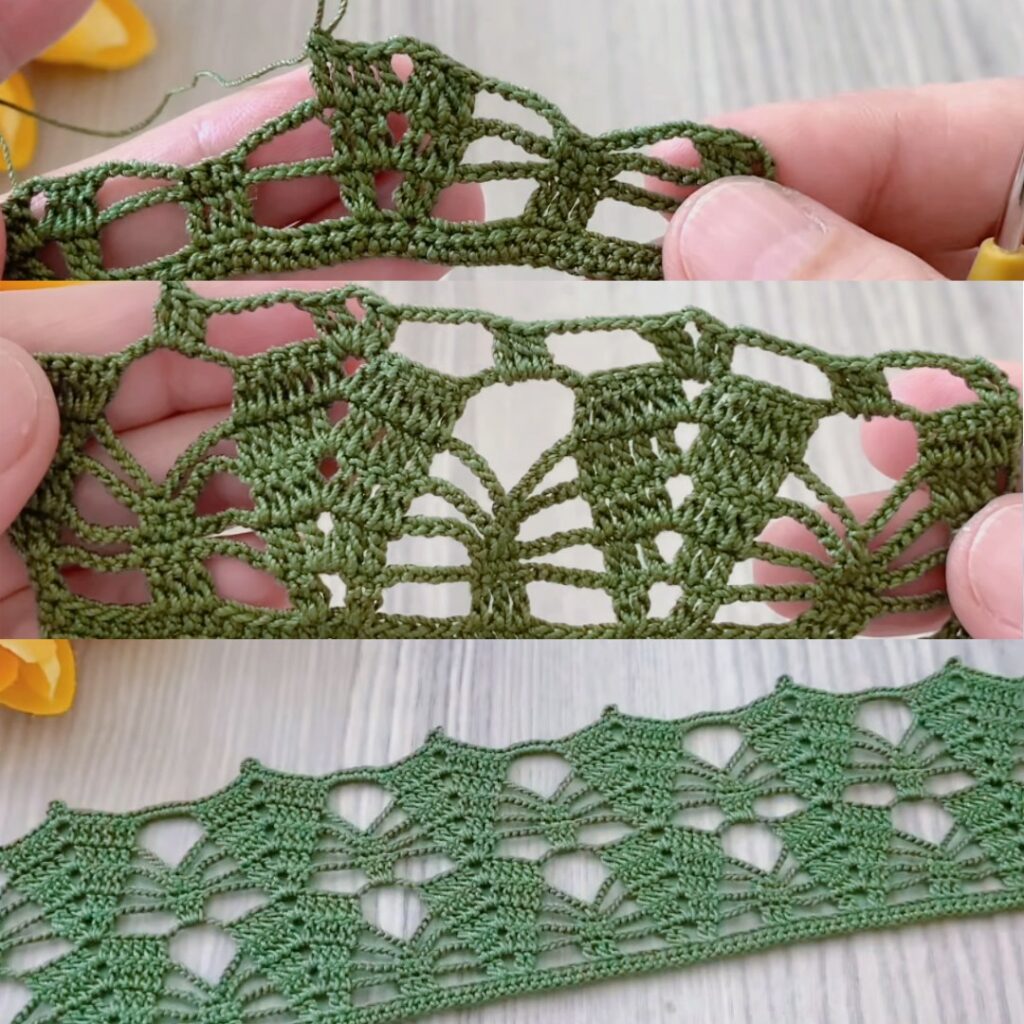
Edge Pattern — round-by-round
Round 1 — set anchor loops
Working into the base sc row (either attached fabric or strip):
- Sc in next 3 sc, ch 3, sk 2 sc — repeat across until the end.
- End by sc in the last 1–2 sc to square the row.
Check: you should have a small ch-3 loop every ~3–4 base stitches — one loop per leaf unit.
Round 2 — leaf body (main decorative round)
Into each ch-3 loop work this leaf stitch set all into the same loop:
(sc, hdc, 3 dc, tr, 3 dc, hdc, sc)
Then sl st into the next base sc to anchor, sc in next 2 sc, ch 3, sk 2 sc and repeat leaf in the next loop.
- sc — neat base
- hdc — shoulder shaping
- 3 dc — left side of leaf
- tr — tall center (midrib)
- 3 dc — mirror to right side
- hdc, sc — tidy finish
Repeat across the row.
Check: you should see neat pointed leaf scallops sitting on the edge.
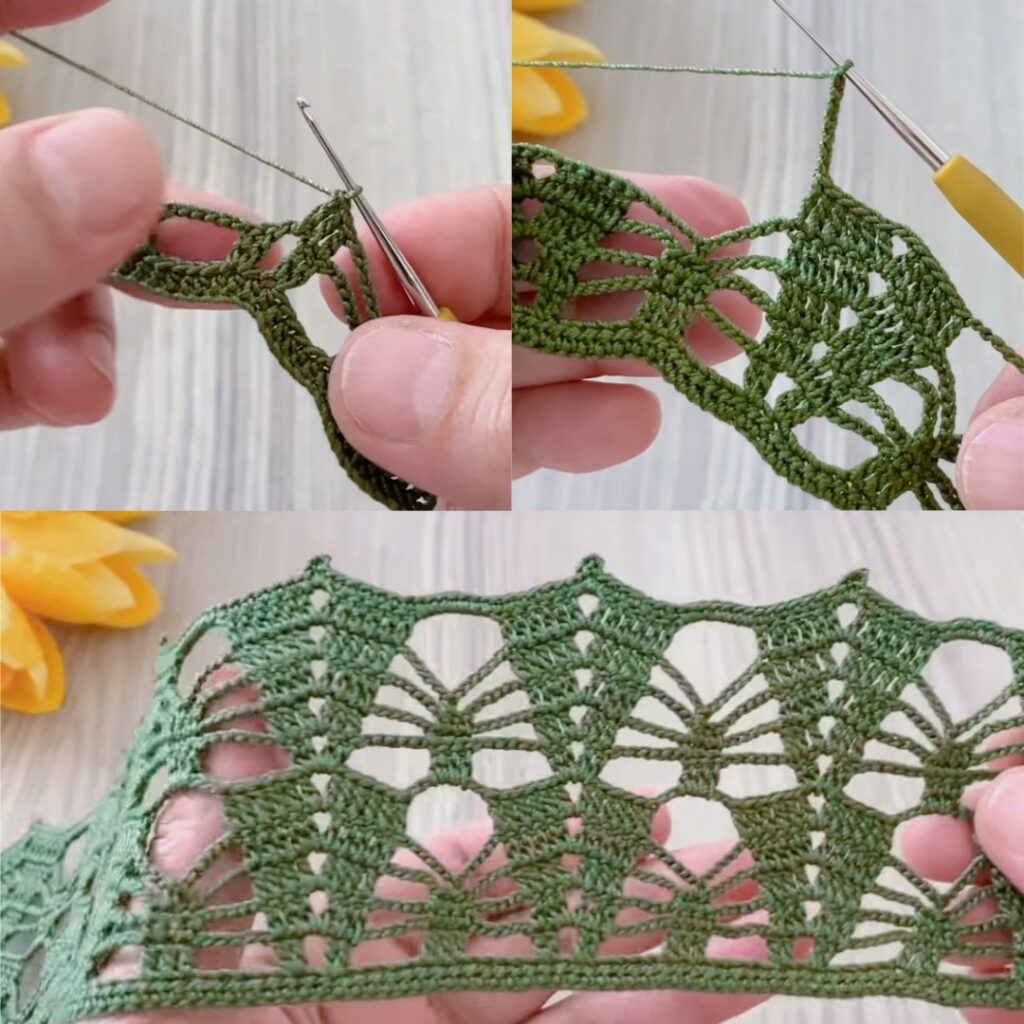
Round 3 — tip picots & tidy base
- Join yarn at the top of any leaf (or pick up in last sl st).
- For each leaf tip: sl st into the tr (tip), ch 3, sl st into same st (picot) — this makes a tiny dot at each point.
- After placing a picot, work sc 2 across the small base between leaves (or
sl st + scdepending on spacing) to tidy the underside. - Continue around; fasten off and weave in ends.
Alternative finish: replace single picot with (sc, ch 3, sc) for a little bud rather than a dot.
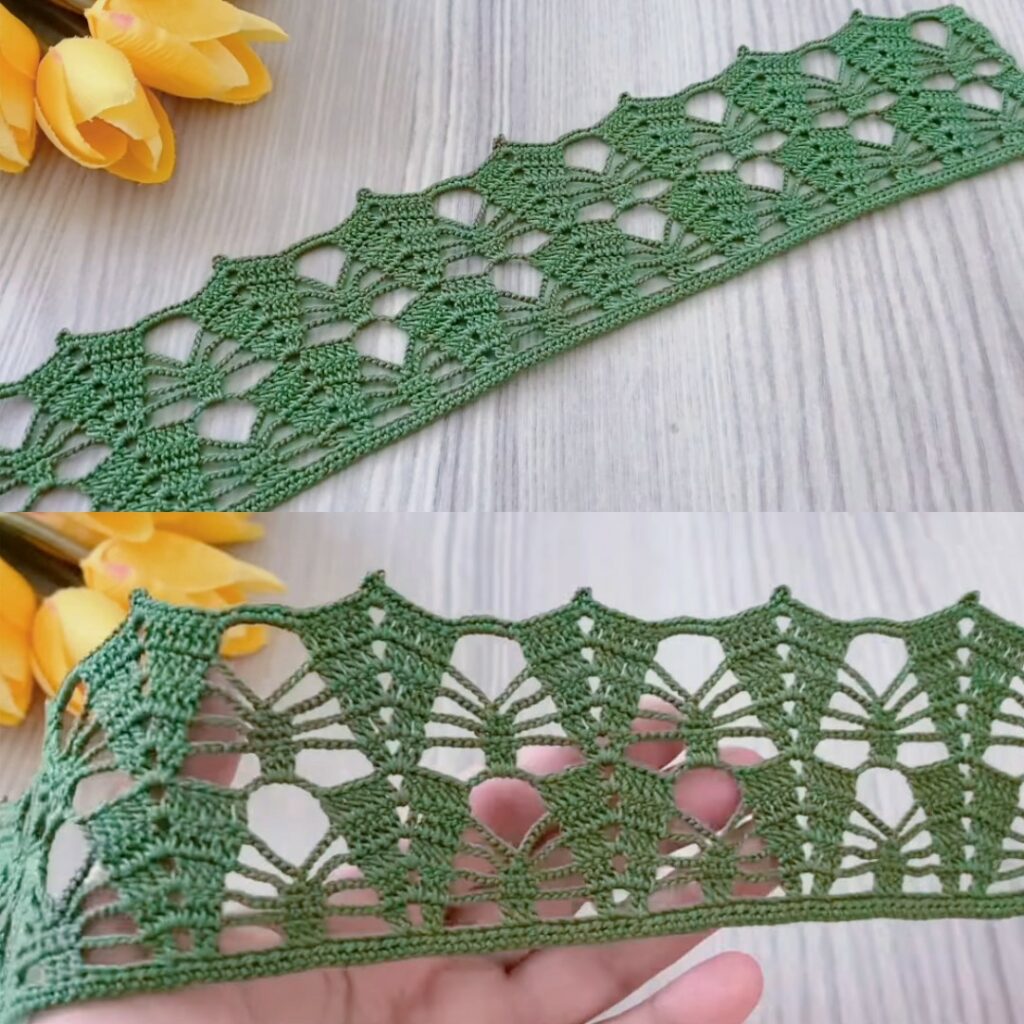
Corners (turning a rectangular piece)
At each corner of your project:
- After working the last full scallop on the side, make a corner loop: ch 6 (or ch 4 for tighter corner / ch 8 for gentler corner), then continue the leaf repeats along the next side anchoring the first leaf into that corner loop (work first leaf cluster into the ch-6). This gives a smooth, decorative corner.
Joining the strip to fabric (if using Option B)
- Align strip to fabric edge. Sew with fine whipstitch or mattress stitch through the base sc row and the garment edge.
- Or crochet on: hold strip to edge and work sc through both the fabric edge and the base sc of the strip to attach.
Blocking & finishing
- Pin each leaf so tips are pointed and picots are crisp. Pull corners into shape if used. Mist with water and let dry thoroughly.
- For very crisp trims (table linens), apply a light starch or diluted PVA/sugar solution after blocking — test on a scrap first.
Troubleshooting & adjustments
- Edge waves (too many scallops): reduce number of scallops per inch by increasing space between anchor loops — e.g.,
sc 4, ch 3, sk 3instead ofsc 3, ch 3, sk 2. - Points curl up (cup): use slightly longer central tr or larger picots, or block more firmly. If persistent, loosen tension (larger hook) during leaf rounds.
- Edge flattens / loses shape: shorten picots (ch 2) or use smaller hook on Round 3 to pull tips taut.
- Uneven scallops: ensure you’re working the same stitches into each ch-3 loop and count first 3–4 repeats to set rhythm.
Quick variations
- Petite edge (smaller): change
3 dc→2 dcandtr→dc. Use smaller hook/finer yarn. - Fuller leaves: change
3 dc→5 dcand make ch-4 anchors (gives big dramatic leaves). - Two-colour: work base sc row in color A; switch to color B for leaf body to make leaves pop.
- Beaded edge: thread small beads onto yarn before crocheting and slip a bead onto the central tr of each leaf for sparkle.
Uses & layout ideas
- Shawl / scarf: repeat the edge along two long sides; for triangle shawl work along the long edge only.
- Blouse neckline / hem: make narrower/petite version to trim necklines or sleeve cuffs.
- Runner / table: make long strip and join strips end-to-end or crochet two strips and sew/attach to both sides of fabric.
- Appliqué leaves: make single leaf motif (magic loop, then
(sc, hdc, 3 dc, tr, 3 dc, hdc, sc)) and sew them on as decorative motifs.
VIDEO: