 by
by Nice day! Here’s a clear, step-by-step text tutorial for a dazzling flower motif inspired by “💙Dazzling Crochet Flower Motif Pattern — Runner, Tutorial for Blouse” (Crochet with Nese). It’s written so a beginner can follow exactly, with checks after major rounds, joining tips for a runner or blouse, blocking/finishing, and a few variations.
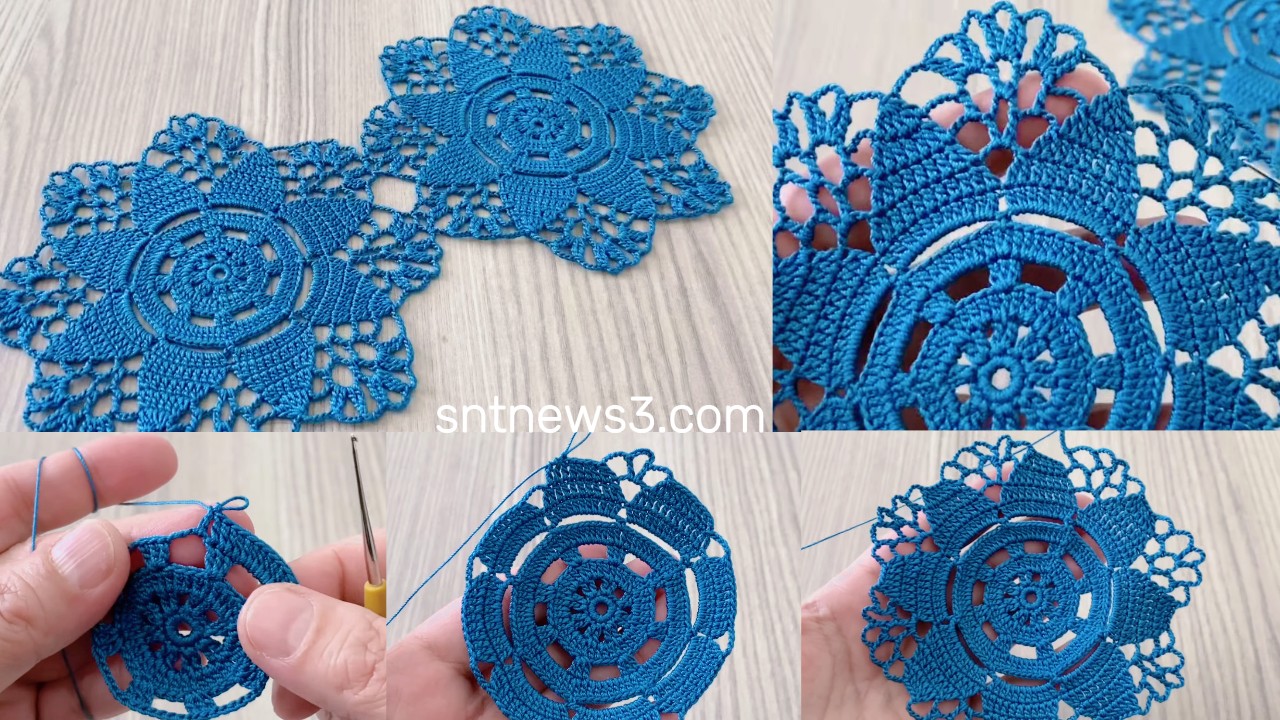
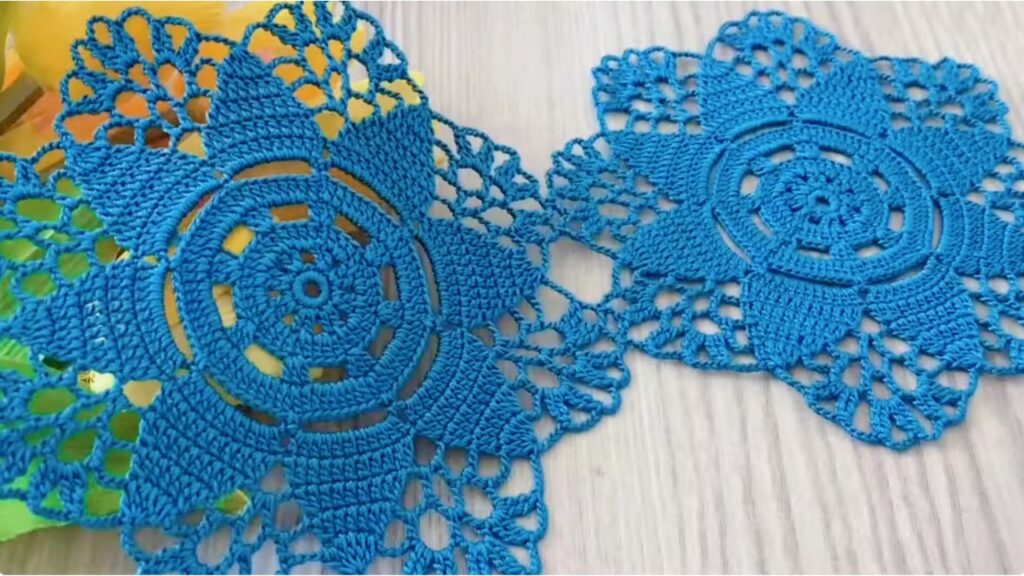
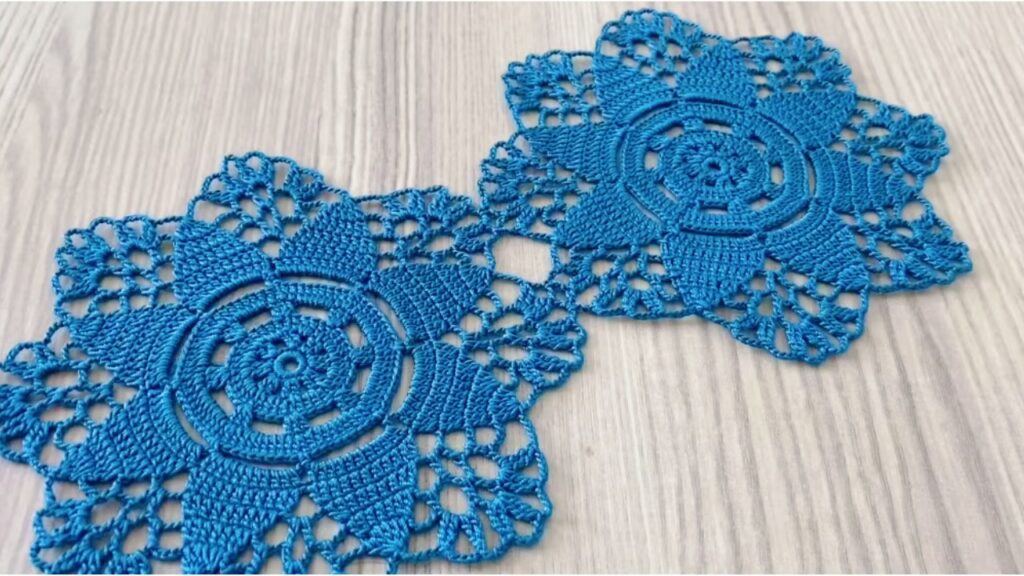
🌼 Dazzling Flower Motif — Step-by-Step
Finished (blocked) motif: ~9–13 cm (3.5–5 in) depending on yarn & hook
Yarn: DK / sport (cotton for crisp lace; cotton-blend or acrylic for softer drape)
Hook: 3.0–4.5 mm (choose to hit desired finished size)
Notions: tapestry needle, blocking pins/mat, scissors, stitch markers (optional)
Abbreviations (US)
- ch = chain
- sl st = slip stitch
- sc = single crochet
- hdc = half double crochet
- dc = double crochet
- tr = treble crochet
- pic = picot (ch3, sl st into base)
- st(s) = stitch(es)
- sp = space
- rep = repeat
Pattern overview
Worked in rounds from center → petals → tidy round → lacy arches → arch decoration → outer scallop. Pattern produces an eye-catching 8-petal flower medallion that converts to a joinable block with small side/corner loops for neat seams.
Round-by-round (exact)
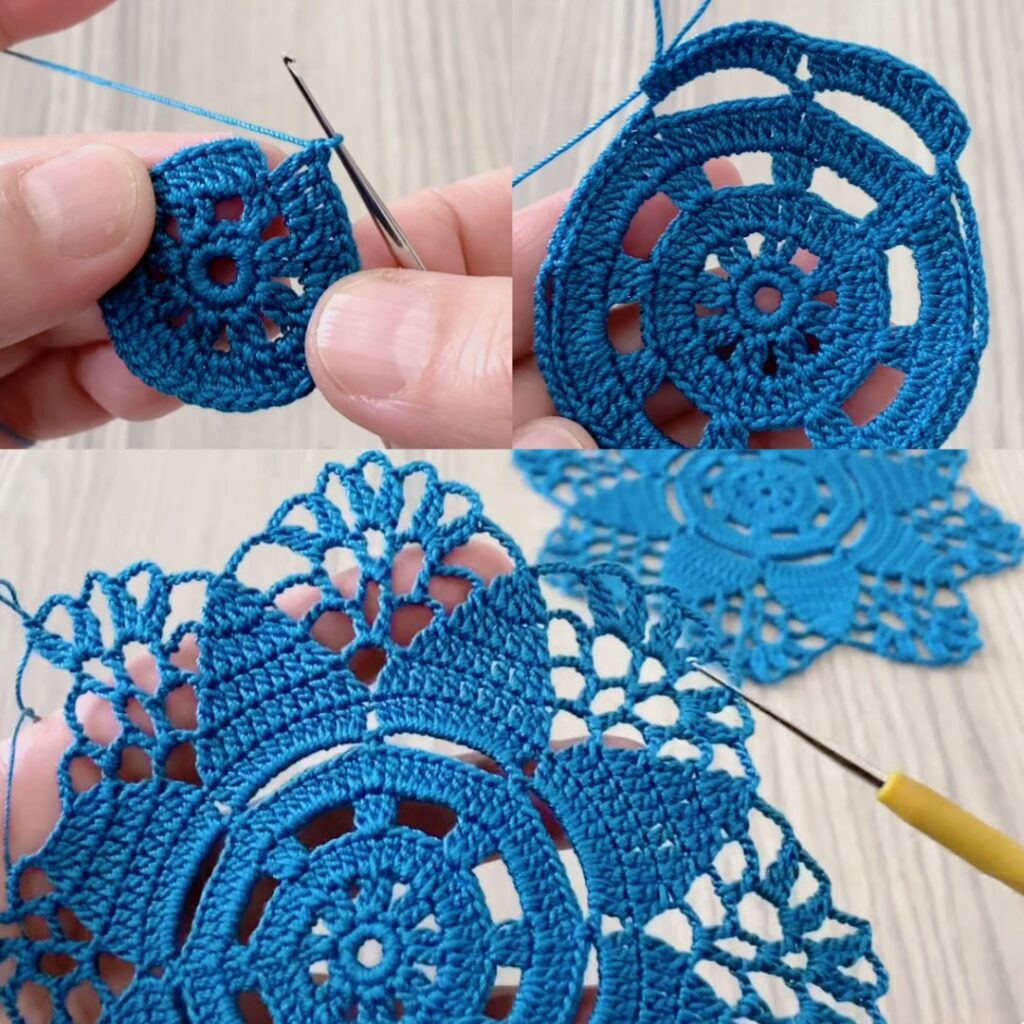
Round 1 — Center (make magic ring)
- Make a magic ring.
- ch 3 (counts as dc), work 15 dc into ring. (ch-3 + 15 dc = 16 dc total).
- Pull ring closed, sl st to top of ch-3 to join.
Check: 16 dc.
Round 2 — Loop foundation (petal bases)
- ch 4, skip next dc, sc in next dc — repeat around.
You will have 8 ch-4 loops and 8 sc between them. Join with sl st.
Check: 8 loop spaces.
Round 3 — Puffy petals (8 petals)
- In each ch-4 loop work: (sc, hdc, 7 dc, hdc, sc) — all into the same loop (one big petal cluster).
- After each petal, sl st into next ch-4 loop and repeat. After 8 petals join with sl st.
Check: 8 full rounded petals.
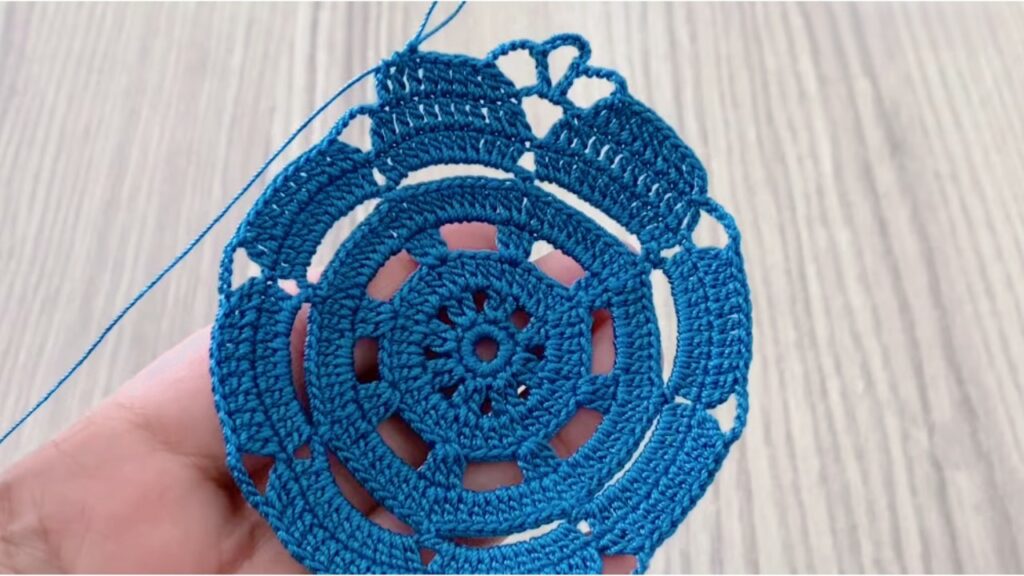
Round 4 — Tidy sc round
- Rejoin between any petals. Work sc evenly around the petal bases to even the motif and make a smooth outer boundary. Aim for ~10 sc per petal area (adjust ±1–2 to keep flat).
- Join with sl st.
Check: motif edge is smooth (not cupped or ruffled).
Round 5 — Tall lacy arches (frame)
- From a petal tip: sl st to outer tip → ch 7 → anchor into the sc round between the next petals with (tr, ch 2, tr, ch 2, tr) worked into that sc or small space → sl st to next petal tip.
- Repeat all the way around to form 8 large arches. (If ch-7 feels too long/short with your yarn/hook, use ch-6 or ch-8.) Join.
Check: 8 evenly spaced arches between petals.
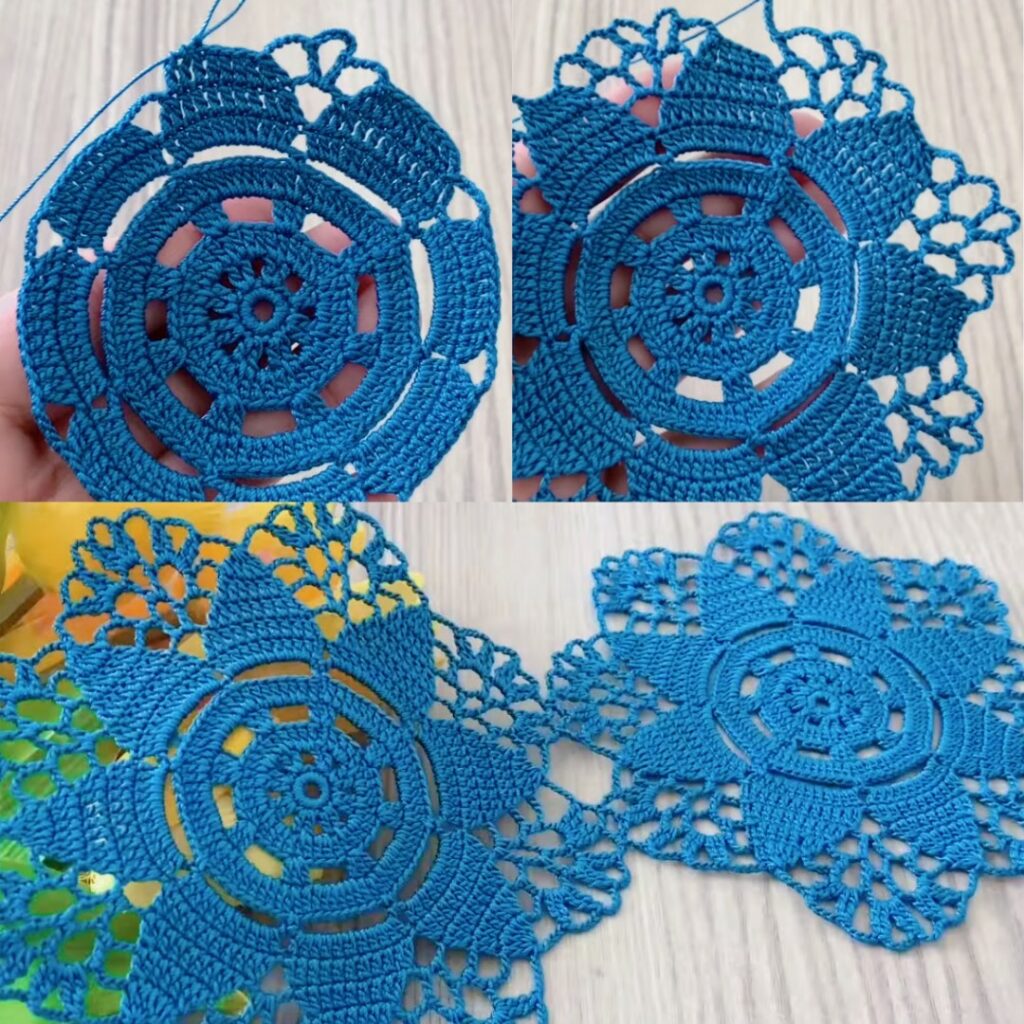
Round 6 — Arch decoration (ribs)
- Into each big ch-arch: sl st into arch base → ch 3 → dc into top of first tr → ch 1 → dc into top of middle tr → ch 1 → dc into top of last tr → ch 3 → sl st into arch base.
- Repeat for all 8 arches and join. (Simpler: make 3 dc separated by ch-1 in each arch.)
Check: each arch shows three inner ribs — gives layered look.
Round 7 — Side & corner loops (convert to joinable block)
- Mark four quarter points (every 2 petals). Rejoin at a quarter marker.
- Along each side between corners work a sequence of sc and side loops such as: sc X → (sc, ch 4, sc) repeated Y times → sc X, then at corner make ch 6 to form a corner loop. (Choose X & Y so all sides have identical counts; e.g., 10 sc + 3 side loops per side.)
- Join and fasten off.
Check: 4 corner ch-6 loops and evenly spaced side loops — motifs will align when joined.
Round 8 — Outer scallop & picot finish
- Rejoin and work an outer scallop edge: sc 3, (pic: ch 3 + sl st into same st), sc 4 — adjust counts so scallops lie flat around curves. Place picots at regular intervals for a dotted/bobbly look.
- Join, fasten off, and weave in ends. Block.
Check: scallops even and crisp after blocking.
Blocking
- Pin motif to blocking board/towel in desired final shape. Pull corner loops outward to form crisp corners if you used Round 7. Pin picots for pointy scallops. Mist with water or use steam lightly; allow to dry fully. Blocking transforms the lace — don’t skip it.
Joining motifs (runner or blouse)
Join-As-You-Go (JAYG) — recommended for flat seams
- Make a first motif completely. For each new motif, work up to Round 8. When working Round 8, at each stitch that should meet an adjacent finished motif, replace that stitch/picot with a sl st into the corresponding stitch/picot of the finished motif. Join at side loops and corner loops. This yields a flat, nearly invisible seam and makes building rows very quick — perfect for runners and one-piece blouses.
Sew-after
- Make and block all motifs. Lay out the layout, pin them, then sew through the Round 4/5 area or across side loops using a tapestry needle and matching yarn (mattress stitch or neat whipstitch).
Making a Runner (quick plan)
- Decide motif width M (blocked). For a narrow runner choose 1 motif × N; wider runner 2×N or 3×N. Example: motif ≈ 12 cm → 1×8 = 96 cm length narrow runner. JAYG join motifs in a row; finish long edges with a scallop or dc round for weight.
Making a Blouse (one-piece, JAYG)
- Measure chest circumference C, motif width M. Half-chest = C/2. Motifs across top row ≈ round(half-chest ÷ M). Build top row; leave center joins open to shape neckline (skip joining some top center joins). Add rows downwards joining as you go. Leave side openings unjoined for armholes (1–3 motif heights depending on style). Finish neckline & armholes with 2 rounds sc then picot or eyelet row.
Troubleshooting & tips
- Cups upward: loosen tension or use a larger hook for petals/arch rounds; block firmly.
- Ruffles/waves: shorten arch chains (ch-6 instead of ch-7) or remove a few sc from Round 4.
- Joins gap: add an extra sl st when joining or block motifs more firmly before joining.
- Want more drape: use a softer yarn and increase hook by 0.5–1 mm. For crisper lace use cotton and a slightly smaller hook.
Quick variations
- Two-color: change color after Round 3 (petals) for contrast.
- Bigger motif: increase petal dc (7 → 9) and arch chains (ch-8/9).
- Petite motif: decrease petal dcs (7 → 5) and use smaller hook/finer yarn.
- Simpler beginner option: replace Round 5–6 with ch-5 loops and 3 dc inside each loop for easier lacy results.
VIDEO: