by
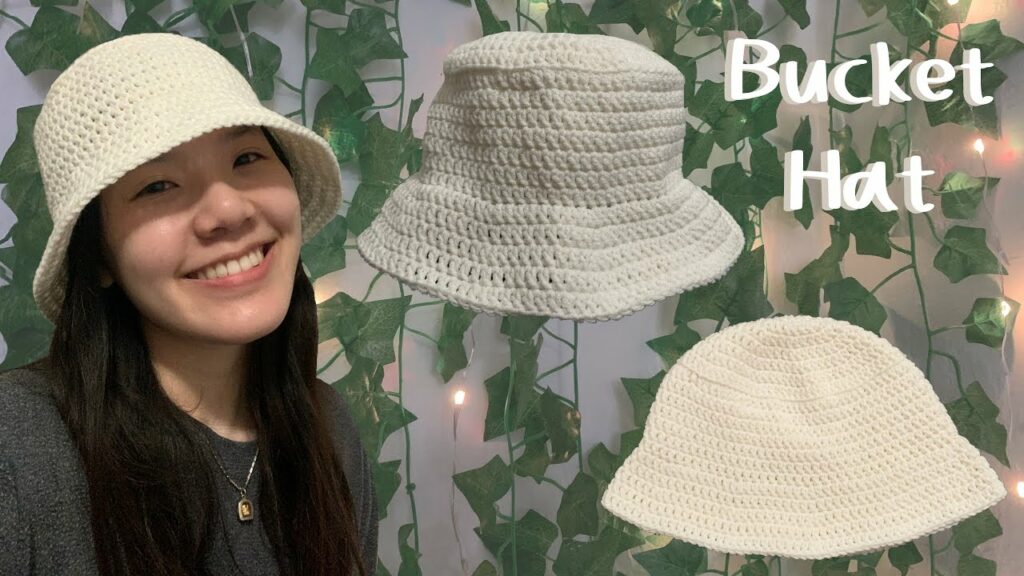
by The bucket hat is a fashion staple that’s both trendy and practical, offering sun protection with a laid-back vibe. And the best part? You can totally crochet one yourself! With just a few basic stitches, you can create a personalized bucket hat that’s perfect for sunny days, festivals, or just adding a cool touch to your everyday look. This tutorial is designed to be super easy, making it accessible for confident beginners and a quick, satisfying project for more experienced crocheters.
Why Crochet Your Own Bucket Hat?
- Fashionable & Fun: Bucket hats are back in a big way! Crocheting one allows you to customize it to your exact style, choosing unique colors and textures.
- Quick to Make: Unlike larger crochet projects, a bucket hat works up relatively fast, giving you instant gratification. You can often finish one in just a few hours.
- Skill Builder: It’s a great project for practicing working in the round, consistent tension, and simple shaping (increases and working straight).
- Customizable: Play with different yarn types, colors, stripe patterns, or even add small appliqués to make it uniquely yours.
- Practical: Provides sun protection for your face and neck, making it ideal for outdoor activities.
- Great for Gifts: A handmade bucket hat is a thoughtful and unique gift for friends and family.
Key Considerations Before You Start
To ensure your bucket hat turns out perfectly, keep these points in mind:
- Yarn Choice (Crucial for Shape!):
- Fiber: For a hat that holds its shape well and is comfortable to wear, cotton or cotton blends are highly recommended. They’re breathable, durable, and offer great stitch definition. Sturdy acrylic yarns can also work, but avoid anything too stretchy or fuzzy if you want a firm brim.
- Weight: Worsted weight (Category 4) is ideal. It works up quickly and provides enough bulk for the hat’s structure. DK (Category 3) can also be used but might result in a floppier hat or require a smaller hook and more stitches.
- Colors: Choose colors that match your wardrobe! Solids, stripes, or even a variegated yarn can look fantastic.
- Hook Size: Match your hook to your chosen yarn weight. For a bucket hat, it’s often beneficial to go down half a size from the yarn label’s recommendation. This creates a denser fabric, which helps the hat hold its shape and prevents it from becoming too floppy. For Worsted weight yarn, a 4.0mm (US G/6) or 4.5mm (US 7) hook is a good starting point.
- Gauge (Important for Fit!): While a formal gauge swatch isn’t always necessary for a hat, paying attention to the diameter of your flat top will determine the overall fit. Your hat should fit snugly but comfortably on your head.
- Stitch Pattern: Simple, dense stitches are best for the main body and brim. Single crochet (sc) or half double crochet (hdc) are excellent choices as they create a sturdy fabric. This tutorial will use hdc for quick progress and good drape.
- Hat Sizing: This pattern is designed for an average adult head (approximately 21-23 inches / 53-58 cm circumference). The instructions for the flat top will specify a diameter. Adjusting this initial diameter will change the hat’s size.
Materials You’ll Need
- Yarn: Approx. 150-200 yards of Worsted weight (Category 4) cotton or sturdy acrylic yarn.
- Crochet Hook: Size G/6 (4.0mm) or US 7 (4.5mm) – adjust to achieve desired density.
- Yarn Needle (Tapestry Needle): For weaving in ends.
- Scissors:
- Stitch Marker (optional but helpful): To mark the beginning of rounds.
Essential Crochet Abbreviations
- ch: chain
- sl st: slip stitch
- sc: single crochet
- hdc: half double crochet
- hdc inc: half double crochet increase (2 hdc in same st)
- st(s): stitch(es)
- FO: Fasten off (cut yarn and pull through loop)
- (): indicates instructions to be worked into the same stitch/space
- ***…***: repeat instructions within asterisks
- []: indicates stitch counts at the end of a round
Quick & Easy Crochet Bucket Hat Tutorial (Average Adult Size)
We’ll work this hat in continuous rounds (unless specified), which means you won’t join with a slip stitch at the end of each round unless instructed. Use a stitch marker to keep track of your first stitch in each round.
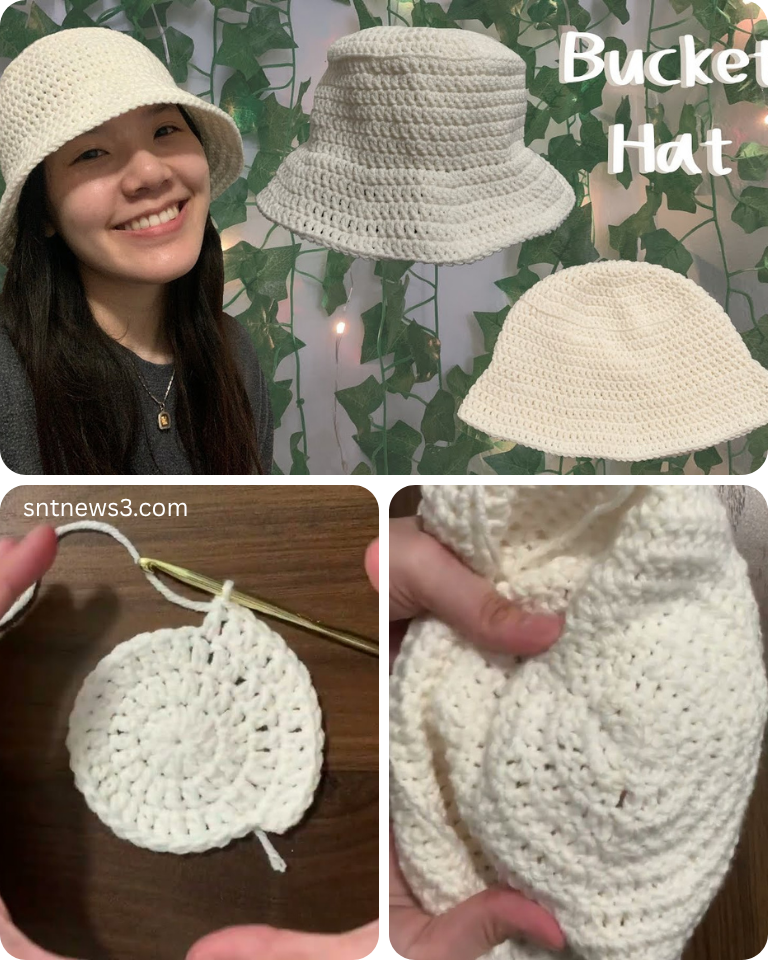
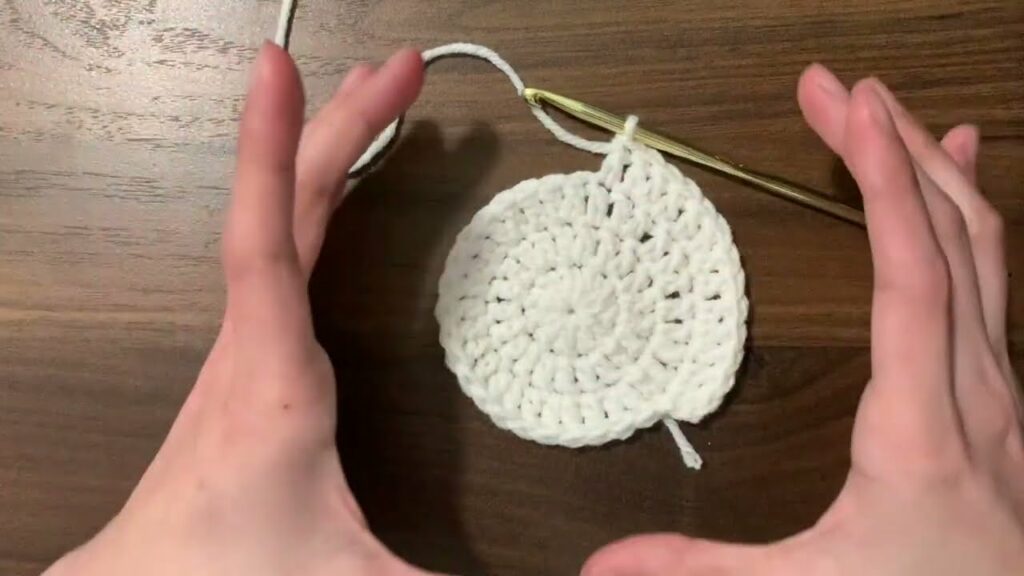
Part 1: The Hat Top (Flat Circle)
This forms the crown of your bucket hat.
- Starting: Make a Magic Ring (or Ch 4, sl st to 1st ch to form a ring).
- Round 1: Ch 2 (does NOT count as a st). Work 10 hdc into the Magic Ring. Pull the tail of the Magic Ring tight to close the center hole. [10 hdc]
- Round 2: Hdc inc (2 hdc) in each st around. [20 hdc]
- Round 3: Hdc in next st, hdc inc in next st. Repeat from * around. [30 hdc]
- Round 4: Hdc in next 2 sts, hdc inc in next st. Repeat from * around. [40 hdc]
- Round 5: Hdc in next 3 sts, hdc inc in next st. Repeat from * around. [50 hdc]
- Round 6: Hdc in next 4 sts, hdc inc in next st. Repeat from * around. [60 hdc]
- Round 7:Hdc in next 5 sts, hdc inc in next st. Repeat from * around. [70 hdc]
- At this point, your flat circle should measure approximately 6.5-7 inches (16.5-18 cm) in diameter. This is the diameter of your hat’s crown. Try it on! It should sit flat on top of your head. If it’s too small, add another increase round.

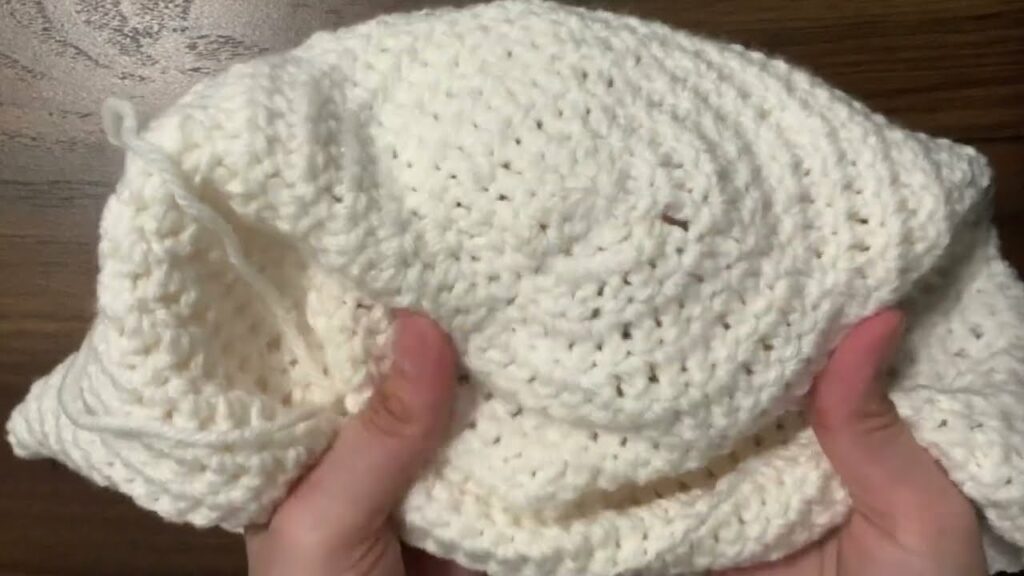
Part 2: The Hat Sides (Working Straight)
Now we’ll work straight rounds to form the body of the hat.
- Round 8: Hdc in each st around. [70 hdc]
- Rounds 9 – 18: Repeat Round 8. Continue working straight hdc rounds until your hat body measures approximately 3.5-4 inches (9-10 cm) from the edge of your flat top. This forms the “walls” of the bucket hat.
- Try the hat on occasionally to check the depth. It should come down to about the top of your ears or just cover them, depending on your preference.
- For a slightly looser fit around the head, you could add one more increase round (e.g., Round 8) before starting the straight rounds. For example, Round 8: Hdc in next 6 sts, hdc inc in next st. [80 hdc] Then work straight rounds with 80 hdc.
Part 3: The Brim (Increasing Again)
This creates the classic wide brim of the bucket hat.
- Round 19 (Brim Increase):Hdc in next 6 sts, hdc inc in next st. Repeat from * around. [80 hdc]
- This is our first brim increase. It creates a gentle flare.
- Round 20: Hdc in each st around. [80 hdc]
- Round 21 (Brim Increase): Hdc in next 7 sts, hdc inc in next st. Repeat from * around. [90 hdc]
- Round 22: Hdc in each st around. [90 hdc]
- Round 23 (Brim Increase): Hdc in next 8 sts, hdc inc in next st. Repeat from * around. [100 hdc]
- Rounds 24 – 25: Hdc in each st around. [100 hdc]
- Work more straight rounds here if you want a wider brim. Two to three rounds after the last increase is usually sufficient for a classic bucket hat look.
- Final Round (Optional, for defined edge): Ch 1. Sc in each st around. Join with a sl st to the first sc. [100 sc]
- FO, leaving a 6-inch (15 cm) tail.
Finishing Your Bucket Hat:
- Weave in All Ends: This is crucial for a neat and durable finish. Thread all loose yarn tails onto your yarn needle and carefully weave them into the stitches on the wrong side of your hat. Trim any excess.
- Blocking (Recommended!):
- Wet Blocking: Gently wet your hat (you can mist it or quickly submerge it). Squeeze out excess water (do not wring!).
- Shaping: Place the damp hat over a bowl, a balloon, or even your head (if you don’t mind it being damp for a bit) to shape the crown and brim. You can flatten the brim or give it a slight curve.
- Drying: Allow the hat to air dry completely. This might take several hours or overnight.
- Blocking helps to even out your stitches, makes the hat sit perfectly, and sets the shape of the brim.
Tips for Success & Making Your Hat Even Cooler:
- Consistent Tension: Maintaining even tension throughout your hdc stitches is vital for a smooth fabric and a well-shaped hat.
- Counting Stitches: Always keep track of your stitch count, especially in the increase rounds, to ensure your hat maintains its circular and then cylindrical shape.
- Try It On: Don’t be afraid to try on your hat as you go, especially after the flat top and during the body-shaping rounds. This helps ensure a good fit.
- Color Blocking & Stripes: Introduce new colors at the beginning of any round for easy stripes. You can alternate colors every few rounds or create thick color blocks.
- Embellishments: Sew on small crocheted appliqués (like a flower, a star, or an initial), attach pins, or embroider simple designs onto the hat once finished.
- Experiment with Brim: For a stiffer brim, you could insert floral wire into the last round of the brim (before the final sc round) or use a brim stiffener if desired. For a super floppy brim, you might increase more aggressively in the brim rounds.
You’ve now got a fantastic, handmade crochet bucket hat ready for your next adventure! Enjoy rocking your stylish and unique creation.
Video tutorial: