by
by Easy Elegant Lacy Motif — Step-by-step (US terms)
Skill level: Beginner → Easy-intermediate
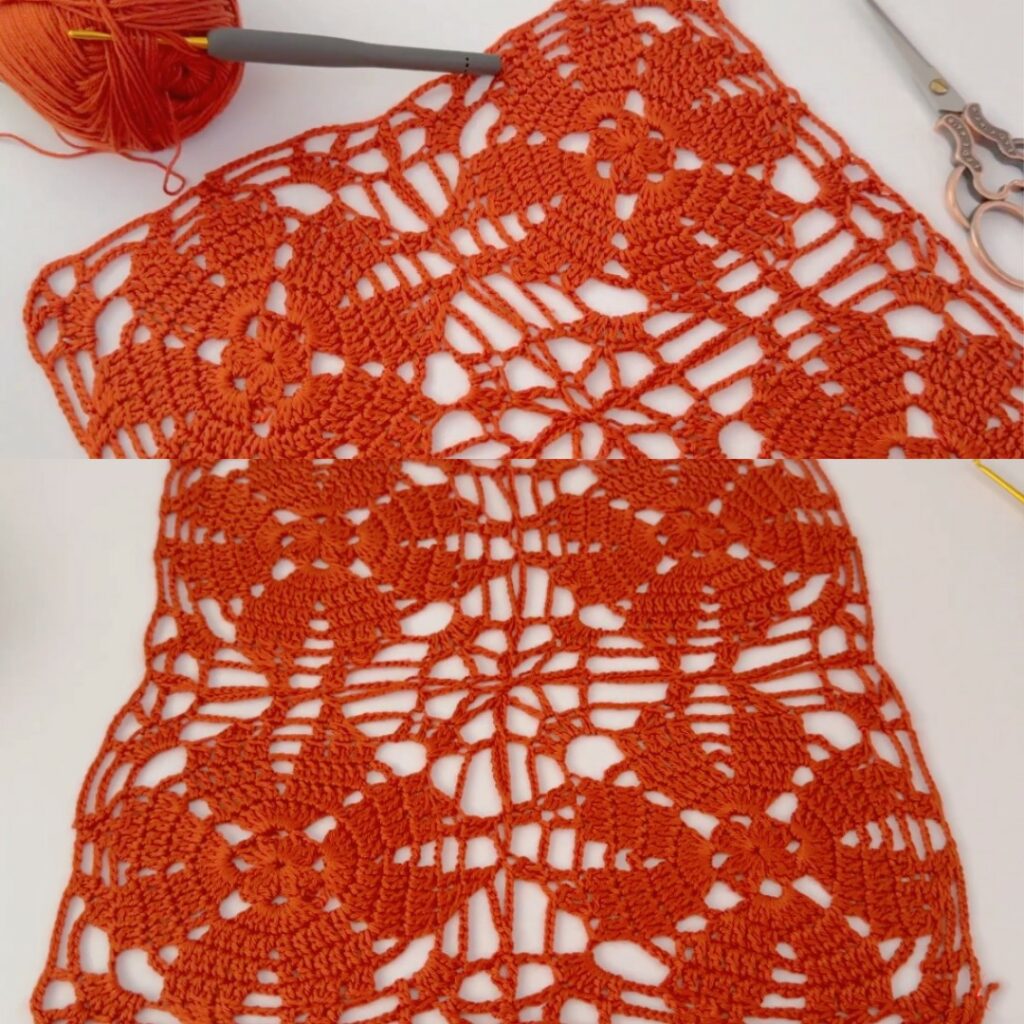
Finished motif (sample): ~10 cm (4″) blocked using DK + 3.5 mm hook (adjust hook/yarn for size).
Uses: panels for blouses, shawls, summer jackets, runners, blankets, tablemats.
Materials
- Yarn: sport/DK cotton or cotton-blend (for summer); fingering for delicate look.
- Hook: 3.0–3.5 mm for fingering/sport, 3.5–4.0 mm for DK.
- Tapestry needle, scissors, blocking pins/mat, stitch markers (optional).
- Optional: small beads or contrast thread for surface accents (skip for pure airy look).
Abbreviations (US)
- ch = chain
- sl st = slip stitch
- sc = single crochet
- hdc = half double crochet
- dc = double crochet
- tr = treble crochet
- sp = space
- st = stitch
- rep = repeat
- BLO = back loop only
- JAYG = join-as-you-go
Pattern overview (how it works)
- Worked in rounds from center out.
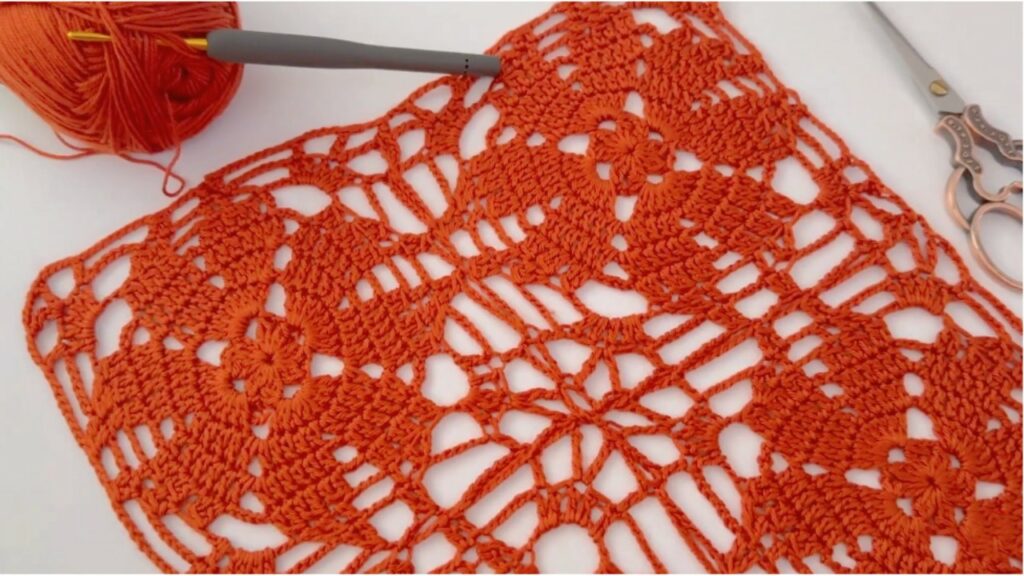
- Round design: small center ring → petal/fan rounds → chain arches → a “squareing” round to make a square motif.
- Final round is a sc round used for joining (join-as-you-go) or finishing.
- The whole motif is very repetitive and easy to memorize.
Make a test motif first
Make one motif and block it. Measure the blocked width (W). Use W to calculate how many motifs you need for your project.
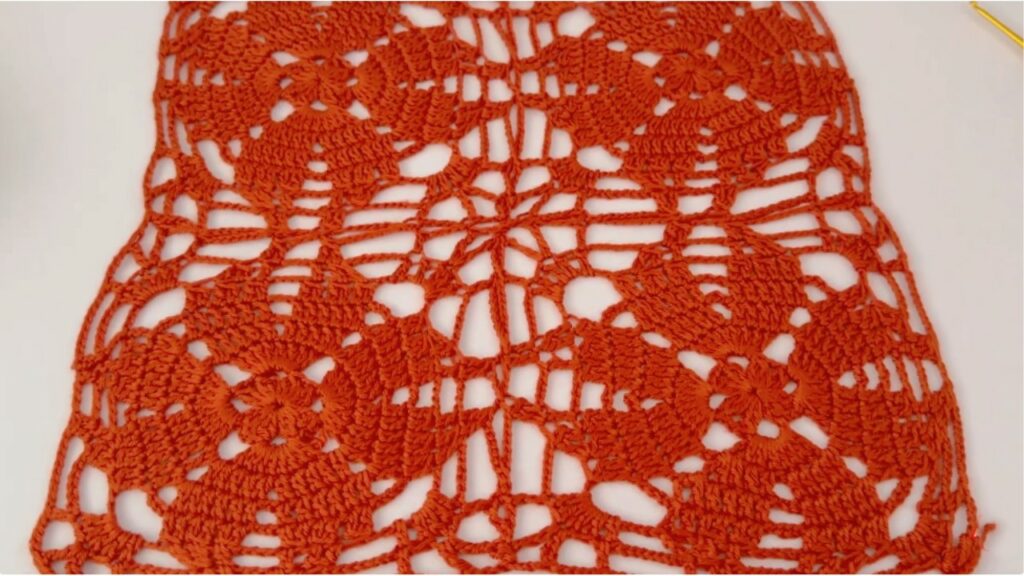
Motif — full rounds
Round 1 — center ring
- Make a magic ring (or ch 4 and sl st to form a ring).
- ch 3 (counts as dc), work 11 dc into ring — 12 dc total. Pull ring closed. Join with sl st to top of ch-3.
Round 2 — anchor loops
- ch 1, sc in next dc, ch 3 — repeat around to make 12 sc + 12 ch-3 loops.
- Join with sl st to first sc.
(These ch-3 loops will anchor petals.)
Round 3 — small petals (fans)
- Sl st into first ch-3 loop to sit your hook inside that loop.
- Into each loop work: (sc, ch 1, hdc, 3 dc, hdc, ch 1, sc) — a tapered petal/fan.
- Repeat around (12 petals). Join with sl st.
Round 4 — small connecting round
- ch 1. sc in outer sc of petal, ch 3 — repeat around forming small arches between petals. Join with sl st.
(This round stabilizes petals and creates nice small arches to work larger fans into.)
Round 5 — big fans (flower blossom)
- Into each ch-3 arch of Round 4 work: (sc, ch 1, hdc, 5 dc, hdc, ch 1, sc) — larger fan/petal (12 large fans).
- Join with sl st.
Round 6 — tall chain arches
- ch 1, sc in first sc, ch 7, sc in next sc — repeat around to make 12 ch-7 loops. Join.
Round 7 — top fans (narrow)
- In each ch-7 loop work: (sc, ch 2, 3 dc, ch 2, sc) — a narrow top fan. Join with sl st.
Round 8 — squareing / corners (make 4 sides)
You have 12 top fans; group them so there are 4 sides, each with 3 fan tops, and make 4 corner ch-3 spaces.
- ch 3 (counts as dc), 3 dc in next fan top space, 3 dc in next fan top space, in the third fan top space of the group work (3 dc, ch 3, 3 dc) to form a corner.
- Repeat that [3dc, 3dc, corner] sequence 4 times so you consume all 12 fan tops and end with four corners. Join with sl st.
(If your motif looks slightly off, move the corner placement so the 4 corners are evenly spaced — it’s normal to tweak the first motif.)
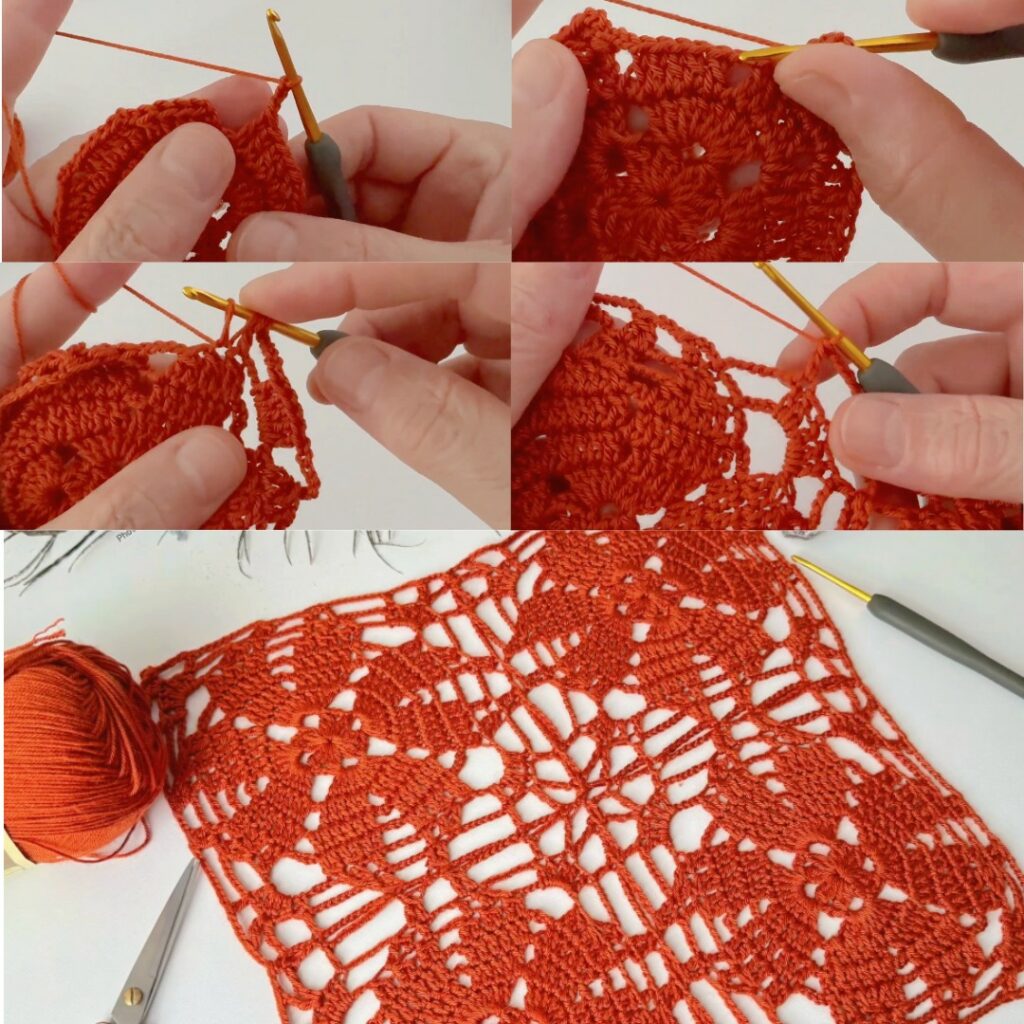
Round 9 — tidy sc round (join round)
- ch 1, sc evenly around motif; place 3 sc in each corner ch-3 to round them. Join with sl st. Keep yarn attached if you plan to join-as-you-go.
Optional Round 10 — small scallop
- skip 2 sc, 5 dc in next sc (shell), skip 2 sc, sc in next sc — repeat for a delicate scalloped edge. Join and fasten off. Block.
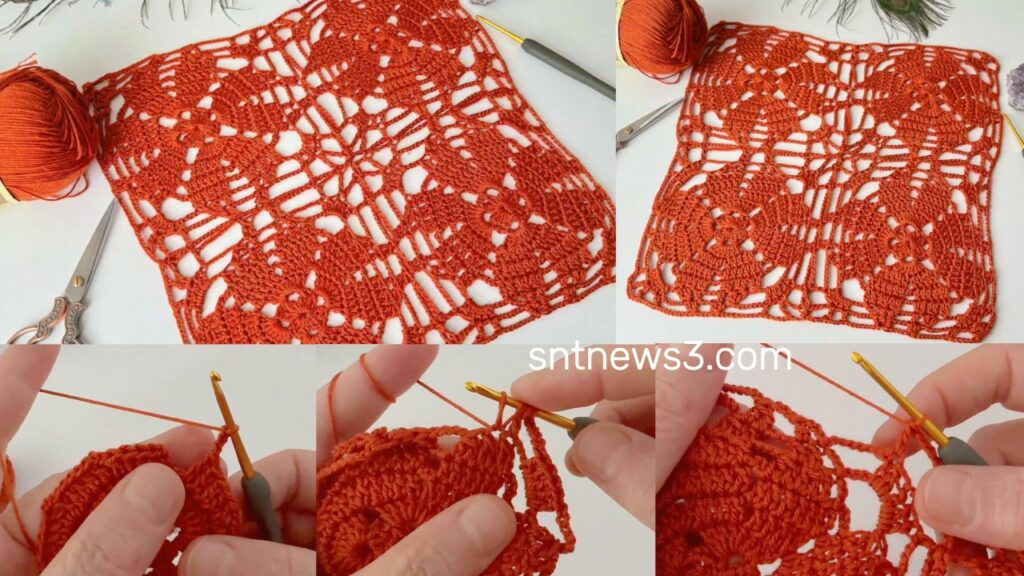
Join-as-you-go (JAYG) — quick method
Best to attach motifs during Round 9 so seams are flat.
Simple JAYG rule
- Make first motif completely and block it.
- Begin the second motif and work through Round 8. Start Round 9 (sc round). When you reach a stitch on the side that will touch an existing motif, replace the plain sc with:
sc in your motif st, ch 1, sl st into the corresponding sc (or corner) of the finished neighbor, ch 1 - Continue R9 and finish. For corners touching two neighbors, sl st into both neighbors’ corner ch-3 spaces (use ch-1 joins for spacing).
- Build rows left→right. For the next row down, each new motif will join to the motif above and to the left as you progress.
Tips: pin motifs first to keep join points aligned; if joins look too tight, use ch-2 instead of ch-1.
Blocking & finishing
- Wet-block each motif pinned to exact same dimensions. Blocking dramatically improves lace look and makes joining neat.
- After joining, block the assembled piece again to even seams and open pattern.
Border ideas (three quick options)
1) Delicate scallop (recommended)
- Round 1: sc evenly around whole piece (3 sc in each corner).
- Round 2: skip 2 sc, 5 dc in next sc, skip 2 sc, sc in next sc — repeat around.
2) Clean ribbed edge (warmer)
- Round 1: hdc evenly around.
- Rounds 2–4: hdc in BLO to make a soft rib edge.
3) Big boho scallops
- Round 1: sc around.
- Round 2: ch 6 arches
- Round 3: into each arch work
(sc, ch 3, 9 dc, ch 3, sc)for large scallops.
Sizing & yarn estimate
Measure your motif after blocking: W (cm). Then:
- motifs_across = round(desired_width_cm / W)
- motifs_down = round(desired_length_cm / W)
- total_motifs = motifs_across × motifs_down
Yarn estimate (accurate method):
- Make and block 1 motif, weigh it in grams.
- Yarn grams required ≈ (weight_per_motif × total_motifs) + 10–15% for joins & border.
Convert grams to skeins using label weight.
Rough starter estimate: one DK motif ~ 8–14 g depending on size; a throw (12×15 motifs = 180) × 10 g ≈ 1.8 kg + extras.
Variations & tiny “elegant touches”
- Color pop center: work R1–R3 in a contrast color for a subtle center bloom.
- Surface slip-stitch line: add a single surface slip-stitch diagonal across motifs for a stripe effect. Use a slightly darker yarn and keep stitches loose.
- Picot tips: add
ch 3, sl stpicots on outer fan tips for delicate points. - Small bobbles: add a tiny 3-dc popcorn on every 4th petal center for texture (optional — skip if you want a smooth light garment).
Troubleshooting
- Motifs different sizes? Block and if needed add one sc round to small motifs to match.
- Joins puckering? Join more loosely (ch-2 joins) or sew with mattress stitch for flatter seam.
- Edges ripple? Add one stabilizing sc round before shells.
- Pattern misaligns? Make sure the corner placement in Round 8 yields 4 evenly spaced corners. Adjust if necessary.
Quick reference (cheat-sheet)
- R1: magic ring → 12 dc
- R2: sc, ch3 anchors
- R3: (sc, ch1, hdc, 3dc, hdc, ch1, sc) ×12 (petals)
- R4: sc, ch3 arches
- R5: big fans (5 dc center) ×12
- R6: ch7 loops ×12
- R7: (sc, ch2, 3dc, ch2, sc) ×12
- R8: [3dc, 3dc, corner(3dc,ch3,3dc)] ×4 → square
- R9: sc round (3 sc in corners) → join or finish
- R10 (opt): scallops
VIDEO: