 by
by Quick summary (what you’ll make)
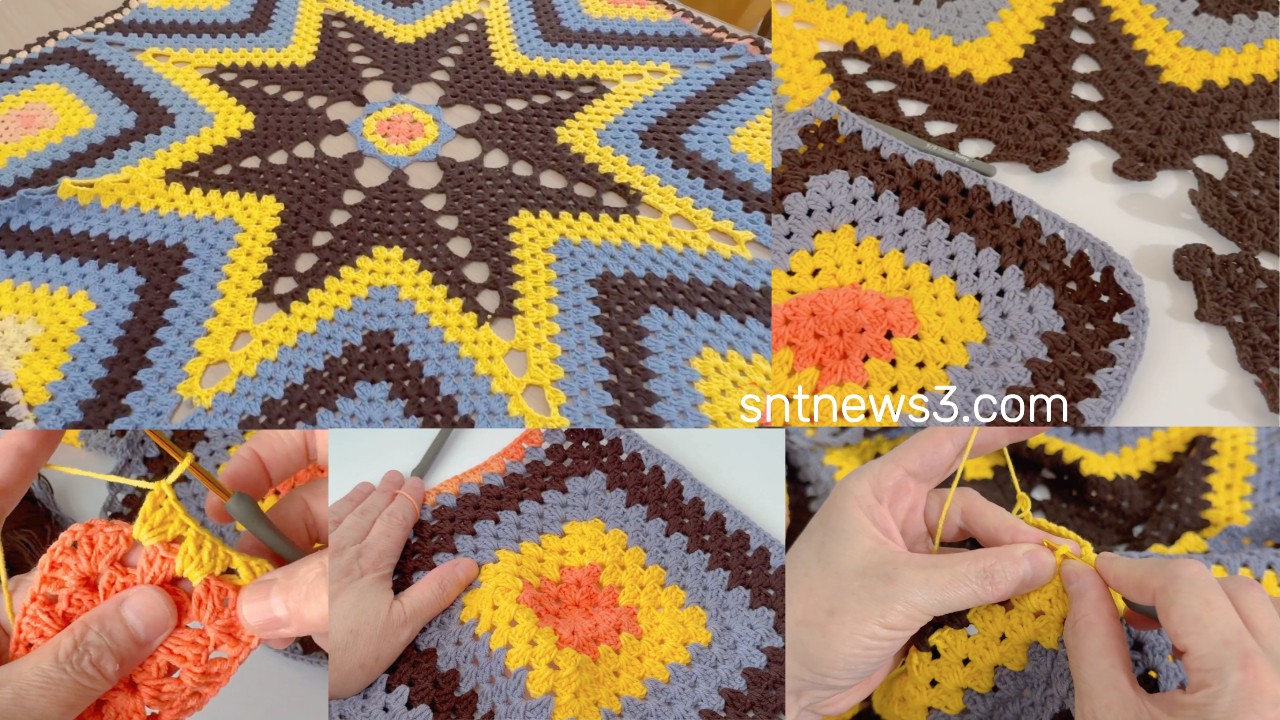
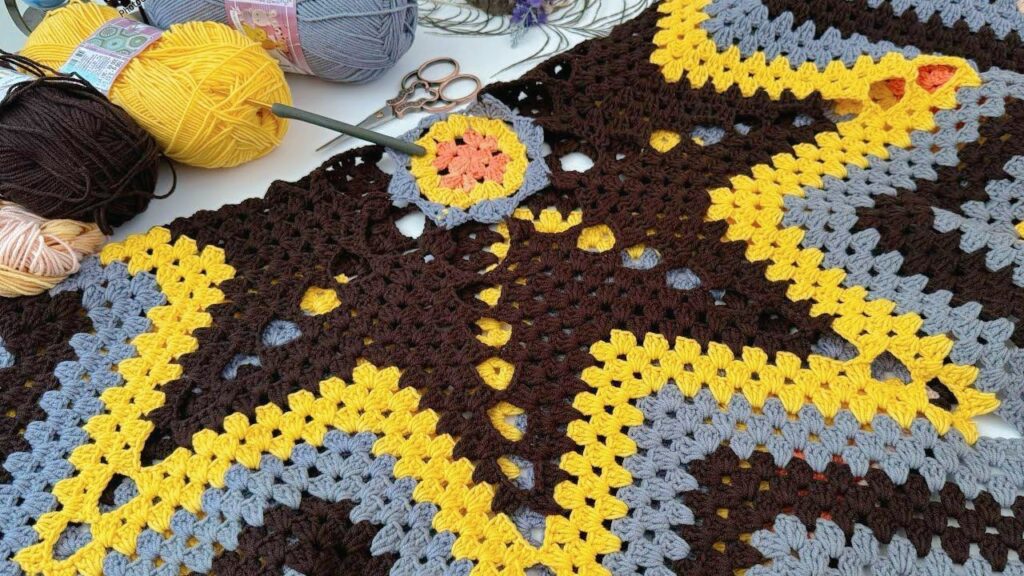
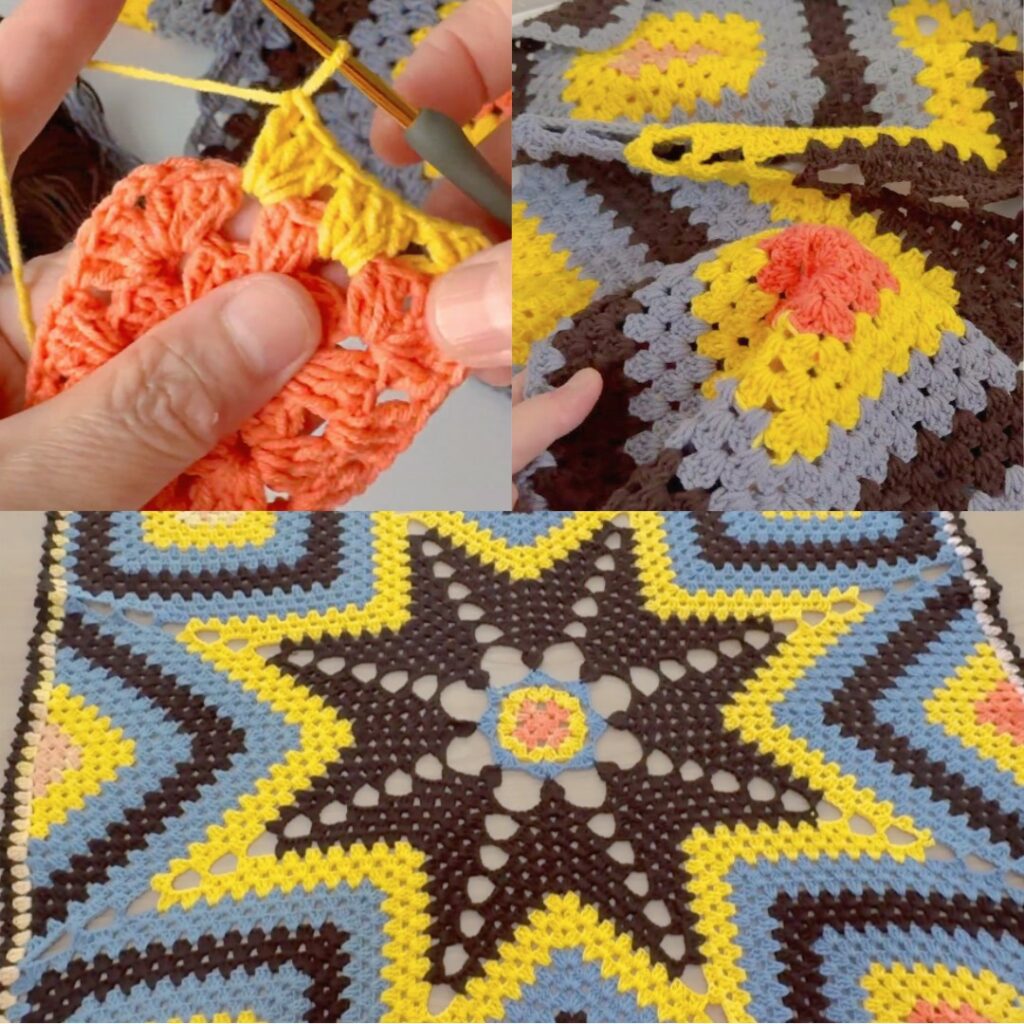
- A gorgeous motif blanket built from identical floral square motifs (mandala → square rounds), joined-as-you-go (or sewn) and finished with a bold scallop border.
- Works well in single color, ombré/gradient, or multi-color palettes.
- Skill: easy → intermediate. Great for gifts and decorative throws.
Materials (suggested)
- Yarn: DK/light worsted (soft acrylic, cotton blend, or wool blend). For a plush blanket use worsted weight and larger hook — pattern scales.
- Hook: 3.5 mm for DK sample; use 4.0–5.5 mm for chunkier yarn.
- Tapestry needle, scissors, blocking pins & mat.
- Optional: stitch markers, measuring tape.
- Optional: contrast yarn for surface accents.
Yarn estimate (ballpark):
- Baby throw (70×90 cm): ~700–900 g DK
- Throw (120×150 cm): ~1.8–2.5 kg DK
- Large bed blanket: 3–4+ kg depending on hook/yarn
(Accurate estimate available after you make & weigh one motif.)
Abbreviations (US)
- ch = chain
- sl st = slip stitch
- sc = single crochet
- hdc = half double crochet
- dc = double crochet
- tr = treble crochet
- sp = space
- st = stitch
- rep = repeat
- JAYG = join-as-you-go
- BLO = back loop only
Make one motif first (very important)
- Work one motif fully, block it flat, and measure its blocked width W (cm) across the square.
- Weigh that motif (grams) if you want a yarn estimate. Use those numbers to calculate counts and yarn.
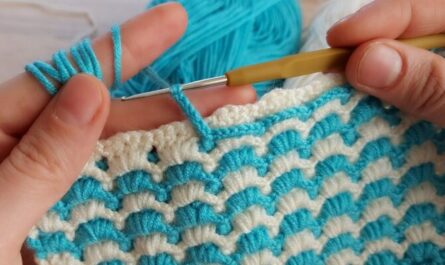
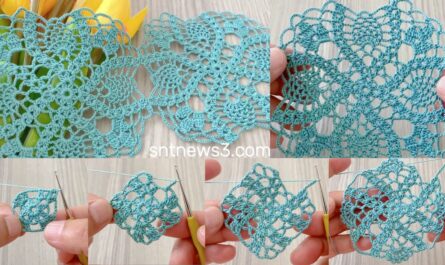
Motif — round-by-round (mandala → square)
This motif is lacy but stable and squares nicely.
R1 — center ring
- Magic ring. ch 3 (counts as dc), 11 dc into ring (12 dc total). Pull tight. Join with sl st to top of ch-3.
R2 — anchor loops
- ch 1, sc in next dc, ch 3 — repeat around (12 sc + 12 ch-3 loops). Join.
R3 — small petals
- Sl st into first ch-3 loop. In each loop work: (sc, ch1, hdc, 3 dc, hdc, ch1, sc). (12 petals). Join.
R4 — small arches
- ch 1, sc in outer sc of petal, ch 5 — repeat around to make 12 ch-5 arches. Join.
R5 — large fans (petal row)
- Into every other ch-5 arch work (sc, ch1, hdc, 5 dc, hdc, ch1, sc) (big fan).
- Into the alternate arches work (sc, ch3, sc) (connector). Join.
R6 — tall loops
- ch 1, sc in first sc, ch 7, sc in next sc — repeat (12 ch-7 loops). Join.
R7 — narrow top fans
- In each ch-7 loop work (sc, ch2, 3 dc, ch2, sc). Join.
R8 — squareing round (4 sides)
- You have 12 top fans. Group them so each side gets 3 fans and create four corner ch-3 spaces:
- ch 3 (counts as dc), 3 dc in next fan top, 3 dc in next fan top, in the third fan top work (3 dc, ch 3, 3 dc) (corner) — repeat the sequence 4 times to use all 12 fans. Join.
R9 — tidy sc round (join round)
- ch 1, sc evenly around motif; place 3 sc into each corner ch-3 to round corners. Join. Keep yarn attached if you plan to JAYG. (Optional: R10 shell scallop).
Optional R10 — scallop edge
- skip 2 sc, 7 dc in next sc (big shell), skip 2 sc, sc in next sc — repeat for bold scallops. Join and fasten off.
Block each motif to the exact same size before joining.
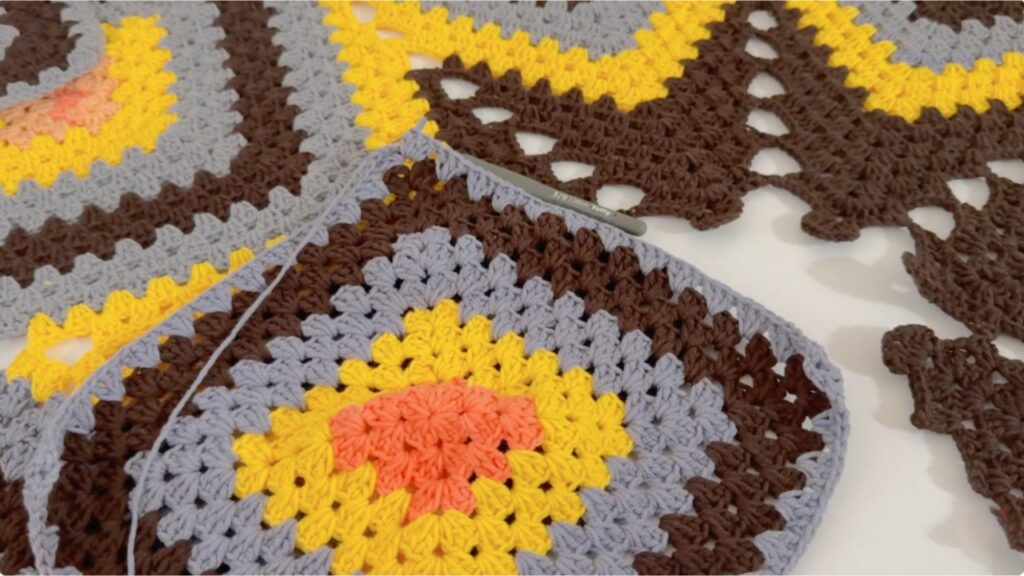
Making many motifs efficiently
- Work in an assembly line: make R1 for N motifs, then R2 for N motifs, etc. This is faster than finishing one motif at a time.
- Block as you finish motifs or block in small batches.
How many motifs? (math)
Decide final blanket size (W_blanket × H_blanket in cm) and measure motif width W.
- motifs_across = round(W_blanket / W)
- motifs_down = round(H_blanket / W)
- total_motifs = motifs_across × motifs_down
Example: W = 10 cm; Blanket 120×150 cm → motifs_across = 12, motifs_down = 15 → total = 180 motifs.
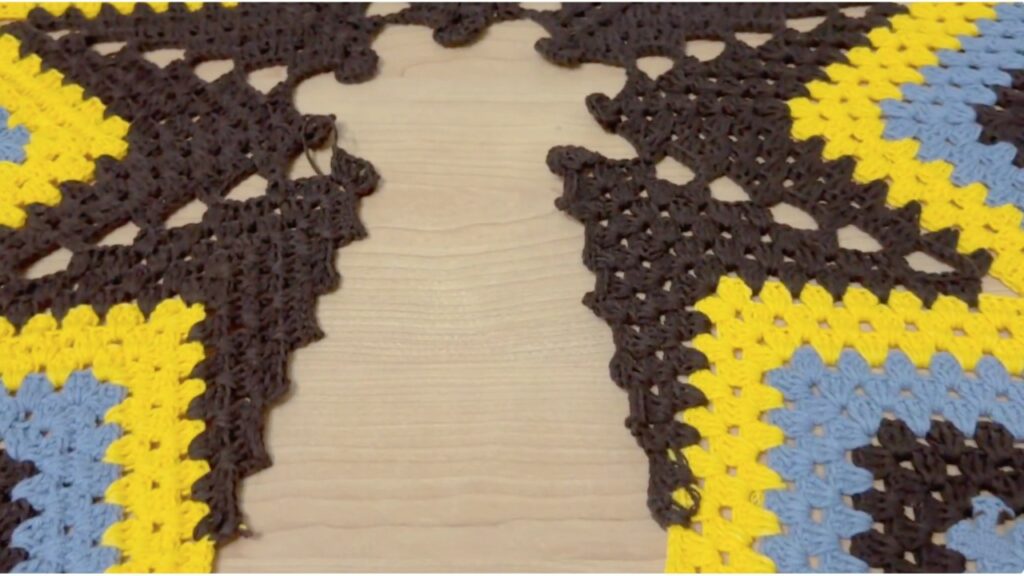
Join methods (two good choices)
Option A — Join-As-You-Go (recommended)
- Finish first row of motifs completely (or do R1–R8 and finish R9 while joining).
- When making a new motif’s R9, replace certain scs with a sl-st into the finished neighbor like this:
sc in your motif stitch, ch 1, sl st into corresponding sc (or corner) of neighbor, ch 1
- For corners that meet two neighbors, sl st into both neighbors’ corner spaces (work gently).
- Build rows left→right; for each new row join each motif to the one above and to the left as you go.
Practical tip: pin the motif onto the neighbor before the sl-st join to ensure alignment.
Option B — Sew after blocking
- Block motifs, lay out the grid, and tack with pins. Use a tapestry needle and yarn to mattress stitch through back loops only for the flattest seam. Whipstitch is faster but a bit bulkier.
Border — bold, legendary scallop (gives the visual feast finish)
After motifs are joined and blocked, add a multi-round border.
Round B1 — sc stabilizer
- Join yarn at any corner. sc evenly around whole blanket, placing 3 sc in each corner. Join.
Round B2 — big shells
- ch 3 (counts dc), skip 2 sc, 9 dc in next sc (very large shell), skip 2 sc, sc in next sc — repeat around. (9 dc shells create a dramatic scallop.)
Round B3 — arch row
- ch 1, sc in first dc of shell, ch 8, sc in center top of the next shell — repeat around. These large arches prepare for final giant scallops.
Round B4 — giant scallops
- Into each ch-8 arch work: (sc, ch 3, 15 dc, ch 3, sc) — enormous scallops that swing and drape beautifully. Join.
Round B5 — picot trim (optional)
- sc around; at the top of each giant scallop make a small picot:
sc, ch3, sl st in same sc. Fasten off and weave ends.
Note: adjust shell sizes if you used a different motif size so border sits pleasingly; large shells look spectacular for a “legendary” blanket.
Final blocking & finishing
- Wet or steam block the entire assembled blanket pinned to desired dimensions — block the scallops carefully so they open and lay flat.
- Weave in all ends neatly on the wrong side.
- If desired, add tassels at corners or a fringe along one or both shorter edges for extra drama.
Yarn estimate (accurate method)
- Make and block one motif and weigh it (grams).
- Yarn grams needed ≈ (grams_per_motif × total_motifs) + 12% for joins & border.
- Convert grams to skeins using label info.
Example: 1 motif = 11 g; total motifs = 180 → 11×180 = 1980 g + 12% ≈ 2220 g → ~2.25 kg yarn.
Troubleshooting & tips
- Motifs slightly different sizes? Block all motifs to same dimensions; if some stay small add one extra sc round to them.
- Joins pucker? Join more loosely (use ch-2 instead of ch-1), or sew with mattress stitch.
- Edges ripple? Add a sc stabilizing round before big shells.
- Blanket too stiff? Use a larger hook or softer yarn for more drape.
- Want more warmth? Use thicker yarn and a bigger hook; reduce shell size on border if very heavy.
Variations & styling ideas
- Monochrome luxe: one color for a modern, elegant look.
- Gradient / ombré: make motifs in color groups and arrange in gradient blocks — stunning.
- Center-color motifs: two-color motifs (center color + outer color) for floral pop.
- Mixed textures: alternate lacy motifs with solid granny squares for contrast.
Quick project checklist before you start
- Make one motif → block & measure W and weigh it.
- Decide blanket size and calculate motif counts (across × down).
- Buy yarn based on motif weight × count + 12%.
- Batch-make motifs (R1→R9 in pipeline), block them.
- Join motifs row by row (JAYG recommended).
- Work the legendary scallop border.
- Final block and finish.
VIDEO: