 by
by Quick plan
- Make one lacy square motif (worked in rounds).
- Block it and measure W (blocked motif width, cm).
- Decide project & compute how many motifs you need.
- Make motifs (assembly line), block, join (JAYG or sew), add border, finish.
- Optional: turn motif panels into cardigan by adding sleeves/edging.
Materials (suggested baseline)
- Yarn: DK / light worsted (cotton blend for summery garments; acrylic/wool blend for warm blankets).
- Hook: 3.5 mm (adjust to your yarn & gauge).
- Tapestry needle, scissors, blocking pins/mat, stitch markers.
- Optional: small buttons, tassel maker.
Example project yarn estimates (very approximate)
- Baby blanket (70×90 cm): 700–900 g DK
- Throw (120×150 cm): 1.8–2.5 kg DK
- Cardigan (adult M): 900–1300 g DK (depends on length and sleeve style)
(You’ll get exact numbers by weighing one motif — instructions below.)
Abbreviations (US)
ch, sl st, sc, hdc, dc, tr, sp, st, rep, BLO (back loop only), JAYG (join-as-you-go).
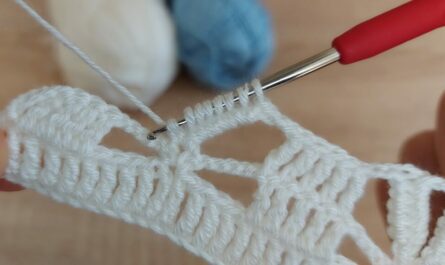
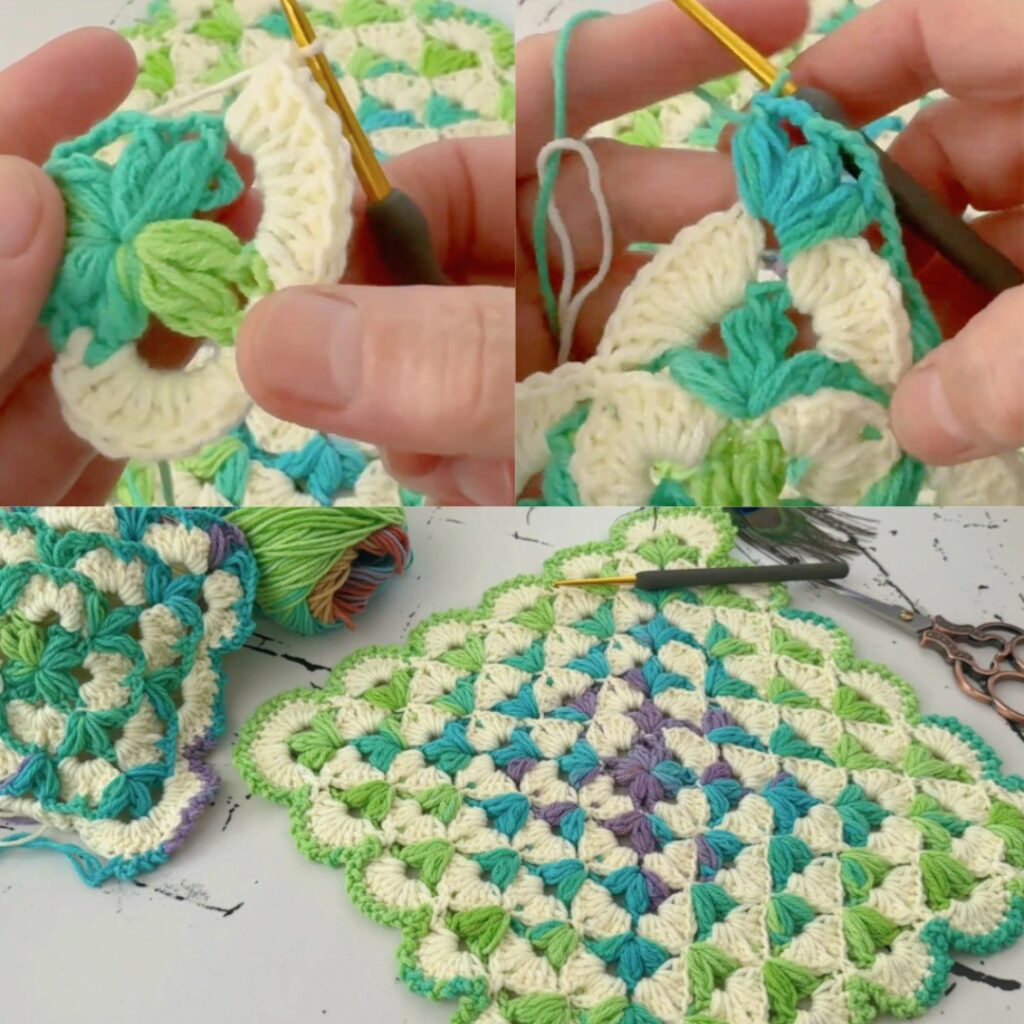
The motif — worked in rounds (one motif)
Make one motif, block it, measure width W and weight (g). I include exact rounds so you can follow.
Round 1 — center ring
- Magic ring. ch 3 (counts as dc), work 11 dc into ring (12 dc total). Pull tight. Join with sl st to top of ch-3.
Round 2 — anchors
- ch 1, sc in next dc, ch 3 — repeat around to make 12 sc + 12 ch-3 loops. Join.
Round 3 — small petals
- Sl st into first ch-3 loop.
- In each loop work: (sc, ch1, hdc, 3 dc, hdc, ch1, sc) — tapered petal. Repeat (12 petals). Join.
Round 4 — connector arches
- ch 1, sc in outer sc of petal, ch 5 — repeat around (12 ch-5 arches). Join.
Round 5 — larger fans (alternate)
- Into every other ch-5 arch work: (sc, ch1, hdc, 5 dc, hdc, ch1, sc) (big fan).
- Into the remaining arches work (sc, ch3, sc) (small connector). Join.
Round 6 — tall chain row
- ch 1, sc in first sc, ch 7, sc in next sc — repeat around (12 ch-7 loops). Join.
Round 7 — top fans
- Into each ch-7 loop work (sc, ch2, 3 dc, ch2, sc). Join.
Round 8 — squareing round (4 sides)
You have 12 top fans. Group them so each side has 3 fans and make 4 corner ch-3 spaces:
- ch 3 (counts dc), 3 dc into next top fan, 3 dc into next top fan, in the third top fan of the group work (3 dc, ch 3, 3 dc) (corner).
- Repeat [3dc, 3dc, corner] 4 times. Join.
(If it looks uneven, move which top fan you use as corner so corners are evenly spaced.)
Round 9 — tidy sc round (join round)
- ch 1, sc evenly around motif; 3 sc in each corner ch-3 to round corners. Join. Keep yarn attached if you intend to join-as-you-go.
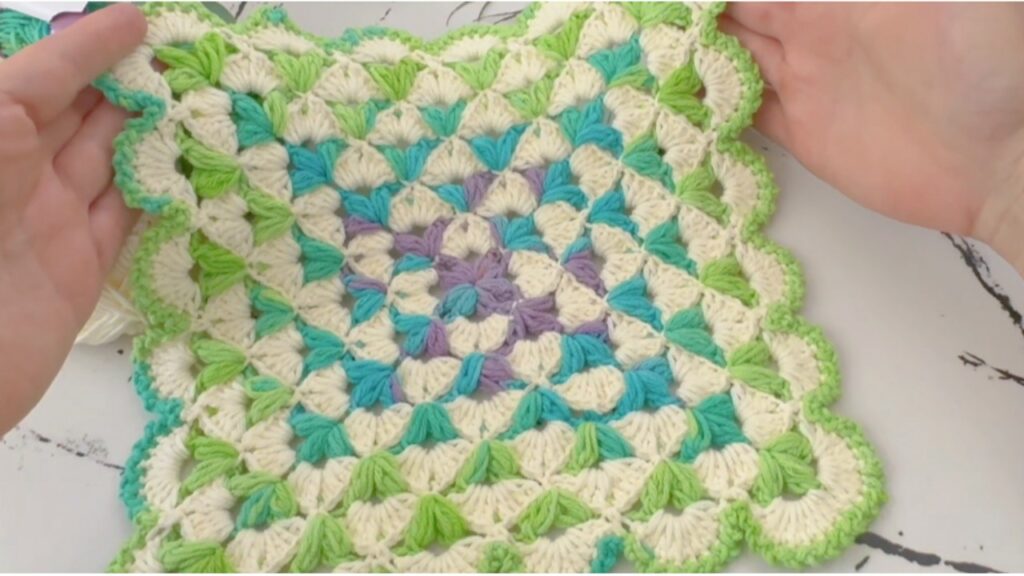
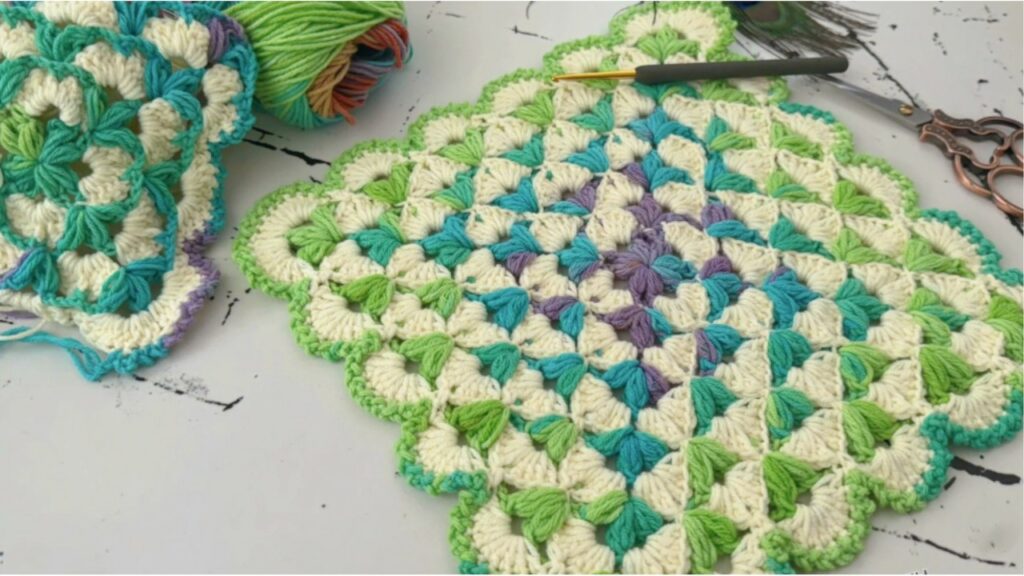
Optional Round 10 — scallop
- skip 2 sc, 5 dc in next sc (shell), skip 2 sc, sc in next sc — repeat around for a scalloped edge. Join and fasten off. Block square.
Make & measure one motif (very important)
- After blocking, measure W (cm) — width across flats.
- Weigh the motif in grams to estimate yarn per motif. Save these numbers.
Project planning formulas
motifs_across = round(desired_width_cm / W)motifs_down = round(desired_length_cm / W)total_motifs = motifs_across × motifs_downyarn_grams ≈ total_motifs × g_per_motif + 10–15%(extra for joins/border)
Work strategy (efficient)
- Batch work: make R1 for N motifs, then R2 for N motifs, etc.
- Block motifs as you go in manageable batches.
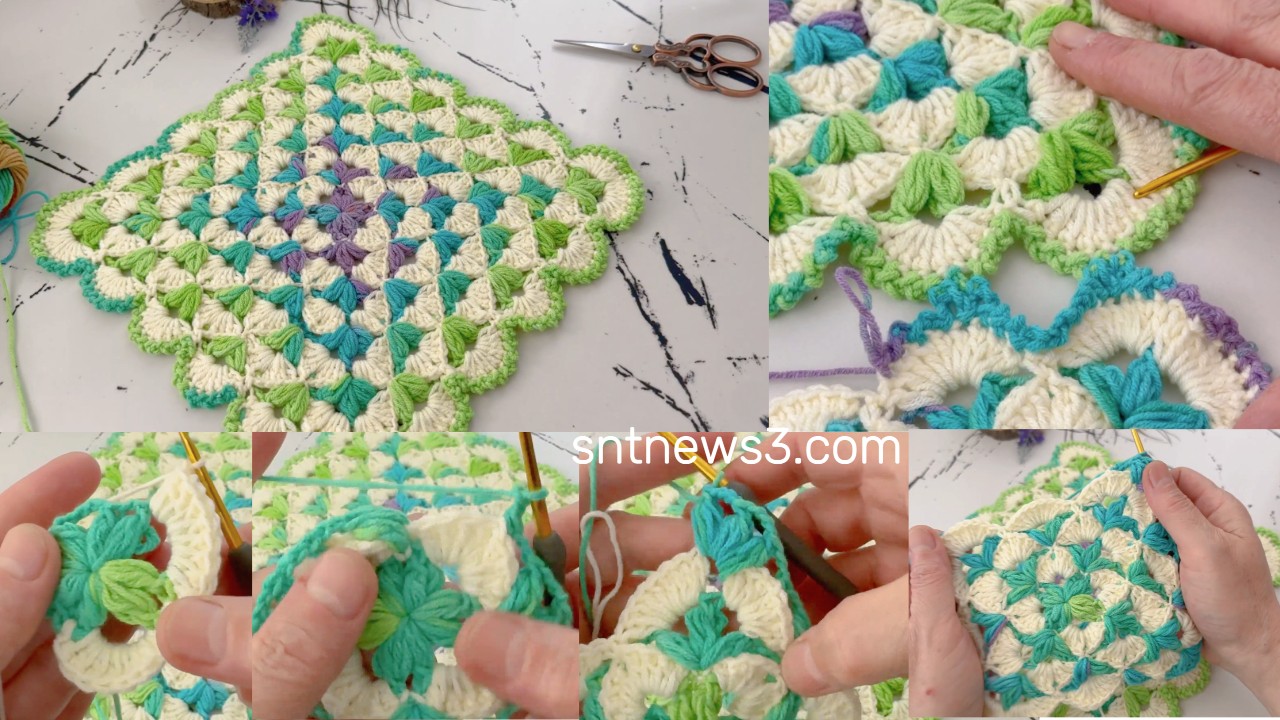
Joining motifs (two main methods)
A — Join-As-You-Go (JAYG) — recommended for flat seams
- Finish motifs through R8. Start R9 and when you need to attach to an already finished motif substitute some scs with:
sc in your motif st, ch 1, sl st into the corresponding sc (or corner) of the finished motif, ch 1 - For corners where a new motif touches two neighbors, sl st into both neighbors’ corner ch-3s (space out with ch-1).
- Work rows left→right; for each new row attach to motifs above and left as needed. Pin motifs before joining if alignment is tricky.
Tips: if joins pull tight, replace ch 1 with ch 2 for looser joins.
B — Sew after blocking
- Block all motifs to exact same dimensions, lay out grid, pin, and sew with tapestry needle using mattress stitch through back loops only for the flattest seam. Whipstitch is quicker but bulkier.
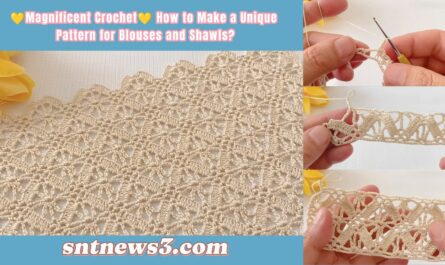
Edging / Borders (three styles)
1 — Classic scallop (elegant, balances lacy motifs)
- Round 1: sc evenly around whole assembled piece (3 sc in corners).
- Round 2: skip 2 sc, 5 dc in next sc (shell), skip 2, sc in next sc — repeat for a scallop finish. Block.
2 — Ribbed warm border (cozy)
- Round 1: hdc evenly around.
- Rounds 2–5: hdc in BLO around to create a ribbed, cushioned frame.
3 — Dramatic boho scallops
- Round 1: sc around.
- Round 2: skip 2 sc, 9 dc in next sc, skip 2, sc — large shells.
- Round 3: ch-arches then in arch work (sc, ch3, 15 dc, ch3, sc) for giant scallops.
Turning motifs into a CARDIGAN (overview)
You can use the exact motif grid to build front/back panels and sleeves.
Simple construction (panel method)
- Decide finished bust (F) and ease (e.g., +6–8 cm). Compute
motifs_across_total = round(F / W)and split into front halves and back. Typical: front left = N/2, front right = N/2 (or leave center seam). - Decide rows (motifs_down) for desired body length.
- Make panels: front (two halves) and back: join motifs into rectangles.
- Join shoulders leaving neck opening (leave X motif widths free centered at top). Example neck opening 18–22 cm ≈ 1–2 motif widths depending on W.
- For sleeves: either (A) pick up stitches around armhole and work rounds of the motif-adapted repeat (or simple dc rounds) to make sleeve in the round; or (B) create sleeve panels from motifs (one or two rows of motifs that are seamed into the armhole).
- Add edging around front/neck/armholes: 1–2 rounds sc then a decorative shell round. Add buttons or leave open with a tie.
Quick sleeve pickup (top-down)
- With RS facing, pick up approx
armhole_circ_cm × sts_per_cmstitches evenly; join and work the body repeat in rounds, decreasing evenly for tapered sleeves, finish with cuff rounds in sc or hdc.
Turning motifs into a BLANKET or SHAWL
- Blanket: compute motif counts using formulas above and join motif grid into rectangle. Add the border type you prefer.
- Shawl: arrange motifs into a triangle or crescent (e.g., 3 large motifs triangle like some ÖRGÜ MÜ DEDİNİZ shawls), or make long rectangle and fold into a wrap; add fringe or tassels.
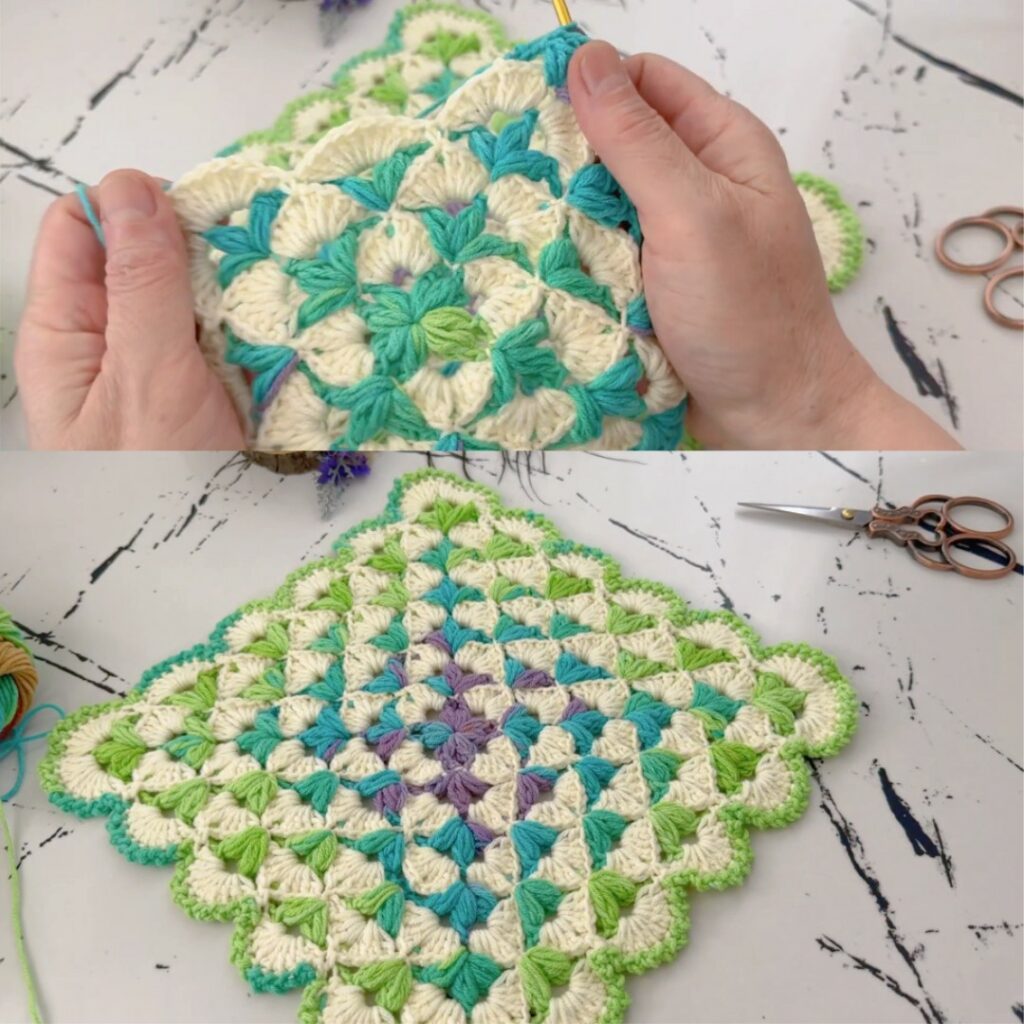
Blocking & final finishing
- Block every motif carefully to the same size — this is the most important step for a neat finished object. Use pins and wet/steam blocking.
- After joining entire piece, re-block assembled piece to square/seams and open scallops.
- Weave in ends inside seams and trim.
Troubleshooting & fixes
- Motifs uneven size: block them all; if outliers remain small, add one sc round to even them.
- Seams pucker: loosen join tension (use ch-2) or sew with mattress stitch through back loops only.
- Edges ripple: add a sc stabilizer round before decorative shells.
- Motif lopsided: check Round 8 corner placement — ensure 4 corners evenly spaced; adjust by shifting which fan is used as a corner.
- Too open or too stiff: change hook size, use smaller hook for denser fabric or bigger hook for more drape.
Yarn estimate (accurate method)
- Crochet and block one motif; weigh it (g).
Total_grams = g_per_motif × total_motifs + 12%(joins/border).- Convert grams to skeins by label weight.
Example: g_per_motif = 10 g, total_motifs = 120 → 1200 g + 12% ≈ 1344 g → buy ~1.4 kg.
Quick production checklist
- Make 1 motif → block, measure W and weight.
- Calculate motifs needed for your project using formulas.
- Buy yarn (use motif weight estimate + 15% extra).
- Batch-make motifs (R1→R9 pipeline).
- Block motifs in batches.
- Join row by row (JAYG recommended).
- Add border and final block.
- Weave ends & add decorative details.
VIDEO: