 by
by This tutorial shows how to:
- make the lacy motif used in the video,
- block & measure it,
- plan motif counts for a crop/blouse,
- join motifs into front/back,
- finish edges and straps — everything you need to make the same blouse.
Materials
- Yarn: sport / DK cotton or cotton blend (summer/spring blouse).
- Hook: 3.0–3.5 mm recommended for DK/sport (adjust to your yarn & desired drape).
- Tapestry needle, scissors, blocking pins/mat, stitch markers (optional).
- Optional: small buttons or narrow ribbon for ties.
Abbreviations (US)
ch = chain
sl st = slip stitch
sc = single crochet
hdc = half double crochet
dc = double crochet
tr = treble crochet
sp = space
st = stitch
rep = repeat
RS = right side
JAYG = join-as-you-go

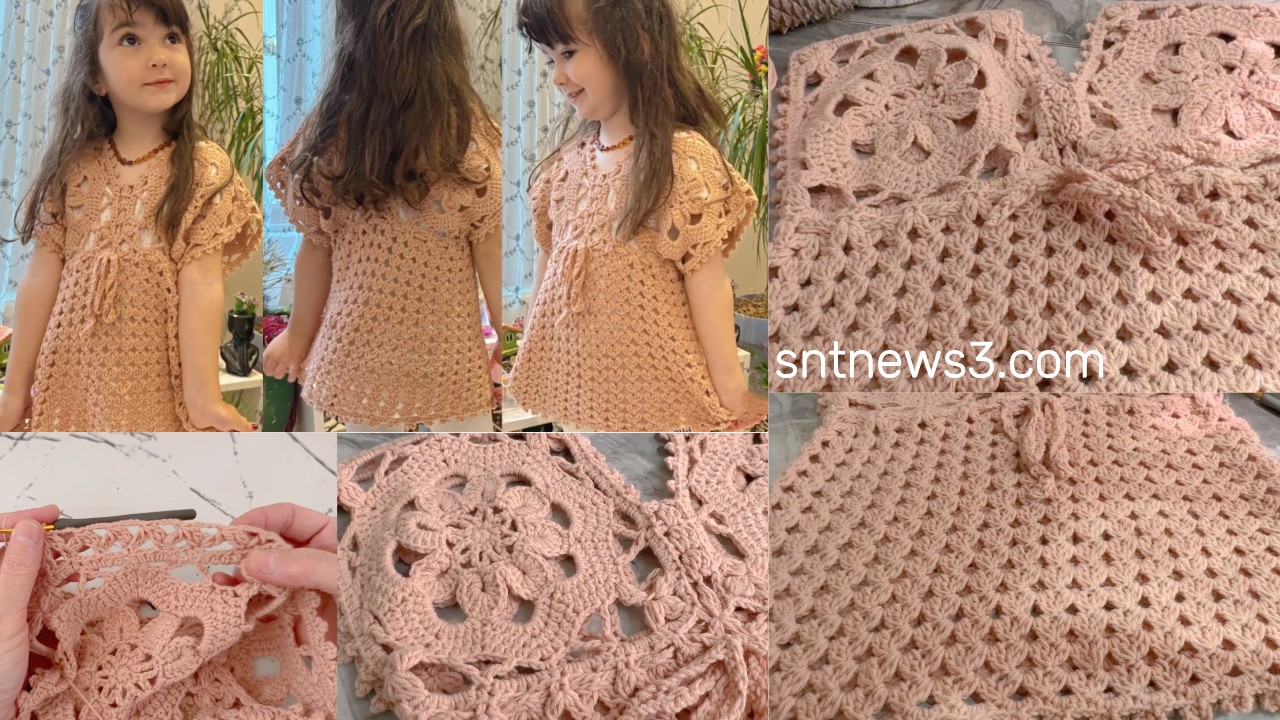
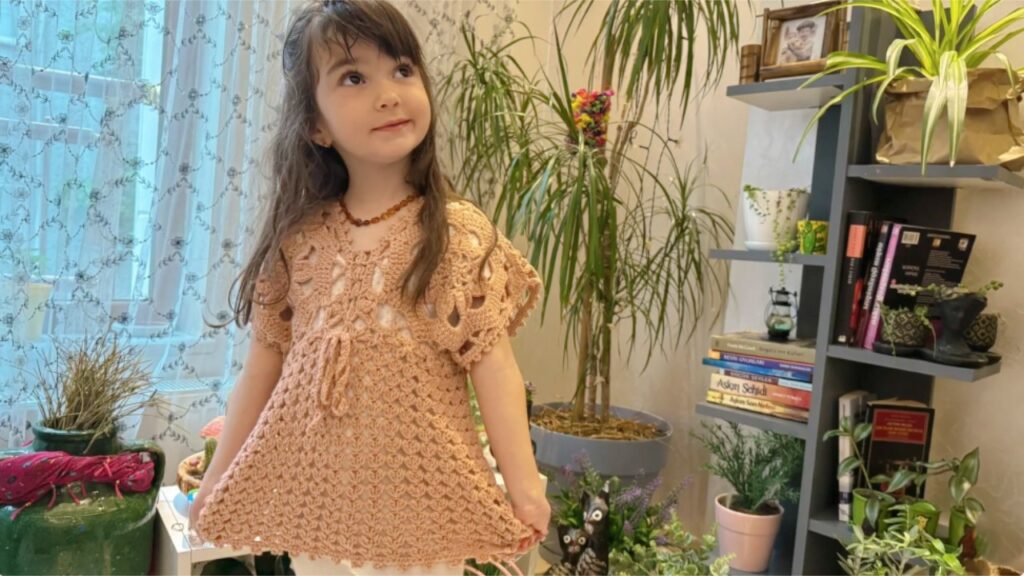
Design overview
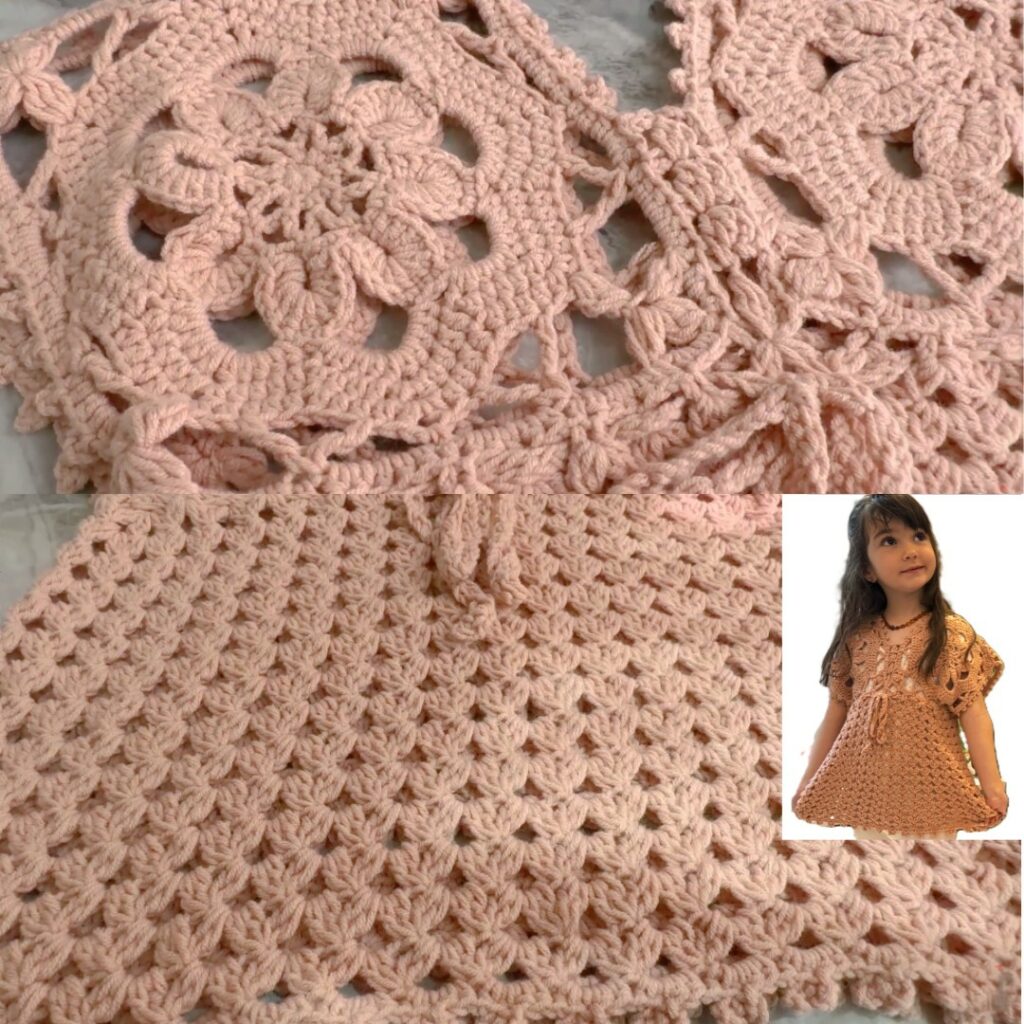
- Motifs are round → squared (flower/petal center grown to a 4-sided motif).
- Blouse built from identical motifs joined as a simple grid: front and back panels.
- Crop length is adjustable by motif rows; straps/short sleeves are optional motif additions or simple crocheted bands.
Make one motif first (very important)
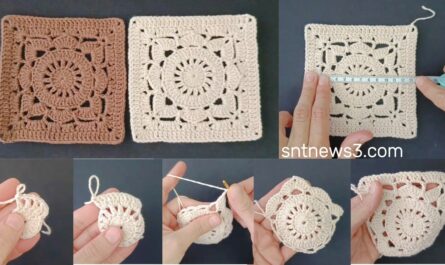
Work one motif, block it to final shape and measure:
- W = blocked motif width across flats (cm).
- Weigh the motif (grams) to estimate yarn. Save these numbers.
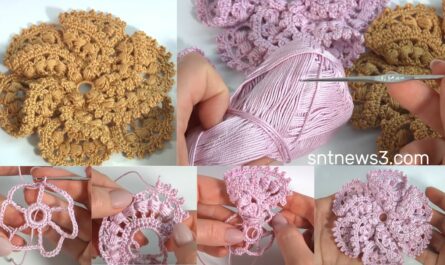
Motif — round-by-round (exact pattern)
Work loosely for nice lace. This pattern makes 12 petals and squares them into 4 sides.
R1 — center
- Magic ring. ch 3 (counts as dc), work 11 dc into ring (12 dc total). Tighten ring. Join with sl st to top of ch-3.
R2 — anchors
- ch 1, sc in next dc, ch 3 — rep around (12 sc + 12 ch-3 loops). Join.
R3 — small petals
- Sl st into first ch-3 loop. Into each loop work: (sc, ch1, hdc, 3 dc, hdc, ch1, sc). Repeat (12 petals). Join.
R4 — small connector
- ch 1, sc in outer sc of petal, ch 4 (or ch 5 for airier) — rep around (12 ch-4/5 arches). Join.
R5 — large fans (alternate)
- Into every other arch work (sc, ch1, hdc, 5 dc, hdc, ch1, sc) (big fan).
- Into the remaining arches work (sc, ch3, sc). Join.
R6 — tall loops
- ch 1, sc in first sc, ch 7, sc in next sc — rep around (12 ch-7 loops). Join.
R7 — top small fans
- In each ch-7 loop work (sc, ch2, 3 dc, ch2, sc). Join.
R8 — squareing (create 4 sides)
You have 12 top fans. Make 4 sides with 3 fans each and form 4 corner ch-3 spaces:
- ch 3 (counts as dc), 3 dc in next top fan space; 3 dc in next top fan space; in the third top fan of the trio work (3 dc, ch 3, 3 dc) (corner).
- Repeat the [3dc, 3dc, corner] ×4 to use all 12 fan tops. Join.
R9 — tidy sc (join round)
- ch 1, sc evenly around; place 3 sc in each corner ch-3 to round it. Join.
- Optional R10: skip 2 sc, 5 dc in next sc, skip 2 sc, sc in next sc — scallop edge. Fasten off and block.

Blocking & measuring
- Wet or steam-block each motif to the same dimensions. Pin square and let dry.
- Measure W (cm) across flats and weigh motif (g). Those numbers let you calculate motif counts and yarn.
Calculate motif counts for your blouse
Decide finished bust (with ease) and crop height. Use these formulas:
motifs_across_total = round(finished_bust_cm / W)motifs_down = round(desired_body_height_cm / W)total_motifs = motifs_across_total × motifs_down
Split across front/back: front_motifs_across ≈ round(motifs_across_total/2) (adjust to center neck/gap).
Example (W = 10 cm, finished bust = 96 cm, desired height = 20 cm):
- motifs_across_total ≈ 96/10 = 9.6 → 10 motifs across (front 5 + back 5)
- motifs_down ≈ 20/10 = 2 rows
- front panel = 5×2 = 10 motifs; back = 5×2 = 10 motifs → total 20 motifs (+ 2–4 spare).
Make all motifs
- Work in assembly-line batches (R1×N, R2×N, …) for speed.
- Block in small groups so sizes stay uniform.
Joining motifs (recommended: JAYG)
Join-as-you-go while doing R9 (the sc round). This gives flat seams and minimal sewing.
Simple JAYG rule
When your new motif’s R9 reaches a position adjacent to an already finished motif, replace the plain sc with:
sc in your motif stitch, ch 1, sl st into the corresponding sc (or corner) of the finished neighbor, ch 1
- For joining to two neighbors at a corner: sl st into each neighbor’s corner ch-3 (space with ch-1 between sl sts).
- Build the first row left→right (no joins for the very first motif). For next rows join each new motif to the one above and left as you progress.
Tips
- Pin motifs before joining to align petals.
- If joins pull, use ch-2 instead of ch-1 for a bit more slack.
Alternative: sew motifs after blocking with mattress stitch (back loop only) for a flatter seam but more sewing.
Shoulder/neck shaping (easy)
- After panels are joined, shoulder seam width typically 9–12 cm (adult S/M). Mark center top for neck opening. Leave that many motif widths open or partially unjoined to create the neck. Example: leave 1–2 motif widths (or half motifs) for a scoop neck. Pin and try on before permanently joining.
Side seams & armholes
- Seam sides up from hem to the place where you want the armhole to start (leave 1 motif height or a half-motif height free if making short cap sleeves).
- Option: add 1–2 small motifs beside shoulder to make short motif cap sleeves.
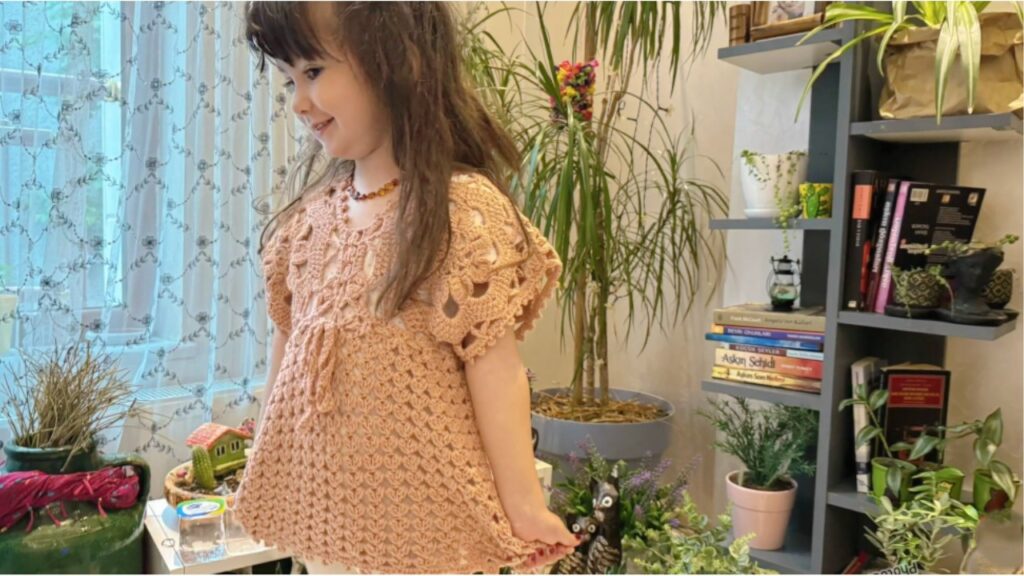
Straps / short sleeves / finishing options
- Straps: crochet a flat strap (ch 60–80, sc back) or make narrow motif strips (1–2 motifs long). Sew/tie at shoulders.
- Cap sleeve: add a row of motifs around top of armhole and seam the outer half.
- Button front: add narrow button band after seaming: pick up sts and sc 2–3 rounds; make button loops (ch 3) or sew buttons.
Neckline & edge finishing
- Pick up stitches around neck and front opening. Do 1 round sc evenly (place 3 sc in corners).
- Optional second round: scallop/shell: skip 2 sc, 5 dc in next sc, skip 2, sc — gives a delicate finish.
- Armhole finishing: sc 1-2 rounds around each hole; optional small shell round.
Yarn estimate (accurate method)
- Weigh one blocked motif (g).
Yarn grams ≈ total_motifs × g_per_motif + 10–15%(joins, edge, straps).- Convert to skeins by label weight.
Example: g_per_motif 10 g × 22 motifs = 220 g + 15% ≈ 253 g → buy 300 g to be safe.
Blocking & final touches
- Block the assembled blouse pinned to final measurements so seams relax and motifs sit flat.
- Weave in ends on WS; secure straps/buttons.
- Light steam block after sewing straps to keep shape.
Troubleshooting & tips
- Motifs mismatched size: block again; if a motif remains smaller add an extra sc round to enlarge it.
- Seams pucker: join more loosely (ch-2 joins) or sew with mattress stitch through back loops only.
- Edges ripple: add a sc stabilizing round before decorative shells.
- Neck too small: unpick shoulder seam and leave more motifs unjoined at center; try on before final seam.
- Want more coverage: add another motif row to body (longer crop or full top).
Variations & styling ideas
- Two-color motifs: center one color, outer rounds another → pretty floral pop.
- Ombre blouse: make motifs in color gradation (dark at bottom → light at top).
- Add lining: sew in a lightweight camisole for modesty.
- Fringe hem: attach short fringe around hem for boho look.
Quick project checklist
- Make 1 motif → block, measure W and weigh g.
- Calculate motif counts for front & back using formulas.
- Batch-make motifs and block.
- Join motifs row by row (JAYG recommended).
- Seam shoulders & sides, add straps/finishing.
- Add edging, final block, weave ends.
VIDEO: