by
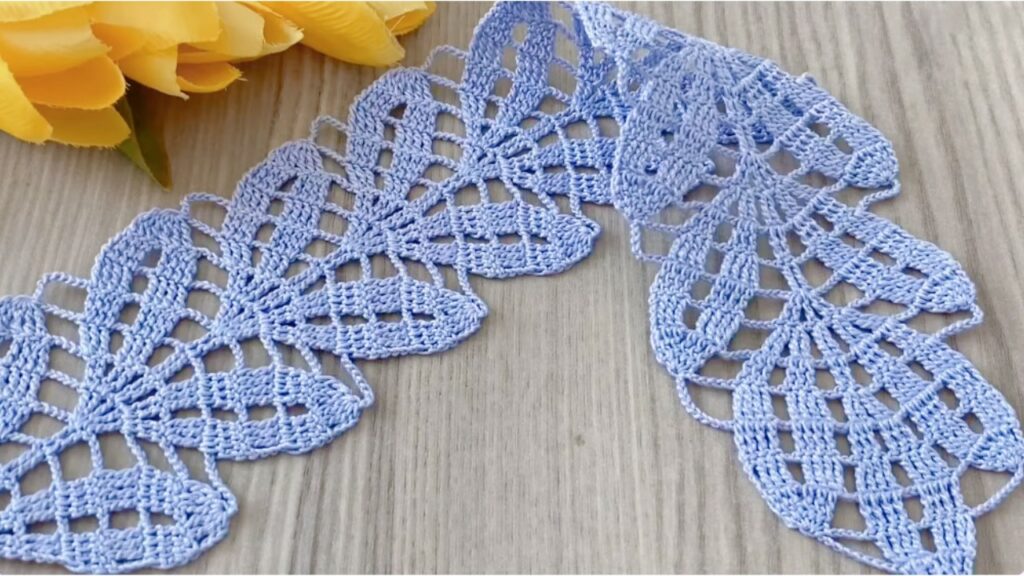
by 🌿 Gorgeous Leaves — Multi-Purpose Lace Edge Pattern (step-by-step)
Nice choice — here’s a clear, beginner-friendly step-by-step text tutorial for a leafy lace edge inspired by Crochet with Nese. This pattern is written so you can use it as:
- a decorative edge for blankets, shawls, table linens or blouses,
- a repeating border strip that can be joined into runners, or
- an individual leaf motif (use several as appliqués or join into a panel).
I include exact stitch repeats, checks after each round, blocking and simple variations.
Tools & materials
- Yarn: fingering → DK (use cotton for crisp edge, acrylic/wool for drape).
- Hook: 2.5–4.5 mm depending on yarn (use recommended hook on yarn label, adjust for desired look).
- Notions: tapestry needle, blocking pins, scissors.
Abbreviations (US terms)
- ch = chain
- sl st = slip stitch
- sc = single crochet
- hdc = half double crochet
- dc = double crochet
- tr = treble crochet
- sk = skip
- st(s) = stitch(es)
- sp = space
- pic = picot (ch 3, sl st into base)
- rep = repeat
Pattern concept (how it sits on an edge)
Work the edge along the finished row of your piece (or along a foundation chain if making a border strip). The basic leaf unit spans a small number of base stitches (I use a multiple of 6 + 2 for convenience). Each leaf is made from a chain loop filled with tall stitches to form the leaf shape, separated by small connector stitches so the leaves flow along the edge.
Gauge & repeat
- Repeat multiple: 6 + 2 (i.e., ch 8, ch 14 etc for a sample edge).
- One leaf unit ≈ 3–4 cm across with DK yarn + 4.0 mm hook (depends on yarn/hook).
FOUNDATION (attach to finished fabric edge)
Option A — working onto a finished piece:
Work a row of sc evenly along the edge of the fabric (this gives a tidy base to attach leaf units). Count sts and plan leaves so they space evenly.
Option B — make a border strip (start from a chain):
ch a multiple of 6 + 2 (for example ch 38 for 6 leaf units: 6×6 =36 + 2 = 38). Work one row of sc across chain to make a base row, then begin the leaf rounds.
LEAF EDGE — Round-by-Round (worked along base sc row)
Round 1 — base row (if you started on a chain)
If you chained (Option B): sc in 2nd ch from hook and across — one sc per chain. Turn. This is the base row you’ll attach leaf units to.
If working onto fabric: ensure you have a neat base row of sc or evenly spaced attachment loops.
Round 2 — set leaf spacing (attach points)
- sc in next 2 sts, ch 3, sk 2 sts, sc in next st — repeat across.
- This forms small connector points where leaf loops will be attached. Adjust spacing (sc counts) to fit your fabric edge.
- End with sc in last st. Turn/leave work ready for leaf loops.
Check: you should have a small ch-3 loop every 3–4 stitches along the edge — roughly one per leaf.
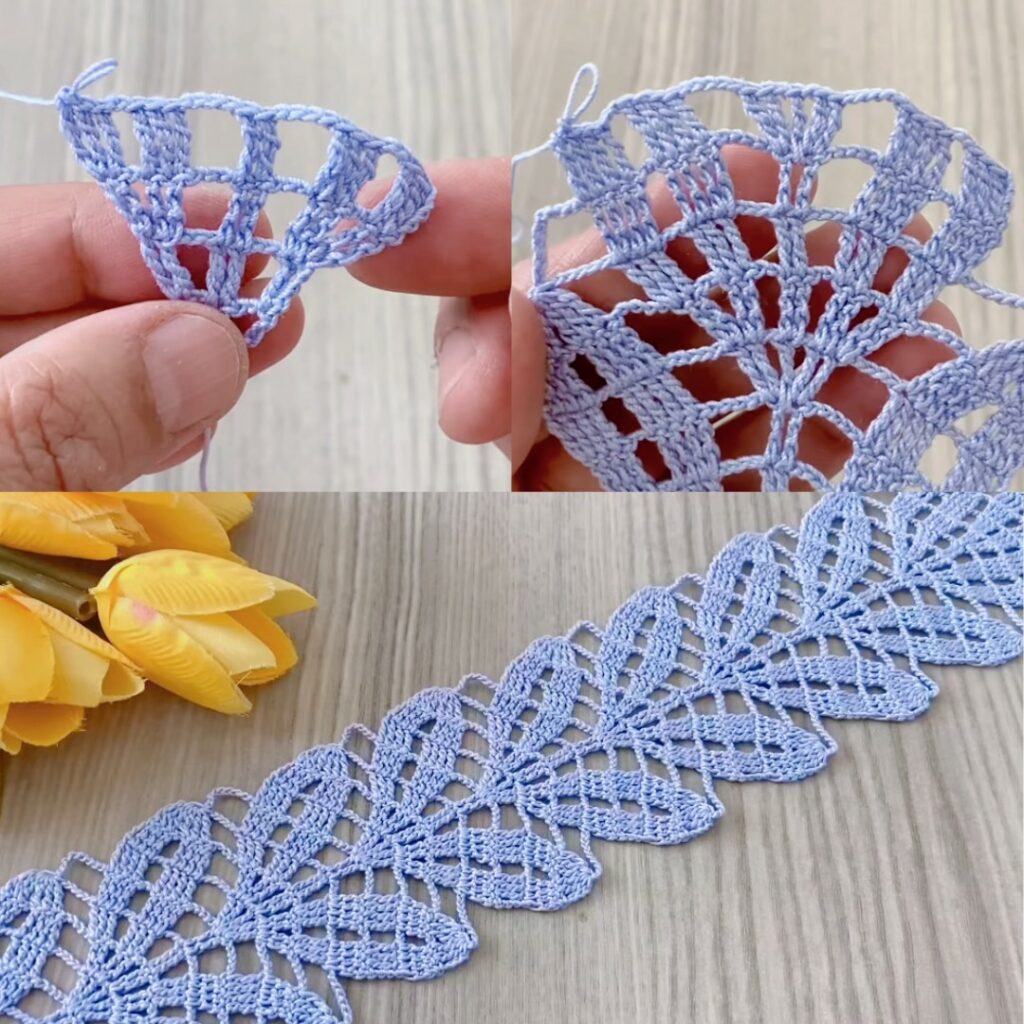
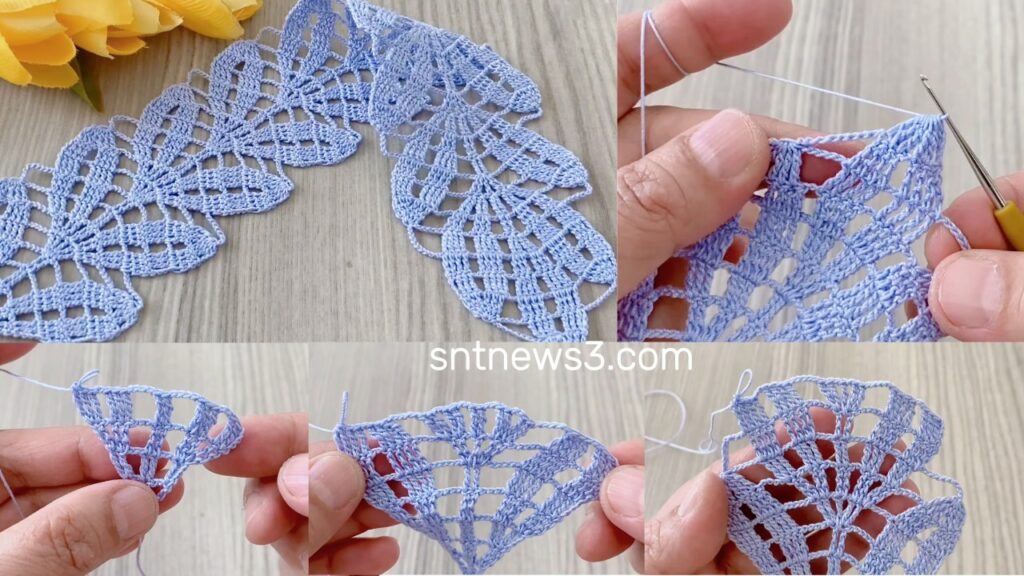
Round 3 — Leaf body (worked into each ch-3 / chosen attachment point)
For each ch-3 loop (or chosen attachment st) work the leaf:
- Into the ch-3 loop: sc, hdc, 3 dc, tr, 3 dc, hdc, sc — all into the same small loop/space.
- This creates a tapered leaf with a taller center (tr = leaf midrib).
- Slip-stitch into the next base sc to anchor, sc in next sc, ch 3, skip 2 (or anchor the next ch-3) and repeat leaf in the next loop.
- Continue across the row.
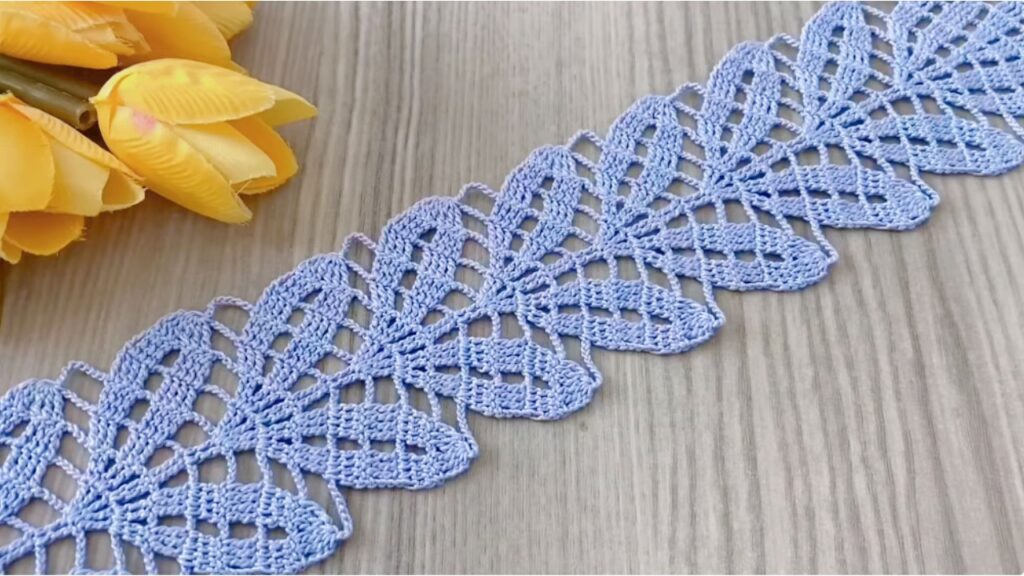
Check: after Round 3 you should see a series of small leaves with pointed tips (tr in middle) separated by one or two small sc/ch-3 connectors.
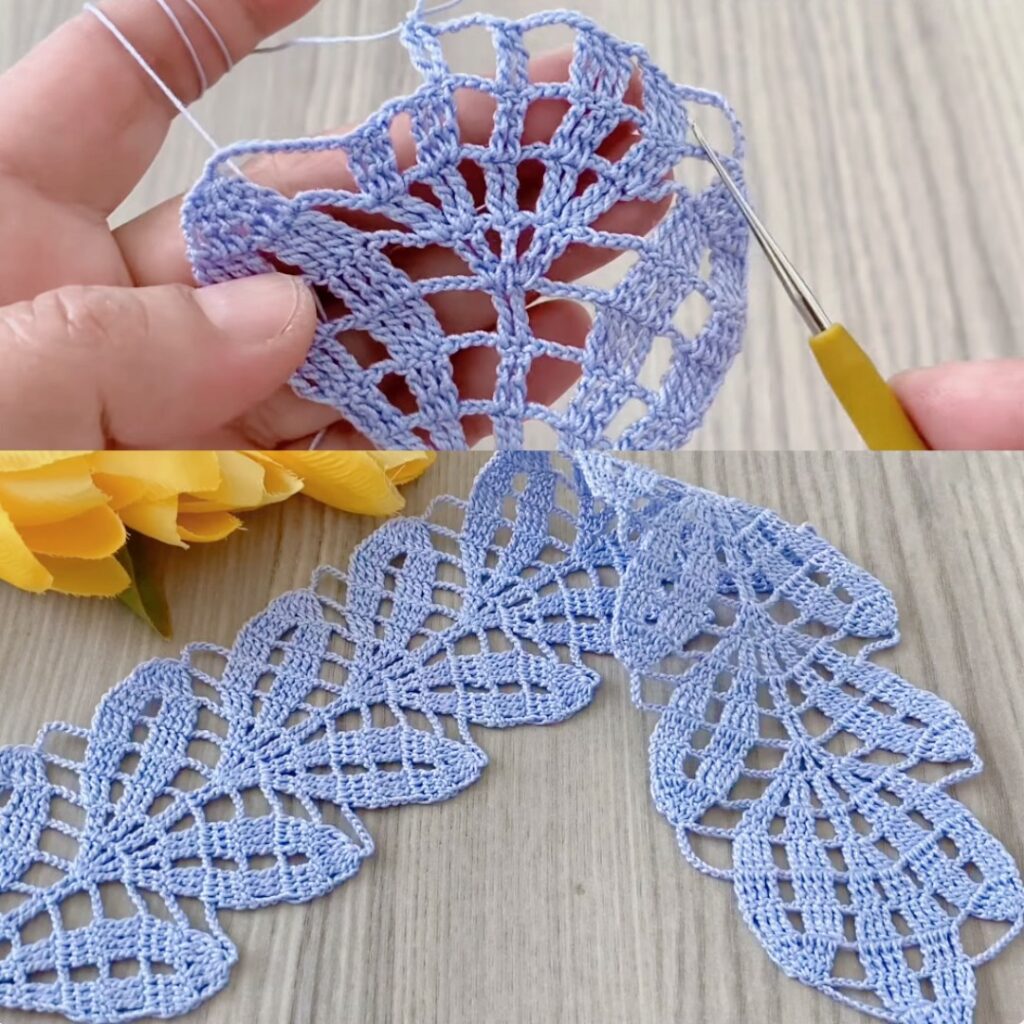
Round 4 — Leaf shaping & outer scallop
- Re-attach at the base of any leaf. Working behind/around the tips, sl st into the top of the leaf tip (between the 3dc/tr/3dc), ch 4, sl st back into same place to make a tiny picot/loop on the tip (optional).
- Then sc 2 across the joining space between leaves, sc into base between leaves to tidy the base. Repeat along edge.
- Finish with a final sl st and fasten off.
Optional variation for a lacy scallop: instead of small picots on tips, make (sc, ch 3, sc) across the outside curve (gives a rounded scallop between leaves).
Simple Edge (faster, fewer stitches)
If you want a quicker version:
- Round A: sc in next 3, ch 5, sc in next 3 — this makes a loop every few stitches.
- Round B (leaf): Into ch-5 loop work sc, hdc, 5 dc, hdc, sc. Anchor with sc to base. Repeat.
This is less pointed and produces a fuller leaf.
Joining into a continuous border around a project
- Work the leaf repeat along one side. At corners, make a corner increase: ch 6 loop (corner) and work 2 leaf units anchored into that corner loop so your border turns the corner gracefully. Continue along next side.
- For circular/oval edges, adjust ch counts on the corner to shape the curve (smaller ch loop = tighter corner).
Using as a strip (runner / band)
- Make a long strip of the base chain + leaf edge. Block flat, then join strips end-to-end with mattress stitch or by crocheting a joining round (sc across one strip meeting the other with sl st joins).
Using leaves as individual appliqués / motifs
If you prefer an isolated leaf motif (for appliqué or joining into panels):
- Make a magic loop, ch 5. Round 1 into loop: sc, hdc, 3 dc, tr, 3 dc, hdc, sc. Pull loop closed. Fasten off and block flat. You now have a single leaf that can be sewn on.
Finishing & Blocking
- Lightly block the edge by pinning each leaf so the points are sharp and the outer curve is even. Spray with water and allow to dry.
- For a crisper edge (table runner/ doily), block and apply light starch or fabric stiffener after drying.
Troubleshooting & tips
- Leaves cup: increase picot/outer chain length slightly or block more firmly. If still cupping, loosen tension (use larger hook) for the leaf rounds.
- Leaves flatten too much / lose point: shorten the central tr (replace tr with dc) or reduce outer dc counts (use 1–2 fewer dc per side).
- Edge waves: adjust spacing on the base row — fewer leaves per inch (increase sc between leaf anchors) to remove fullness.
- Want more texture: replace central tr with 2 tr or make the middle dc cluster 5 → fuller leaf.
Variations & styling ideas
- Delicate lace: use finer yarn and smaller hook; reduce dc counts (3 dc → 1 dc per side) for a petite scallop.
- Bold leaves: use thicker yarn, larger hook, and increase 3 dc → 5–7 dc per side for dramatic leaves.
- Two-colour edge: work base row in background color; switch to contrast for leaf rounds so leaves pop.
- Fringed runner: after finishing leaves, attach long chain fringes between leaf anchors for boho runner.
- Edging for sleeve/neckline: scale down (fewer dc) and use smaller hook for a subtle decorative trim.
Quick stitch summary (compact)
- Foundation: base sc row.
- Leaf repeat (per anchor): sc, hdc, 3 dc, tr, 3 dc, hdc, sc into loop/attachment. Anchor with sl st into next base st.
- Outer finish: small picot or ch-3 loop on tip + sc across base.
VIDEO: