 by
by 👉 US crochet terms
👉 Explained slowly, clearly, and with many words so beginners feel confident
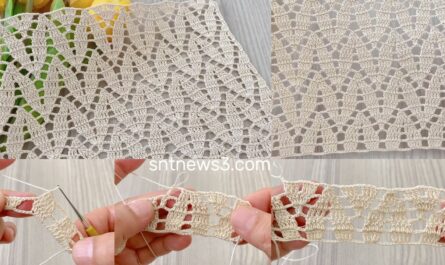
This square motif is simple, elegant, and very useful.
You can use it for blankets, shawls, blouses, tunics, scarves, runners, pillow covers, and many more projects.
Please read through once before starting 🌸
🧶 MATERIALS (BEGINNER FRIENDLY)
Choose light-colored yarn so stitches are easy to see.
- Yarn:
- Sport (No.2) or DK (No.3)
- Cotton or cotton blend recommended
- Hook: 3.0 – 4.0 mm (check yarn label)
- Scissors
- Yarn needle
📘 BASIC CROCHET ABBREVIATIONS (US TERMS)
Keep this list nearby:
- ch = chain
- sl st = slip stitch
- sc = single crochet
- hdc = half double crochet
- dc = double crochet
- sp = space
- corner sp = corner space

📌 IMPORTANT NOTES FOR BEGINNERS
- Work slowly and relax your hands
- Always count your stitches
- Corners are made with chain spaces
- If your square curls → use a bigger hook
- If your square waves → use a smaller hook
📏 FINISHED SIZE
- About 8–11 cm (3–4 inches)
- Size changes depending on yarn and hook
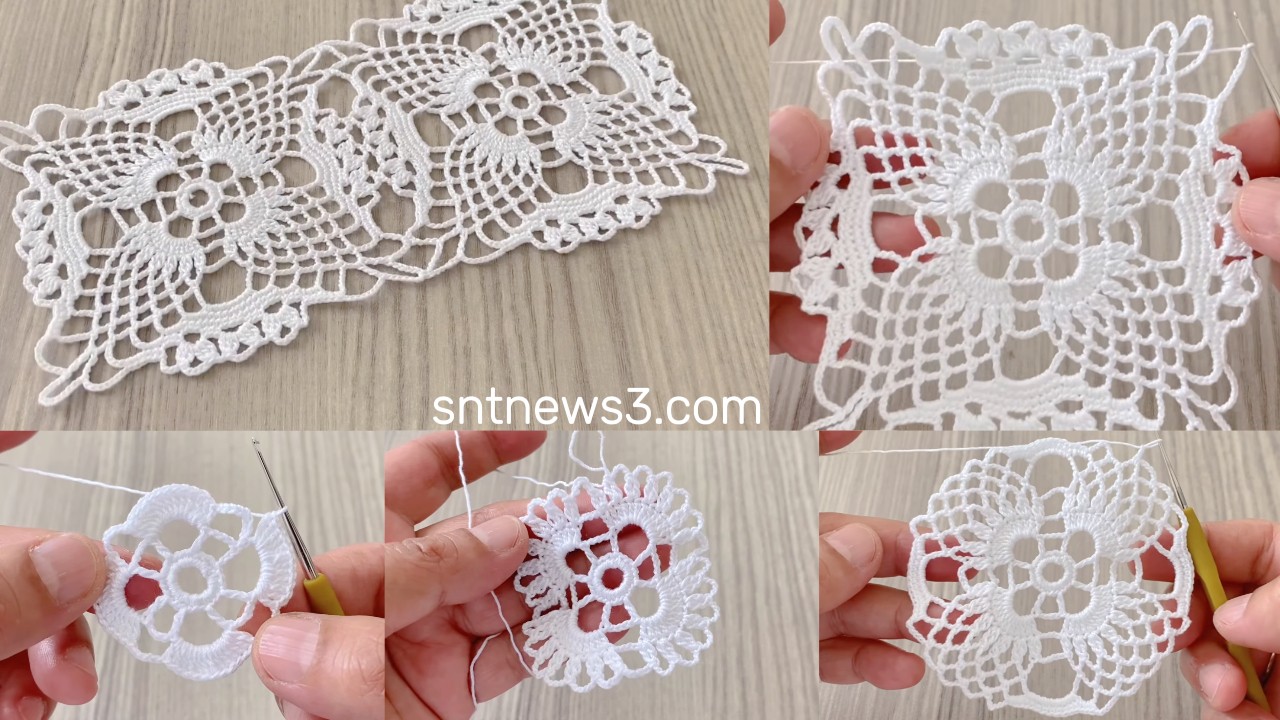
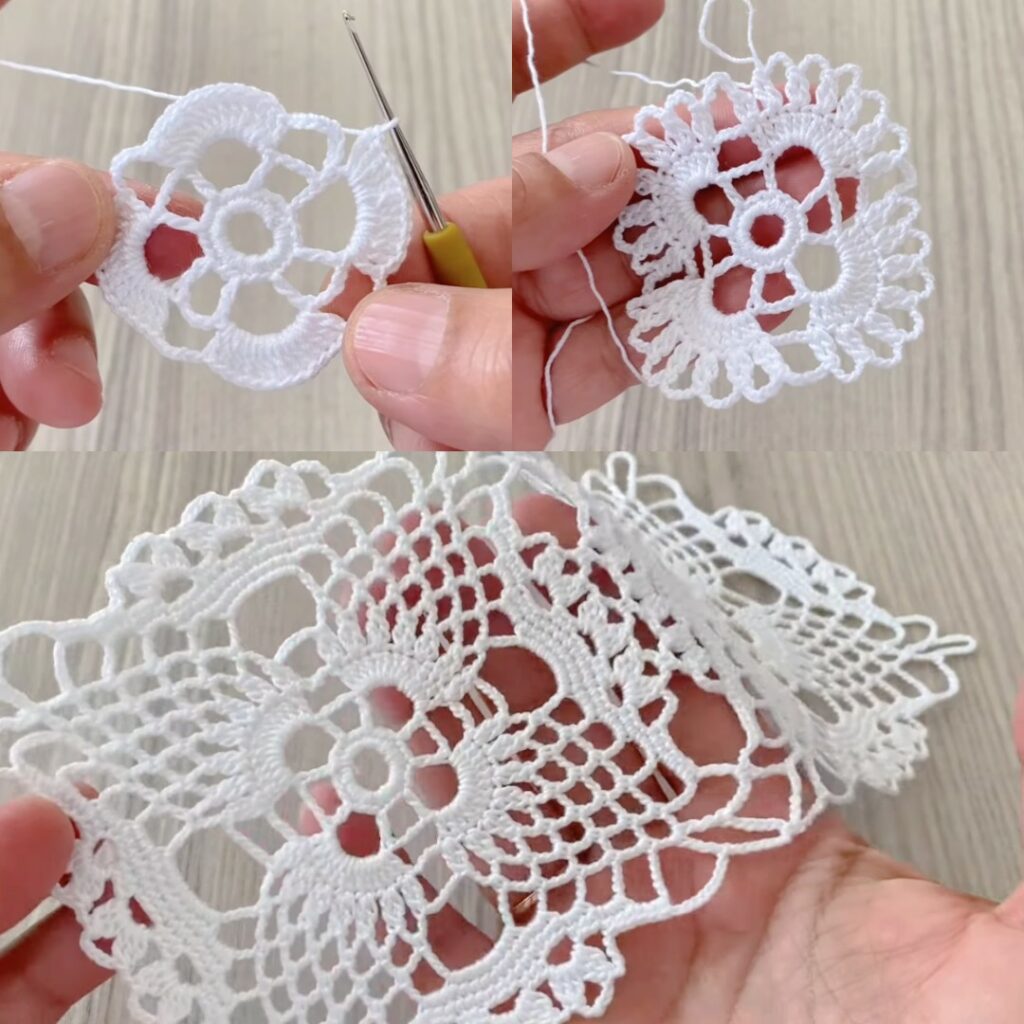
🟢 ROUND 1 – MAKE THE CENTER CIRCLE
This round creates the starting center.
Option 1 – Magic Ring (recommended)
- Make a magic ring
- Ch 3 (counts as first dc)
- Work 11 dc into the ring
- Pull ring tight
- Sl st into the top of ch 3 to close
Option 2 – Chain Ring
- Ch 4
- Sl st into first chain to form a ring
- Ch 3
- Work 11 dc into ring
- Sl st to join
✅ You now have 12 dc in a circle

🟡 ROUND 2 – CREATE THE FOUR CORNERS
This round turns the circle into a square shape.
- Ch 3 (counts as dc)
- Dc in same stitch
- Ch 2 (this forms a corner)
- 2 dc in next stitch, ch 2
- Repeat * to * around
- Sl st into top of ch 3
✅ You now have 4 corners, each made with ch-2 spaces
🟡 ROUND 3 – BUILD THE SQUARE SIDES
This round makes the square very clear.
- Sl st into the first corner space
- Ch 3
- Dc, ch 2, 2 dc in same corner space
- *Dc in next 2 stitches
- In next corner space: (2 dc, ch 2, 2 dc)*
- Repeat * to * around
- Sl st to join
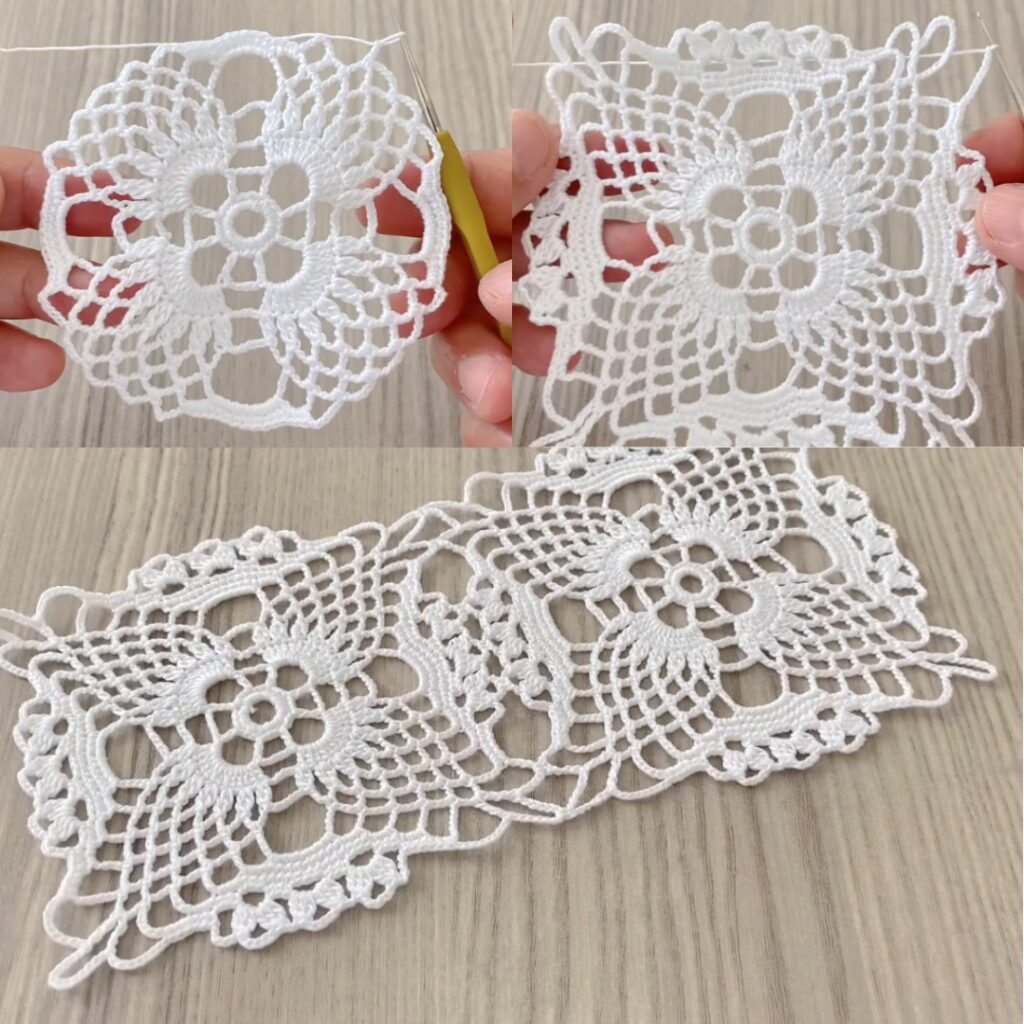
🟡 ROUND 4 – ELEGANT DECORATIVE ROUND
This round adds beauty but stays beginner-safe.
- Sl st into corner space
- Ch 3
- Dc, ch 2, 2 dc in same corner
- *Dc in each stitch across side
- In corner space: (2 dc, ch 2, 2 dc)*
- Repeat * to * around
- Sl st to finish
✅ Your square is now flat, neat, and elegant

🟡 ROUND 5 – OPTIONAL SIMPLE BORDER
This round makes joining squares easier.
- Ch 1
- Sc in each stitch around
- In each corner space: (sc, ch 1, sc)
- Sl st to close
✨ OPTIONAL DECORATIVE PICOT EDGE
For a pretty finish:
- Sc, ch 3, sl st into same stitch
- Repeat around
🪡 BLOCKING (VERY IMPORTANT)
Blocking makes your square look perfect.
- Lightly wet or steam the square
- Gently stretch into a square shape
- Pin corners if possible
- Let dry completely
🧵 HOW TO JOIN THE SQUARES
Easy Methods for Beginners:
- Sewing: whip stitch or mattress stitch
- Crochet join: slip stitch join or single crochet join
👗 WHAT CAN YOU MAKE?
✔ Blanket
✔ Shawl
✔ Blouse
✔ Tunic
✔ Cushion cover
✔ Table runner
🌸 VERY HELPFUL BEGINNER TIPS
- Use stitch markers in corners
- Count stitches every round
- Practice with scrap yarn first
- Light colors show stitches better
- Don’t worry if the first square is not perfect 💛
🌈 EASY VARIATIONS
- Bigger square → add more rounds
- Lacy look → add chain spaces
- Thicker look → use hdc instead of dc
- Colorful style → change color each round
❤️ YOU CAN DO THIS
This square motif is:
- Easy
- Elegant
- Very useful
Even if you are a complete beginner, you can make this 💕
VIDEO: