 by
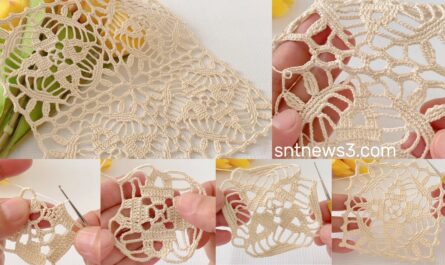
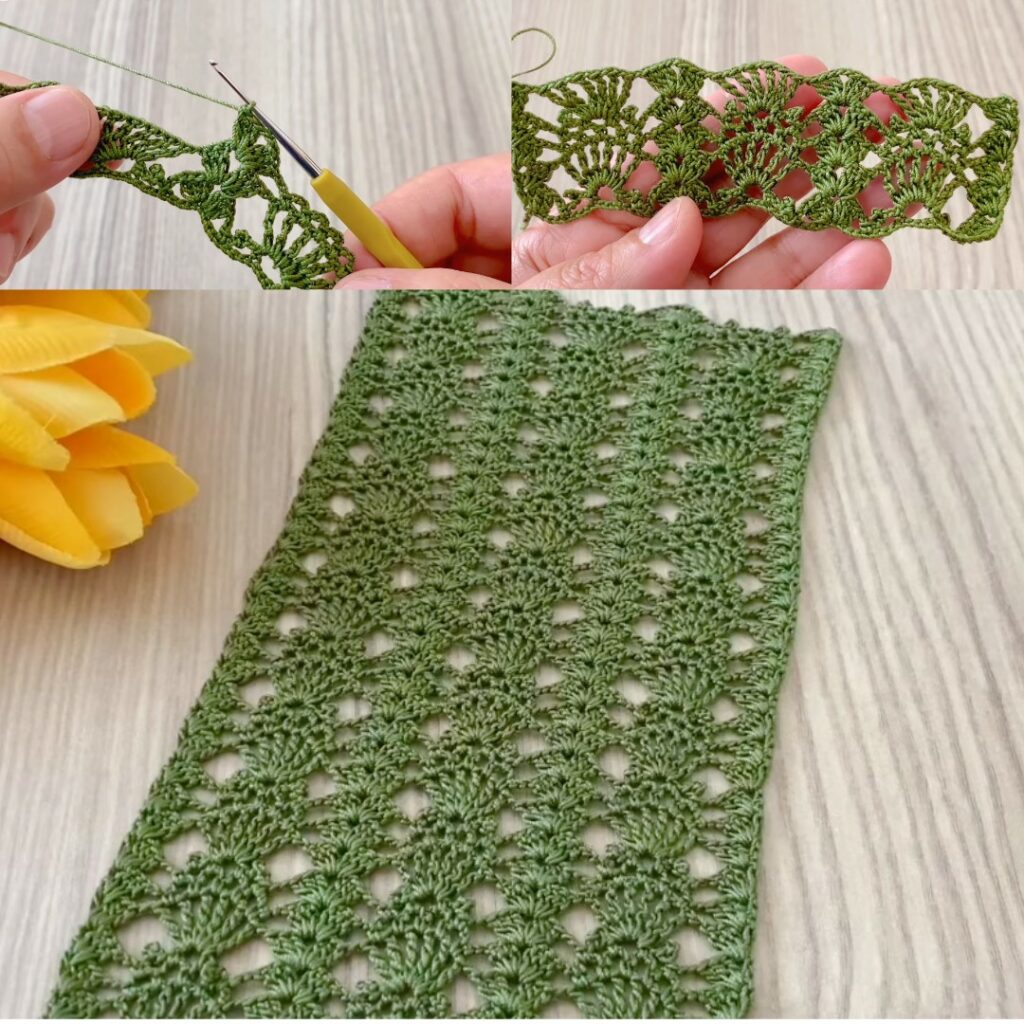
by This pineapple pattern looks very elegant and professional, but it is actually made with simple stitches repeated in a calm order.
Perfect for shawls, runners, blouses, scarves, tablecloths, and lace panels.
Please read once fully before starting 🌸
🧶 MATERIALS (BEGINNER-FRIENDLY)
Choose light yarn so you can see stitches clearly.
- Yarn:
- Sport (No.2) or DK (No.3)
- Cotton or cotton blend is best for pineapple lace
- Hook: 3.0 – 4.0 mm (match yarn label)
- Scissors
- Yarn needle

📘 CROCHET ABBREVIATIONS (US TERMS)
Please keep this list near you:
- ch = chain
- sl st = slip stitch
- sc = single crochet
- dc = double crochet
- sp = space
- ch-sp = chain space
- rep = repeat
📌 VERY IMPORTANT NOTES FOR BEGINNERS
- Pineapple patterns are made with chains and dc only
- The shape grows gradually, do not rush
- Count chain spaces, not stitches
- If fabric curls → use bigger hook
- If fabric waves → use smaller hook
- This pattern repeats row by row
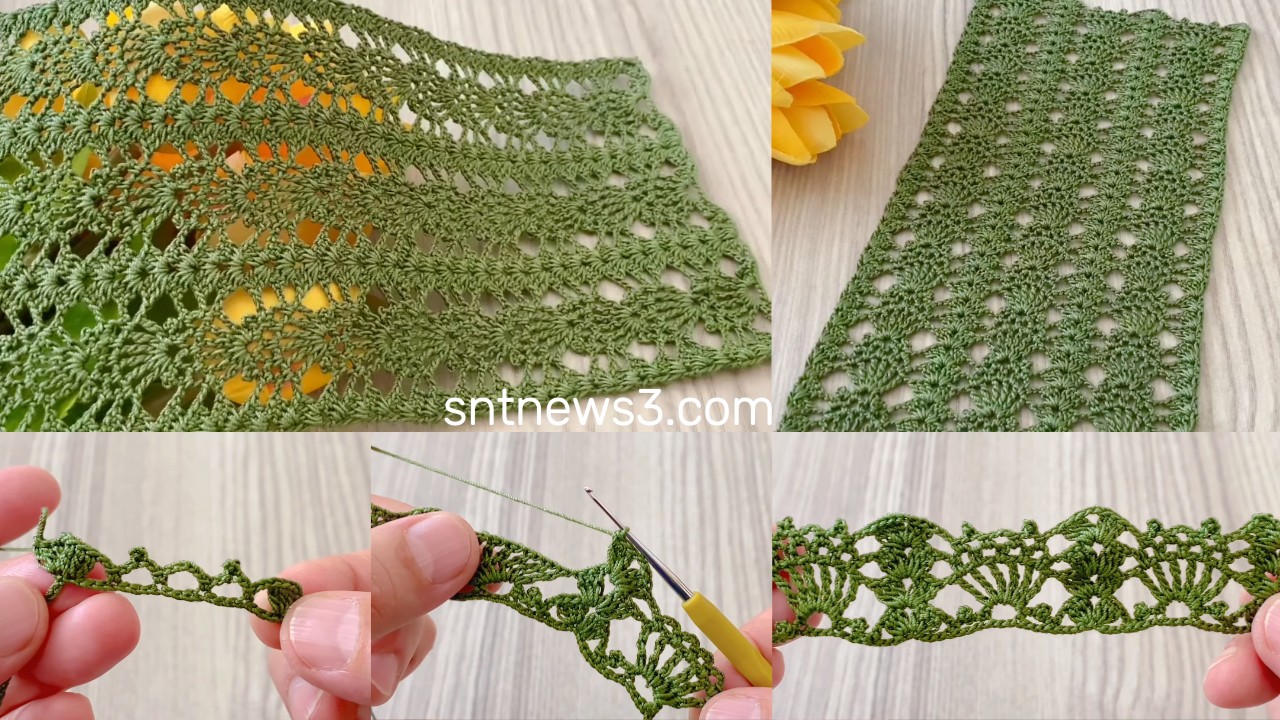
🔗 FOUNDATION CHAIN
Chain a multiple of 6 + 1
Examples
- Small sample: ch 31
- Runner: ch 181
- Shawl panel: ch according to width
🌟 ROW 1 – BASE SETUP ROW
This row prepares spaces for pineapples.
- Dc in 4th chain from hook
- Ch 2, skip 2 chains, dc in next chain
- Repeat * to * across
- End with dc in last chain
- Ch 3, turn
✅ You have dc posts separated by chain-2 spaces
🌟 ROW 2 – START OF PINEAPPLE FRAME
- Dc in first dc
- Ch 2, dc in next dc
- Repeat across
- Ch 3, turn
👉 This row keeps spacing neat and even
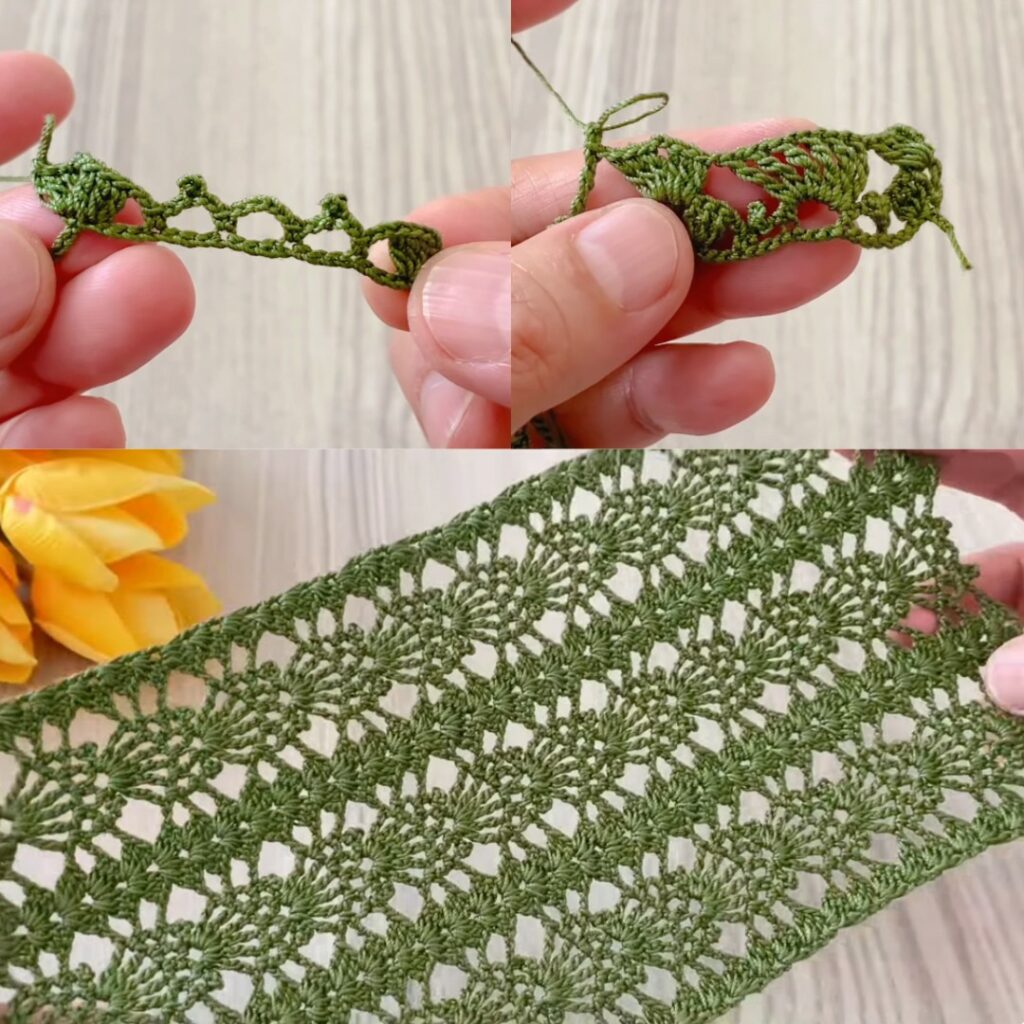
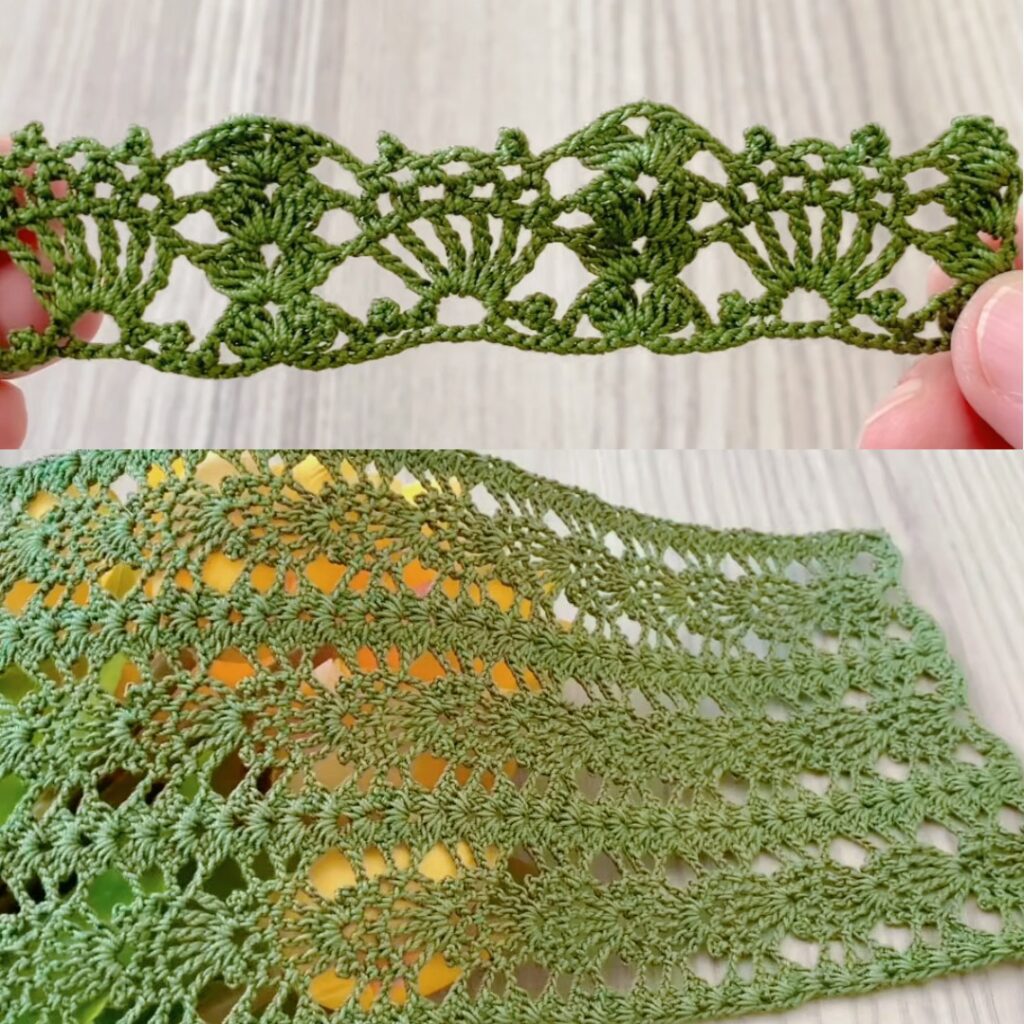
🍍 ROW 3 – BEGIN PINEAPPLE SHAPE
Now the pineapple shape begins forming.
- Dc in first dc
- Ch 3
- Skip next dc, dc in next dc
- Ch 3, skip 1 dc, dc in next dc
- Repeat across
- Ch 3, turn
✅ Larger chain spaces start shaping pineapple sides
🍍 ROW 4 – GROWING THE PINEAPPLE
- Dc in first dc
- Ch 4
- Skip next dc, dc in next dc
- Repeat across
- Ch 3, turn
🌸 Pineapple body is becoming visible
🍍 ROW 5 – WIDEST PART OF PINEAPPLE
This is the largest opening.
- Dc in first dc
- Ch 5
- Skip next dc, dc in next dc
- Repeat across
- Ch 3, turn
✅ Pineapple is now at its fullest width
🍍 ROW 6 – START CLOSING THE PINEAPPLE
Now we slowly close the shape.
- Dc in first dc
- Ch 4
- Skip next dc, dc in next dc
- Repeat across
- Ch 3, turn
🍍 ROW 7 – CLOSING MORE
- Dc in first dc
- Ch 3
- Skip next dc, dc in next dc
- Repeat across
- Ch 3, turn
🍍 ROW 8 – FINISH THE PINEAPPLE
- Dc in first dc
- Ch 2
- Skip next dc, dc in next dc
- Repeat across
- Ch 3, turn
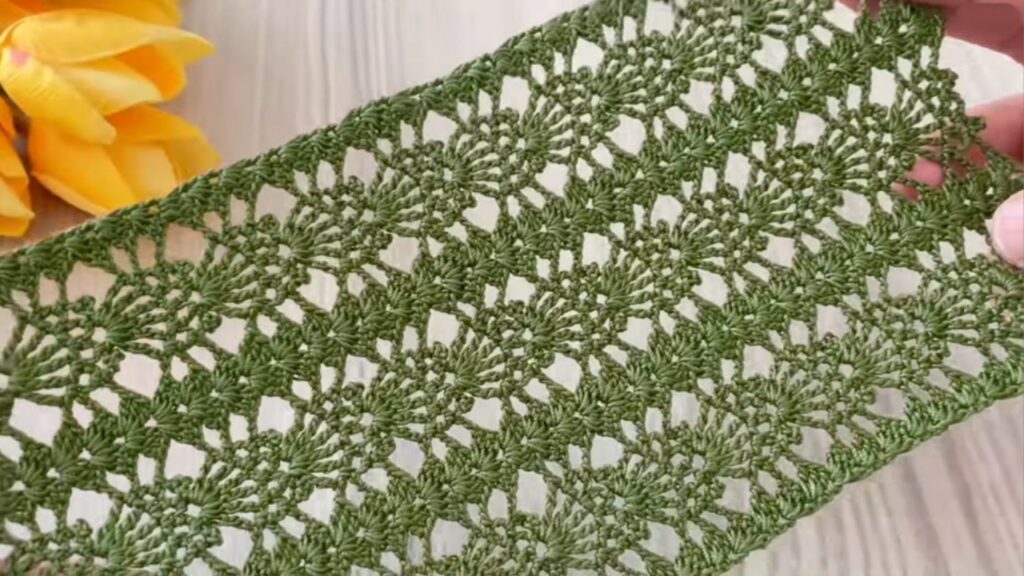
✅ One full pineapple motif is complete 🎉
🔁 PATTERN REPEAT
To continue the design:
- Repeat Rows 3 to 8
- Each repeat creates new pineapples
🌿 OPTIONAL EDGE (BEGINNER SAFE)
Simple Clean Edge
- Sc evenly around
- Corners: (sc, ch 2, sc)
Decorative Picot Edge
- Sc, ch 3, sl st into same stitch
- Repeat around
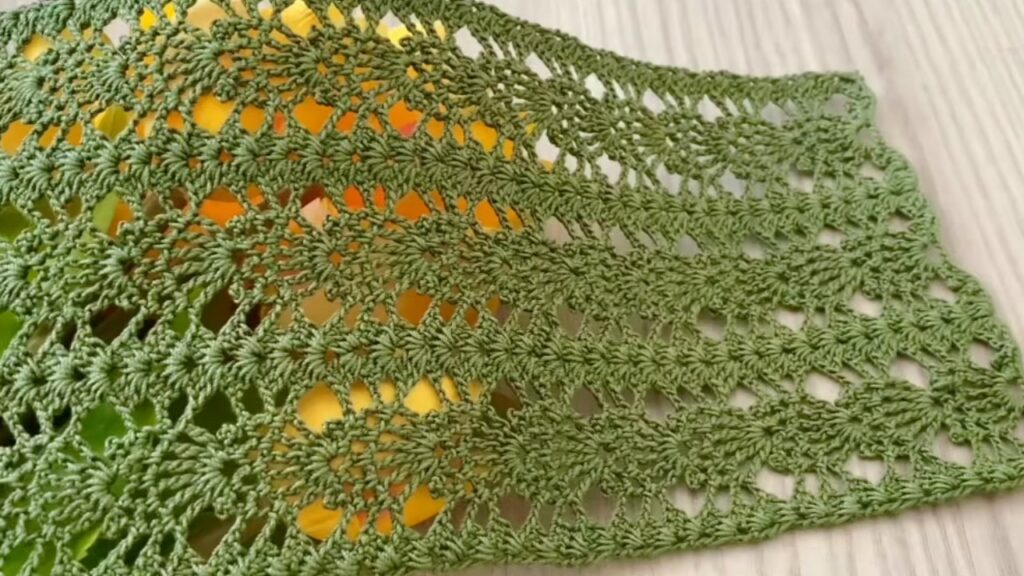
🪡 BLOCKING (VERY IMPORTANT FOR PINEAPPLE)
Pineapple lace must be blocked to look beautiful.
- Lightly wet or steam
- Stretch gently so pineapples open
- Pin edges and tips
- Let dry completely
✨ Blocking transforms your work!
👗 PROJECT IDEAS
✔ Shawl
✔ Table runner
✔ Blouse panel
✔ Curtain lace
✔ Scarf
✔ Bedspread strip
🌸 BEGINNER TIPS (PLEASE READ)
- Use stitch markers for pineapple centers
- Count chain spaces carefully
- Practice with small swatch first
- Don’t pull chains too tight
- Relax your hands 🧡
🌈 EASY VARIATIONS
- Bigger pineapple → add more chain rows
- Smaller pineapple → reduce max chain
- Dense fabric → replace ch-5 with ch-4
- Elegant look → use mercerized cotton
❤️ YOU ARE DOING GREAT
This pineapple pattern looks advanced, but you only used:
- Chains
- Double crochet
- Repeating rows
That means you CAN do this, even as a beginner 🌼
VIDEO: