 by
by ULL STEP-BY-STEP WRITTEN TUTORIAL (US TERMS)
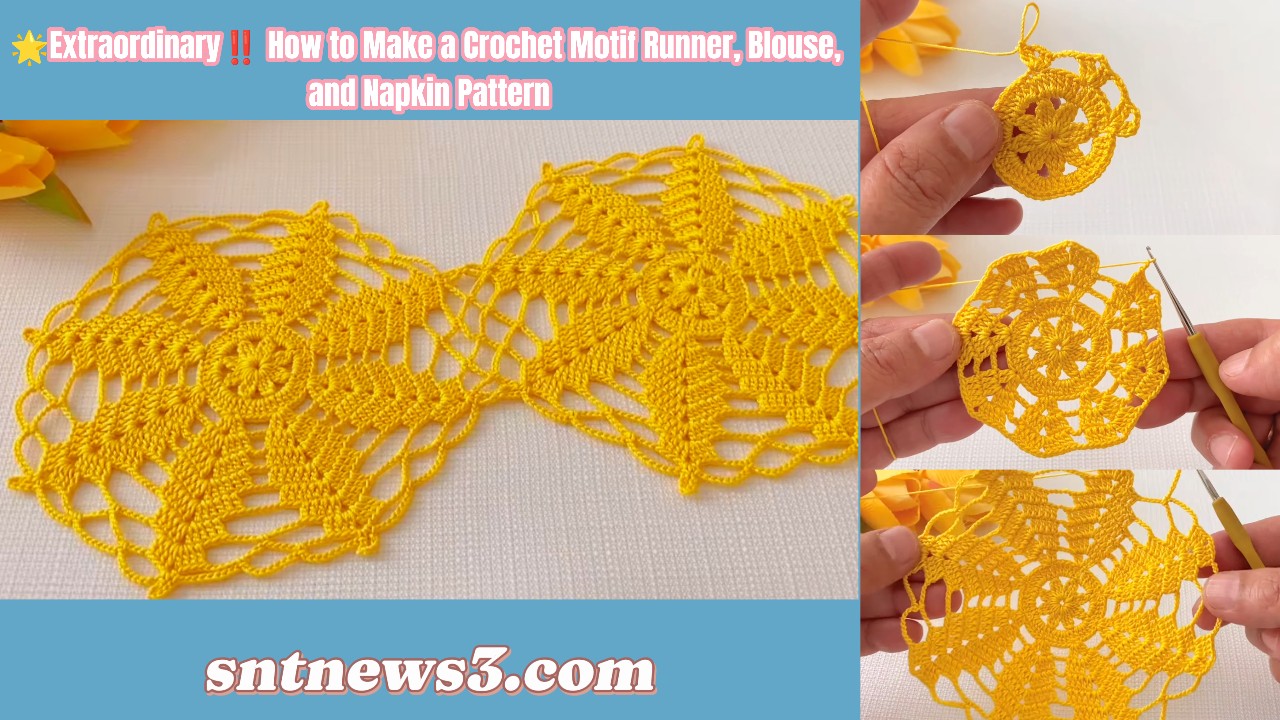
🌼 IMPORTANT: UNDERSTANDING THE PATTERN FIRST
This pattern:
- is worked in one piece
- looks like joined motifs, but is continuous
- uses fans, chain spaces, and connecting stitches
- stays flat and elegant
- is easy to resize in width and length
Once you understand the repeat, the pattern becomes relaxing and rhythmic.
📌 SKILL LEVEL
Beginner – Easy
(You only need chains, single crochet, and double crochet)
🧵 MATERIALS
- Yarn:
- Cotton yarn for runner or napkin
- Cotton / bamboo blend for blouse
- Light or medium yarn recommended
- Crochet hook:
- 3.0 – 4.0 mm (choose for soft drape)
- Scissors
- Tapestry needle
✂️ ABBREVIATIONS (US TERMS)
- ch = chain
- sl st = slip stitch
- sc = single crochet
- dc = double crochet
- sp = space
- sk = skip
- rep = repeat
📐 PATTERN MULTIPLE (VERY IMPORTANT)
This pattern works in a multiple of:
👉 8 + 2
Examples:
- 26 chains → napkin
- 34 chains → narrow runner
- 50 chains → blouse panel
- 74+ chains → shawl width
🔰 FOUNDATION CHAIN
- Make a slip knot.
- Chain your chosen number
(example used here: 34 chains). - Keep chains loose and even.
🧶 ROW-BY-ROW INSTRUCTIONS
🔹 ROW 1 – FOUNDATION MESH
This row creates the base structure.
- Dc in the 4th chain from the hook
(skipped chains count as first dc). - Ch 1.
- Sk 1 chain.
- Dc in next chain.
- Repeat across the row:
- ch 1, sk 1, dc
- Dc in the last chain.
- Turn your work.
👉 You now have a light mesh foundation.
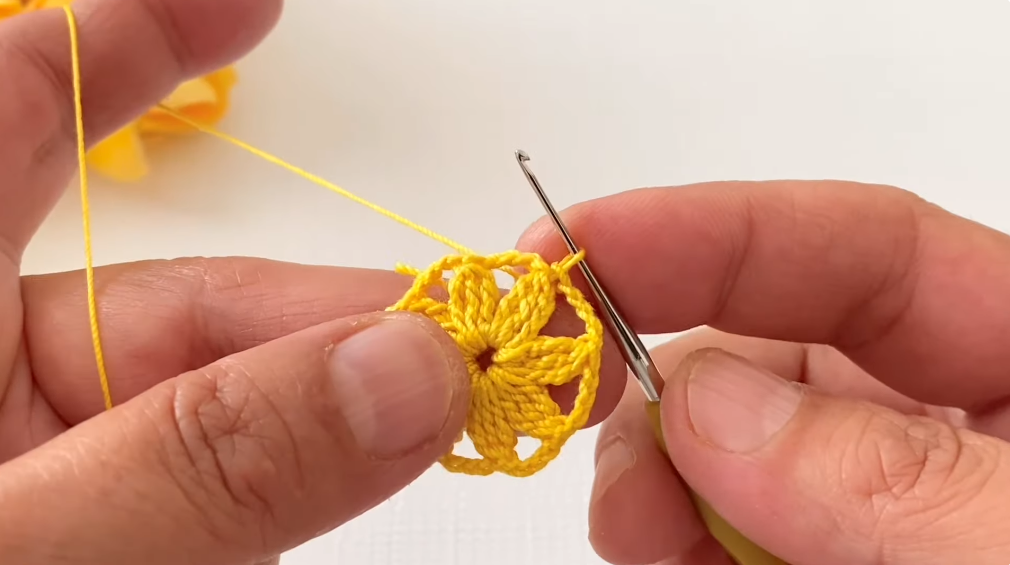
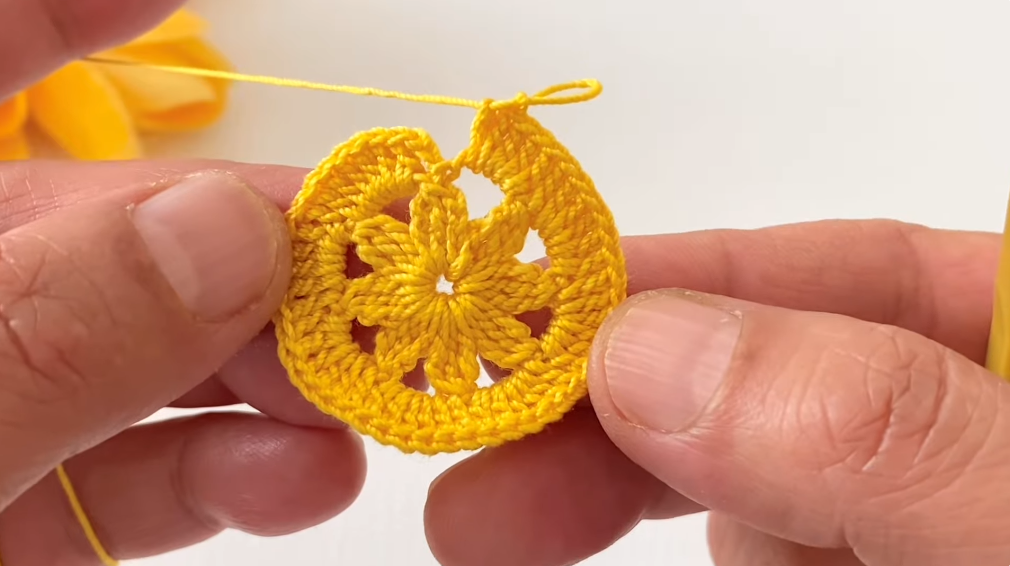
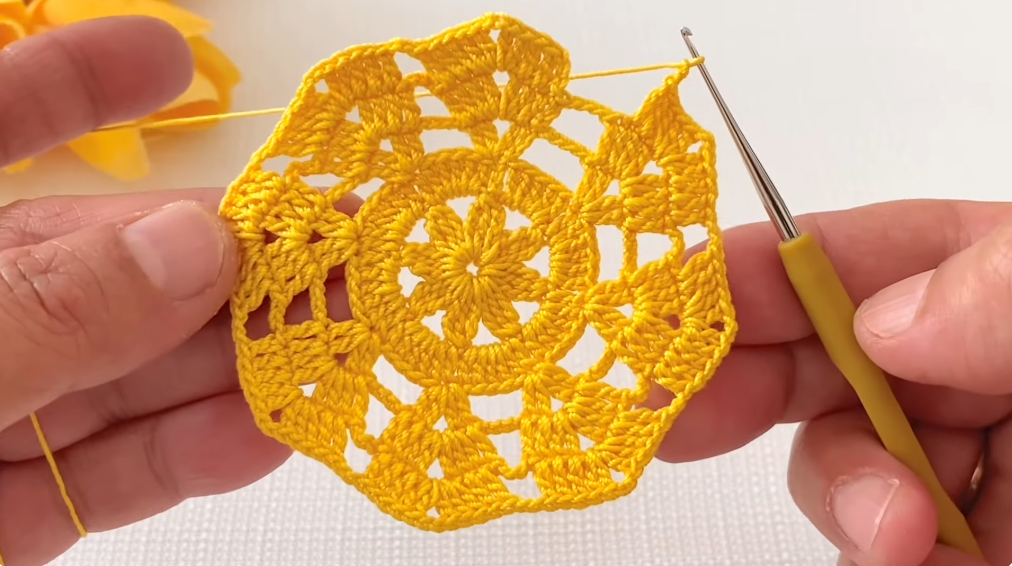
🔹 ROW 2 – LARGE MOTIF FANS (MAIN DESIGN ROW)
This row creates the extraordinary motif look.
- Ch 3 (counts as first dc).
- In the first ch-1 space:
- work 3 dc
- ch 3
- work 3 dc
- Sk the next dc.
- In the next ch-1 space:
- 3 dc, ch 3, 3 dc
- Repeat across the row.
- Dc in the top of the turning chain.
- Turn.
👉 You will clearly see large flower-like motifs.
🔹 ROW 3 – MOTIF CONNECTING ROW
This row locks the motifs together.
- Ch 3.
- Dc in the first dc.
- Ch 1.
- Dc into the ch-3 space of the motif.
- Ch 1.
- Dc in the next dc.
- Repeat across:
- dc, ch 1, dc, ch 1
- Dc in the last stitch.
- Turn.
👉 This row stabilizes the pattern.

🔹 ROW 4 – SMALL MOTIF ACCENT ROW
Adds texture and elegance.
- Ch 3.
- In the first ch-1 space:
- 2 dc
- ch 2
- 2 dc
- Sk next dc.
- In next ch-1 space:
- 2 dc, ch 2, 2 dc
- Repeat across.
- Dc in last stitch.
- Turn.
👉 Motifs now have layered depth.
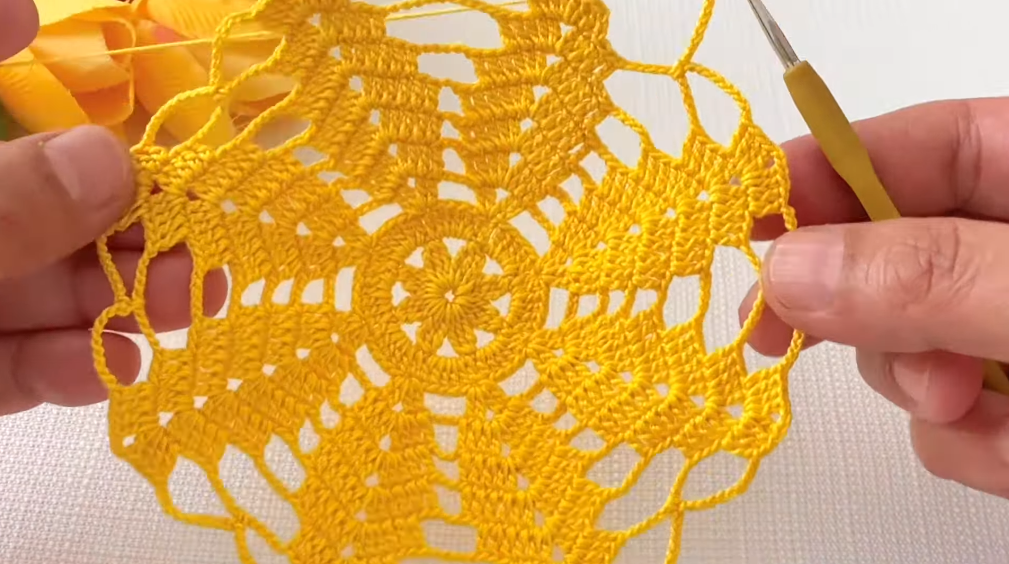
🔹 ROW 5 – OPEN LACE ROW
This row adds softness and flow.
- Ch 1.
- Sc in the first dc.
- Ch 4.
- Sc in the center of the motif (ch-3 space).
- Ch 4.
- Repeat across.
- Sc in the last stitch.
- Turn.
👉 This row keeps the fabric breathable and light.
🔁 PATTERN REPEAT (VERY IMPORTANT)
👉 Repeat Rows 2 – 5
Continue until your piece reaches the desired length.
Each repeat:
- preserves the motif illusion
- keeps edges straight
- allows unlimited length
📏 HOW TO USE THIS PATTERN
🔸 FOR A TABLE RUNNER
- Chain 26–34
- Crochet long
- Add decorative border
- Block flat
🔸 FOR A NAPKIN / PLACEMAT
- Chain 26
- Work until square
- Add scallop border
🔸 FOR A BLOUSE
Option 1: Panels
- Make two rectangles
- Sew shoulders
- Leave armholes
- Add edging
Option 2: One-Piece
- Crochet wide rectangle
- Fold in half
- Sew sides
- Leave neckline opening
🌸 OPTIONAL BORDER (VERY PRETTY)
Border Round 1
- Sc evenly around entire piece
- 2 sc at corners
Border Round 2 – Decorative Edge
- (sc, ch 3, sc) in each space
- Sl st to join
Optional fancy edge:
- (sc, ch 5, sc) for runner
- (sl st, ch 3, sl st) for napkin
✨ FINISHING
- Cut yarn.
- Pull through loop.
- Weave in all ends carefully.
- Lightly block to open motifs.
🧩 WHY THIS PATTERN IS SPECIAL
✔ Motif appearance without sewing
✔ Works for many projects
✔ Elegant but beginner-friendly
✔ Easy to resize
✔ Beautiful drape
💡 TROUBLESHOOTING
- Motifs uneven?
→ Count stitches carefully in Row 2. - Edges wavy?
→ Tighten chain-3 spaces slightly. - Too stiff?
→ Use larger hook.
🧶 QUICK CHEAT-SHEET
- Chain 8 + 2
- Row 1: Mesh base
- Row 2: Large motif fans
- Row 3: Connect motifs
- Row 4: Small accent motifs
- Row 5: Lace row
- Repeat Rows 2–5
- Add border
- Block
VIDEO: