 by
by Full Step-by-Step Written Tutorial
Beginner Friendly | US Crochet Terms
🧶 SKILL LEVEL
Beginner to Easy-Intermediate
(Only basic stitches used)
🧵 MATERIALS
- Yarn: Cotton or cotton-blend (light DK or sport weight recommended)
- Crochet hook: 3.0–4.0 mm (match yarn)
- Scissors
- Yarn needle
- Stitch markers (optional)
✂️ ABBREVIATIONS (US TERMS)
- ch = chain
- sl st = slip stitch
- sc = single crochet
- hdc = half double crochet
- dc = double crochet
- tr = treble crochet
- sp = space
- st = stitch
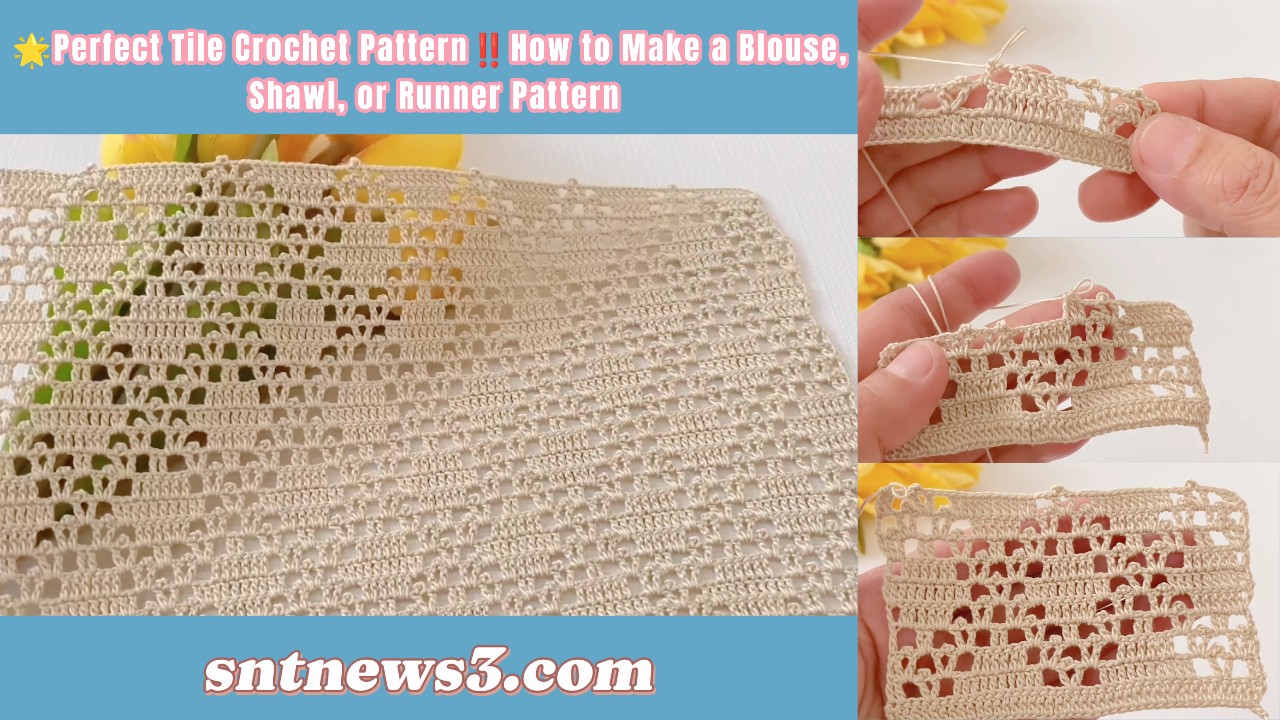
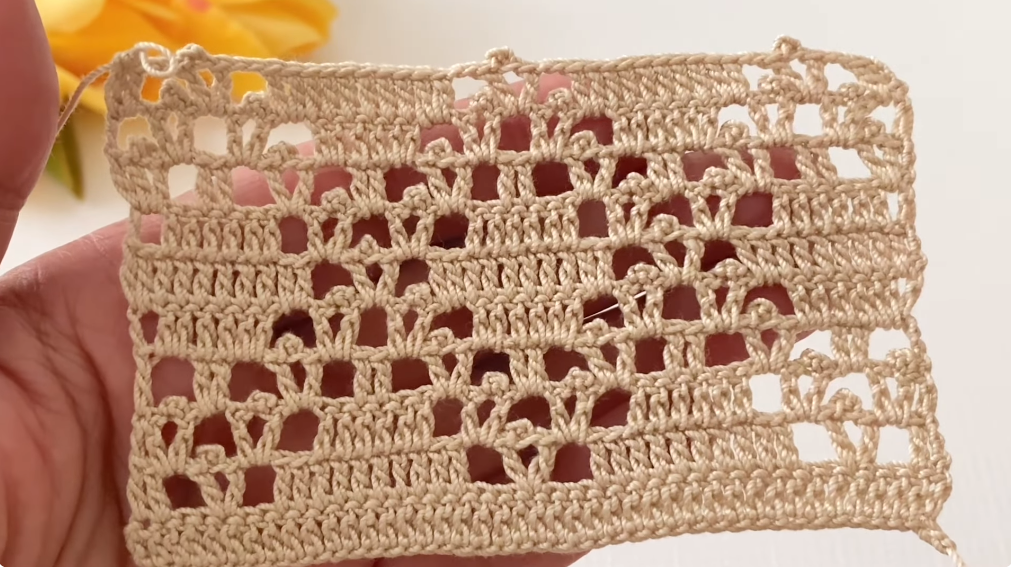
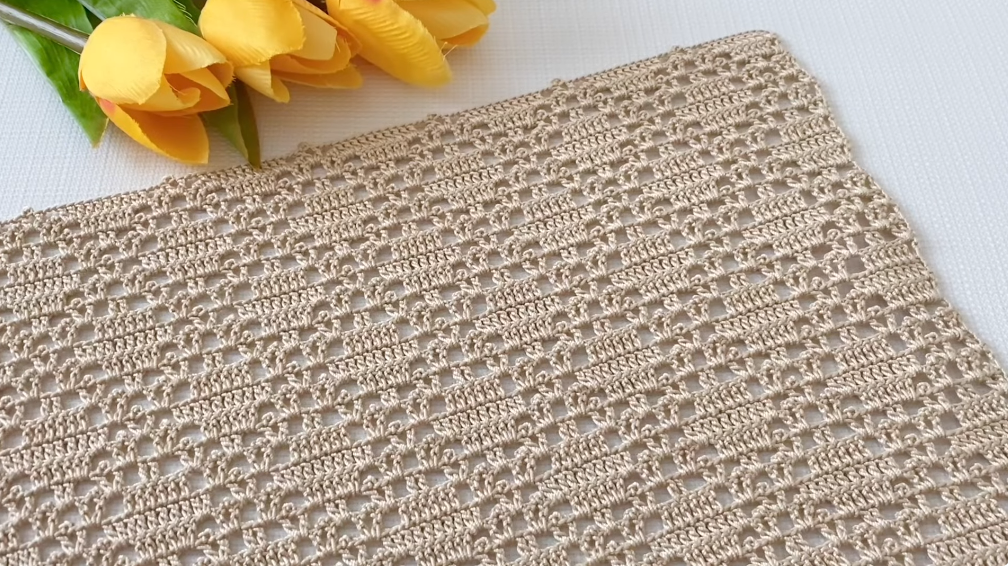
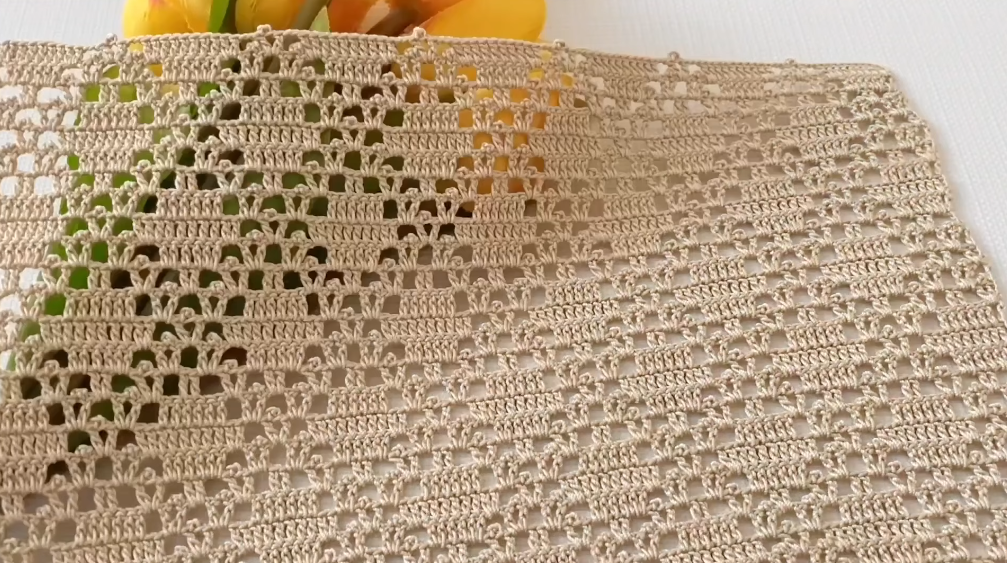
📐 PATTERN FEATURES
- Tile / geometric look
- Repeating square motif
- Lightweight and breathable
- Easy to join for garments or runners
- Size adjustable
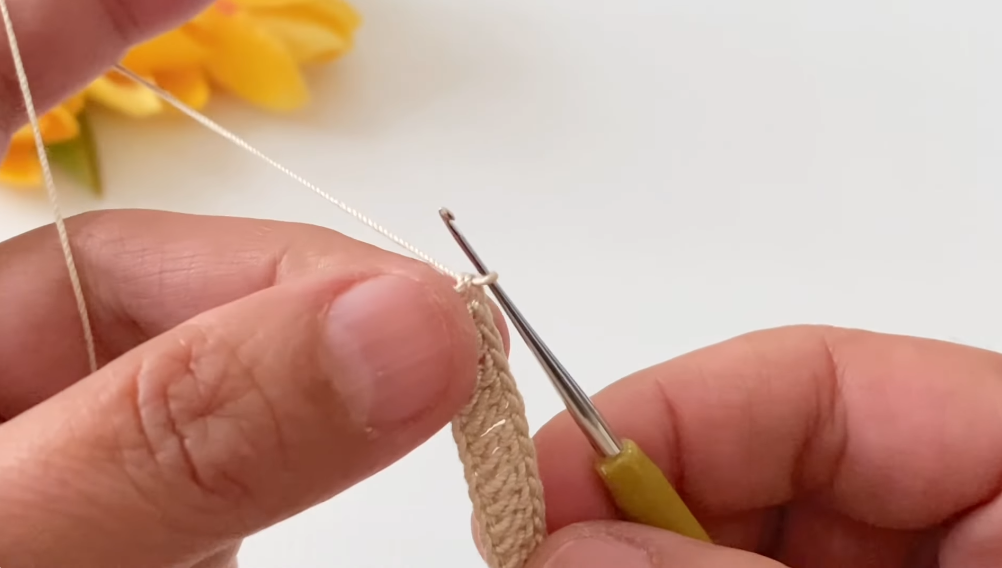
🪡 STEP-BY-STEP CROCHET INSTRUCTIONS
🔰 ROUND 1 – CENTER TILE RING
- Make a magic ring
(or ch 4, sl st to first chain). - Ch 3 (counts as first dc).
- Work 15 dc into the ring.
- Pull ring tight.
- Sl st to top of ch-3.
✔ Total: 16 dc
✔ Forms a solid tile center
🔹 ROUND 2 – SPACED GRID ROUND
- Ch 3.
- Dc in same stitch.
- Ch 1.
- Skip 1 stitch.
- In next stitch work 2 dc.
- Ch 1.
- Repeat (2 dc, ch 1, skip 1 st) around.
- Sl st to join.
✔ Creates neat, even spaces
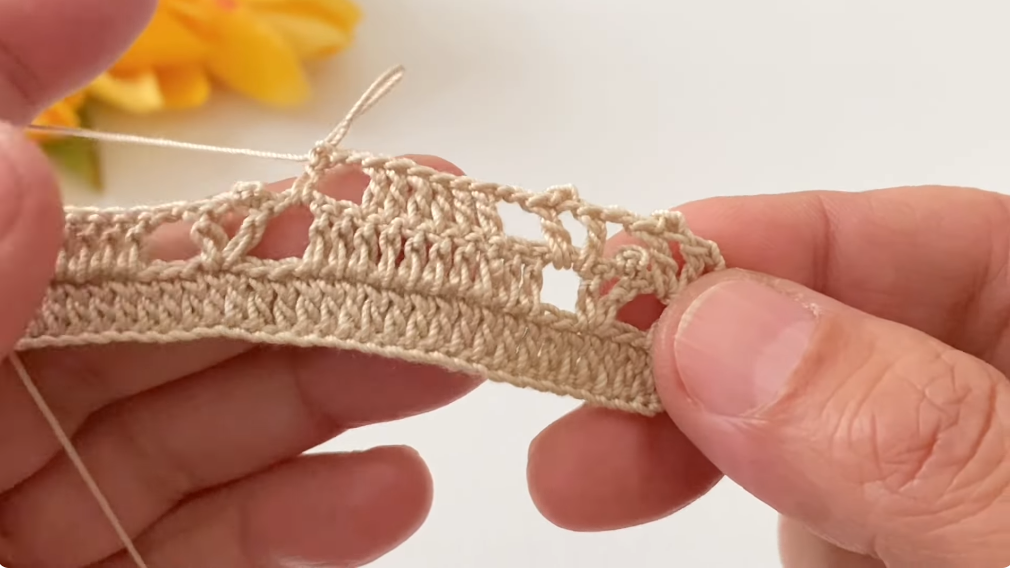
🔹 ROUND 3 – TILE BLOCKS
- Sl st into ch-1 space.
- Ch 3.
- Work 2 dc into same space.
- Ch 2.
- In next ch-1 space: 3 dc.
- Ch 2.
- Repeat around.
- Sl st to close.
✔ Clear tile blocks appear
🔹 ROUND 4 – LACE FRAMES
- Sl st into ch-2 space.
- Ch 1.
- Sc in same space.
- Ch 3.
- Sc in next ch-2 space.
- Ch 3.
- Repeat around.
- Sl st to finish.
✔ Adds airiness and elegance
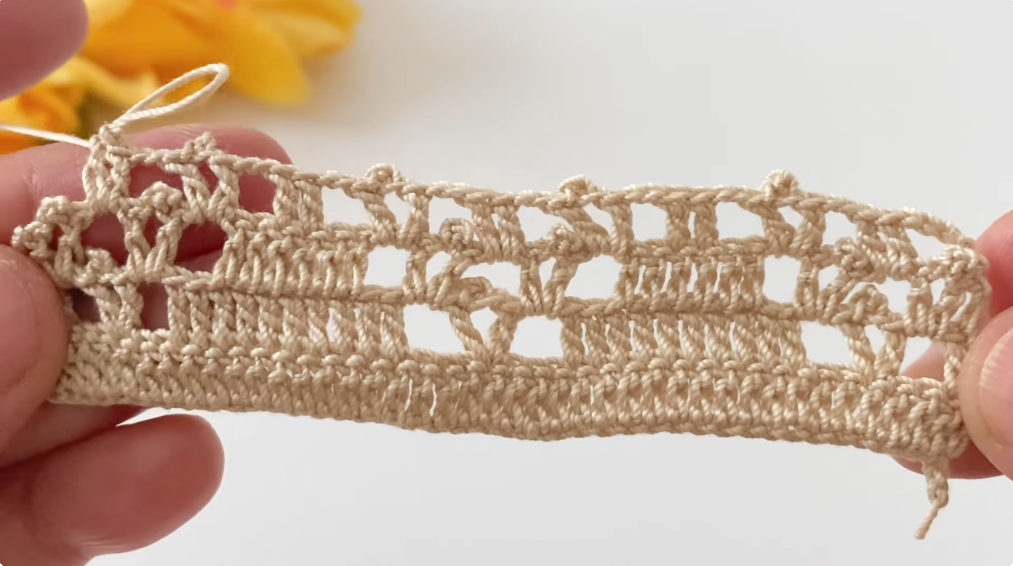
🔹 ROUND 5 – SQUARE SHAPING
- Sl st into next ch-3 space.
- Ch 3 (counts as dc).
- 2 dc in same space.
- Ch 1.
- In next space: 3 dc, ch 1.
- At corners work:
- (3 dc, ch 3, 3 dc)
- Continue around.
- Sl st to join.
✔ Motif becomes a square 🟦
🔹 ROUND 6 – TILE EDGE DEFINITION
- Ch 1.
- Sc in each stitch and space around.
- In each corner ch-3 space:
- (sc, ch 2, sc)
- Sl st to close.
- Fasten off.
✔ Clean, structured tile edge
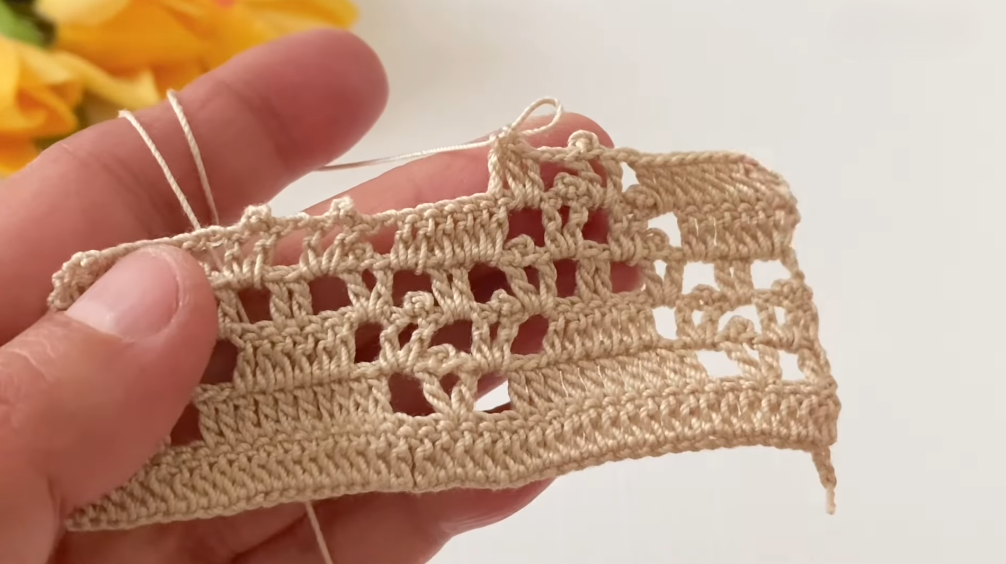
🔁 MAKING THE FABRIC (BLouse / SHAWL / RUNNER)
✔ Table Runner
- Join motifs edge-to-edge
- Recommended layout: 1 × long row or 2–3 motifs wide
✔ Blouse
- Join motifs loosely
- Leave armholes by skipping joins
- Use same pattern for sleeves
✔ Shawl
- Join motifs diagonally
- Or add motifs in rows for rectangular shawl
🧵 JOINING METHODS
🔹 Sewing Join (Flat & Clean)
- Mattress stitch through back loops
🔹 Slip Stitch Join
- Sl st through both motifs’ loops
🔹 Join-As-You-Go
- Best for large projects
💡 For garments, avoid tight joins.
✨ OPTIONAL BORDER (RUNNER / SHAWL)
Border Round
- Join yarn at corner.
- Sc evenly around.
- In corners: (sc, ch 2, sc)
- Sl st, fasten off.
Optional lace border:
- (sc, ch 3, skip 2 sts) repeat
🌸 BLOCKING & FINISHING
- Weave in all ends
- Wet or steam block
- Pin corners straight
- Let dry flat
✔ Blocking enhances the tile geometry
🧠 BEGINNER TIPS
- Count stitches every round
- Use stitch markers for corners
- Keep tension relaxed
- Practice one motif first
- Use cotton yarn for best stitch clarity
📋 QUICK ROUND SUMMARY
- R1: Solid center
- R2: Spaced grid
- R3: Tile blocks
- R4: Lace frame
- R5: Square shaping
- R6: Edge finish
🌟 WHY THIS IS A “PERFECT TILE” PATTERN
✔ Modern & elegant
✔ Breathable fabric
✔ Easy repeats
✔ Ideal for wearables & décor
✔ Beginner approved
VIDEO: