 by
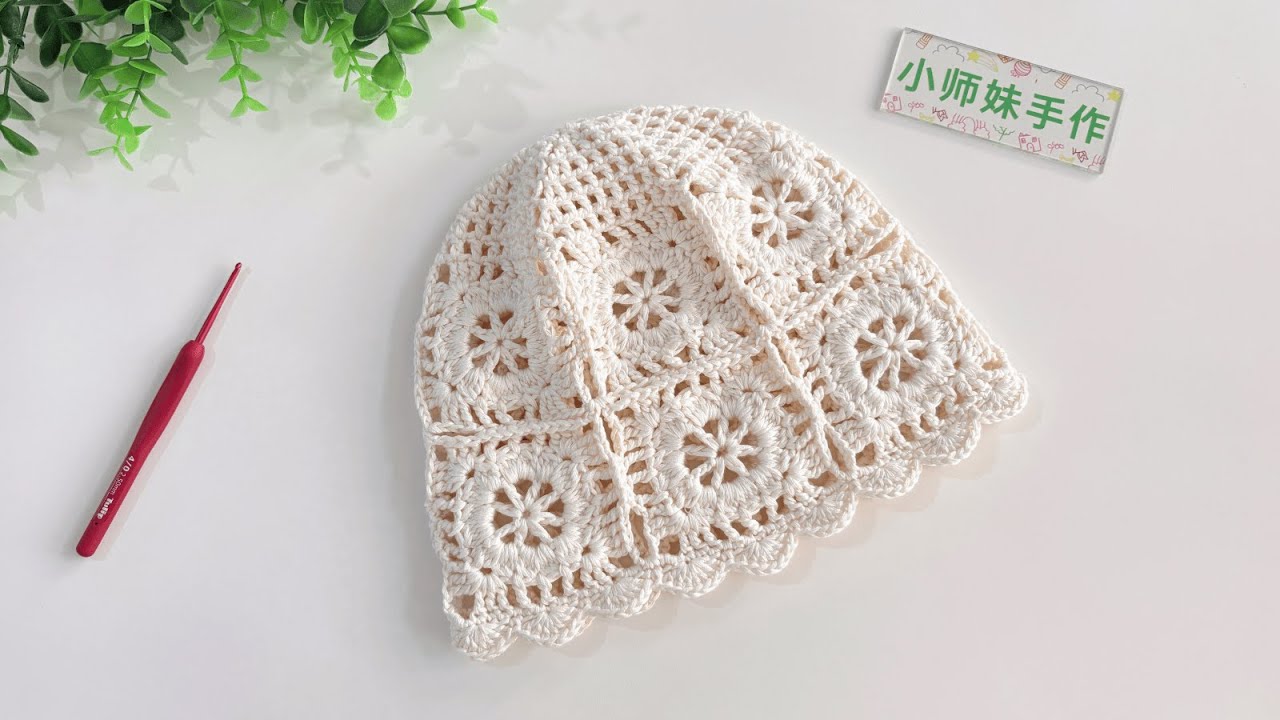
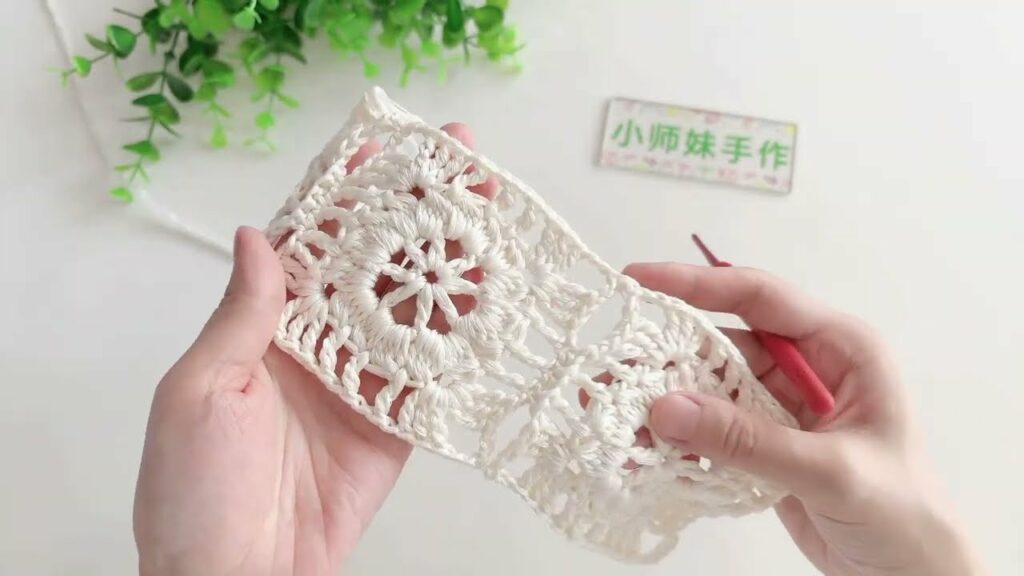
by Imagine a hat that’s not only incredibly soft and smooth against the skin but also boasts a mesmerizing visual texture, created by intricate “hollow” stitches that mimic delicate lace. Now, picture that hat crafted with a patchwork of subtly shifting colors or even different stitch patterns, coming together to form a truly unique, artistic statement. This is the essence of a Patchwork Knitted Hat that embraces both luxurious comfort and beautiful design.
This detailed article will guide you through the concepts and techniques required to create such a stunning accessory. While “patchwork” might sound complex, it often refers to intentionally combining different sections – be it color blocks, varied stitch patterns, or even separate knitted squares – to form a cohesive whole. We’ll explore how to achieve that coveted soft, smooth texture and integrate elegant hollow stitching for a hat that’s a joy to wear and behold.

Why Knit a Patchwork Hat with Hollow Stitching?
- Elevated Aesthetics: The combination of patchwork and hollow stitching creates a sophisticated, artistic look that stands out from a basic beanie.
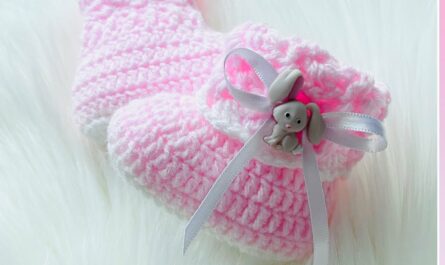
- Luxurious Comfort: Focusing on soft, smooth yarns ensures a delightful feel against the skin, free from itchiness.
- Skill Development: This project offers a fantastic opportunity to practice colorwork, different stitch patterns (including lace or openwork), and seamless joining techniques.
- Customization Galore: The “patchwork” concept allows for endless creativity in color schemes, yarn choices, and stitch combinations.
- Unique Gift: A handmade hat of this caliber is a truly special and cherished gift for loved ones.
- Mindful Knitting: Working on different sections and seeing them come together can be a very engaging and satisfying knitting experience.
Key Considerations Before You Start:
- Yarn Choice (The Foundation of Softness and Smoothness):
- Fiber: This is paramount for achieving a soft and smooth texture.
- Merino Wool (Superwash): An excellent choice. It’s incredibly soft, breathable, and often machine washable, making it practical.
- Cashmere or Cashmere Blends: The ultimate in luxury and softness, though more expensive.
- Alpaca or Alpaca Blends: Known for their exceptional softness and warmth without being heavy.
- Fine Cotton or Cotton Blends (Mercerized): Can offer a smooth, cool feel with good stitch definition, especially for lighter hats.
- Soft Acrylics: High-quality, soft acrylics can also be a good, affordable, and easy-care option, often labeled “baby soft.”
- Ply/Twist: Yarns with a round, even ply (like a good merino worsted or DK) tend to create smoother, more defined stitches compared to loosely plied or “hairy” yarns.
- Weight: DK (Light Worsted/Category 3) or Worsted (Category 4) are versatile choices. DK will create a finer, more delicate hat, while Worsted will be cozier and quicker to knit. Consistency in yarn weight is crucial if using multiple colors/yarns for patchwork.
- Colors for Patchwork: Choose a palette that harmonizes or intentionally contrasts. Think about how the colors will interact with the “hollow” sections. For example, a light color might make the holes more prominent than a dark color.
- Fiber: This is paramount for achieving a soft and smooth texture.
- Needle Size:
- Match your needle size to your yarn weight, but consider going down a half size for the ribbing to ensure a snug fit.
- Circular needles are highly recommended for knitting hats in the round. DPNs (double-pointed needles) are useful for the crown decreases.
- For DK yarn: US 4-6 (3.5-4.0 mm)
- For Worsted yarn: US 7-9 (4.5-5.5 mm)
- Gauge (Crucial for Fit and Stitch Definition):
- Always swatch! Knit a large swatch (at least 6×6 inches) in your chosen yarn and stitch pattern(s). This is vital for ensuring the hat will fit and that your hollow stitches look as intended.
- Measure your stitches and rows per inch/cm and adjust needle size accordingly.
- For lace/hollow stitches, your gauge might be slightly looser than for solid stockinette.
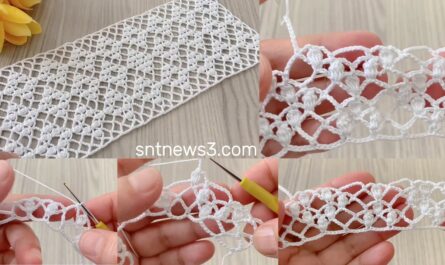
- “Hollow Stitching” Techniques:
- This refers to various lace or openwork patterns. They are created by combining yarn overs (yo) with decreases (e.g., k2tog, ssk).
- Simple Eyelets: The most basic form of hollow stitching (e.g., k1, yo, k2tog).
- Lace Ribbing: Combining knit/purl ribbing with eyelets for a stretchy, airy fabric.
- Small Lace Motifs: More intricate patterns that repeat.
- The key is to choose a pattern that isn’t too complex for a first attempt at a patchwork hat.
- Patchwork Approach:
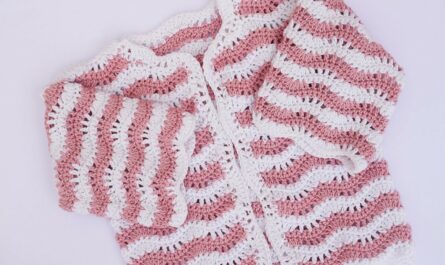
- Color Blocks: The easiest form of patchwork. Knit a section in one color, then switch to another.
- Alternating Stitch Patterns: Knit a section in stockinette, then a section in a textured stitch, then a section with a hollow stitch.
- Different Yarn Textures: (More advanced) Combining a smooth yarn with a slightly fuzzy or textured one (ensure consistent gauge).
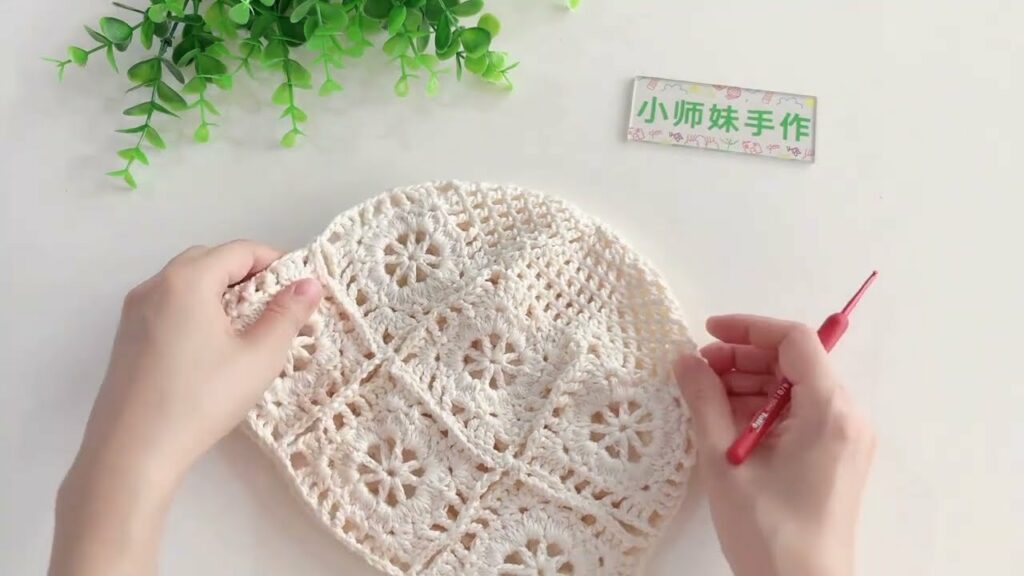
- Sewn-Together Squares: (More complex) Knitting individual squares (some with hollow stitch, some solid) and then seaming them together before forming the hat. For a smoother texture, knitting in one piece with color/pattern changes is usually preferred.

Materials You’ll Need:
- Yarn:
- Main Color (for ribbing, perhaps one patchwork section, and joining): ~100-150 yards of soft, smooth Worsted (Category 4) yarn.
- Contrast Colors (for patchwork sections): 2-3 additional colors, ~50-100 yards each, same weight and fiber as main color.
- Knitting Needles:
- 16-inch circular needles in your chosen size (e.g., US 7 / 4.5 mm)
- Set of DPNs (double-pointed needles) or a longer circular needle for magic loop method, in the same size, for crown decreases.
- Stitch Marker: To mark the beginning of the round.
- Tapestry Needle: For weaving in ends.
- Scissors: For cutting yarn.
- Measuring Tape: For checking gauge and hat dimensions.
Project Outline: Patchwork Knitted Hat
This example will feature 3 main sections: a ribbed brim, a body with alternating stockinette and a simple hollow stitch pattern, and a crown with decreases. We’ll use color changes for the “patchwork.”
Size: Adult Small/Medium (Approx. 20-22 inch head circumference, with stretch)
Part 1: The Ribbed Brim (Color A)
This provides elasticity and a comfortable fit.
- Cast On: Using Color A and your circular needle, cast on 96 stitches using a stretchy cast-on method (e.g., Long-Tail Cast-On or Twisted German Cast-On).
- Join in the Round: Place a stitch marker to mark the beginning of the round. Be careful not to twist your stitches.
- Ribbing Rounds (K1, P1 Rib):Knit 1, Purl 1 around. Repeat for 10-12 rounds, or until the brim measures approximately 1.5-2 inches.
- This ribbing will create a very smooth and elastic edge.
Part 2: The Hat Body – Patchwork with Hollow Stitching
We will divide the body into sections, alternating colors and introducing our “hollow stitch” pattern.
Section 1: Smooth Stockinette (Color B)
- Switch to Color B (cut Color A, leaving a tail for weaving in, or carry it up if using later).
- Rounds 1-8: Knit every stitch around. (8 rounds of stockinette stitch).
- This creates a solid, smooth foundation for the first patchwork section.
Section 2: Simple Hollow Stitching (Color C)
- Switch to Color C.
- Round 9:Knit 2 together (k2tog), Yarn Over (yo) around.
- This creates a row of simple eyelets – your first “hollow” texture.
- Rounds 10-16: Knit every stitch around. (7 rounds of stockinette following the eyelet row).
- The yarn overs from Round 9 will create the small holes.
Section 3: Smooth Stockinette (Color A – returning to first color)
- Switch back to Color A.
- Rounds 17-24: Knit every stitch around. (8 rounds of stockinette stitch).
Section 4: Simple Hollow Stitching (Color B – returning to second color)
- Switch back to Color B.
- Round 25: Knit 2 together (k2tog), Yarn Over (yo) around.
- Rounds 26-32: Knit every stitch around. (7 rounds of stockinette following the eyelet row).
- Total Body Length Check: At the end of Part 2, your hat body (from the top of the ribbing to the current row) should measure approximately 6.5-7.5 inches. Adjust the number of plain knit rows in each section if you want a taller or shorter hat, ensuring the overall length is suitable before starting decreases.
Part 3: The Crown Decreases (Remaining Color A or B – your choice)
The crown shaping will reduce the stitches to close the top of the hat.
- Switch to DPNs or Magic Loop: When stitches become too tight on the circular needle, switch to DPNs or use the magic loop method.
- Crown Decrease Round 1:Knit 6, Knit 2 together (k2tog) around.
- [84 stitches remaining]
- Crown Decrease Round 2: Knit every stitch around.
- Crown Decrease Round 3:Knit 5, k2tog around.
- [72 stitches remaining]
- Crown Decrease Round 4: Knit every stitch around.
- Crown Decrease Round 5:Knit 4, k2tog around.
- [60 stitches remaining]
- Crown Decrease Round 6: Knit every stitch around.
- Crown Decrease Round 7:Knit 3, k2tog around.
- [48 stitches remaining]
- Crown Decrease Round 8: Knit every stitch around.
- Crown Decrease Round 9:Knit 2, k2tog around.
- [36 stitches remaining]
- Crown Decrease Round 10: Knit every stitch around.
- Crown Decrease Round 11:Knit 1, k2tog around.
- [24 stitches remaining]
- Crown Decrease Round 12: Knit every stitch around.
- Crown Decrease Round 13:K2tog around.
- [12 stitches remaining]
Part 4: Finishing
- Cut Yarn: Cut your yarn, leaving a long tail (at least 8-10 inches).
- Thread Needle: Thread the tail onto your tapestry needle.
- Gather Stitches: Slip all remaining 12 stitches from your needles onto the tapestry needle. Pull the yarn tail tightly through these stitches to gather the top opening closed.
- Secure: Pass the needle through the center hole to the inside of the hat. Weave in the tail securely on the inside for several stitches to reinforce the closure.
- Weave in All Other Ends: Use your tapestry needle to weave in all yarn tails from your color changes. Try to weave them invisibly into stitches of the same color.
- Blocking (Highly Recommended!): Gently wet your hat (or mist it thoroughly). Gently squeeze out excess water (don’t wring). Place it over a balloon, a large bowl, or a hat blocker to gently shape it. Allow it to air dry completely. Blocking will relax the stitches, even out your patchwork sections, and make your “hollow” stitches truly pop.
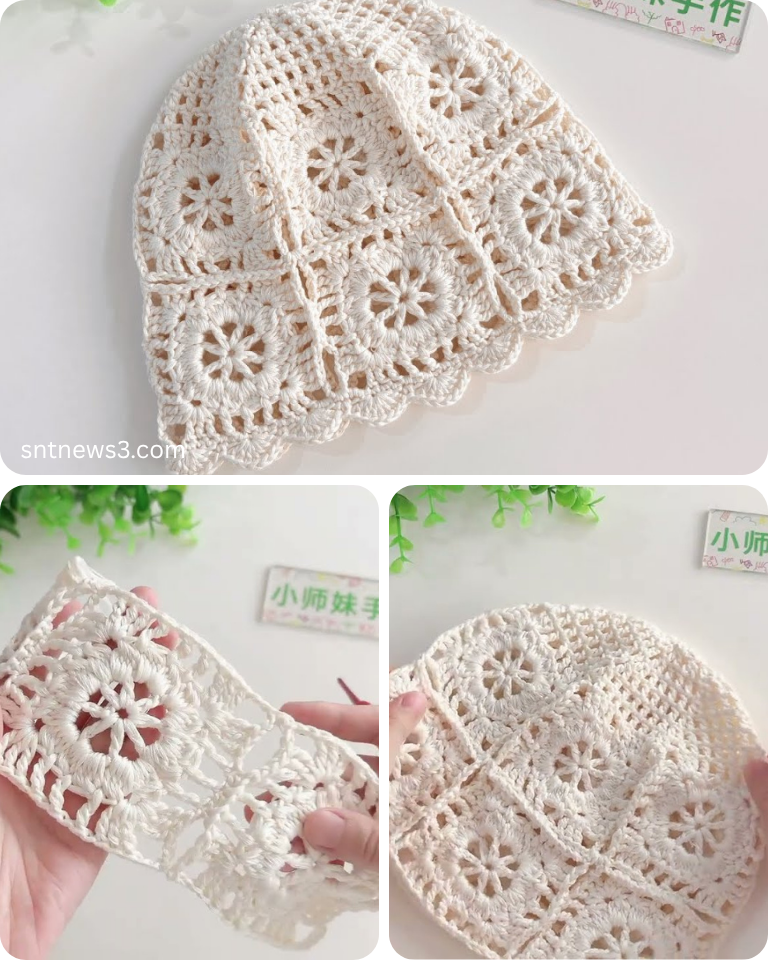
Your Patchwork Knitted Hat is Complete!
Take a moment to admire your unique creation. This hat is a testament to the beauty of combining simple elements—soft yarn, defined stitches, and thoughtful color placement—to create something truly special.

Tips for Customization and Further Exploration:
- Color Play: Experiment with more colors, or use a variegated yarn for one of the patchwork sections for an interesting effect.
- More Complex Hollow Stitches: Once comfortable, explore more intricate lace patterns (e.g., faggoting stitch, simple lace panels) for your “hollow” sections. Just remember to ensure the stitch count still works with your decreases.
- Textured Patchwork: Instead of just stockinette, try sections of garter stitch, seed stitch, or simple cables for varied textures alongside your hollow stitches.
- Slouchy Fit: Add more plain knit rounds in Part 2 before starting the crown decreases for a slouchier hat.
- Pom-Pom: Add a matching or contrasting yarn pom-pom to the top for a playful touch.
- Lining (for extra warmth): If you desire extra warmth without adding bulk, you can knit a simple stockinette lining in a very soft yarn and sew it inside.
- Care: Always refer to your yarn label for specific washing instructions. Proper care will help maintain the softness and beauty of your knitted hat.
Enjoy wearing your unique, soft, and beautifully textured Patchwork Knitted Hat, a true piece of wearable art!
Video tutorial: