 by
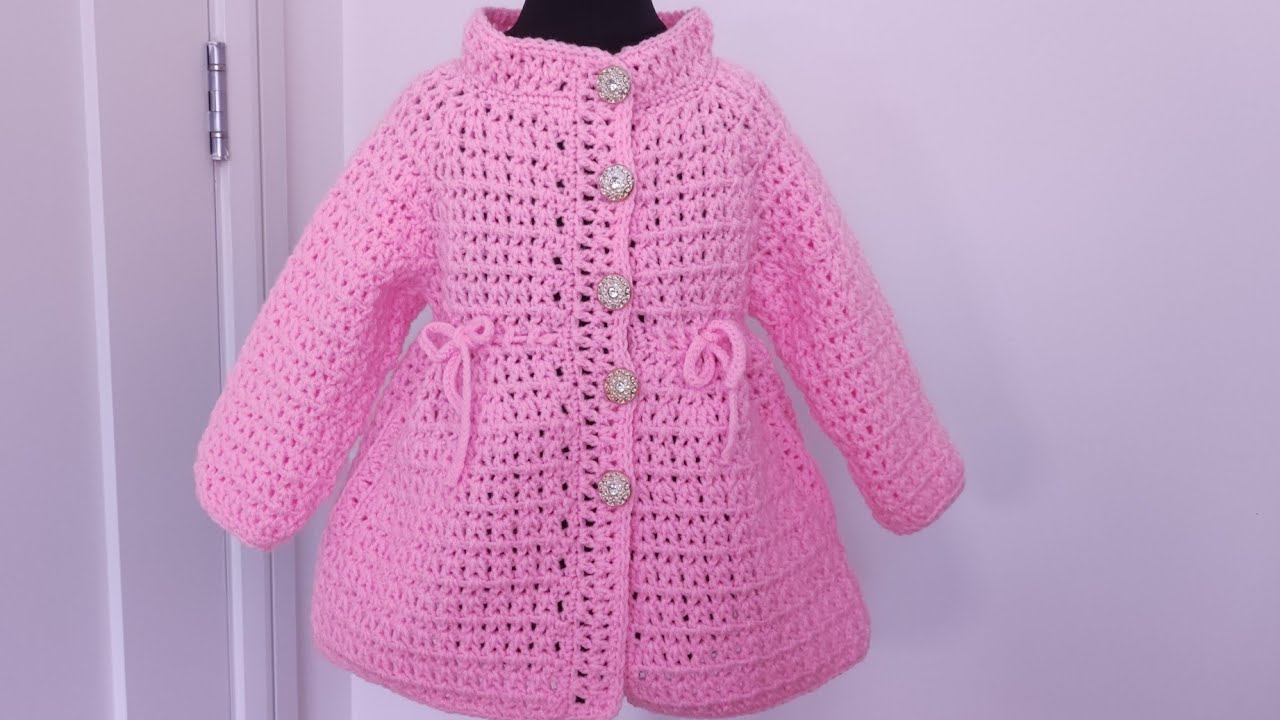
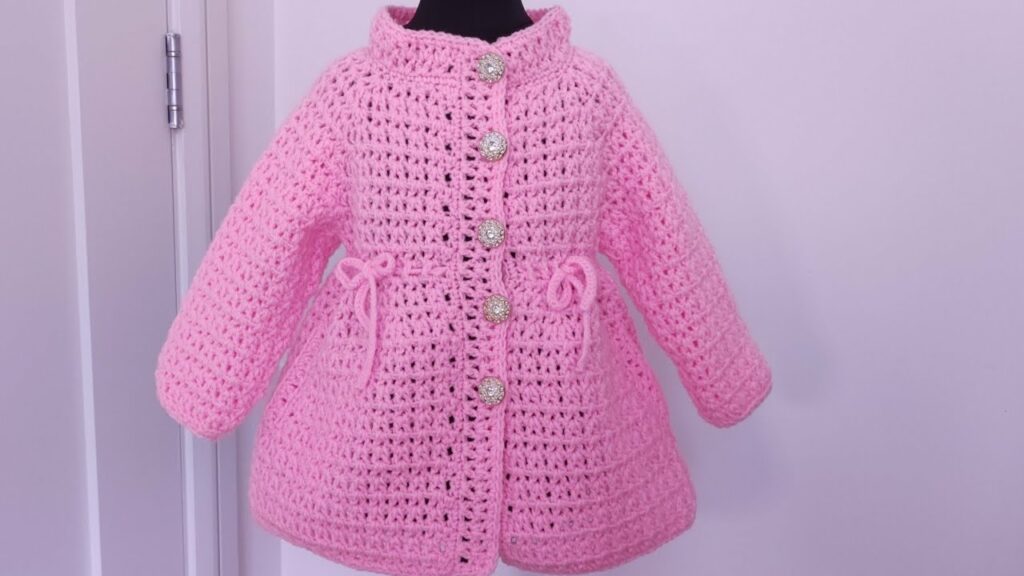
by Imagine a little girl twirling in a beautiful, handmade cardigan, adorned with delicate floral touches and soft, spring-like colors. The “Early Bloom” cardigan or light coat is designed to capture that whimsical spirit, providing a charming and practical layering piece for spring and cooler summer evenings. This project goes beyond a simple blanket; it’s an opportunity to create a custom-fit garment that will be cherished and perhaps even become a treasured heirloom.
This detailed article will guide you through crocheting an “Early Bloom” cardigan/coat for girls. We’ll cover essential garment-making techniques, a lovely main stitch, and how to add those delightful “bloom” embellishments that make it truly unique. Whether you’re a seasoned crocheter looking for a new challenge or an adventurous beginner ready to tackle your first garment, prepare to infuse your hook with the magic of spring!
Why Crochet an “Early Bloom” Cardigan/Coat?
- Personalized & Unique: Create a one-of-a-kind garment tailored to a specific child, choosing colors and embellishments that reflect her personality.
- Skill Development: This project offers valuable practice in garment construction, understanding shaping (armholes, necklines), reading patterns, and maintaining consistent tension over a larger piece.
- Heirloom Quality: A handmade cardigan is often saved and passed down, becoming a cherished memory.
- Practical & Versatile: Perfect for layering over dresses, t-shirts, or long-sleeved tops, making it suitable for various seasons.
- Creative Expression: The “Early Bloom” theme allows for beautiful color play and the addition of floral appliqués or embroidery, making it a true work of art.
Key Considerations Before You Start:
- Sizing (Absolutely CRUCIAL for Garments!):
- Measurements are best: If possible, measure the child you’re making it for. Key measurements include:
- Chest Circumference: Around the fullest part of the chest.
- Arm Length: From shoulder (top of the arm) to desired cuff length.
- Body Length: From shoulder to desired hem length.
- Standard Sizing: If measuring isn’t possible, refer to standard children’s sizing charts (e.g., for 2T, 4T, 6/8). Our tutorial will target a 4T size (approx. 23″ chest), with notes on how to adjust.
- Ease: Garments need “ease” (extra room) for comfort and movement. A typical cardigan might have 2-4 inches of positive ease.
- Measurements are best: If possible, measure the child you’re making it for. Key measurements include:
- Yarn Choice:
- Fiber: Choose soft, comfortable, and easy-care yarns suitable for children.
- Cotton or Cotton Blends: Breathable, good drape, durable, and washable. Excellent for warmer climates or spring.
- Acrylic: Affordable, wide color range, durable, and highly washable. Choose a soft, non-pilling variety.
- Superwash Merino Wool: Soft, warm, breathable, and often machine washable (check label!).
- Weight: DK (Light Worsted / Category 3) or Worsted (Category 4) are ideal. DK creates a lighter fabric with good drape, while Worsted makes a warmer, quicker project.
- Colors for “Early Bloom”:
- Main Color: Soft pastel (mint, lavender, sky blue, butter yellow, soft pink) or a neutral (cream, light gray).
- Accent Colors: Small amounts of white, brighter yellow, and various greens/pinks for flowers and leaves.
- Quantity: Approximately 600-800 yards for a 4T, depending on yarn weight and chosen length. Always buy an extra skein if unsure!
- Fiber: Choose soft, comfortable, and easy-care yarns suitable for children.
- Hook Size:
- Match your hook to your yarn weight, but consider going up half a size to create a fabric with good drape, preventing the cardigan from feeling too stiff.
- For DK yarn: 4.0 mm (US G/6) or 4.5 mm (US 7).
- For Worsted yarn: 5.0 mm (US H/8) or 5.5 mm (US I/9).
- Gauge (NON-NEGOTIABLE for Garments!):
- MAKE A SWATCH! This is the most critical step for ensuring your cardigan fits.
- Crochet a swatch (e.g., 4″ x 4″) using your chosen yarn and hook in the main stitch pattern. Measure your stitches and rows per inch/cm. If your swatch is larger than the pattern’s gauge, go down a hook size. If it’s smaller, go up.
- Stitch Patterns:
- Main Body: A simple, solid stitch like Half Double Crochet (hdc) or Double Crochet (dc) creates a quick and sturdy fabric. Alternatively, a simple mesh or shell stitch for a lighter, more open feel. We’ll use hdc for this tutorial as it creates a nice texture and drape.
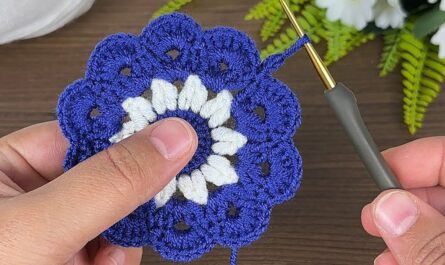
- “Bloom” Embellishments: Simple crocheted daisy appliqués (as in a previous request!), surface crochet for stems/vines, or small embroidered leaves.
- Construction Method: We’ll use a classic method: crocheting the back and two front panels flat, then the sleeves, and finally seaming them together. This is straightforward for beginners to garment making.
Materials You’ll Need:
- Yarn:
- Main Color: Approx. 700 yards of DK or Worsted Weight soft yarn.
- Accent Colors: Small amounts of various greens, yellows, pinks, whites for flowers/leaves.
- Crochet Hook: Size H/8 (5.0 mm) or G/6 (4.0 mm) (adjust for gauge).
- Yarn Needle (Tapestry Needle): For weaving in ends and seaming.
- Scissors: For cutting yarn.
- Stitch Markers: Very helpful for marking armholes, necklines, and front/back.
- Measuring Tape: For checking gauge and garment dimensions.
- Buttons (Optional): 3-5 small decorative buttons.
Essential Crochet Abbreviations:
- ch: chain
- sl st: slip stitch
- sc: single crochet
- hdc: half double crochet
- dc: double crochet
- hdc2tog: half double crochet 2 together (decrease)
- st(s): stitch(es)
- FO: fasten off
- RS: right side
- WS: wrong side
- (): indicates instructions to be worked into the same stitch/space
- ***…***: repeat instructions within asterisks
- []: indicates stitch counts at the end of a round/row
How To Crochet an “Early Bloom” Cardigan/Coat (Size 4T Approx. 23″ Chest): Step-by-Step Tutorial
Gauge (Very Important!): Make a swatch: Ch 17. Row 1: Hdc in 2nd ch from hook and in each ch across. (16 hdc) Rows 2-10: Ch 1 (does not count as st), turn. Hdc in each hdc across. Measure 4″x4″. You should have approximately 16 hdc and 10 rows per 4 inches. Adjust hook size if needed.
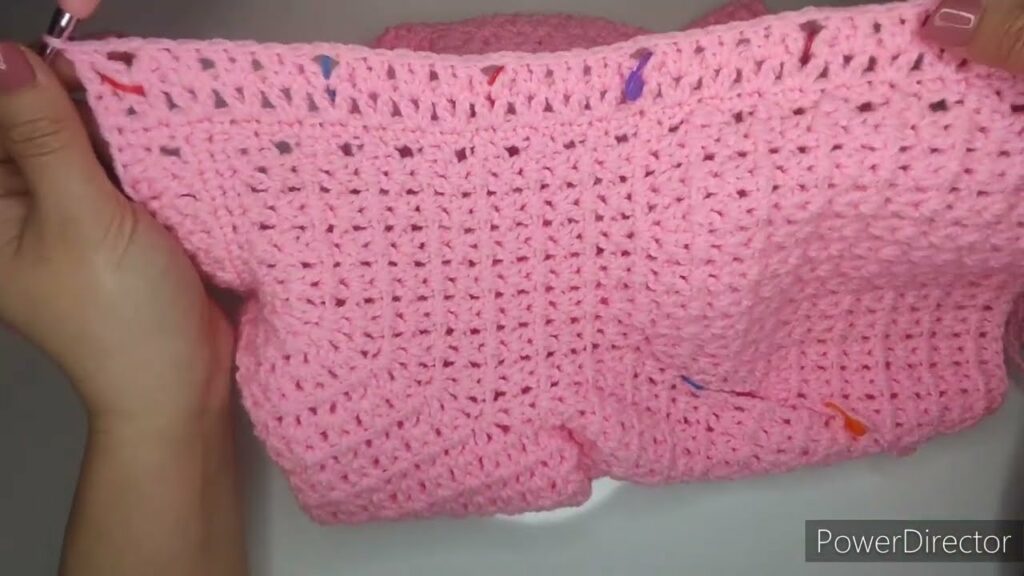
Part 1: The Back Panel
This forms the back of the cardigan.
- Starting Chain: Using Main Color, Ch 49. (This should give approximately 12 inches width, allowing for ease. Adjust based on your gauge and desired width).
- Row 1 (WS): Hdc in 2nd ch from hook and in each ch across.
- [48 hdc]
- Ch 1, turn.
- Rows 2 – 25 (Body): Hdc in each hdc across.
- [48 hdc]
- Ch 1, turn.
- Continue until piece measures approx. 9-10 inches from starting edge, or desired length before armholes.
- Row 26 (Shape Armholes – Decrease):
- Sl st in first 2 sts. Ch 1. Hdc in next 44 sts. Leave last 2 sts unworked.
- [44 hdc]
- Ch 1, turn.
- Rows 27 – 38 (Armhole Depth): Hdc in each hdc across.
- [44 hdc]
- Ch 1, turn.
- Continue until armhole measures approx. 6-7 inches deep, or desired depth. This is also your total height for the back panel.
- FO, leave a long tail for seaming.
Part 2: The Front Panels (Make 2 – Left and Right)
These form the front opening of the cardigan. They will be narrower than the back.
First Front Panel (e.g., Right Front when looking at the finished garment)
- Starting Chain: Using Main Color, Ch 25. (Approx. 6 inches width, allowing for ease).
- Row 1 (WS): Hdc in 2nd ch from hook and in each ch across.
- [24 hdc]
- Ch 1, turn.
- Rows 2 – 25 (Body): Hdc in each hdc across.
- [24 hdc]
- Ch 1, turn.
- Continue until piece measures approx. 9-10 inches from starting edge, same as back panel.
- Row 26 (Shape Armhole – Decrease):
- Sl st in first 2 sts. Ch 1. Hdc in next 22 sts. Leave last 2 sts unworked.
- [22 hdc]
- Ch 1, turn.
- Rows 27 – 30 (Armhole Depth – Straight): Hdc in each hdc across.
- [22 hdc]
- Ch 1, turn.
- Row 31 (Shape Neckline – Decrease):
- Hdc in first 18 sts. Hdc2tog over last 2 sts.
- [19 hdc]
- Ch 1, turn.
- Row 32 (Straight): Hdc in each hdc across.
- [19 hdc]
- Ch 1, turn.
- Row 33 (Shape Neckline – Decrease):
- Hdc in first 17 sts. Hdc2tog over last 2 sts.
- [18 hdc]
- Ch 1, turn.
- Rows 34 – 38 (Straight to Shoulder): Hdc in each hdc across.
- [18 hdc]
- Ch 1, turn.
- Continue until armhole measures approx. 6-7 inches deep, matching back panel.
- FO, leave a long tail for seaming.

Second Front Panel (e.g., Left Front – reverse shaping)
- Follow steps 1-5 of the First Front Panel.
- Row 31 (Shape Neckline – Decrease):
- Hdc2tog over first 2 sts. Hdc in remaining 18 sts.
- [19 hdc]
- Ch 1, turn.
- Row 32 (Straight): Hdc in each hdc across.
- [19 hdc]
- Ch 1, turn.
- Row 33 (Shape Neckline – Decrease):
- Hdc2tog over first 2 sts. Hdc in remaining 17 sts.
- [18 hdc]
- Ch 1, turn.
- Rows 34 – 38 (Straight to Shoulder): Hdc in each hdc across.
- [18 hdc]
- Ch 1, turn.
- FO, leave a long tail for seaming.
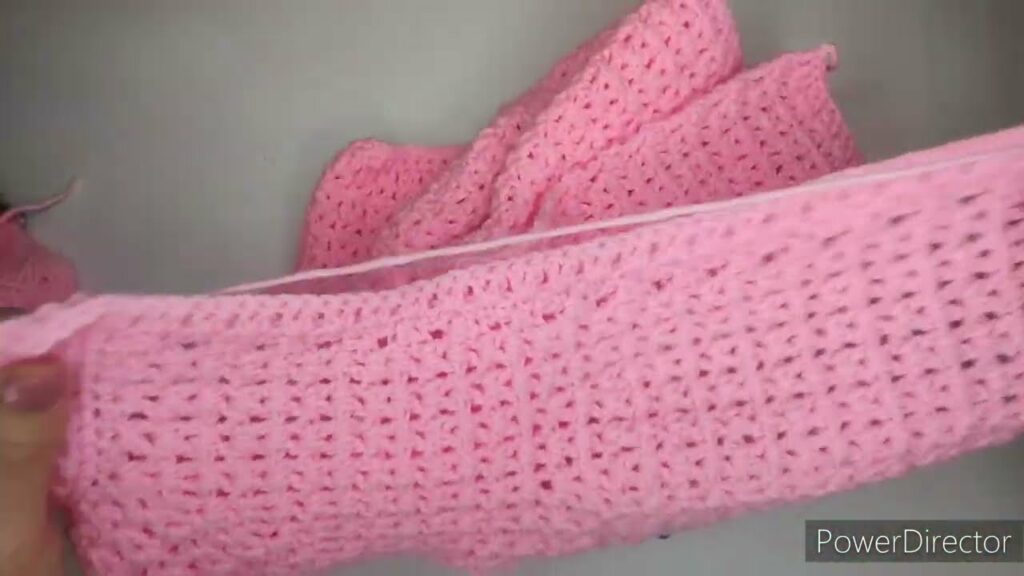
Part 3: The Sleeves (Make 2)
We’ll work these flat and then seam them.
- Starting Chain (Cuff): Using Main Color, Ch 25.
- Row 1 (WS – Cuff): Hdc in 2nd ch from hook and in each ch across.
- [24 hdc]
- Ch 1, turn.
- Rows 2 – 4 (Cuff): Hdc in each hdc across.
- [24 hdc]
- Ch 1, turn.
- Row 5 (Increase for Arm):
- Hdc in first st. Hdc inc in next st. Hdc in next 20 sts. Hdc inc in next st. Hdc in last st.
- [26 hdc]
- Ch 1, turn.
- Row 6 – 8 (Straight): Hdc in each hdc across.
- [26 hdc]
- Ch 1, turn.
- Row 9 (Increase): Hdc in first st. Hdc inc in next st. Hdc in next 22 sts. Hdc inc in next st. Hdc in last st.
- [28 hdc]
- Ch 1, turn.
- Rows 10 – 12 (Straight): Hdc in each hdc across.
- [28 hdc]
- Ch 1, turn.
- Continue this pattern (increase every 4th row by 2 sts) until you reach a width of approx. 40 hdc stitches. Then work straight until the sleeve measures approx. 12-13 inches from cuff to shoulder (or desired length).
- FO, leaving a long tail for seaming.

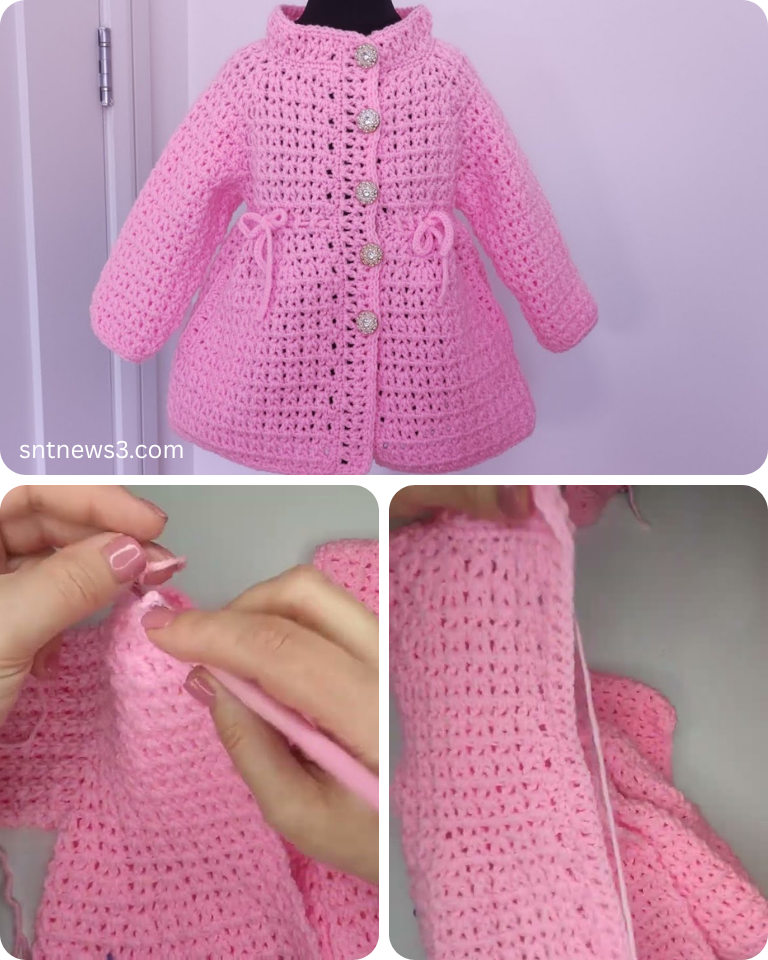
Part 4: Assembly
Use your yarn needle and the long tails (or separate pieces of yarn) to seam the panels together. Use a mattress stitch or whip stitch for neat, invisible seams.
- Shoulder Seams: Align the top (shoulder) edges of the front panels with the top edges of the back panel. Sew the shoulder seams.
- Side Seams: Fold the front and back panels together, matching the side edges. Sew the side seams from the bottom hem up to the armhole.
- Sleeve Seams: Fold each sleeve in half lengthwise, matching the side edges. Sew the sleeve seams from the cuff to the top.
- Attach Sleeves: Turn the cardigan right side out. Insert the sleeve into the armhole (also right side out). Align the sleeve seam with the side seam of the cardigan. Evenly distribute the top of the sleeve around the armhole opening. Sew the sleeve securely into the armhole. Repeat for the second sleeve.
Part 5: Edging & Collar
This adds a finished look to the cardigan’s opening and neckline.
- Attach Yarn: Using Main Color, attach yarn with a sl st to the bottom corner of one of the front panels.
- Round 1 (Sc Border): Ch 1 (does NOT count as st). Work sc stitches evenly around the entire opening of the cardigan (up one front, around the neckline, down the other front, and across the bottom hem).
- Tips for even spacing: Place 1 sc per hdc row on the sides, 1 sc per stitch on the bottom/top. In corners, work (sc, ch 1, sc).
- Sl st to the first sc to join.
- Round 2 (Optional Ribbing/Collar):
- Ch 1, turn. Work 1 sc in the BLO of each sc around.
- You can repeat this row 1-2 more times for a small ribbed border.
- For a collar, you can work a few more rows in the BLO along just the back neckline and front edges, decreasing gradually at the corners if desired.
- Buttonholes (if using buttons): On the appropriate front panel (usually the right side for girls, left for boys), determine button placement. On one of the border rows, create buttonholes by chaining 2 and skipping 2 stitches at the button locations. On the next row, sc into the chain space.
Part 6: “Early Bloom” Embellishments
This is where your cardigan truly comes to life!
- Crochet Daisy Appliqués:
- Center (Yellow/Orange): Ch 4, sl st to first ch to form ring. Sc 8 into ring. Sl st to join. FO.
- Petals (White/Pink): Join petal color to any sc in BLO of center. (Ch 2, dc, hdc into same BLO st. Sl st into next BLO st). Repeat from * around for 8 petals. FO, leave long tail.
- Make 3-5 daisies of varying sizes/colors.
- Surface Crochet Stems/Vines:
- Using green yarn and a yarn needle or smaller crochet hook, create simple lines of surface slip stitch or duplicate stitch to form subtle vines or stems on the cardigan.
- Embroidered Leaves:
- Using green yarn and a yarn needle, embroider small lazy daisy stitches or straight stitches next to your crocheted flowers to represent leaves.
- Attach Embellishments: Strategically sew your crocheted daisies and leaves onto the front panels, along the bottom hem, or trailing over the shoulders, creating a natural, blooming effect.
Part 7: Final Touches
- Weave in All Ends: Double-check every single yarn tail and weave them in securely and invisibly.
- Attach Buttons: Sew your chosen buttons onto the opposite front panel, aligning with your buttonholes.
- Blocking (Essential for Garments!):
- Gently wet the entire cardigan (or steam it).
- Carefully lay it flat on a clean surface or blocking mats. Gently stretch and shape it to the correct dimensions, easing out any unevenness.
- Pin the edges to hold the shape.
- Allow it to air dry completely. Blocking makes a huge difference in how a garment drapes and fits.
Your “Early Bloom” Cardigan/Coat is Complete!
You’ve created a beautiful, personalized garment that will add a touch of handmade charm and warmth to a special little girl’s wardrobe.
Tips for Success & Customization:
- Try it on often: If you can, have the child try on the pieces during construction to check the fit, especially before seaming.
- Stitch Pattern Variations: Instead of plain hdc, explore a simple shell stitch, granny stripe, or a textured stitch for the body.
- Color Play: Experiment with ombre effects, variegated yarns, or more vibrant contrasting colors for your “blooms.”
- Different Embellishments: Instead of daisies, create small butterflies, bumblebees, or other spring-themed motifs.
- Adding Pockets: Crochet two small squares/rectangles and attach them to the front panels before adding the final border.
- Hooded Version: Instead of just a collar, you can crochet a rectangular hood, seam it, and attach it to the neckline.
- Care: Always refer to your yarn label for specific washing instructions. Hand washing and laying flat to dry are generally recommended for handmade crochet garments to maintain their shape.
Enjoy the beautiful process and the even more beautiful outcome of your “Early Bloom” cardigan!
Video tutorial: