 by
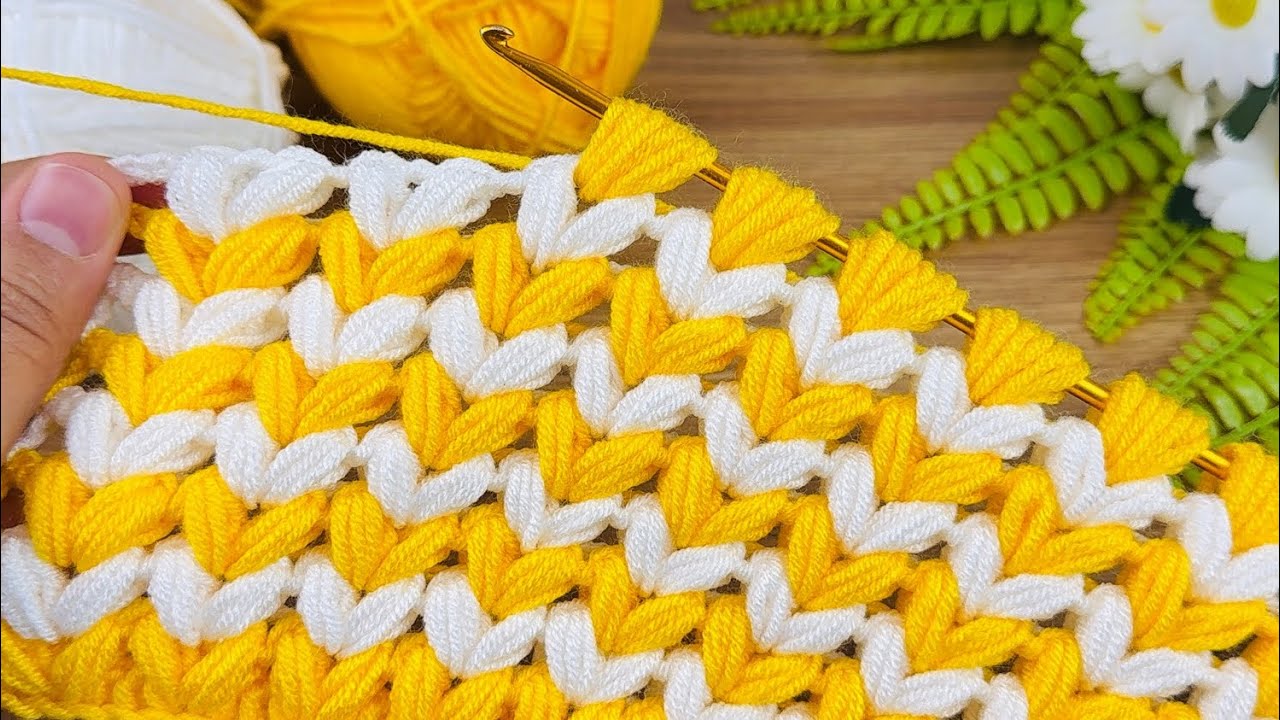
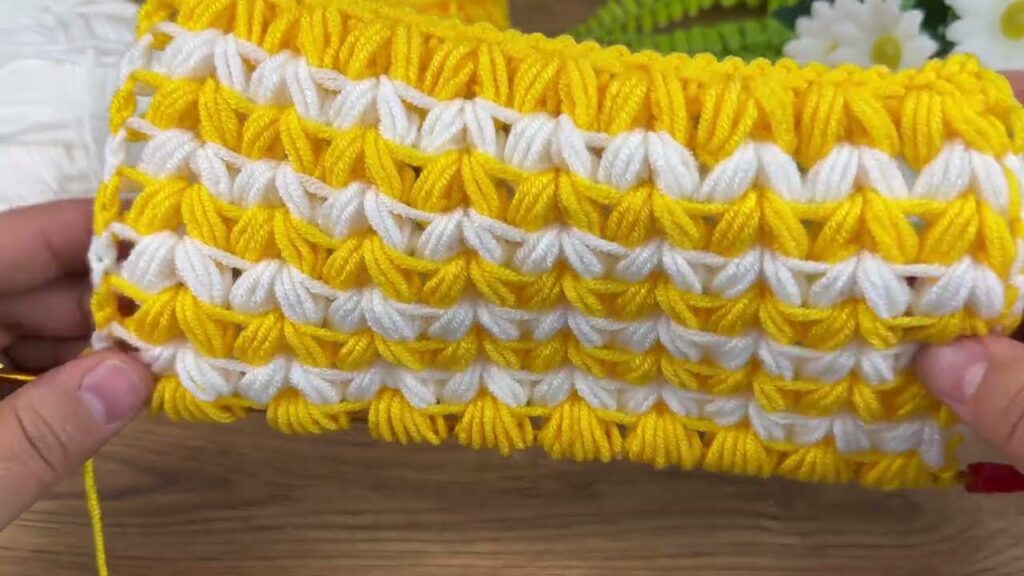
by Tunisian crochet, often called a “hybrid” of knitting and crochet, creates a unique, dense, and beautifully textured fabric that resembles weaving. It’s known for its warmth and drape, making it an excellent choice for blankets. Adding a second color not only enhances the visual appeal but also allows for stunning striped or color-blocked designs that truly highlight the stitch definition.
This detailed article will walk you through creating a Two-Color Tunisian Blanket, focusing on the fundamental Tunisian Simple Stitch (TSS). This pattern is perfect for those new to Tunisian crochet, offering clear instructions on the unique two-pass process and how to seamlessly incorporate color changes. Get ready to create a cozy, reversible, and visually striking blanket that will be a cherished addition to any home!

Why Crochet a Two-Color Tunisian Blanket?
- Unique Woven Texture: Tunisian crochet produces a fabric that looks distinctly different from traditional crochet, often resembling woven cloth.
- Exceptional Warmth: The dense nature of Tunisian stitches creates a thick, cozy fabric ideal for blankets.
- Less Stretching: Compared to traditional crochet, Tunisian fabric tends to be more stable and less prone to stretching out of shape.
- Stunning Colorwork: Two colors allow for beautiful stripes, color blocks, or even more complex intarsia designs, adding depth and visual interest.
- Skill Development: Master the unique forward and return passes, learn to read Tunisian stitches, and practice neat color changes.
- Reversible: Many Tunisian stitches, including TSS, create a fabric that looks great on both sides.
- Meditative Process: The repetitive nature of Tunisian crochet can be very relaxing and therapeutic.
Key Considerations Before You Start:
- Tunisian Crochet Basics: Unlike traditional crochet, Tunisian crochet involves keeping multiple loops on your hook at once. Each row is worked in two passes:
- Forward Pass (FwP): You pick up loops from the previous row and keep them on your hook.
- Return Pass (RetP): You yarn over and pull through loops to reduce them, creating the stitches of the current row.
- Yarn Choice:
- Fiber: Look for yarns that are soft, have good drape, and won’t be too stiff. Acrylic, wool, or blends work wonderfully for blankets. Avoid highly textured or “fuzzy” yarns for your first Tunisian project, as they can obscure stitch definition.
- Weight: Worsted (Category 4) or Bulky (Category 5) are excellent choices for a warm and quick-to-grow blanket.
- Colors: Choose two colors that complement each other well, or that provide a pleasing contrast for your striped design.
- Hook Size (Crucial!):
- You must use a Tunisian crochet hook. This is a longer hook (typically 10-14 inches or 25-35 cm) with a stopper at the end to hold all your loops.
- Always go up 1-2 hook sizes from what you would normally use for traditional crochet with the same yarn. Tunisian crochet fabric tends to be dense and can curl significantly. A larger hook helps mitigate this.
- For Worsted weight yarn, try a 6.0 mm (US J/10) to 8.0 mm (US L/11) Tunisian hook.
- Gauge & Curling:
- Tunisian crochet fabric inherently curls, especially at the bottom. Using a larger hook and adding a border are key strategies to prevent this. Blocking the finished blanket will also help significantly.
- Make a small swatch to check your gauge and see how much your fabric curls. Adjust hook size if necessary.
- Stitch Choice: Tunisian Simple Stitch (TSS):
- This is the most basic Tunisian stitch and perfect for learning. It creates a beautiful, textured fabric.
- Color Change Technique:
- In Tunisian crochet, color changes are typically made during the last yarn over of the return pass of the previous row to ensure a clean transition.
Materials You’ll Need:
- Yarn:
- Color A: Approx. 1000-1500 yards Worsted Weight (Category 4) yarn (e.g., for a baby blanket or lapghan). Adjust for larger sizes.
- Color B: Approx. 1000-1500 yards Worsted Weight (Category 4) yarn.
- Tunisian Crochet Hook: Size 7.0 mm (US K/10.5) or 8.0 mm (US L/11) with a stopper.
- Yarn Needle (Tapestry Needle): For weaving in ends.
- Scissors: For cutting yarn.
- Measuring Tape: For checking gauge and blanket dimensions.
Essential Tunisian Crochet Abbreviations:
- ch: chain
- sl st: slip stitch
- yo: yarn over
- st(s): stitch(es)
- TSS: Tunisian Simple Stitch
- FwP: Forward Pass
- RetP: Return Pass
- Last St: The last stitch of the row, worked through two loops to create a neat edge.
- (): indicates instructions to be worked into the same stitch/space
- ***…***: repeat instructions within asterisks
- [ ]: indicates stitch counts or specific instructions
Crochet Two-Color Tunisian Blanket Pattern: Step-by-Step
This pattern will guide you through creating a striped blanket using Tunisian Simple Stitch. We’ll alternate colors every two rows for a classic look.
Gauge Swatch (Recommended): Ch 20. Work 10 rows of TSS. Measure the width and height. This will help you determine how many chains you need for your desired blanket width. Adjust your hook size if your swatch is too dense or too loose.
Understanding Tunisian Simple Stitch (TSS):
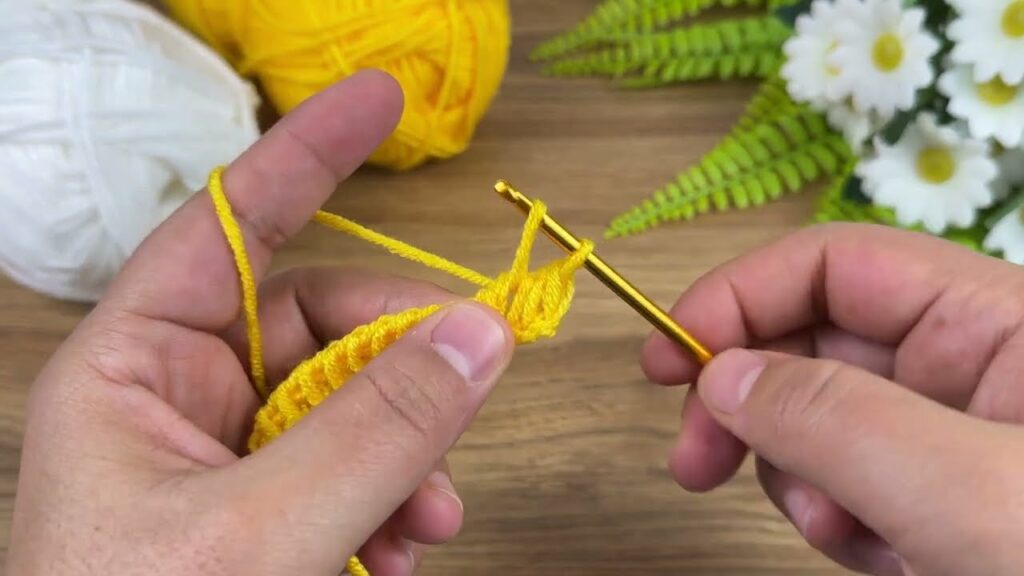
- Forward Pass (FwP):
- Insert hook under the vertical bar of the next stitch.
- Yo, pull up a loop. Keep loop on hook.
- Repeat across the row until you have a loop for each stitch.
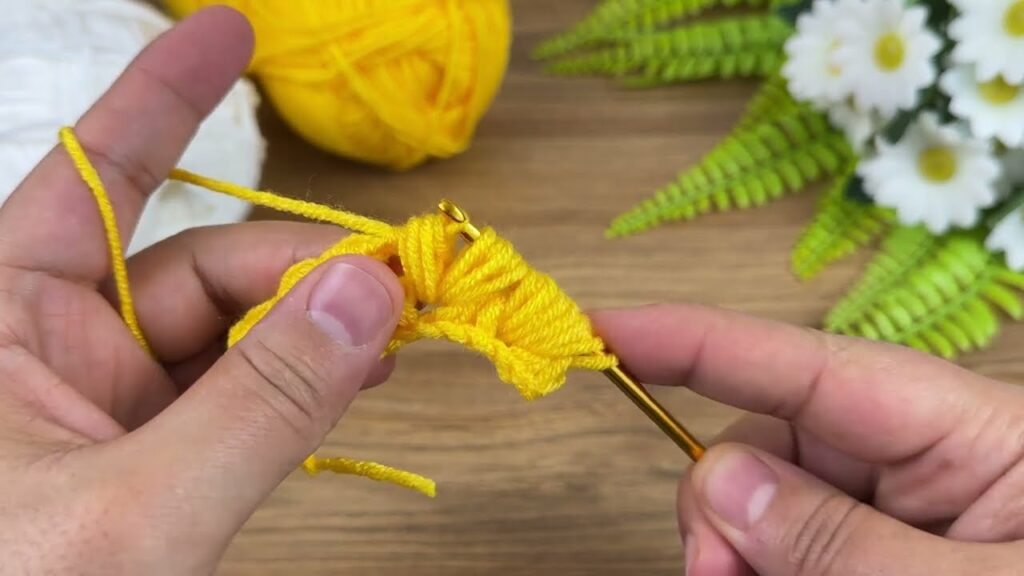
- Return Pass (RetP):
- Yo, pull through 1 loop (this creates a chain-1, often called the “edge stitch”).
- Yo, pull through 2 loops on hook. Repeat from * across the row until only 1 loop remains on your hook.
Color Change Method:
To change colors neatly at the end of a row: When you are on the last step of the Return Pass for the row where you want to change colors (i.e., you have 2 loops left on your hook), drop the current color, pick up the new color, and yarn over with the new color to pull through the final 2 loops.
The Blanket Pattern (Alternating 2 Rows Per Color)
Step 1: Starting the Blanket (Color A)
- Foundation Chain: Using Color A, ch 120 (for a small blanket/lapghan. Adjust this number to your desired blanket width. Aim for an even number of chains if you plan a border).
- Foundation Row (FwP):
- Insert hook into the 2nd ch from hook. Yo, pull up a loop. Keep loop on hook.
- Repeat: Insert hook into the next ch, yo, pull up a loop. Keep loop on hook.
- Continue across the entire foundation chain. You should have 120 loops on your hook.
- [120 loops on hook]
- Foundation Row (RetP):
- Yo, pull through 1 loop.
- Yo, pull through 2 loops. Repeat from * across the row until only 1 loop remains on your hook.
- [1 loop on hook]
Step 2: Working the Body (Color A – Row 1)
- Row 1 (FwP):
- Skip the first vertical bar (this is the loop already on your hook).
- Insert hook under the 2nd vertical bar from your hook. Yo, pull up a loop. Repeat from * across the row.
- For the Last Stitch: Insert hook under both vertical loops of the very last stitch on the edge. Yo, pull up a loop.
- [120 loops on hook]
- Row 1 (RetP – Prepare for Color Change):
- Yo, pull through 1 loop.
- Yo, pull through 2 loops. Repeat from * across the row until 2 loops remain on your hook.
- Drop Color A. Pick up Color B. Yo with Color B and pull through the final 2 loops on your hook.
- [1 loop on hook, now in Color B]
Step 3: Working the Body (Color B – Row 2)
- Row 2 (FwP): (Now working with Color B)
- Skip the first vertical bar.
- Insert hook under the 2nd vertical bar from your hook. Yo, pull up a loop. Repeat from * across the row.
- For the Last Stitch: Insert hook under both vertical loops of the very last stitch on the edge. Yo, pull up a loop.
- [120 loops on hook]
- Row 2 (RetP – Prepare for Color Change):
- Yo, pull through 1 loop.
- Yo, pull through 2 loops. Repeat from * across the row until 2 loops remain on your hook.
- Drop Color B. Pick up Color A (you can leave Color A attached at the side, running it up loosely, to avoid cutting). Yo with Color A and pull through the final 2 loops on your hook.
- [1 loop on hook, now in Color A]
Step 4: Continuing the Striped Pattern
- Repeat Step 2 (for Color A) and Step 3 (for Color B), alternating every two rows, until your blanket reaches your desired length.
- Important: When you finish a section with Color A, you’ll be ready to start a Color B section. When you finish a section with Color B, you’ll be ready to start a Color A section.
- Don’t cut your yarn after each color change if you’re only alternating every two rows. Just drop the color you’re not using and pick it up again on the next switch. If you’re doing very wide stripes, you might want to cut and reattach.
Step 5: The Last Row (Bind Off)
Once your blanket reaches the desired length and you’ve finished your final RetP, you need to bind off your stitches to create a finished edge.
- Using the color of your last finished row:
- Skip the first vertical bar.
- Insert hook under the 2nd vertical bar from your hook. Yo, pull up a loop, and pull that loop directly through the loop already on your hook (sl st).
- Repeat from * across the row.
- For the Last Stitch: Insert hook under both vertical loops of the very last stitch on the edge. Yo, pull up a loop, and pull that loop directly through the loop already on your hook.
- [All stitches bound off, 1 loop remains on hook]
- Fasten off, leaving a tail to weave in.
Part 6: Optional Border (Recommended for Finishing & Anti-Curling)
A simple traditional crochet border can neatly frame your blanket and significantly help with curling.
- Attach Yarn: Using either Color A or Color B (or a third color), attach yarn with a sl st to any corner of your blanket.
- Round 1 (Single Crochet Border):
- Ch 1 (does NOT count as a st).
- Work sc stitches evenly around the entire perimeter of your blanket.
- Along the sides (where you have rows of FwP/RetP): Work 1 sc for each row, or 2 sc for every 3 rows, or whatever looks neat and even to prevent pulling or rippling.
- Along the top and bottom (where you had your foundation chain and bind-off row): Work 1 sc into each stitch.
- Corners: When you reach a corner, work (sc, ch 1 or 2, sc) into the corner stitch/space to keep it flat.
- Join with a sl st to the first sc of the round.
- Round 2 (Optional – for a thicker border): Ch 1. Sc in each sc around, working (sc, ch 1 or 2, sc) in the corner ch-sp. Join with a sl st.
- Fasten off and weave in ends.
Finishing Your Tunisian Blanket:
- Weave in All Ends: Take your time to neatly weave in all yarn tails using your yarn needle. This is crucial for a clean, professional finish.
- Blocking (Highly Recommended!): Tunisian crochet has a tendency to curl. Blocking will greatly help flatten your blanket and even out stitches.
- Gently wet the entire blanket (or steam it).
- Carefully shape and stretch it to your desired dimensions on a flat, clean surface (like a foam mat). Pin the edges if necessary.
- Allow it to air dry completely. Do not tumble dry unless your yarn label explicitly allows it.
Your Two-Color Tunisian Blanket is Complete!
You now have a wonderfully textured, warm, and visually appealing blanket crafted with the unique art of Tunisian crochet.
Tips for Success & Customization:
- Preventing Curling:
- Use a larger hook size than you typically would for traditional crochet.
- Add a border using traditional crochet stitches (sc or hdc).
- Blocking is your best friend for Tunisian crochet!
- Yarn Impact: Different fibers will yield different results. Wool will be warm and bouncy; cotton will be dense and have good drape; acrylic is affordable and easy to care for.
- Color Combinations: Experiment with bold contrasts, subtle analogous colors, or even variegated yarns for one of the colors for unique effects.
- Stitch Variations: Once you’re comfortable with TSS, explore other Tunisian stitches like Tunisian Knit Stitch (TKS) for a knit-like fabric, or Tunisian Purl Stitch (TPS) for a bumpy texture. Combining stitches can create even more interesting patterns.
- Size Adjustment: To change the width, adjust your starting chain (ensure it’s the right number for your desired stitch pattern repeat, if applicable). To change the length, simply work more or fewer rows.
- Carrying Yarn: When alternating colors every two rows, you can simply drop the inactive yarn at the side of your work and pick it up two rows later. Just ensure you run it loosely enough that it doesn’t pull on the edge.
- Care: Always refer to your yarn label for specific washing and drying instructions. Most handmade blankets are best hand washed or machine washed on a delicate cycle and laid flat to dry.
Enjoy the unique texture and warmth of your beautiful Tunisian crochet blanket!
Video tutorial: