 by
by Easy Continuous Crochet Flower — Step-by-step
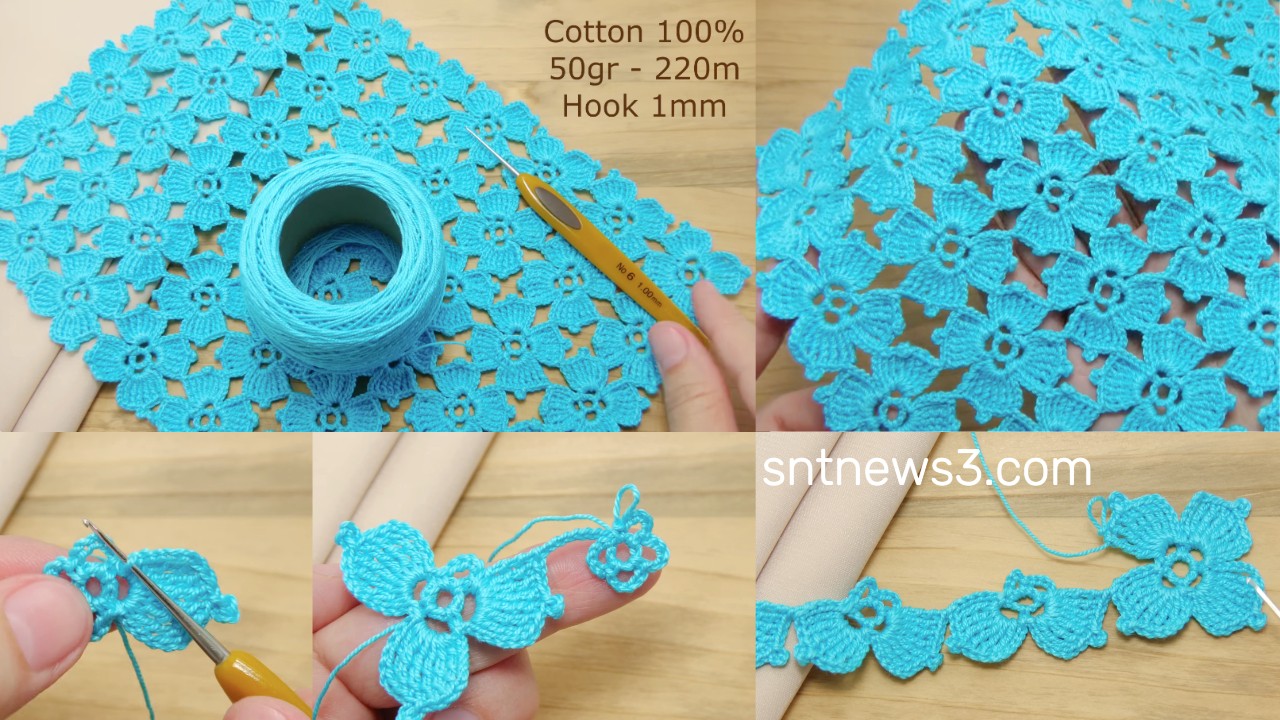
Finished size (sample): 5–7 cm (2–2.8″) depending on yarn & hook.
Yarn / hook (suggestion):
- Sport/DK yarn + 3.0–4.0 mm hook → medium small flower.
- Size 10 crochet thread + 1.5–2.5 mm hook → lacey tiny flower.
- Bulky yarn + larger hook → oversized decorative flower.
Materials: yarn, matching hook, scissors (only for final cut), tapestry needle for weaving, blocking pins (optional).
Abbreviations (US)
- ch = chain
- sl st = slip stitch
- sc = single crochet
- hdc = half double crochet
- dc = double crochet
- tr = treble crochet (optional)
- st = stitch
- sp = space
- rep = repeat
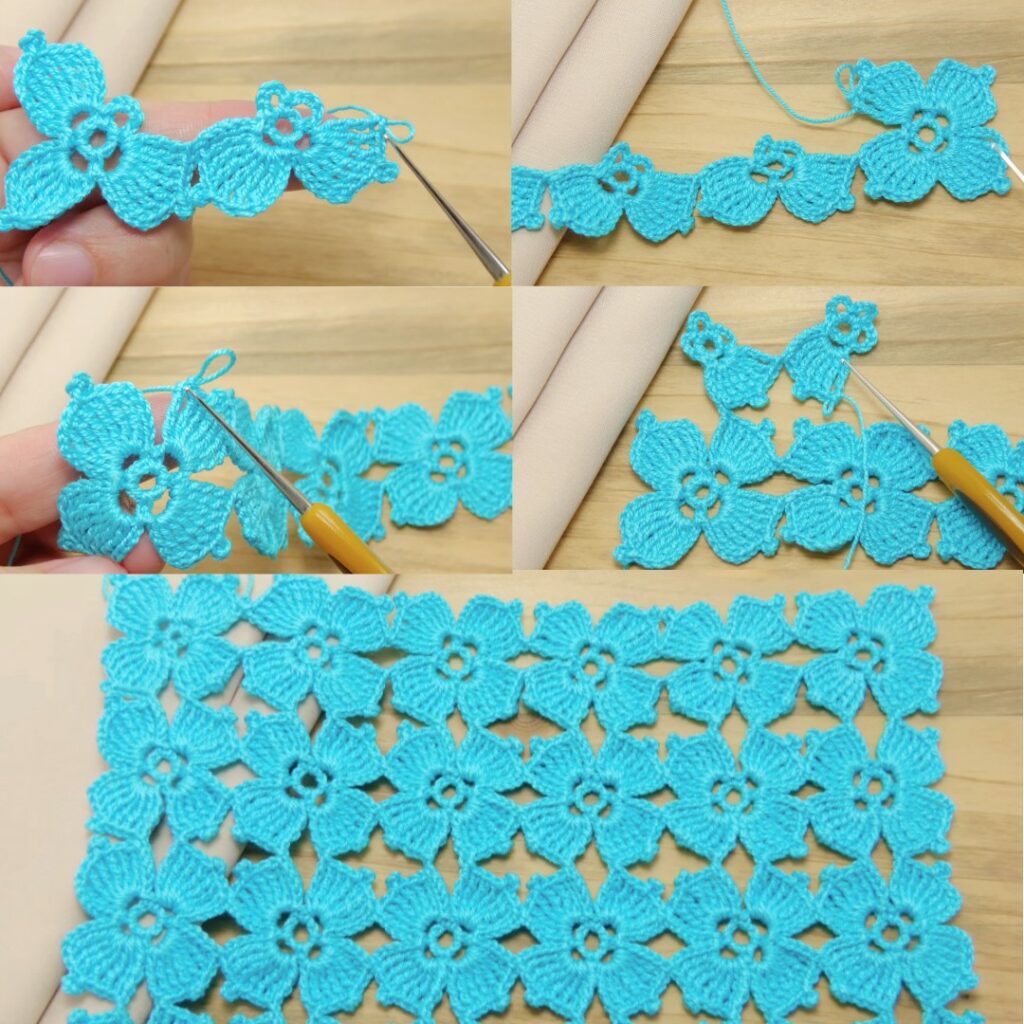
Design overview (how it works)
- Work a small center ring.
- Make anchor loops around the center (ch-loops) that determine petal placement.
- Work petal fans into those loops (5-dc or 3-dc fans).
- Finish with a tidy outer round that stabilizes the flower.
- Do the whole flower continuously (no cutting) so you can immediately start the next motif or continue with a join — instructions below.

Exact stitch pattern (8-petal version)
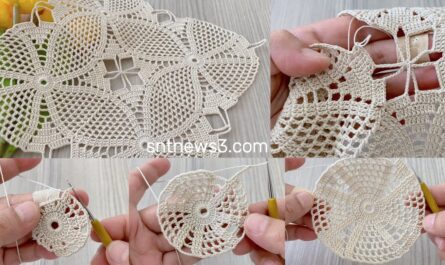
Round 1 — magic ring center
- Make a magic ring (or ch 4 and sl st to form a ring).
- Ch 3 (counts as first dc), work 7 dc into the ring. (Total = 8 dc including the ch-3.)
- Pull ring tight. Join with sl st to top of ch-3.
(You may also do 12 dc if you prefer 12 anchor points; the pattern below uses 8 petals.)
Round 2 — anchor loops (creates 8 ch-3 loops)
- Ch 1, sc in next dc, ch 3 — repeat around until you have 8 sc + 8 ch-3 loops.
- Join with sl st to first sc.
These ch-3 loops are where the petals will be worked.
Round 3 — petal fans (the flower petals)
Work into each ch-3 loop the following tapered fan:
- Sl st into the first ch-3 loop to position your hook.
- Work: (sc, ch 1, hdc, 5 dc, hdc, ch 1, sc) all into the same ch-3 loop.
- This creates a petal with a tall center (5 dc) and tapered edges (hdc + sc).
- Repeat into every ch-3 loop around → you will have 8 petals.
- Join with sl st to first sc (or join to the base sc of the first petal).
(If you want smaller petals, use 3 dc instead of 5 dc. For taller dramatic petals, use 7 dc.)
Round 4 — outline & stabilize (continuous, do not cut)
Without cutting yarn, continue to work an outer round that outlines petals and makes the flower lie flat.
- Ch 1 (do not turn).
- Working along petal edges: sc in the outer sc of the petal, ch 4, sc in the outer sc of the next petal. Repeat around so you form 8 ch-4 arches between petals. Join with sl st into first sc.
- (Optional — tighter outline) Instead of ch-4 you can do ch-3 if you want the petals closer.
Round 5 — finishing round (sc + small scallops)
Still without cutting, tidy the edge so the flower is finished and stable.
- Ch 1. Work sc evenly around working 3 sc into each ch-4 arch (or sc, ch 2, sc to make little picot arches), OR make 5-dc shells for a decorative ruffled edge: skip ch-4, (5 dc) in ch-4, skip next sc, sc in next sc.
- Join with sl st. Fasten off (now you may cut) and weave in tail with tapestry needle.
Working continuously (no cutting / without tearing the yarn)
This is the key “без отрыва нити” method:
- After finishing Round 1, do not cut. Carry the same working yarn into Round 2, Round 3, etc. You never have to tie off until the motif is completely finished.
- When you want to make another flower immediately, simply continue with Round 6 below OR slip the motif off the hook, leave the tail, and begin the next motif with the same yarn by chaining into the next magic ring. That will create a continuous chain of motifs on one strand (useful for making garlands or for saving ends).
- If you need to change color: slip to the point where you want the new color, pull up the new color through the last loop and continue — cut old color later if you want to hide tails.
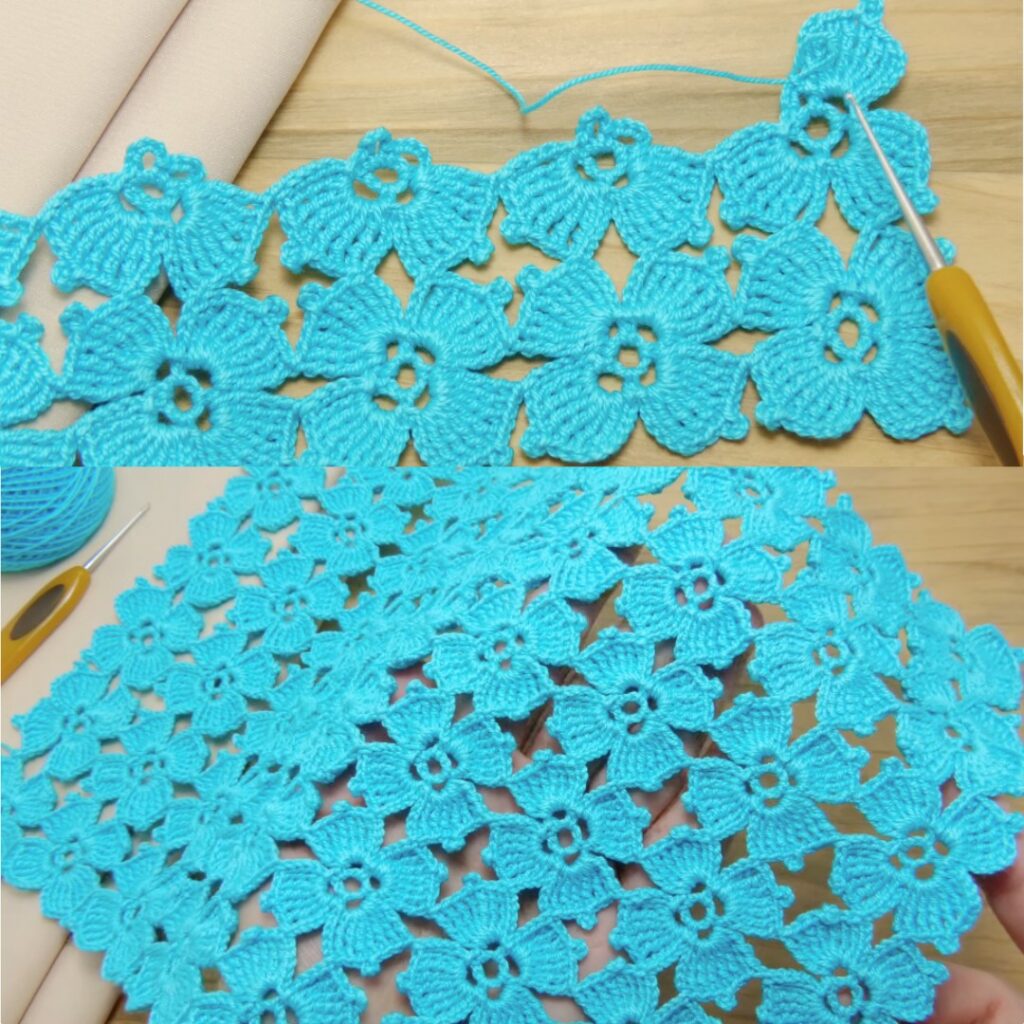
Quick join options (useful if making many flowers)
A — Join-as-you-go (on Round 4 or 5)
If you want to join flower motifs into a flat fabric (no sewing), this is how to join while you work the final stabilizing round:
- Make the first flower completely.
- Make the second flower up through Round 3. Start Round 4 (the ch-arch round). When you reach an arch that lies next to an already finished flower, instead of making a plain ch-4, do:
ch 2, sl st into the corresponding stitch (or ch-space) of the finished flower, ch 2(orch 1, sl st, ch 1depending on spacing).
- Continue; each slipped connection attaches the new flower to its neighbor. This creates an airy joined fabric (great for shawls, runners).
B — Sew after blocking (simple)
Block all flowers, arrange layout, and sew with tapestry needle and matching yarn with whipstitch or mattress stitch through back loops for a nearly invisible join.
Variations (fast ideas)
- 7-petal or 12-petal versions: change Round 1 to 7 or 12 dc to get a different petal count — then make one anchor loop per center dc. Adjust repeats accordingly.
- Smaller petals: use
(sc, 3 dc, sc)instead of the longer petal. - Layered flower: make a small 5-petal flower for the center, then make a larger 8-petal flower and stitch the small one on top for a layered look.
- Beaded center: before you start, pre-string some seed beads and slide one onto the hook to seat at the center when joining Round 1 (or sew a bead on with needle afterward).
- Flower with leaf edge: after Round 4, in the ch-4 arch do
(sc, ch1, (hdc, dc, hdc) in arch, ch1, sc)to create leaf shapes between petals.
Blocking & finishing
- Lightly steam or wet-block the flower and pin the petals to shape. Blocking opens petals and makes motif sit flat.
- For acrylic yarn: steam lightly; for cotton: wet block and pin to dry.
- After blocking, weave in tails neatly on the back.
Troubleshooting & tips
- Petals flop? Use smaller hook or add one extra outline round (Round 5) of sc to stiffen. Cotton holds shape better than acrylic.
- Center hole too large? Pull magic ring tighter or add one more sc round around the center before making anchor loops (e.g., make Round 1 = 12 sc then Round 2 anchors).
- Uneven petals? Make sure you work the exact number of stitches in each petal and into the same size loop — consistency in loop size is key.
- When joining JAYG: pin motifs together first to line up join points; this prevents skew.
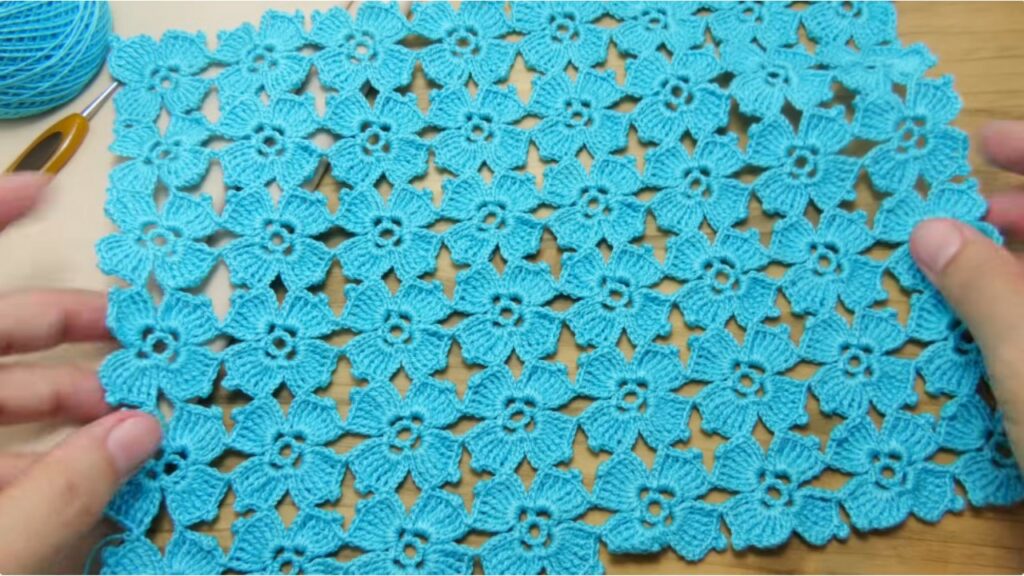
Uses & projects
- Appliqués for hats, garments, bags.
- Make many and join-as-you-go to produce shawls, table runners, placemats or a flower blanket.
- String several on yarn to make a flower garland (work continuously so they’re already connected).
- Use as centers of larger motifs or for layered 3D embellishments.
VIDEO: