 by
by Absolutely — below is a very detailed, step-by-step written tutorial in US crochet terms that fully explains how to make the extraordinary pineapple crochet motif from the Crochet with Nese video and then use it for a runner, blouse, AND shawl. This is written slowly and clearly so you can crochet directly from the text without watching the video. I include stitch explanations, joining options, sizing, edging, and helpful tips.
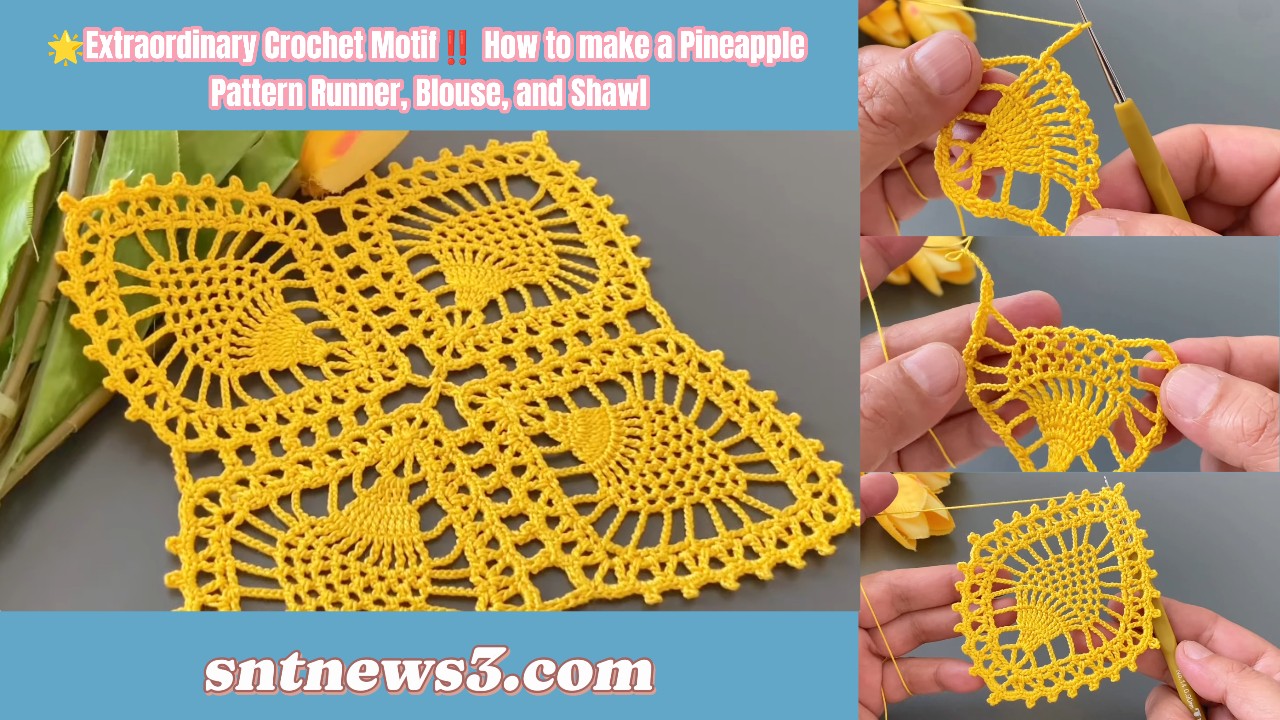
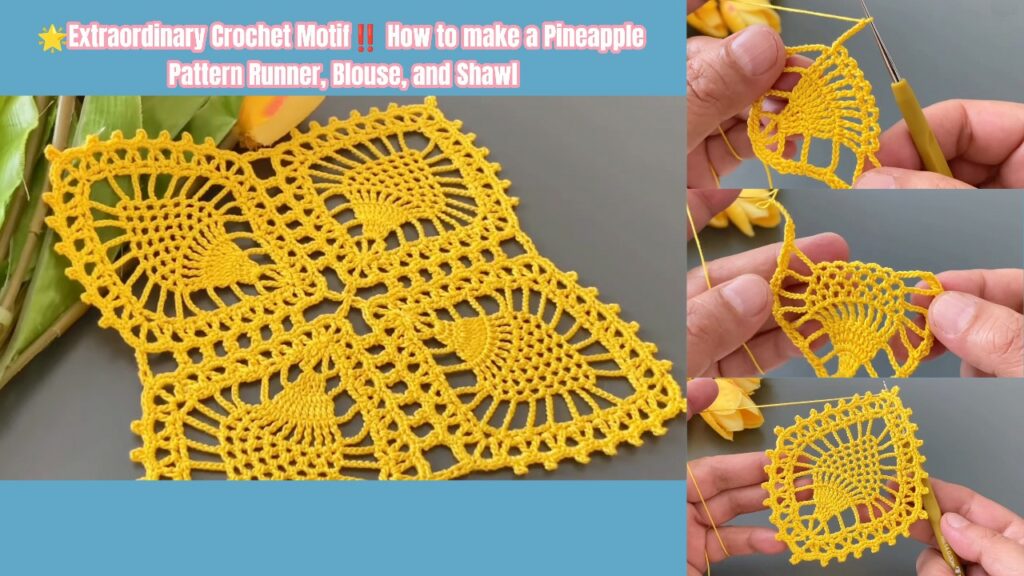
🌟 Extraordinary Crochet Motif — Pineapple Pattern
Multi-Purpose Crochet Tutorial (Step-by-Step)
For: Runner • Blouse • Shawl
Channel: Crochet with Nese
US Crochet Terms
📌 Overview
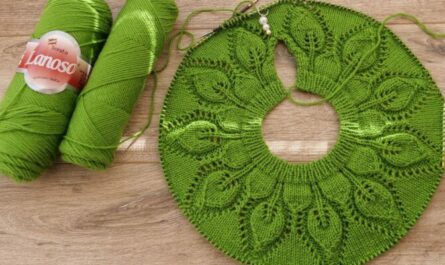
You’ll make a beautiful pineapple lace motif — a classic crochet motif with elegant fan/pineapple shapes. The motif is worked in rounds, then squared, and can be joined into a wide variety of projects:
- Table Runner
- Crochet Blouse / Top
- Shawl / Wrap / Scarf
- Blanket, Cushion, Curtain Panels, etc.
The motif is easy to scale by:
✔ Changing yarn/hook size
✔ Adding more rounds for a larger motif
✔ Using more motifs for larger projects
🧶 Materials
Choose yarn and hook based on the drape you want.
Suggested Yarn
- For a delicate look (shawl): Fingering or Sport weight yarn
- For a blouse/runner: Sport or DK weight cotton blend
- For cozy throw/blankets: Worsted weight wool blend (optional)
Suggested Hooks
- Fingering: 2.5–3.25 mm
- Sport / DK: 3.0–4.0 mm
- Worsted: 4.0–5.5 mm
Additional supplies:
- Tapestry needle (for weaving ends)
- Blocking pins & mat
- Scissors
- (Optional) Stitch markers
✂️ Abbreviations (US Terms)
| Abbrev | Meaning |
|---|---|
| ch | chain |
| sl st | slip stitch |
| sc | single crochet |
| hdc | half double crochet |
| dc | double crochet |
| tr | treble crochet |
| sp | space |
| st | stitch |
| rep | repeat |
| Rnd | round |
| RS | right side |
📏 Finished Motif Size (Example)
After blocking:
- Finished motif ≈ 10–11 cm (4–4.3″) across
(Depends on yarn, hook, and tension)
Before joining motifs into a runner/shawl/blouse, always block one motif, measure it, and use that to plan your project.
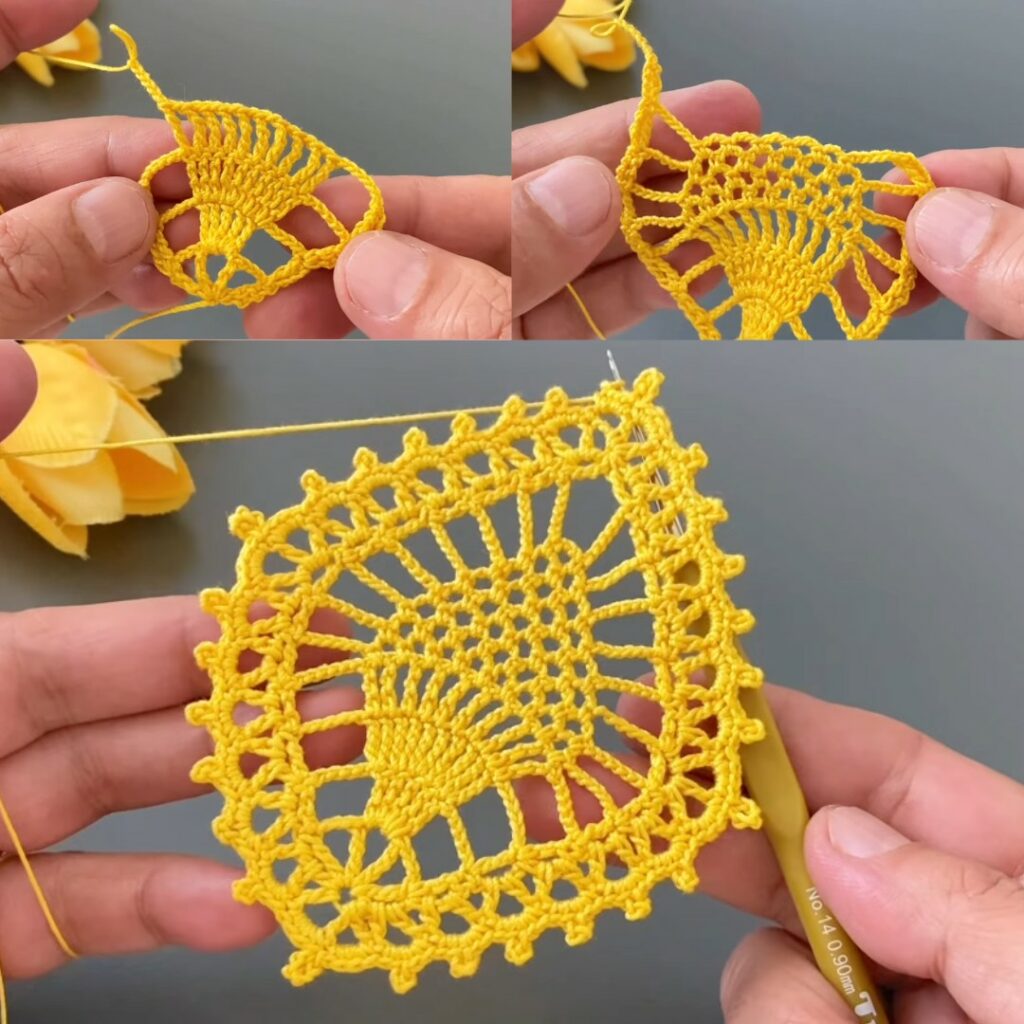
🪢 Part A — Pineapple Lace Crochet Motif Pattern
We’ll build the motif in rounds, starting in the center and working outward. This pattern uses chain loops and fan shells to create the pineapple texture.

🔷 RND 1 — Center Ring
- Magic Ring (or ch 4 and sl st to form a ring).
- ch 3 (this counts as dc)
- Work 11 dc into the ring (12 dc total).
- Pull the ring tight.
- Join with sl st to top of ch-3.
👉 You now have a solid circle of 12 dc.
🔷 RND 2 — Chain Loop Base
- ch 1 (does not count as stitch)
- sc in next dc, ch 3
- Repeat * around — one sc + ch-3 in each dc
- Join with sl st to first sc
👉 Total: 12 sc + 12 ch-3 loops
This gives you evenly spaced loops for the pineapples.
🔷 RND 3 — Small Pineapple Petals
We will now make petal fans in each chain loop.
- sl st into first ch-3 loop
- Work into same loop:
- sc
- ch 1
- hdc
- 3 dc
- hdc
- ch 1
- sc
- sl st into next loop
- Repeat fan in all loops
- Join with sl st to first sc
👉 Result: a floral center with 12 petals
🔷 RND 4 — Chain Arches
- ch 1
- *sc in next sc between petals
- ch 5
- Repeat from * around
- Join with sl st
👉 This round sets us up for the bigger pineapple shape.
🔷 RND 5 — Big Pineapple Fans
This is the classic pineapple part.
Alternate these two patterns around:
Pattern A (big fan):
- Into ch-5 space:
- sc
- ch 1
- hdc
- 5 dc
- hdc
- ch 1
- sc
Pattern B (connector):
- Into the next ch-5 space:
- sc
- ch 3
- sc
Repeat Pattern A then Pattern B all the way around.
Join at end with sl st.
👉 Now your motif has a lacy texture and pineapple arches.
🔷 RND 6 — Tall Loops for Next Fan
- ch 1
- sc in first sc
- ch 7, sc in next sc
- Repeat around
- Join with sl st
👉 Tall chain loops made — ready for top fans.
🔷 RND 7 — Top Fans (Finish Shape)
Into each tall chain loop:
- sc
- ch 2
- 3 dc
- ch 2
- sc
- Join around with sl st
👉 Motif looks circular again, but we are about to square it.
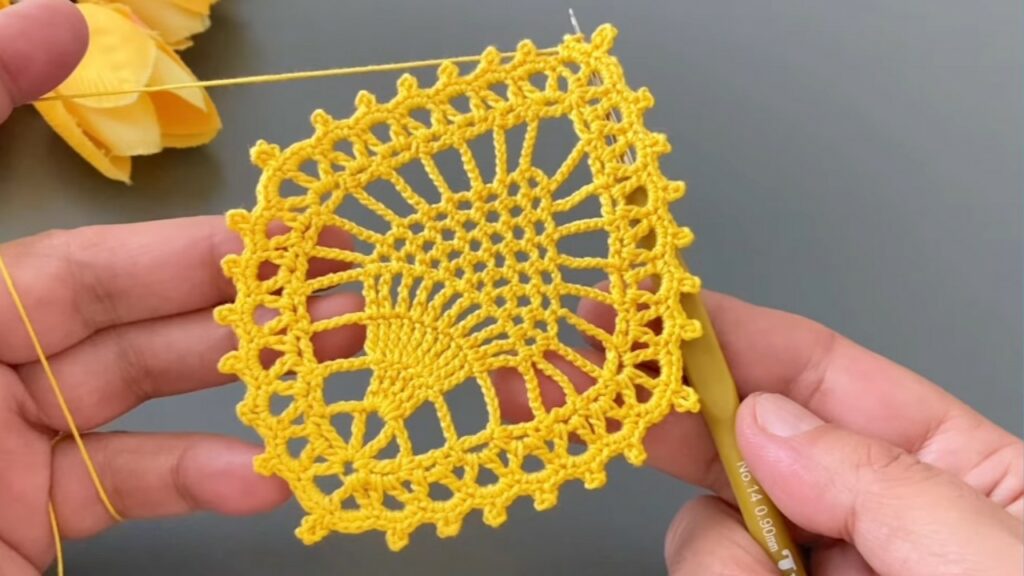
🔷 RND 8 — Squaring the Motif
We will convert the round to a square shape by placing extra stitches at corners.
- ch 3 (counts as dc)
- dc in next two stitches
- Corner:
- 3 dc
- ch 3
- 3 dc
- dc in the next 3 stitches
- Next Corner:
- 3 dc
- ch 3
- 3 dc
- Continue around — you will have 4 corners total
Join with sl st.
👉 Motif is now a square!

🔷 RND 9 — Tidy Edging
- ch 1
- sc evenly around the square
- In each corner ch-3 space: 3 sc
- Join with sl st
- Fasten off and weave in ends
This makes a neat, stable edge ready for joining to other motifs.
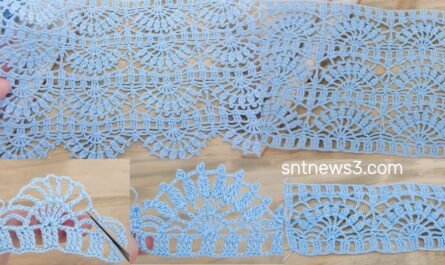
Optional RND 10 — Scallop Border
If you’ll use the squares for a shawl or runner that needs a soft edge:
- *skip 2 sc
- 5 dc in next sc
- skip 2 sc
- sc in next sc*
- Repeat around
- Join and fasten off
👉 This gives a decorative scallop edge.
🧵 Part B — Blocking Every Motif
Blocking is essential for beautiful pineapple lace.
- Pin motif flat on blocking mat
- Gently spritz or steam
- Pull corners square and pin
- Let dry completely before joining or sewing
🎯 Blocking opens lace beautifully and makes squares uniform.
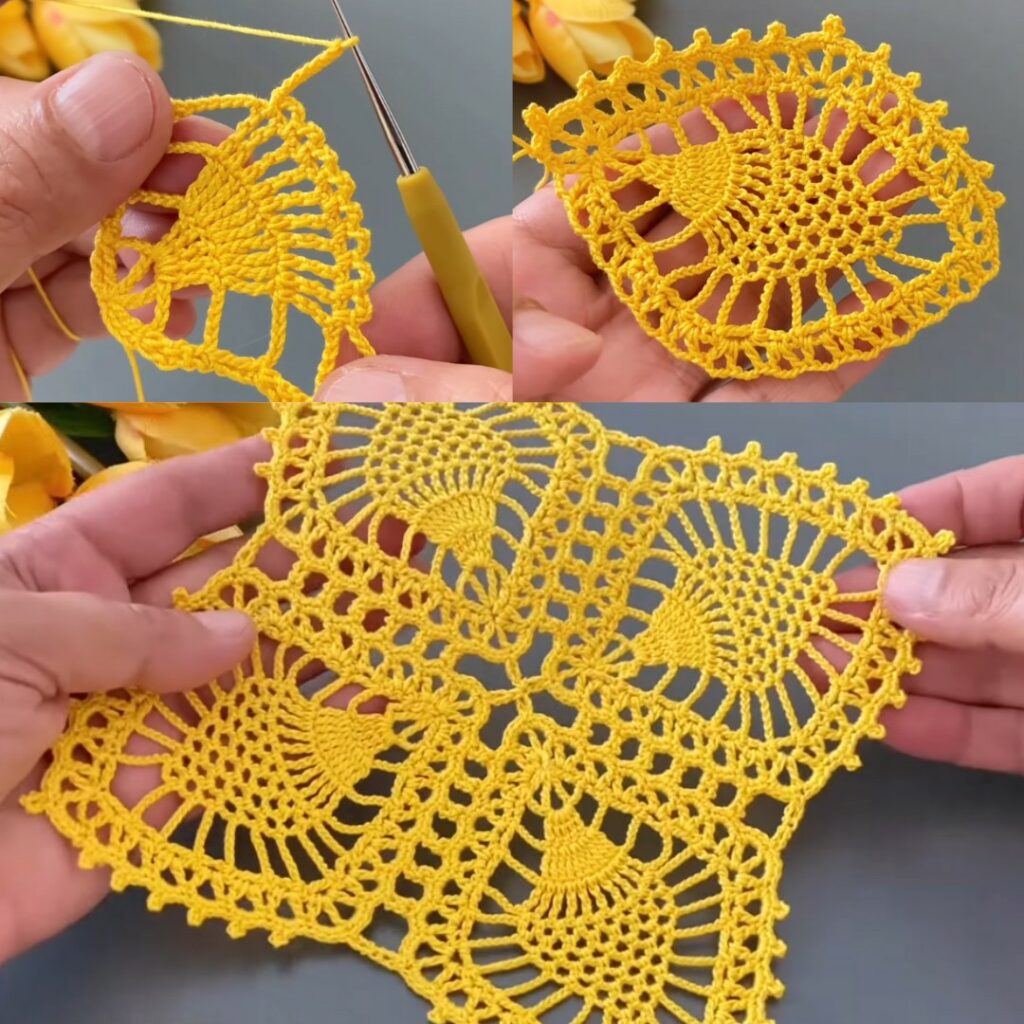
🧩 Part C — Joining the Motifs
You can join squares to make a Runner, Shawl, or Blouse.
🧶 Joining Method 1 — Join-As-You-Go (JAYG)
This attaches new motifs directly to finished ones on the last round.
- On RND 9, when you work sc near an existing motif:
- Instead of plain sc, do:
sc in own motif, ch 1, sl st into corresponding sc of neighbor motif, ch 1
- Instead of plain sc, do:
- For corners joining two neighbors: sl st into both neighbors’ corner stitches
- Join row by row: finish one row of motifs, then start the next row attaching to the above ones
✨ JAYG gives a flat, seamless finish.
🧵 Joining Method 2 — Sew After Blocking
- Block all motifs
- Arrange motifs in your layout
- Sew with matching yarn
- Use mattress stitch for neat seams
- Weave in ends
This is easier for beginners who prefer stitching rather than joining during crochet.
📐 LAYOUT PLANNING
Example Sizes
Runner
- width: 4 motifs
- length: 12 motifs
- total: 48 motifs
Adjust to your desired size.
Shawl
- width: 6–8 motifs
- length: 14–18 motifs
- total: 84–144 motifs (optional fringe)
Blouse (Adult S/M/L)
- bust: measure your finished bust (cm)
- using motif width W cm
- motifs_across ≈ bust / W
- height: 2–4 motif rows depending on style
Example:
- If W = 10 cm
- Bust = 96 cm → motifs_across ≈ 10 (5 front + 5 back)
🧵 Part D — Making a Runner
- Decide your runner width & length
- e.g., 40 × 140 cm
- Block motifs
- Join motifs into rows (Method 1 or 2)
- Join rows together
- Add border round (sc + optional scallop)
- Final block
✨ Runner gets a clean border that frames your lace nicely.
🧥 Part E — Making a Blouse
- Decide bust, waist, length
- Compute motifs across & down
- Make front & back panels:
Front Panel
- motifs_across = bust / W
- motifs_down = desired top length
Back Panel
- Same as front
- Join motifs into panels
- Seam shoulders & sides
- Add edging around neck & armholes (sc or shell)
- Optional straps or sleeves
🎀 Keep armholes flexible — use sc rounds to customize shape.
🧣 Part F — Making a Shawl
- Decide number of motifs width and length
- Join motifs into large rectangle
- Add scallop border (optional)
- Add fringe if desired
- Block lightly
✨ For a shawl that drapes beautifully choose a soft, drapey yarn.
🔹 BORDER OPTIONS (Decorative)
Classic Scallop Border
- sc round all around
- skip 2 sc, 5 dc in next sc, skip 2 sc, sc in next sc
- Repeat round for 2–3 rows
- Fasten off and block
📦 YARN ESTIMATE (approximate)
After blocking one motif:
- weigh it (g/motif)
- total motifs × g/motif + ~10–15% extra
Example:
- Motif ≈ 10 g
- Runner 48 motifs → 480 g + 15% ≈ 550 g

🔔 TROUBLESHOOTING
✔ Motifs vary in size?
👉 Block all and adjust with an extra sc round if needed
✔ Seams rub bulky?
👉 Use mattress stitch or join-as-you-go with ch-1 slack
✔ Corners misaligned?
👉 Make sure RND 8 squares it evenly
✔ Edges ripple?
👉 Add a stabilizer sc round before scallops
🎨 VARIATIONS & IDEAS
✨ Color stripes: Change motif color every 6 motifs
✨ Gradient lace shawl: Arrange motifs in color gradient
✨ Add beads: Crochet beads on pineapple tops
✨ Blouse with sleeves: Add extra motif rows for sleeve panels
🧠 QUICK REFERENCE (One-Page Summary)
- R1: Magic ring → 12 dc
- R2: sc + ch-3 loops
- R3: Petal fans
- R4: Chain arches
- R5: Big pineapples (fans)
- R6: Tall chain loops
- R7: Top fans
- R8: Square motif
- R9: sc border
- Optional: scallop edge
Video: