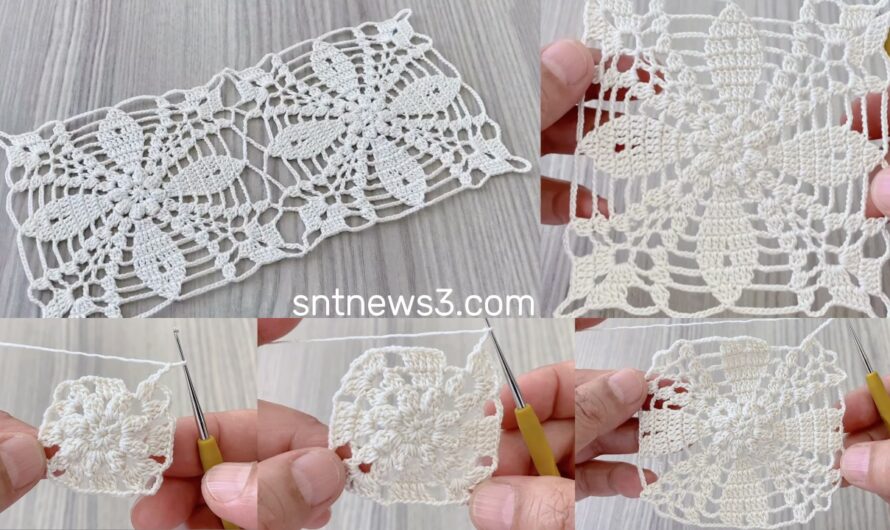
Fascinating Leaves🌿How to Make Crochet Shawl, Blouse Pattern
 by
by This pattern creates flowing leaf motifs connected in rows, perfect for shawls, blouses, tunics, or runners. The fabric grows lengthwise and looks elegant but is …
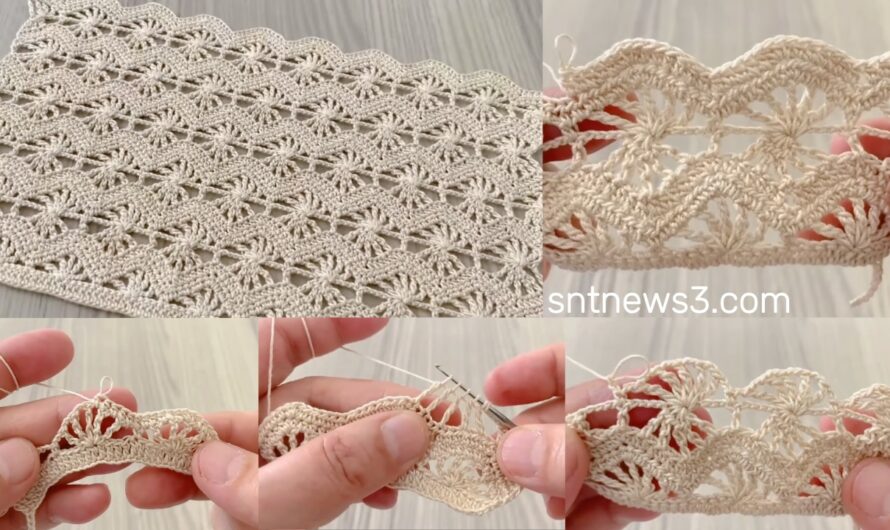
This pattern creates flowing leaf motifs connected in rows, perfect for shawls, blouses, tunics, or runners. The fabric grows lengthwise and looks elegant but is …
Materials & finished size Abbreviations (US) Pattern concept (short) Worked from the centre out: a neat centre → chain-loop scaffold → puff/petal clusters → tidy …
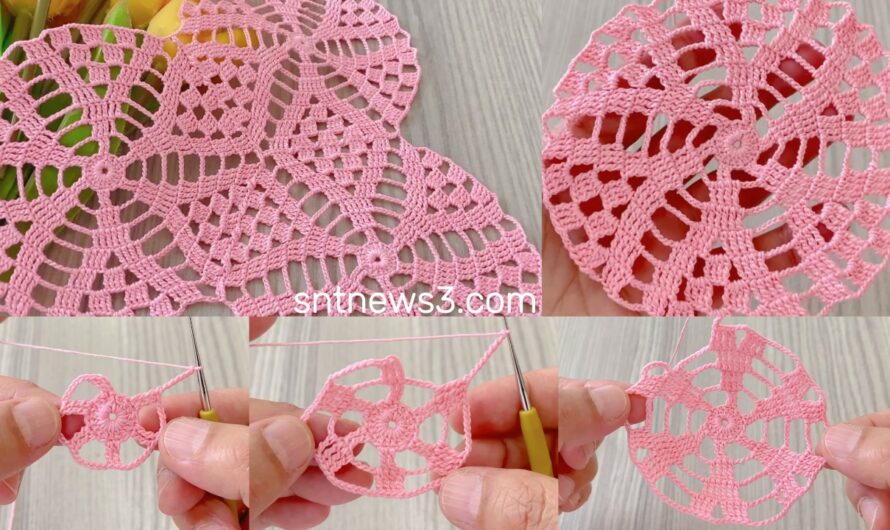
Nice — here’s a clear, beginner-friendly, step-by-step text tutorial for “Easy One-Piece Flower Pattern” (Crochet with Nese style). This makes a single, flat flower medallion …
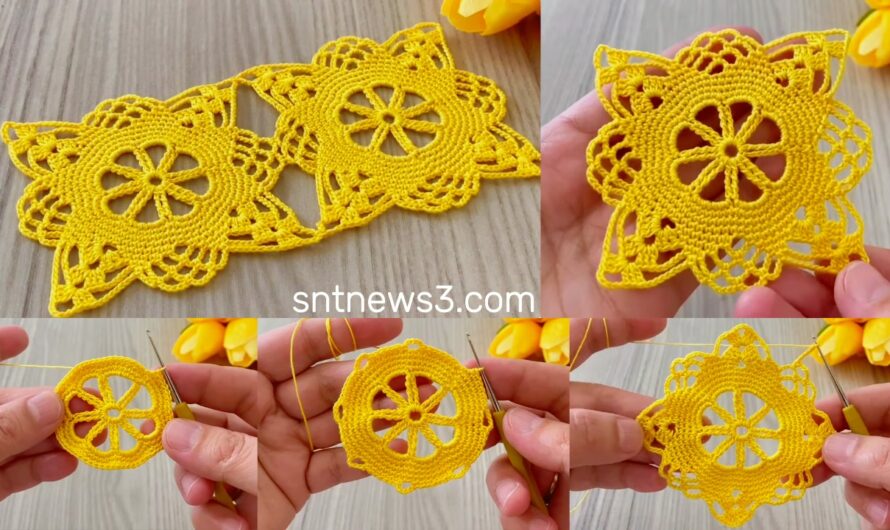
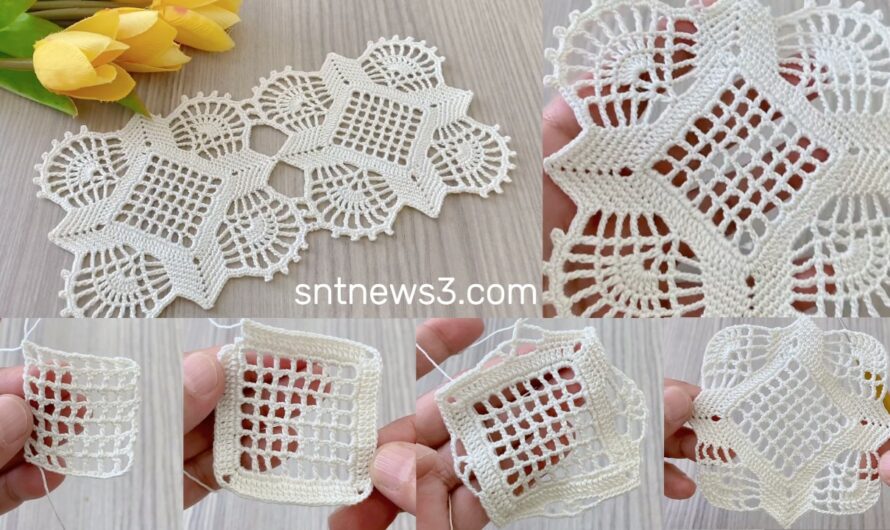
Here’s a clear, beginner-friendly text tutorial so you can crochet the cute square motif from the video. It’s a round flower → square motif that …
Here’s a clear, beginner-friendly, round-by-round text tutorial that makes a pretty round medallion → square motif you can use for blouses, runners, shawls or cushions. …
Great pick — here’s a clear, beginner-friendly text tutorial you can crochet right now. This produces a decorative medallion → square motif that joins into …
Nice pick — below is a complete, beginner-friendly step-by-step text tutorial so you can make a lovely lacy blouse. It’s written to use a joinable …
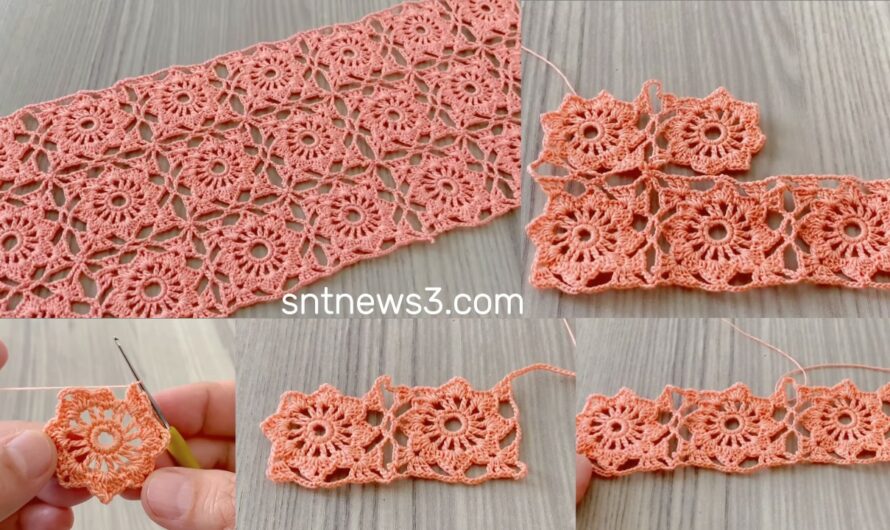
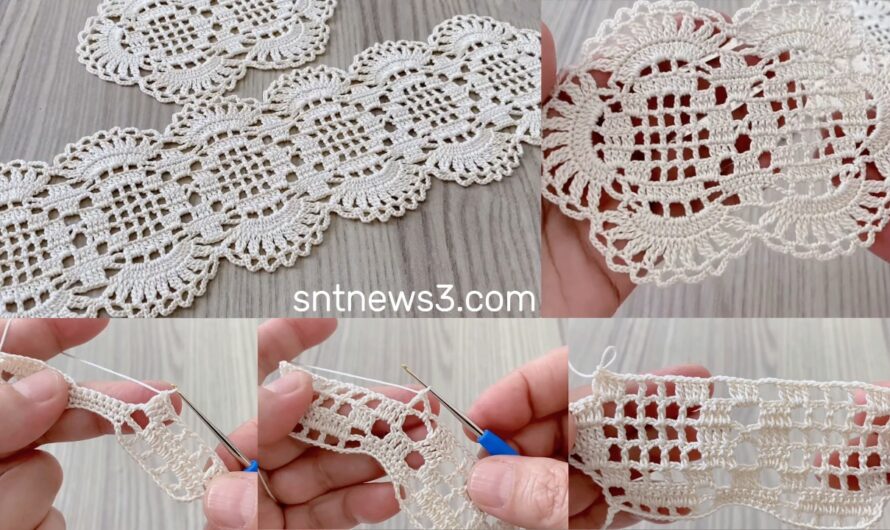
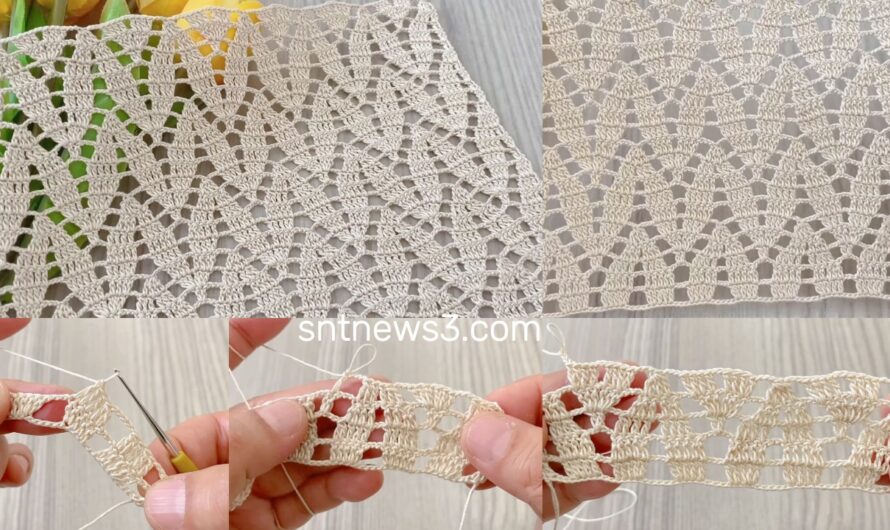
This is a clear, beginner-friendly edge you can crochet onto shawls, blouses, towels, table runners — or as a stand-alone strip. It produces pointed leaf-scallops …
Materials & finished size Abbreviations (US) Pattern overview (what it does) Worked from the center out: small center → chain loops → puffy petals → …
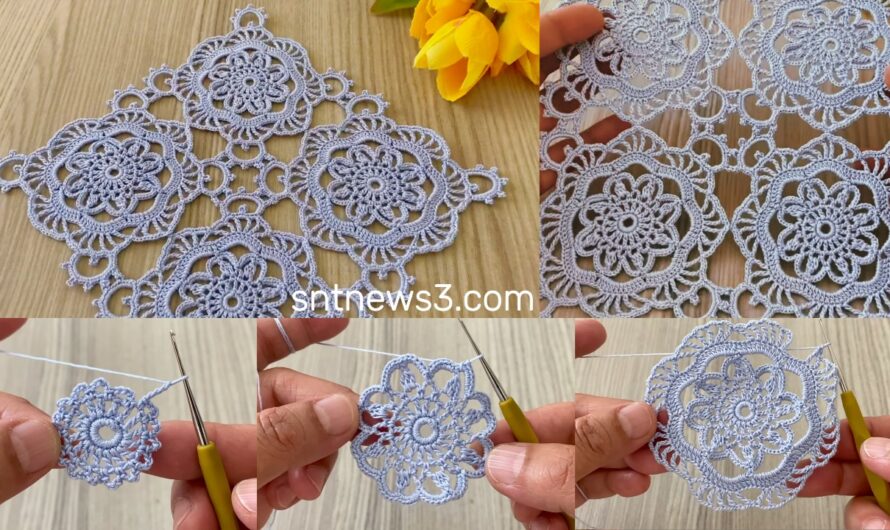
Hello! below is a clear, beginner-friendly, round-by-round text tutorial that produces a delicate snowflake-style medallion converted into a joinable square. Uses US terms. Counts/checks after …