 by
by Quick facts
- Skill: Beginner → easy
- Terms: US crochet terms
- Repeat: multiple of 8 + 1 (easy to remember)
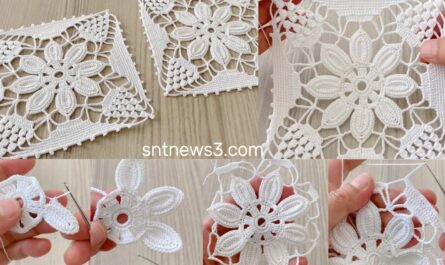
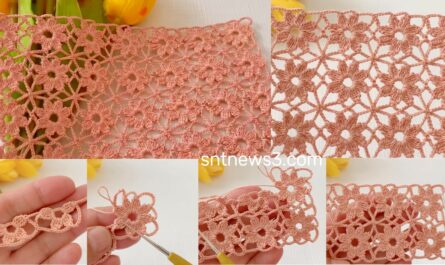
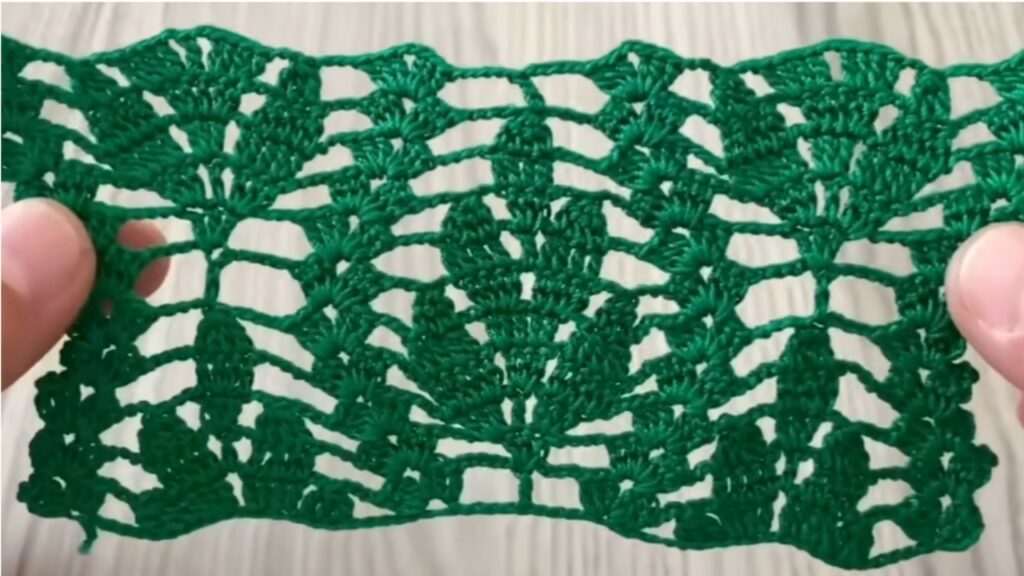
- Basic idea: alternating rows of fans/shells (the “leaf”) and chain/V-st spacer rows that align leaves vertically
Materials
- Yarn: fingering/sport for delicate shawl or blouse; DK for a sturdier blouse. (Cotton blends look crisp; wool blends drape more.)
- Hook: choose to match yarn — sample uses 3.5 mm (for DK) / 3.0 mm (for sport).
- Tapestry needle, scissors, blocking pins/mat, measuring tape.
- Abbreviations: ch, sc, dc, hdc, tr (treble), sl st, sp, st, rep.
Stitch multiple
- Multiple of 8 + 1 (example working chain:
ch 49= 8×6 + 1). - If you need to make the panel wider, change the multiple (8×N + 1).
Swatch / gauge (recommended)
Make a small swatch (multiple 8 + 1) about 10 × 10 cm and block it to see drape. This will help you calculate finished width/length.
The pattern — full step-by-step
Foundation
Chain a multiple of 8 + 1. Example for the sample swatch: ch 49.
Optional tidy base: Row 0 — dc across the chain to stabilize edges: ch 3 (counts as dc), dc in each chain across. Turn.
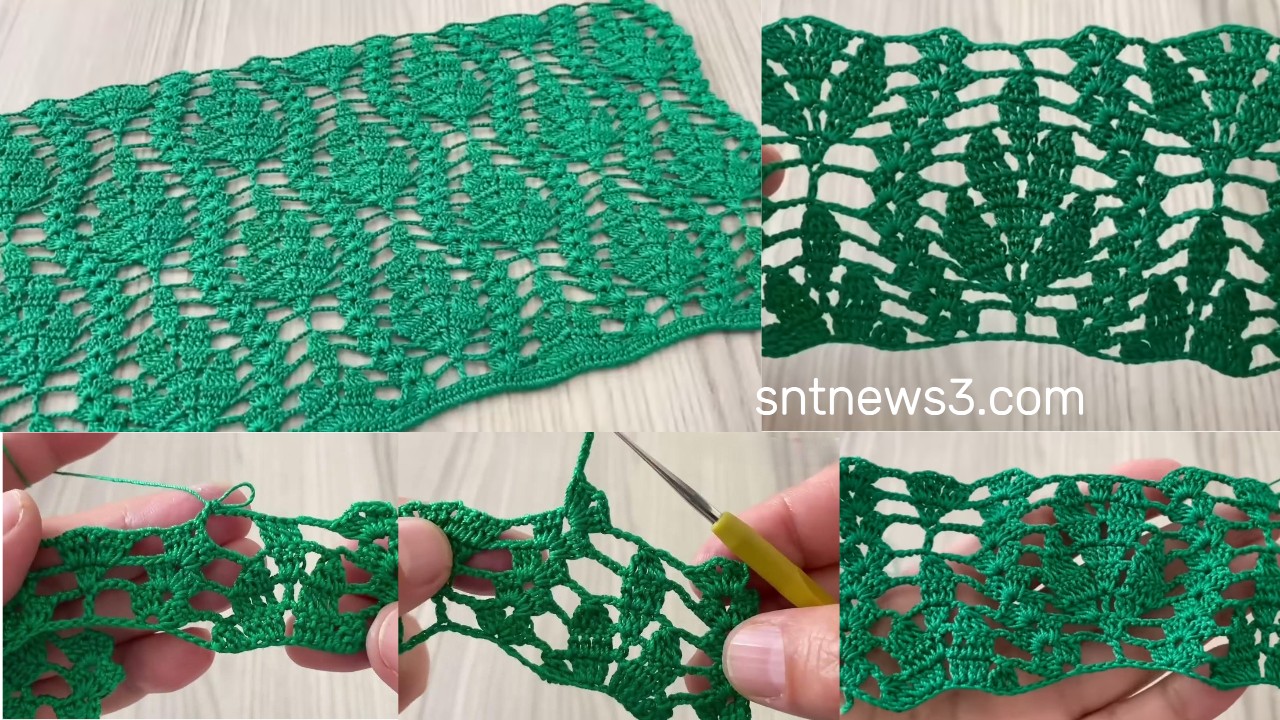
Row 1 — Leaf / Fan row (establish leaves)
- Ch 3 (counts as dc). Dc in next dc (so you begin with 2 dc to anchor the edge).
- Skip next 2 sts, 5 dc in next st (this is the fan = the leaf), skip next 2 sts, dc in next 2 sts.
- Repeat * across the row. End with dc in the top of the turning ch. Turn.
Notes: the 5-dc shell is the “leaf” body. You’ll place V-sts into the center of these shells on the next row so leaves stack vertically.
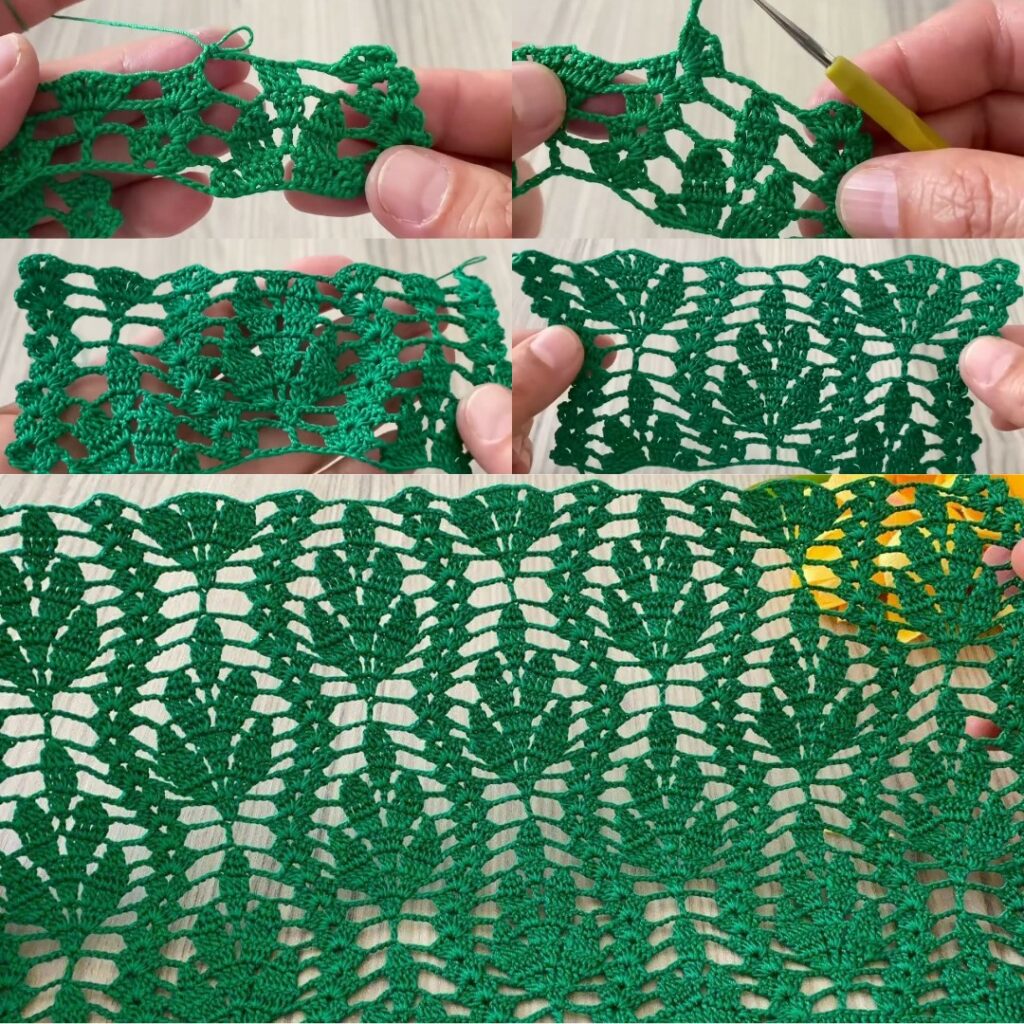
Row 2 — Arch + V-st spacer row (sets leaves apart)
- Ch 3 (counts as dc), dc in next dc.
- Ch 3, V-st (dc, ch 1, dc) into the center (3rd dc) of the 5-dc shell below, ch 3, dc in next 2 dc.
- Repeat * to the row end. End with dc in the top of turning ch. Turn.
Notes: V-st into the center dc of the fan anchors the vertical leaf column and the chain-3 arches give the lace its airy look.
Repeat
Work Rows 1–2 repeatedly until your panel reaches the desired length.
So the repeat is:
Row 1: Fan row (5-dc shells)
Row 2: Arch + V-st row
Repeat.
Worked sample (explicit) — make a small panel
- ch 49.
- Row 0 (optional): ch 3, dc in each ch across; turn.
- Row 1: ch 3, dc in next dc; sk 2, 5 dc in next st, sk 2, dc in next 2 dc rep across; end last dc; turn.
- Row 2: ch 3, dc in next dc; ch 3, V-st (dc,ch1,dc) into center of 5-dc shell below, ch 3, dc in next 2 dc rep; end dc; turn.
- Repeat Rows 1–2 until desired length. Block.
Adjusting the look
- Airier leaves: change ch-3 arches to ch-4 on Row 2.
- Smaller leaves: make 3-dc shells instead of 5-dc on Row 1 (then place V-st into the center dc).
- Taller leaves: use 7-dc shells for a bolder look. You’ll still place the V-st into the center of the shell.
- Denser fabric: substitute hdc for edge dcs if you want less drape.
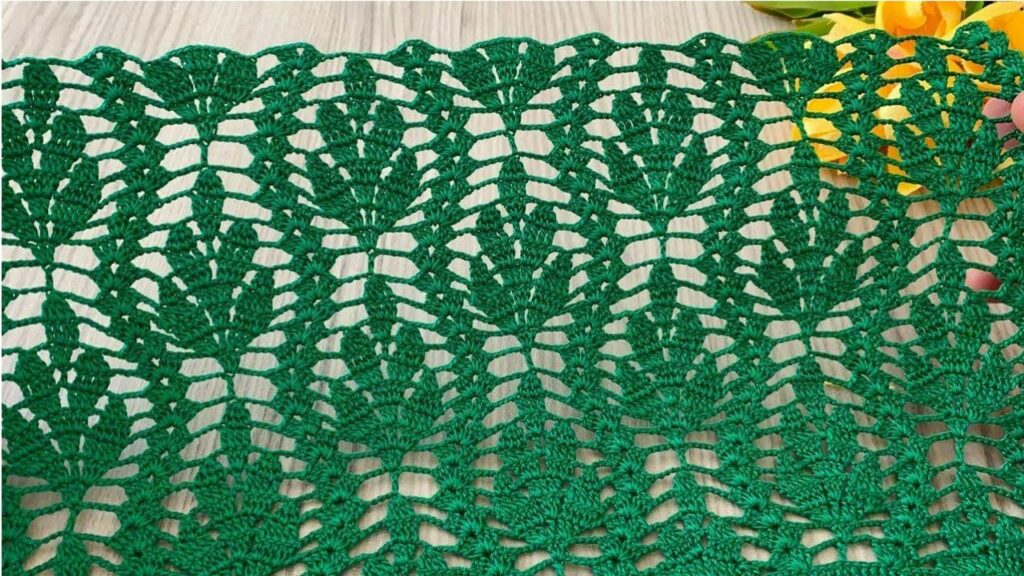
Turning the same panel into a SHAWL
Option 1 — large rectangular shawl:
- Work a wide panel (for example 60–70 cm width) and length about 170–200 cm. Add a scalloped border (see below). Block well to open the lace.
Option 2 — triangular shawl from rectangle:
- Make a long narrow rectangle and fold in half diagonally; seam or pick up along the diagonal and add fringe.
Option 3 — triangle built from center:
- Make a small central triangle motif by increasing repeats each row — (more advanced; I recommend option 1 for simplicity).
Turning the panel into a BLOUSE
Method A — simple two-panel blouse (easiest)
- Make two identical rectangular panels (front & back) of the same width and length. For chest measurement, use your blocked swatch to convert cm to stitches.
- Join the panels at the shoulders: measure and leave a comfortable neck opening (e.g., leave 18–22 cm or 2–3 pattern repeats centered).
- Seam sides from hem up to desired armhole depth (leave the rest open for armhole).
- Finish neck & armholes: pick up stitches and work 1–2 rounds sc, then a decorative shell round if desired. Optionally add short sleeves by picking up around the armhole and working the pattern in the round or adding a short motif strip sewn in.
Method B — open-front blouse (cardigan style)
- Make a single wide rectangle long enough to wrap; fold and seam sides leaving armholes; add a front band (sc rounds) and optional buttons or tie.
Sizing notes:
- Use swatch to compute stitches per cm:
sts_per_cm = (stitches in 10 cm) / 10. - To get the starting chain for half bust:
half_bust_cm × sts_per_cm, then round to nearest multiple of 8 and add +1.
Edging suggestions (neat finish)
Simple sc border (stabilizer)
- Work 1 round sc evenly around the edges (3 sc in each corner). This stabilizes the lace before decorative edging.
Scallop shell border (classic)
- After sc round: skip 2 sc, 5 dc in next sc, skip 2 sc, sc in next sc — repeat around for a scalloped finish.
Picot edge (delicate)
- After sc round: (sc, ch 3, sl st into same sc) every 3–6 sts to make tiny picots.
Fringe/tassels (shawl only)
- Attach tassels on short edges or at shell peaks for a boho look.
Blocking & finishing
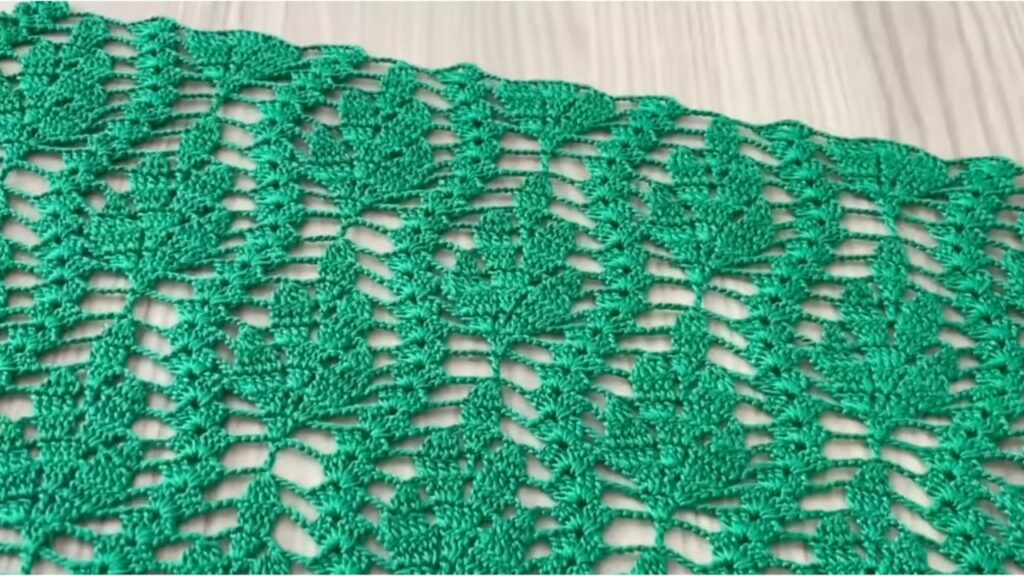
- Wet-block or steam block your finished piece pinned to the exact dimensions. The blocking opens the leaf shapes and evens stitch placement.
- Weave in ends on the wrong side. If blouse, sew any seams with mattress stitch for invisibility.
Troubleshooting & tips
- Leaves don’t line up vertically: make sure you place the V-st into the center (3rd) dc of the 5-dc shell — that anchors the vertical line. If you shifted, count dc in shell and place V-st into the middle one.
- Edges ripple: add Row 0 (a dc tidy base) and/or add one sc round before shell border.
- Fabric too open/floppy: go down one hook size or use 3-dc shells rather than 5-dc.
- Fabric too stiff: use a larger hook or a softer yarn for more drape.
- Stitch counts drifting: keep the multiple (8 + 1) consistent; count shells occasionally.

Variations & little design ideas
- Stripe leaf shawl: change color every 6–8 rows. Leaves on each stripe appear as bands.
- Leaf and lace panels: alternate leaf panels with a simple mesh panel (
ch3, skip, dc) for contrast. - Centered leaf column blouse: work narrower panels and place leaf columns as vertical decorative panels on a plain background.
- Beaded accent (optional): if you want sparkle, slide a small bead onto the yarn and seat it on the V-st when making the anchor dc — but this is optional and not necessary for the basic pattern.
Quick cheat-sheet (for printing)
- Foundation: ch (multiple 8 + 1).
- Row 1 (leaf row): ch3, dc in next dc; sk 2, 5 dc in next st, sk 2, dc in next 2 rep. Turn.
- Row 2 (spacer row): ch3, dc in next dc; ch3, V-st (dc,ch1,dc) into center dc of shell below, ch3, dc in next 2 dc rep. Turn.
- Repeat Rows 1–2. Block. Edging: sc round → scallop round if desired.
VIDEO: