 by
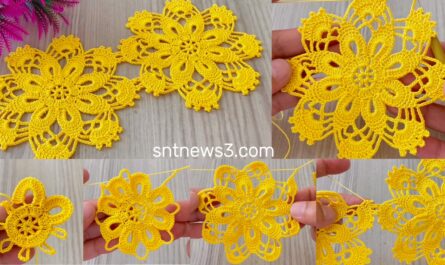
by 🌼 “Perfect Flowers” Motif → One-Piece Blouse / Shawl — Step-by-Step
Finished motif (blocked): ~10–13 cm / 4–5 in (depends on yarn & hook)
Yarn: DK / light worsted or mercerized cotton for crisp lace (use softer yarn for drapier blouse/shawl)
Hook: 3.5–4.5 mm (adjust to get motif size/drape you want)
Notions: tapestry needle, blocking pins/mat, scissors, stitch markers (optional)
Abbreviations (US terms)
- ch = chain
- sl st = slip stitch
- sc = single crochet
- hdc = half double crochet
- dc = double crochet
- tr = treble crochet
- pic = picot (ch 3, sl st to base)
- sp = space
- st(s) = stitch(es)
- rep = repeat
Design notes
- Motif is a flowery medallion with a pronounced petal round, decorative arches and a scalloped picot edge.
- Works beautifully joined-as-you-go (JAYG) so you can build a one-piece blouse by adding motifs row by row and shaping neck/armholes without sewing.
- Also perfect for a rectangular or triangular shawl by arranging motifs into desired shape.
Motif pattern — round by round (exact)
Round 0 — magic ring / foundation
- Make a magic ring (or ch 4, sl st to form ring).
- ch 3 (counts as first dc), work 15 dc into ring. (ch-3 + 15 dc = 16 dc total.)
- Pull ring closed, sl st to top of ch-3 to join. Check: 16 dc.
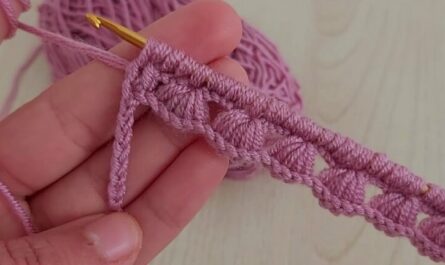
Round 1 — loop foundation (8 loops)
- ch 4, skip next dc, sc in next dc — repeat around.
- This makes 8 ch-4 loops and 8 sc between them. Join with sl st to first sc. Check: 8 loops.
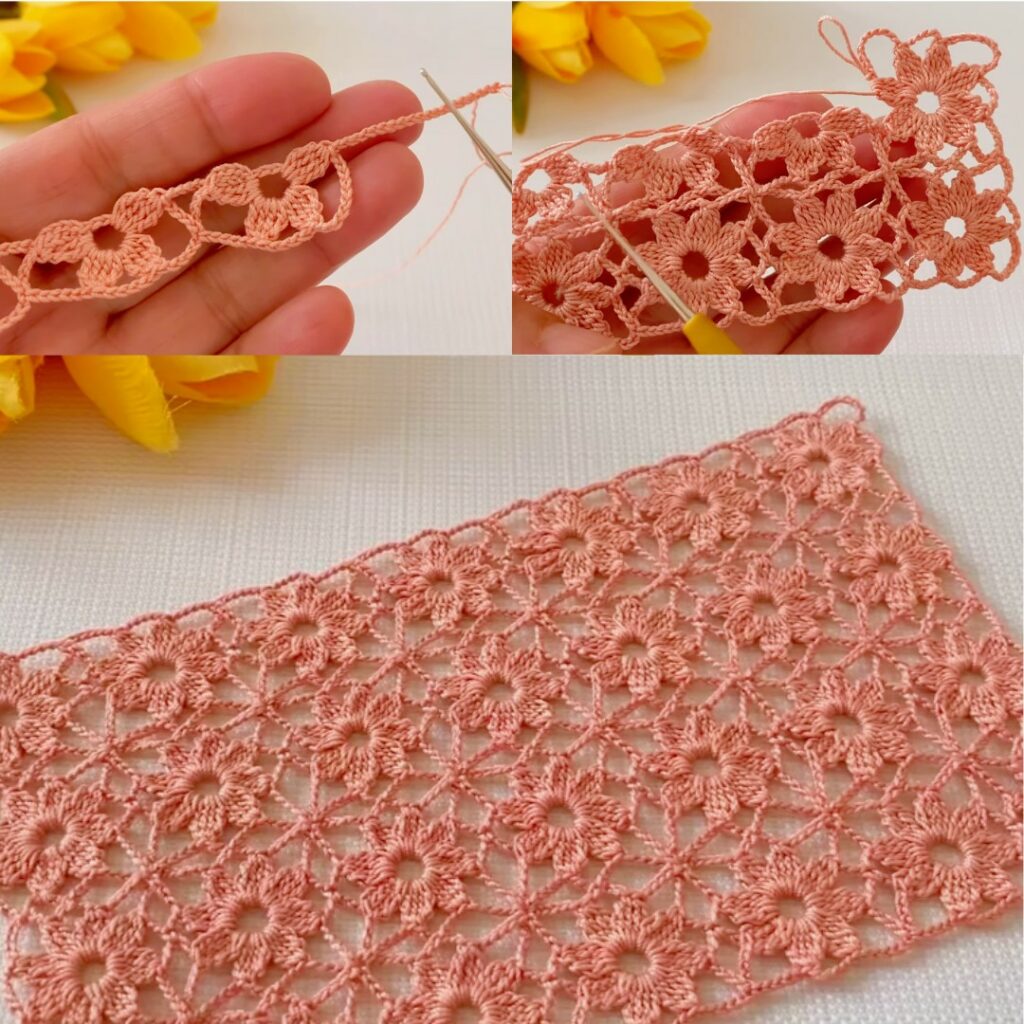
Round 2 — petals (puffy flower)
- Into each ch-4 loop work: (sc, hdc, 7 dc, hdc, sc) — all in same loop.
- This cluster = 11 stitches worked into one loop (but they are one cluster).
- Make this cluster into each of the 8 loops (8 petals). Join with sl st. Check: 8 petals.
Round 3 — tidy sc round (evening)
- Rejoin at base between petals. Work sc evenly around to make a smooth circular boundary. Aim for ~9–12 sc per petal area distributed across each petals’ base (total will be approx 72–96 sc depending on distribution). Adjust so motif lies flat. Join with sl st. Check: smooth circle.
Round 4 — large arches (lacy frame)
- From a petal tip: sl st to outer tip → ch 7 → anchor into the sc round between next petals with (tr, ch 2, tr, ch 2, tr) (work the cluster into a sc or small space) → sl st to next petal tip.*
- Repeat around to form 8 evenly spaced arches. (If ch-7 is visually too long for your yarn/hook, use ch-6 or ch-8.) Join with sl st. Check: 8 arches.
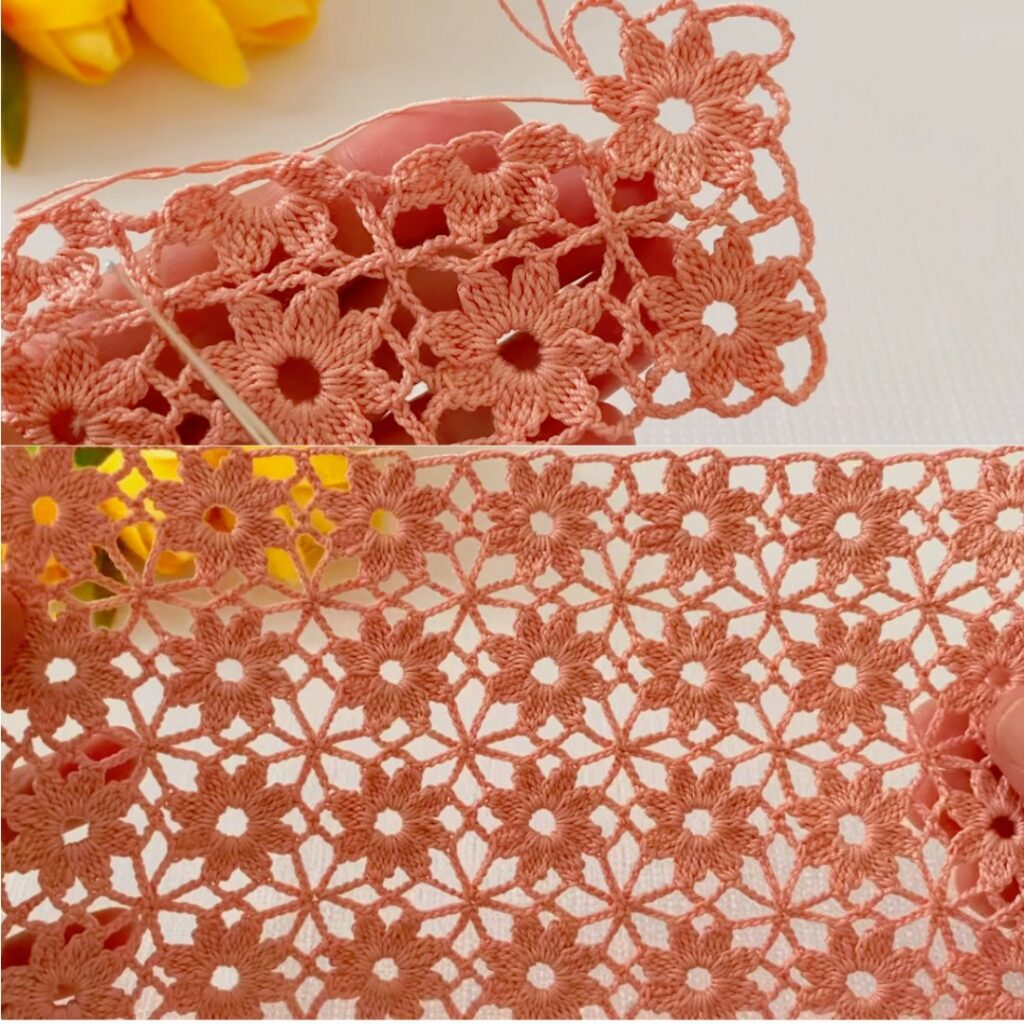
Round 5 — decorative ribs inside arches
- Into each ch-arch do: sl st into arch base → ch 3 → dc into top of first tr → ch 1 → dc into top of center tr → ch 1 → dc into top of last tr → ch 3 → sl st into arch base.
- Repeat for all 8 arches. This gives three slender ribs in each arch (gives the motif depth/texture). Join. Check: 3 ribs per arch.
Round 6 — optional corner/side loops for grid joins
(Include this round if you plan to join motifs into a structured grid for a blouse or runner — it creates side loops & corners for neat joins.)
- Mark four quarter points (every two petals). Start at a quarter marker.
- Along each side between corners: work a series of sc, ch 4, sc repeats across the side so you produce small side-loops. At corner points make ch 6 to form a corner loop.
- After four sides you’ll have corner loops (ch-6) that make a square-ish silhouette after blocking. Join and fasten off or continue. Check: four corner loops and evenly spaced side loops.
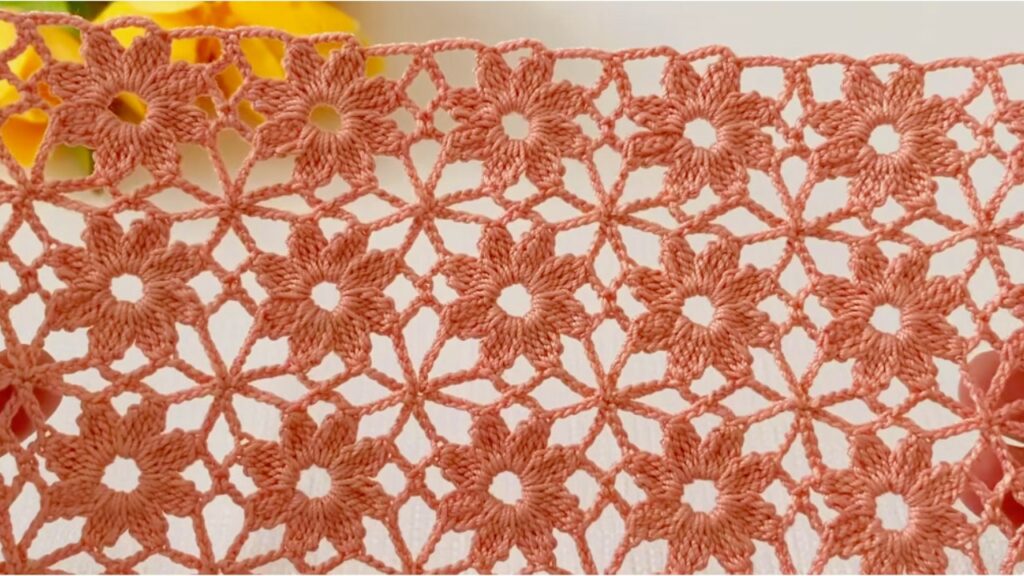
Round 7 — outer scallop & picot finish
- Rejoin and work a scalloped picot border: sc 3 across a curve, (pic: ch 3 + sl st into same st), sc 4 across the next small curve — adjust sc counts to keep the edge flat.
- Place picots at regular intervals for dotted effect. Join, fasten off, and weave ends. Check: even scallops and picots.
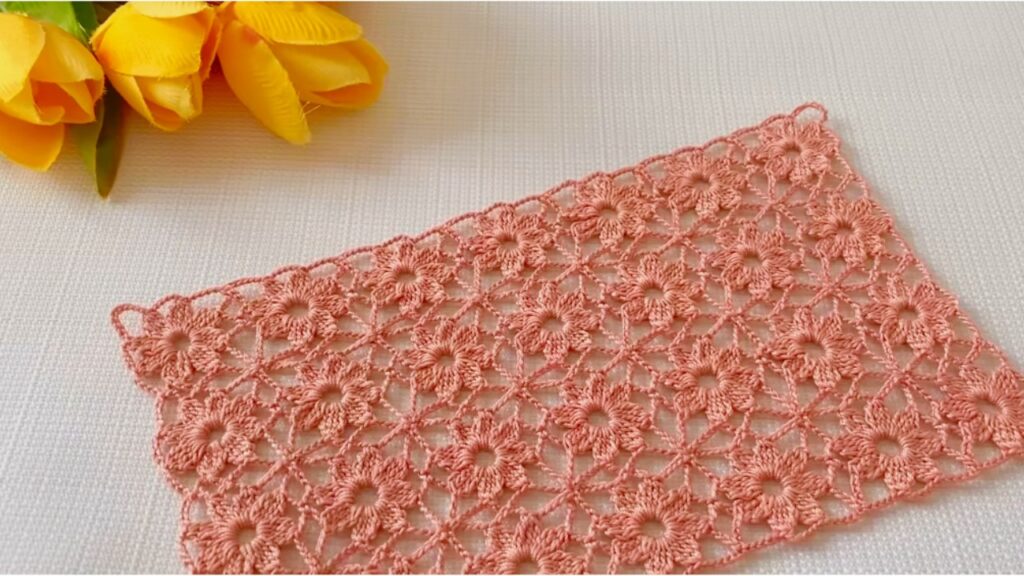
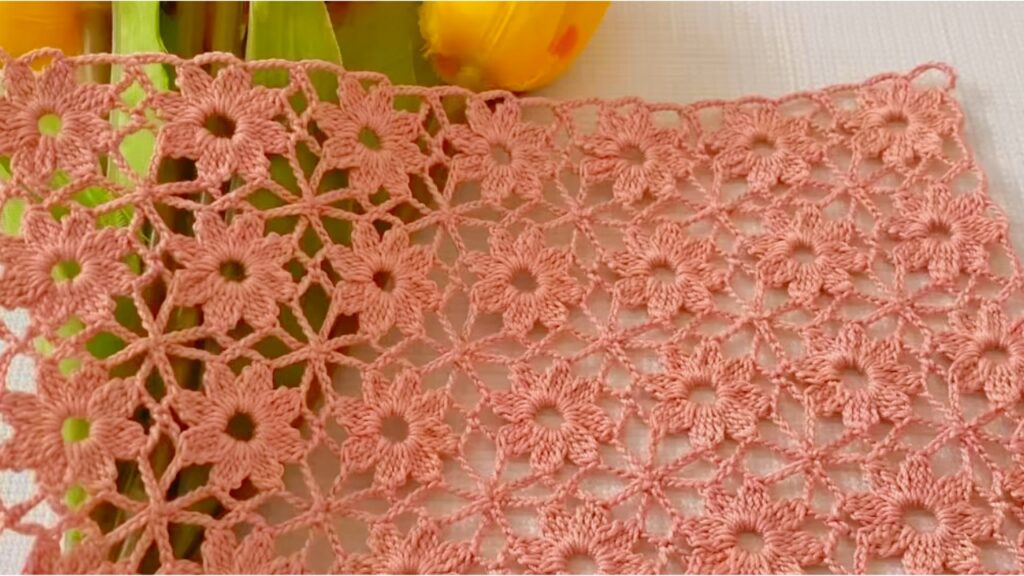
Blocking
- Pin the motif to desired size/shape, pulling corner loops outward (if used) to make crisp corners. Pin picots for pointy scallops. Mist with water or steam lightly; allow to dry completely. Blocking is essential to get motifs that join cleanly for garments.
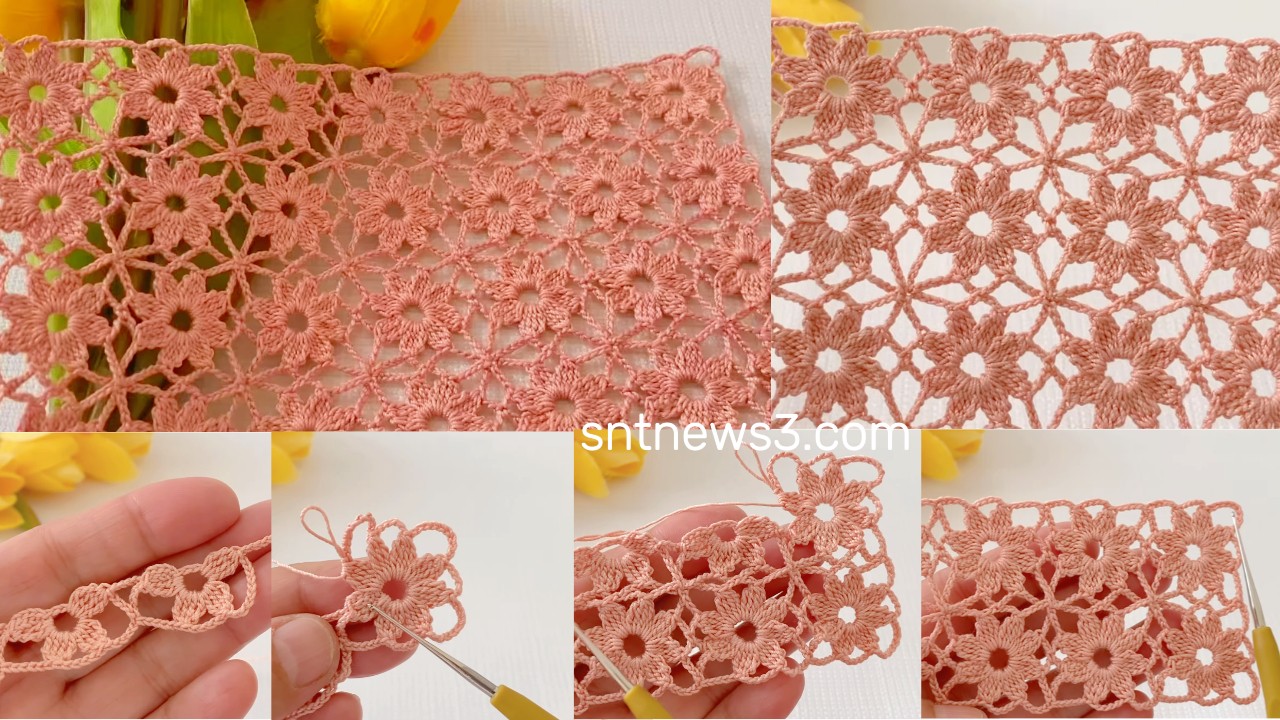
Joining-as-you-go (One-piece blouse method)
This is the nice part — build your blouse without sewing seams.
Basic concept
- Crochet the first motif completely. Make the second motif up through Round 6 (or up through Round 5 if you prefer), then on Round 7 (outer scallop) join it to the adjacent finished motif by replacing the sl st or the outer stitch at each intended join point with sl st into the corresponding stitch or picot of the finished motif. Continue adding motifs row by row; join at side-loops and corner loops so seams are flat.
One-piece blouse layout (starter)
- Decide motif width M (after blocking) and desired half-chest measurement H (front panel width). Number of motifs across top row = round(H ÷ M). Example: motif 11 cm, half-chest 50 cm → 4–5 motifs across.
- Build the blouse from top down (recommended) as follows:
- Make a first row of motifs that will form the top front panel (neckline row). For a round/boat neck, center the row and leave center joins open for the neckline by skipping joining on the center 1–2 motifs as needed.
- Add the next row below by crocheting motifs and JAYG to the row above. Continue until you reach the desired torso length.
- When the front piece reaches desired length, continue working the back panel by crocheting motifs and joining to the inner shoulder edges — OR work the blouse in one continuous sheet: after completing the front rows, add motifs across the shoulder to continue for the back, leaving the neckline opening unjoined where required. This gives a true one-piece construction (like a poncho folded).
- For armholes: when joining rows on the sides, leave the required number of motifs unjoined to create an armhole opening (typically 1–2 motif heights for cap sleeve, 2–3 motifs for deeper armhole).
- Optionally, add short motif strips for sleeves or leave open for a shell style.
Example quick schematic (small adult)
- Top row across chest: 4 motifs (front top).
- Continue rows downward 3–4 motif rows for torso.
- Join across shoulders to continue back (OR make a separate back panel and join shoulders leaving neck opening).
- Side seams: join motifs up to underarm level, leave armhole space (~1–2 motif heights), then continue down to hem.
Neck & hem finishing
- Pick up stitches around neckline with hook and yarn; work 2 rounds sc, then 1 round picot or shell for a neat finish. Hem: 1–2 rounds hdc or sc for weight and drape.
Shawl options
Rectangular shawl: Join motifs into a long rectangle (e.g., 6 × 10 motifs) and work a scallop border.
Triangular shawl (motif triangle):
- Start at the top point with 1 motif, then join a row of 2 motifs beneath it, then 3, etc., to form an expanding triangle. Use half-motifs or leave ragged edges for boho look — or add partial rows. Add a delicate picot or shell border and optional fringe.
Tips & Troubleshooting
- Motif cups (edges pull up): loosen tension or go up one hook size; check petal rounds for tightness.
- Motif waves/ruffles: reduce arch chain length (ch-7 → ch-6) or remove some sc from Round 3 to reduce fabric excess.
- Joins gape: add an extra sl st at join points or block more strongly before joining. JAYG works best on blocked motifs.
- For drapey blouse: use softer yarn, larger hook (0.5–1 mm up). For structured runner: use cotton and smaller hook.
- Keep counts consistent: after each round count petals (8), arches (8), and side-loop counts per side so joins match.
Quick variations
- Two-color motif: change color after Round 2 (petals) so petals contrast with the lace frame.
- Larger petals: increase 7 dc → 9 dc for fuller petals; adjust sc distribution in Round 3.
- Simpler beginner version: replace the arch/post rounds with ch-5 loops and place 3 dc across each loop — still lacy but easier.
VIDEO: