 by
by Quick facts (what this pattern uses)
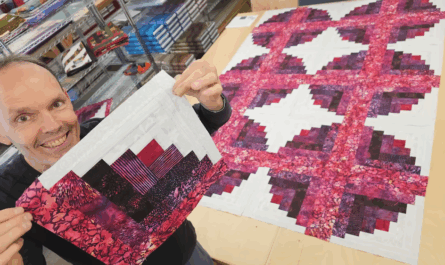
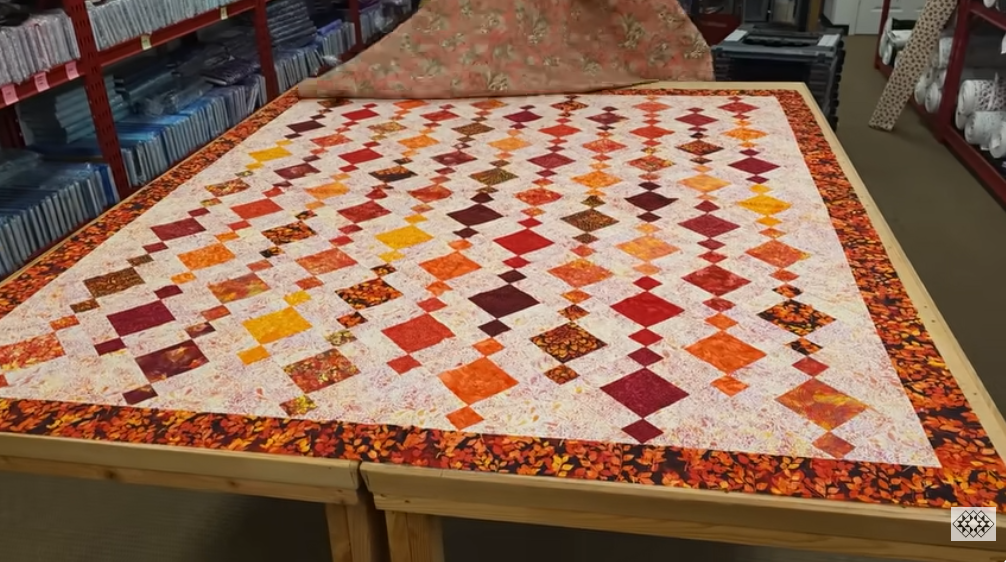
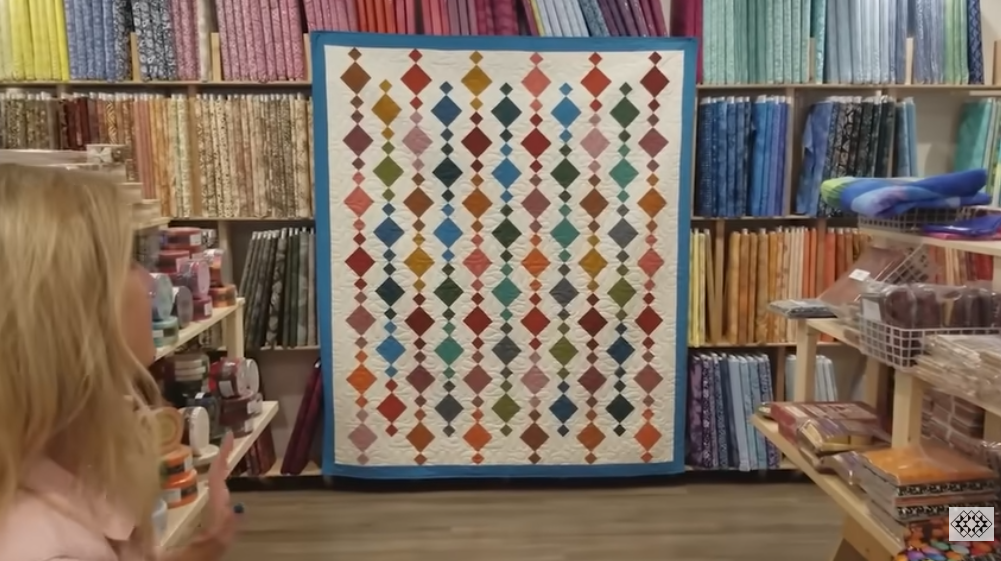
- Pattern name: Beads (Donna Jordan / Jordan Fabrics).
- Finished size: 77″ × 89″ (lap/bed size as published).
- Basic idea: strip-pieced colorful “beads” blocks set on point with background setting triangles — fast to make using fat quarters, quarter-yards, or fat eighths.
Materials (what to buy / gather)
(These match the pattern’s fabric requirements — choose fabrics similar to the video for the same look.)
- Color fabrics: 9 quarter yards OR 9 fat quarters OR 18 fat eighths (you’ll end up with 18 colored strips 5″ wide and 18 colored strips 2½” wide).
- Background fabric (light/neutral): 4 1/8 yards (for strip pieces, setting triangles, etc.).
- Border fabric: ¾ yard.
- Binding fabric: ¾ yard.
- Backing fabric: 5 yards (or pieced to this size).
- Batting: ~80″ × 92″ (a bit larger than the finished quilt).
- Standard tools: rotary cutter, cutting mat, rulers (24″ and small square rulers), sewing machine with ¼” foot, iron/pressing surface, pins or clips, safety pins or basting spray.
Cutting (follow the pattern’s strip method)
The Beads pattern is built from strip units (5″ and 2½” strips) which are then sub-cut and assembled into 9″ finished blocks. Use the cut list below exactly if you want the 77″×89″ finished size.
If using 9 quarter yards (pattern method):
- From each of the 9 quarter-yards cut:
- 1 @ 5″ × 44″ → cut in half along the fold to get two 5″ × 22″ strips → total 18 5″ × 22″ colored strips.
- 1 @ 2½” × 44″ → cut in half to get two 2½” × 22″ strips → total 18 2½” × 22″ colored strips.
- Background fabric:
- Cut 18 @ 2½” × 44″, then cut each in half along the fold → 36 background 2½” × 22″ strips.
- Cut 9 @ 7″ × 44″, cut each in half along the fold → 18 background 7″ × 22″ strips.
- For side setting triangles: cut 2 pieces 13¼” from width of fabric, sub-cut into six 13¼” squares, then cut each square on both diagonals to make 24 side-setting triangles (pattern note: Donna originally said 13″ but 13¼” works better).
- For corner triangles: cut 1 @ 7″ WOF → subcut 2 @ 7″ squares → cut each on one diagonal to get 4 corner triangles.
If using fat quarters: cut 2 @ 5″ × 22″ and 2 @ 2½” × 22″ from each fat quarter (gives same totals).
If using fat eighths: cut 1 @ 5″ × 22″ and 1 @ 2½” × 22″ from each of the 18 fat eighths to reach totals.
Overview of construction steps
- Make strip units (colored 5″ strip + two background 2½” strips) → sub-cut into 5″ segments.
- Make secondary strip units (background 7″ strip + colored 2½” strip) → sub-cut into 2½” segments.
- Assemble sub-cuts into 72 nine-inch blocks (pattern calls for 72 blocks).
- Trim blocks to exact 9″ square if needed, lay out on point, add side & corner triangles, sew rows, add borders, quilt & bind.
Below I expand those into actionable, numbered steps you can follow at your machine.
Step-by-step detailed construction
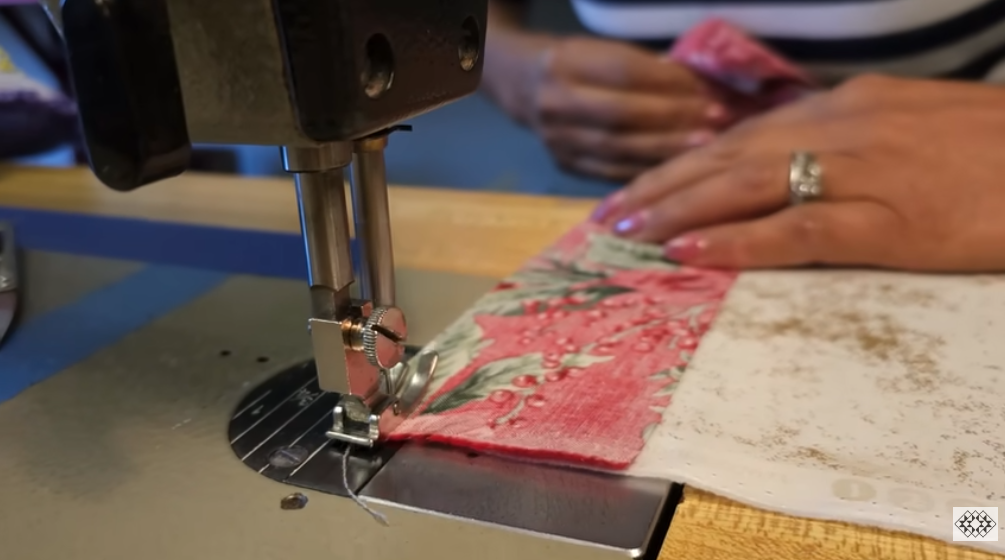
Step 1 — Prepare strips & press
- Press all strips lightly. Keep 5″ colored strips organized and the 2½” background strips separated. Label piles if helpful (e.g., Color 1–18, BG small, BG large). Good organization speeds strip piecing.
Step 2 — Make the main strip units (the “beads” strip unit)
You’ll make units that look like: [2½” BG] + [5″ Color] + [2½” BG] as a 10″ tall strip (before sub-cutting).
- For each colored 5″ × 22″ strip, sew a 2½” background strip to each side using a ¼” seam allowance: BG (right side) to Color (right sides together), press seams toward the center (pattern suggests pressing toward center strip). Repeat for all 18 colored 5″ strips so you have 18 strip units.
- From each completed strip unit, sub-cut four 5″ segments (i.e., cut across the 22″ length into 5″ squares/segments). The pattern yields 72 segments total (18 strip units × 4 = 72). These are the main pieces for the block centers.
Step 3 — Make the secondary strip units
These are used for the small strips that form the “string” that connects elements in the block:
- Pair a 7″ × 22″ background strip with a 2½” × 22″ colored strip, sewing them together (or vice versa depending on placement). Sub-cut this combined strip into 2½” segments as the pattern instructs (these small segments will be used in assembling the 9″ block).
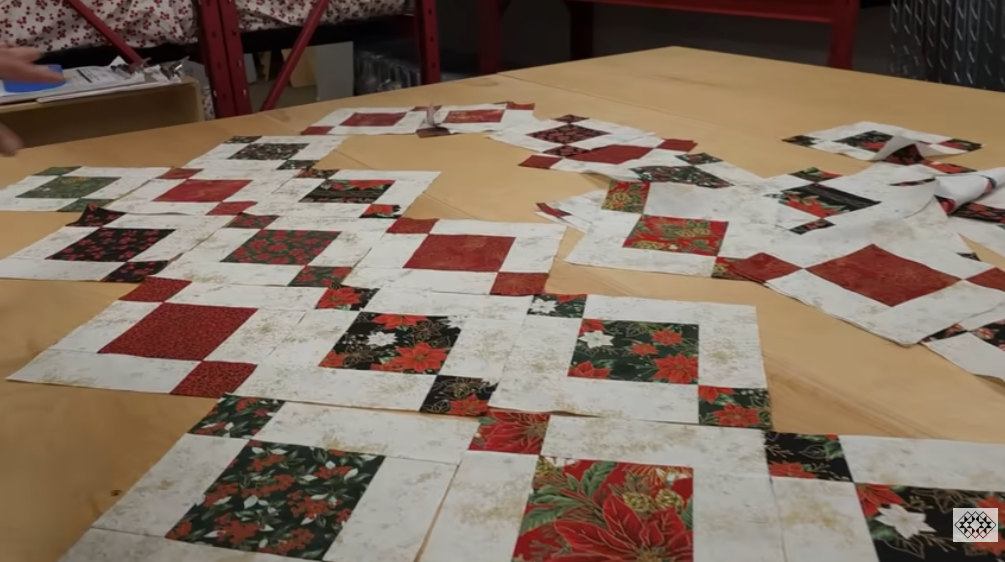
Step 4 — Assemble the 9″ blocks
- Each block uses one 5″ segment from Step 2 and several 2½” segments from Step 3 plus additional background pieces — follow the pattern’s block diagram for the exact arrangement. The Beads block construction is strip-pieced and then joined to create 72 9″ finished blocks. The pattern text shows how the 5″ center and the 2½” strips combine into the 9″ unit. If you prefer: watch the corresponding steps in the Jordan Fabrics video to see exact orientation and pressing.
(Practical tip: sew strip units into sub-units, press, then sew sub-units together — strip-piecing and then sub-cutting keeps everything accurate and fast.)
Step 5 — Square up & trim blocks
- After blocks are assembled, trim each to 9″ square (finished 9″ block size as pattern indicates). Accurate trimming here makes the on-point layout simpler.
Step 6 — Layout — on-point setting
- The Beads pattern sets these 9″ blocks on point. Lay out the 72 blocks on your design wall or floor in the layout shown in the pattern/video. You will need side setting triangles and corner triangles (cut earlier from the background fabric) to fill the on-point edges:
- Add the 24 side setting triangles to the sides as the pattern specifies (these were cut from 13¼” squares cut on both diagonals).
- Add 4 corner triangles made from the 7″ squares cut on the diagonal.
Step 7 — Join rows and assemble the quilt top
- Sew block rows together — because this is an on-point layout you’ll be joining partial rows that include the side triangles. Use accurate ¼” seams, press seams so they nest where possible. Once rows are joined you’ll have the full quilt top. Double-check measurements before adding borders.
Step 8 — Add borders
- Add the border strips as per the pattern (pattern calls for 8 border strips at 3″ WOF to make the outer border). Sew side borders, then top/bottom borders, or vice versa — whichever you prefer.
Step 9 — Baste, quilt, finish
- Baste the quilt sandwich (batting + backing + quilt top) using pins or spray basting.
- Recommended quilting styles seen in the Jordan Fabrics video: an all-over gentle meander or echo quilting that follows the diagonal on-point movement so the bead shapes are enhanced but not overwhelmed. The video demonstrates gentle quilting so the beads keep their soft look.
- After quilting, trim, then attach the binding (¾ yard required by the pattern). Machine- or hand-bind to finish.
Helpful tips from the video & pattern
- Cut side triangles slightly larger (pattern tip: Donna recommends 13¼” for side triangle squares rather than 13″) — gives you extra ease when trimming and squaring after adding triangles.
- Press toward the center strips in the main units (helps nesting and reduces bulk).
- The pattern is very forgiving because it’s strip-pieced; accurate seam allowance and careful trimming are the keys to a flat, even on-point finish.
VIDEO: