 by
by Quick facts
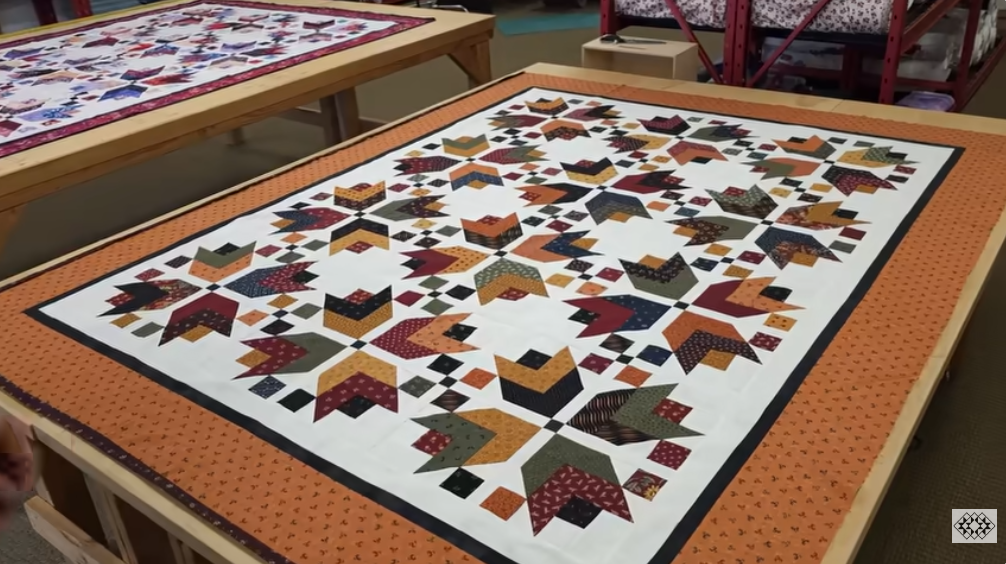
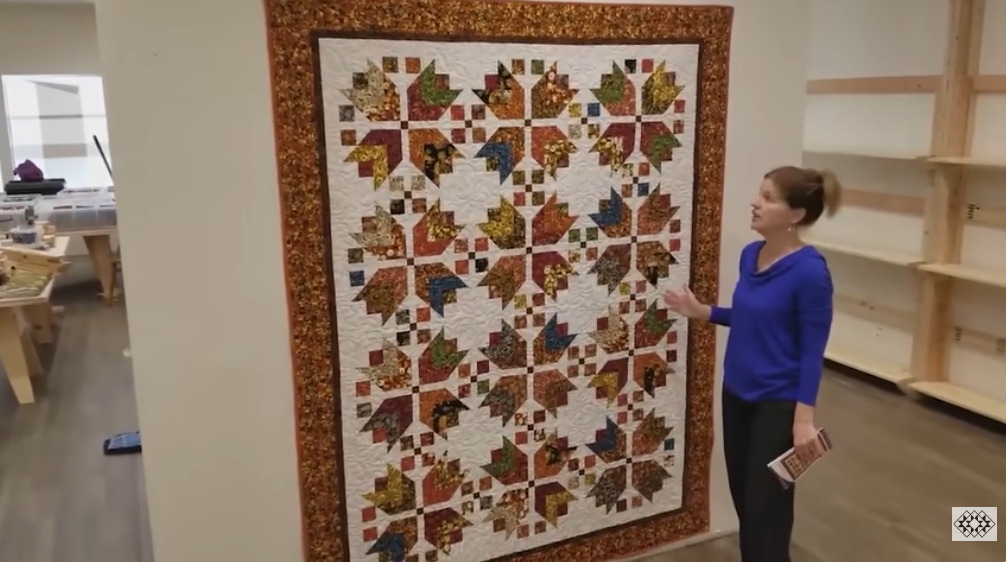
- Pattern: Harvest (Cozy Quilt Designs).
- Technique: strip-piecing using 2½” strips (jelly-roll / scrap friendly).
- Available sizes in the pattern: wall hanging up to king (example sizes: 31″×31″ up to 107″×107″). The Jordan Fabrics video shows a scrap-friendly throw/twin style sample.
Materials
(Adjust yardage by finished size you choose — below is a scrap/jelly-roll friendly shopping approach matched to the pattern.)
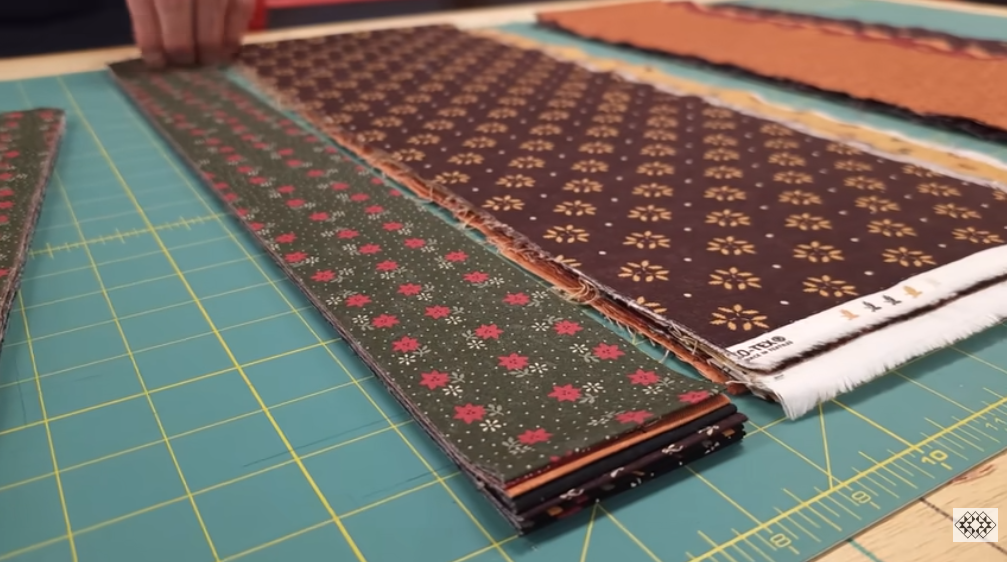
- Scraps or 2½” strips (Jelly Roll style) — assorted warm fall colours (reds, golds, browns, olive, rusts). The pattern is written for 2½” strips so jelly rolls or cut strips from scraps work perfectly.
- Background / neutral fabric — light/medium neutral for sashing/frames and triangle setting pieces (amount depends on size — pattern gives yardage).
- Border fabric — coordinating (1–2 yards depending on size).
- Backing fabric — enough to cover finished quilt + 4–6″ (pattern gives yardage).
- Batting — sized ~4–6″ larger than finished top.
- Thread, rotary cutter, cutting mat, rulers (including a 6½” or 9″ square ruler for trimming), sewing machine with ¼” foot, iron/pressing surface, pins/clips, safety pins or spray baste.
Before you begin
- Watch the Jordan Fabrics video once through to see the assembly rhythm and the look you want: Matt demonstrates how he turns mixed scraps and 2½” strip units into the final on-point layout.
- If you want the exact pattern diagrams and size options, get the Cozy Quilt Designs Harvest pattern (Jordan Fabrics sells the printed & digital pattern). The following step sequence follows the same strip-piecing logic the pattern and video use
Overview of construction (big picture)
- Make strip sets using 2½” strips (mix color strips with background strips).
- Sub-cut those strip sets into component pieces.
- Assemble units into square blocks.
- Square up blocks, lay out on-point with side and corner setting triangles.
- Join rows, add borders, quilt and bind. The pattern provides exact counts per finished size; this tutorial explains the practical, repeatable workflow used in the video.
Detailed step-by-step tutorial
Step 1 — Sort & plan your scraps/strips
- Pull all your 2½” strips / cut scraps and sort into warm/cool/value groups. The video shows a warm, autumn palette — aim for tonal variety so the small strips read as “beads.”
- Arrange a rough layout on a design wall or table to see balance (you’ll shuffle these during strip sewing).
Step 2 — Cut required strips & background pieces
- Use 2½” strip width for the colorful strips (pattern is strip-friendly). Cut background strips and the larger background pieces the pattern requires (the pattern’s cutting list lists triangle square sizes and border lengths). If you don’t have the pattern PDF printed, cut several background 2½” strips and background 7″ or 8″ WOF strips for setting pieces — you’ll sub-cut later.
Step 3 — Make the main strip sets (strip-piecing)
- Sew colored 2½” strips to background 2½” strips in the arrangements the pattern/video shows (for example: BG + color + BG or strip sets of alternating color/background). Use a ¼” seam allowance and press seams flat or to one side as you prefer. The goal is to create long strip units that will be sub-cut into small pieces that form the “beads.”
Step 4 — Sub-cut strip sets into components
- From the long strip sets, sub-cut the lengths called for in the pattern (commonly repeated widths such as 2½”, 5″, or other multiples). The video demonstrates cutting sub-units that then become block components — keep pieces grouped so assembly is fast.
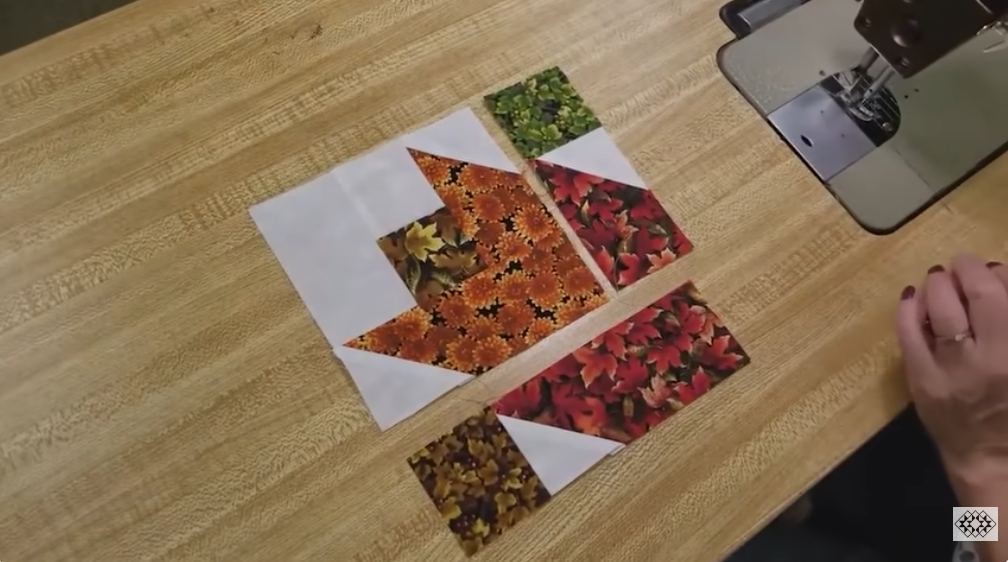
Step 5 — Assemble block sub-units
- Sew sub-units together into larger components (for example, join a small colored strip section to background strips to form a quarter or half of a block). The Harvest pattern is built by combining these sub-units into square blocks — follow the block diagram in the pattern or mimic the video’s sequence: strip-piece → sub-cut → assemble.
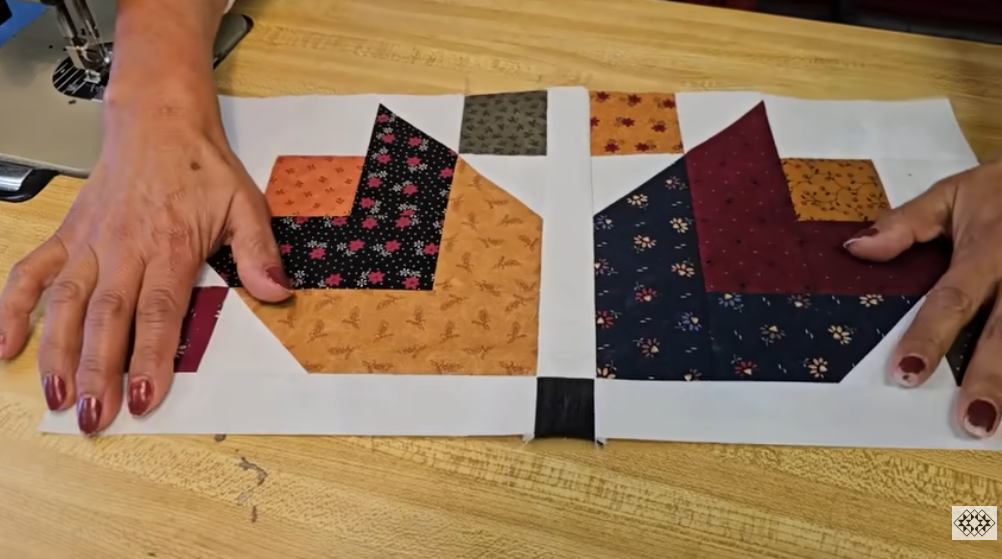
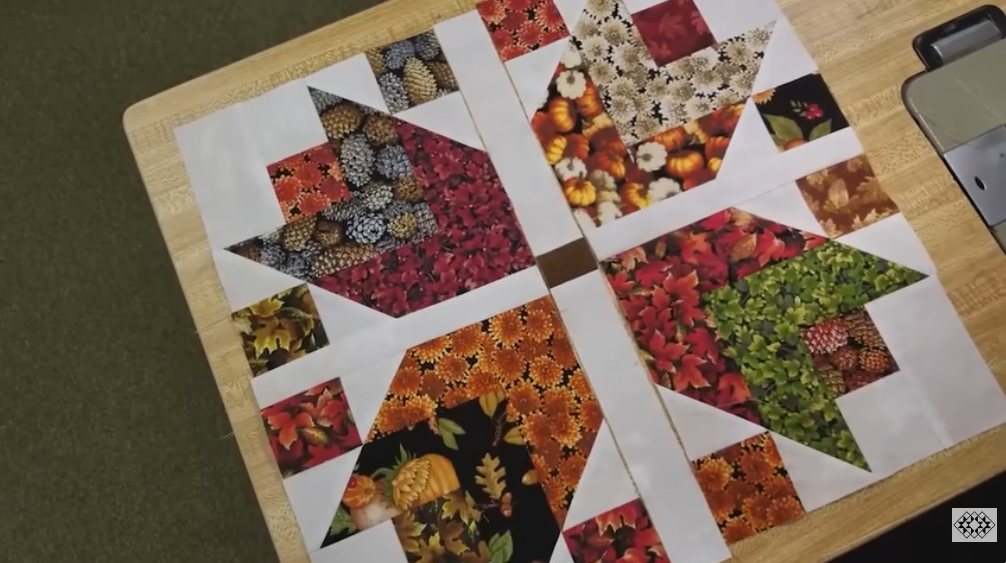
Step 6 — Make full blocks and square them
- Continue assembling until you have the full set of blocks required for your chosen size (pattern provides how many blocks per size). Trim each finished block to the precise size (the pattern’s finished block measurement) to ensure rows fit together cleanly in the on-point layout. Accurate trimming here makes the on-point assembly much easier.
Step 7 — Cut and prepare setting triangles
- Because Harvest uses an on-point (diagonal) setting, you’ll need side and corner triangles cut from the background (and possibly border fabrics). The pattern gives exact square sizes to cut and which diagonals to cut on — cut those squares slightly larger (e.g., add ¼” to the pattern square) if you prefer extra room for trimming later, as Matt sometimes demonstrates when using scraps.
Step 8 — Layout & assemble on-point
- Lay out the trimmed blocks in the on-point layout on your design wall, adding side triangles and corner triangles to create the outer shape. Assemble in manageable rows (partial rows at edges). Sew blocks into rows, press, then join rows to build the full quilt top. The video shows the satisfying progress as the “harvest field” pattern emerges when blocks are placed and turned on point.
Step 9 — Add borders
- Once the top is assembled and squared, add borders per the pattern — usually a narrow inner frame and a wider outer border to finish the edges. Measure carefully and cut border strips to match the quilt’s side and top/bottom measurements (add ¼” seam allowance when cutting).
Step 10 — Baste, quilt & finish
- Baste backing + batting + quilt top (spray or pins). Choose a quilting motif that complements the scrappy strip look:
- All-over meander for a cozy, textured finish.
- Diagonal echoes to emphasize the on-point movement.
- Trim the excess backing and batting, then bind the quilt with your chosen binding method (straight grain or bias cut, 2½” strips joined). The Jordan Fabrics video shows a gentle, warm quilting style that enhances texture without obscuring the small strip detail.
Practical tips from the video & pattern
- Use 2½” strips — works great with jelly rolls and scraps; it’s the backbone of the Harvest pattern.
- Strip-piece then sub-cut — faster and more accurate than piecing individual small strips. The video demonstrates chain piecing for speed.
- Press carefully — pressing seam allowances consistently helps when joining multiple small seams in blocks.
- Trim slightly larger then true up — when working on-point, cut setting triangles/squares a little large and trim after assembly if you want a margin for error (a method Matt uses when working with scraps).
VIDEO: