 by
by Project summary
- Finished quilt size: 48″ × 60″ (baby/throw)
- Grid: 12 squares wide × 15 squares tall = 180 squares
- Finished square size: 4″ × 4″ (so 12×4 = 48″ width, 15×4 = 60″ height)
- Cut square size: 4½” × 4½” (to allow ¼” seam on each side)
- Style: Pixel / patchwork bird on a buffalo-check style grayscale background with lime-green grass band and a narrow dark outer border.
Fabrics & yardage (approximate)
Note: these are suggested amounts based on the 4½” square cutting method; stash fat quarters work great if you want more variety.
- Red family (main bird body, multiple reds): 1¼ yards (or 6–8 fat quarters)
- Dark red / deep accent red: ¼ yard
- Tan / light brown (bird head & leg): ⅜ yard
- Medium brown (branch / tail / leg): ⅓ yard
- Golden yellow (eye/ beak accent): small piece, ~⅛ yard (or one fat eighth)
- Grass / lime green (lower band): ½ yard total (or two fat quarters)
- Background – black / dark charcoal: 1 yard (for the darkest check squares + narrow outer border)
- Background – medium gray: ⅝ yard
- Background – light gray / off-white: ⅝ yard
- Backing: 4.5–5 yards (depending width)
- Batting: 54″ × 66″ (or larger)
- Binding: ½ yard (or cut 2½” strips totaling ~240″ length — ~5/8 yd)
If you want to assemble many small print/gradiated checks like the photo, replace background yardages with collections of fat quarters (3–5 dark greys, 3–5 light greys/whites).
Cutting (all cuts are 4½” squares unless noted)
Cut the following squares from the fabrics you selected. The quilt is 12×15 = 180 squares total. This cutting list gives a small buffer.
Main colors (approx counts):
- Red (various reds): ~50 squares
- Dark red / deep accents: ~8 squares
- Tan / light brown: ~18 squares
- Medium brown: ~6 squares
- Golden yellow (small): 2 squares
- Lime green (grass): 18 squares
Background checks – greys & blacks (mix these for buffalo-check effect):
- Black / dark charcoal: ~30 squares
- Medium gray: ~20 squares
- Light gray / off-white: ~10 squares
Total ~180 squares (counts rounded to make cutting easier). If using fat quarters, cut each into 6–8 squares as needed.
The pixel map (12 × 15)
Below is a row-by-row color map to reproduce the bird and background. Columns are numbered 1–12 left→right; rows are 1–15 top→bottom.
Color key:
- BK = dark charcoal / black (dark check)
- MG = medium gray (medium check)
- LG = light gray / white (light check)
- RD = red (main body)
- DR = dark red (deep shadow accent)
- TN = tan/light brown (head & leg base)
- BR = medium brown (branch/leg)
- YW = yellow/gold (eye detail)
- GR = lime green (grass band)
Use whatever fabrics you like for each category; vary prints/tones for the background checks so the field reads like buffalo check rather than a flat single color.
Grid (each cell is a 4½” square)
Row 1: BK, LG, BK, MG, LG, BK, MG, LG, BK, MG, LG, BK
Row 2: LG, BK, LG, MG, BK, RD, BK, MG, LG, BK, MG, LG
Row 3: BK, MG, RD, RD, RD, RD, DR, RD, MG, BK, LG, BK
Row 4: MG, RD, RD, TN, TN, RD, RD, DR, RD, MG, BK, MG
Row 5: LG, RD, TN, TN, TN, RD, RD, RD, DR, RD, MG, LG
Row 6: BK, RD, RD, RD, RD, RD, RD, RD, RD, DR, BK, BK
Row 7: MG, BK, RD, RD, RD, RD, RD, RD, DR, RD, MG, LG
Row 8: LG, MG, BK, RD, RD, BR, BR, RD, RD, RD, BK, MG
Row 9: BK, LG, MG, BK, RD, RD, RD, RD, RD, BK, MG, LG
Row10: MG, BK, LG, MG, BK, RD, BK, RD, BK, MG, GR, GR
Row11: LG, MG, BK, LG, MG, BK, MG, BK, MG, LG, GR, GR
Row12: BK, LG, MG, BK, LG, MG, BK, MG, BK, LG, GR, GR
Row13: MG, BK, LG, MG, BK, LG, MG, BK, LG, MG, BK, MG
Row14: LG, MG, BK, LG, MG, BK, LG, MG, BK, LG, MG, LG
Row15: BK, LG, MG, BK, LG, BK, MG, BK, LG, BK, LG, BK
Notes on map:
- Rows 3–9 contain the bird silhouette (reds/tans/browns).
- Rows 10–12 include the lime-green grass band (columns 11–12 in rows 10–12: GR).
- The small YW (yellow) accent (eye/beak) is a single square you can put in Row 4 Column 10 if you prefer; in the map above the bird eye is represented by a small change in a red/tan area — if you want a distinct tiny yellow eye, replace the cell at Row 4 Column 10 (currently DR) with YW.
- The background is intentionally a buffalo-check look: alternate BK/MG/LG across rows and columns. Feel free to swap MG/LG positions for a more woven look.
If you’d like, I can produce this pixel map as a printable PDF graph with each cell colored and labeled automatically — say the word “PDF” and I’ll generate it.
Assembly steps
Step 1 — Organize & layout
- Cut all 4½” squares by color. Label small stacks or bowls by color category (RD, TN, BK, MG, LG, GR, etc.).
- Set up a design wall (or floor space) and lay the 12×15 grid following the map above. Stand back and check color balance. Swap background greys if any area looks too heavy or too light.
Step 2 — Sew squares into rows
- Work row-by-row. Start with Row 1: place squares in correct order left→right, right sides together, chain-piece adjacent squares using ¼” seam allowance.
- Press seams in each row all in one direction (I press seams alternately row to row later to nest seams, but consistent pressing for each row is fine). Press toward the darker square when possible (reduces visible seams).
- Repeat for all 15 rows. You’ll end up with 15 strips, each 12 squares long. Each strip should measure: 12 × 4″ finished = 48″ finished length (minus seam allowances), but before trimming the strip length will be 12 × 4½” – seam overlaps; still check squareness.
Step 3 — Square up and trim rows
- After sewing a full row, check length and square—trim if needed so each row is exactly 48″ finished (the easiest method: after pressing, measure final row from seam to seam—each square should be 4″ finished; if there is drift, trim the row ends so all rows match).
- Use a long ruler and rotary cutter to ensure each row is straight.
Step 4 — Join rows
- Arrange the sewn rows back on the design wall in order (Row 1 to Row 15).
- Nest seams between adjacent rows: press Row 1 seams to the left and Row 2 seams to the right, etc., alternating pressing directions to help seams lock and reduce bulk.
- Pin carefully at seam intersections (match seam points) and sew Row 1 to Row 2, Row 3 to Row 4, etc., or sew sequentially row-by-row. Use lots of pins at intersections for accuracy.
- Press the joined seams.
When all 15 rows are joined, you have the quilt center approx 48″ × 60″.
Step 5 — Add narrow outer border
- The photo has a narrow dark border framing the check field. Cut 4 strips of BK (dark) fabric:
- Two strips 4½” × 48½” for the sides (to allow ¼” seam to attach to top/bottom).
- Two strips 4½” × 60½” for top and bottom. (If you prefer a 2″ finished border, cut 4½” wide selvage-to-selvage strips.)
- Sew side borders on first (right sides together) then top/bottom. Press.
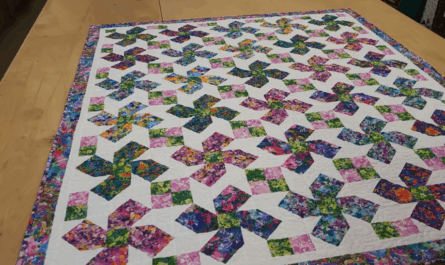
If you’d prefer a wider or pieced outer border (a gradient like the other quilt you showed earlier), piece long narrow strips of reds/greens and attach as a wider border.
Step 6 — Sandwich, baste, and quilt
- Square up the quilt top (trim edges so they are straight). Final top should be 48″ × 60″ plus border—if you used 4½” border strips this yields a final top slightly larger; trim to the desired finished size before layering.
- Layer with batting and backing. Baste with safety pins or spray baste.
- Quilt: choose a quilting pattern that complements the graphic style. Suggestions:
- All-over meander / stippling: modern and quick.
- Wide diagonal straight-line quilting (1″–2″ spacing): echoes the graphic diagonals of the bird.
- Grid quilting (1″ or 1½”): emphasizes check/pixel effect.
- Use a walking foot for even feeding.
Thread: medium-contrast or tone-on-tone—light gray in the background or red in the bird area to show quilting lines subtly.
Step 7 — Binding
- Trim the quilt sandwich square. Make binding strips 2½” wide (or 2¼” if you prefer slimmer). Join to form one continuous binding length.
- Attach binding by machine on front, fold to back, and hand stitch or machine stitch to finish.
Tips for a clean finished look
- Chain-piece the squares for each row to speed up sewing and keep consistency.
- Alternate pressing direction row-to-row so seams nest when joining rows (this makes seam intersections much easier to match).
- Use matching thread on seam lines to make intersections less visible.
- Match seam intersections carefully: use a single pin at each intersection on the side you’re sewing toward — remove right before the needle reaches it.
- Square every few rows with a ruler to prevent accumulated distortion. If rows start drifting, trim and re-square early rather than later.
- For quilt backing consider a tone-on-tone red or a large-scale check/stripe to echo the front.
Troubleshooting / variations
- If you prefer fewer seams, you can make larger strip sets and subcut into squares, but the 4½” square method is simplest and most accurate for a pixel quilt.
- Want the bird to be larger or smaller? Change the finished square size: e.g., 3″ finished squares ⟶ 9×15 grid for a smaller block effect; or 5″ finished squares ⟶ fewer squares overall for a larger quilt. I can recalculate cuts for any new finished size.
- Want to change colors? Use the same pixel map but swap in any color family (e.g., blues for the bird).