 by
by Rail Fence — step-by-step tutorial
(How to recreate the quilt Matt makes in “MATT’S ALL ABOUT RAIL FENCE QUILTS START TO FINISH!”)
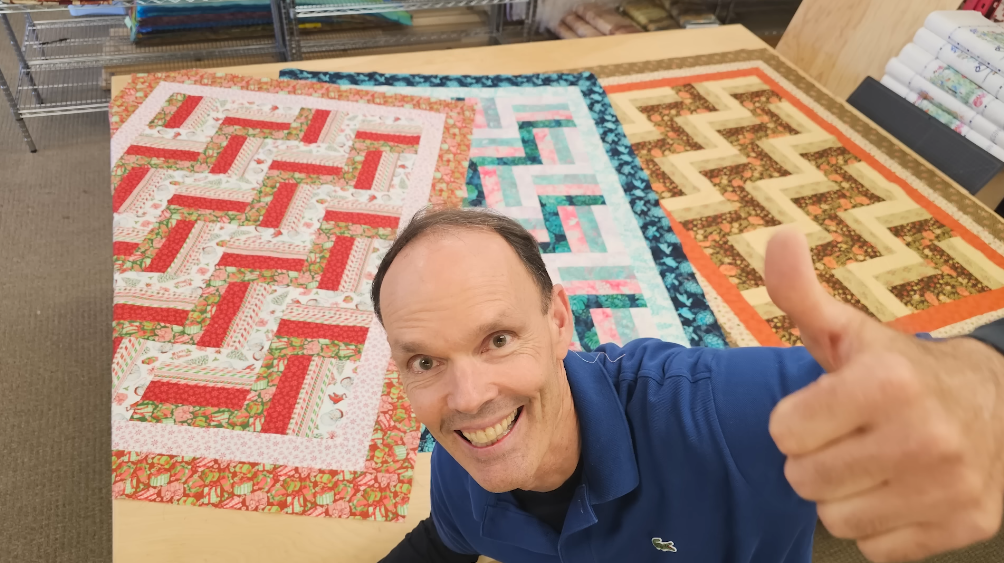
Great choice — Matt’s video is a hands-on, strip-friendly walkthrough showing several easy Rail Fence variations and the fast “cut → strip-piece → sub-cut → assemble” rhythm that makes this pattern so beginner-friendly. Below I turned the video’s workflow into a clear, follow-along text tutorial you can use at the machine.
Quick summary (what this project is)
- Style: Rail Fence — built from long strip sets that look like rails.
- Construction method Matt uses: strip-piecing (sew strips into long sets, sub-cut into blocks, rotate/assemble into rows).
- Flexible — works with jelly-roll strips (2½” strips), fat quarters cut into strips, or yardage cut to strip widths. The Jordan Fabrics site groups Rail Fence layouts and free patterns and shows multiple layout ideas Matt references.
Materials & tools (basic shopping list)
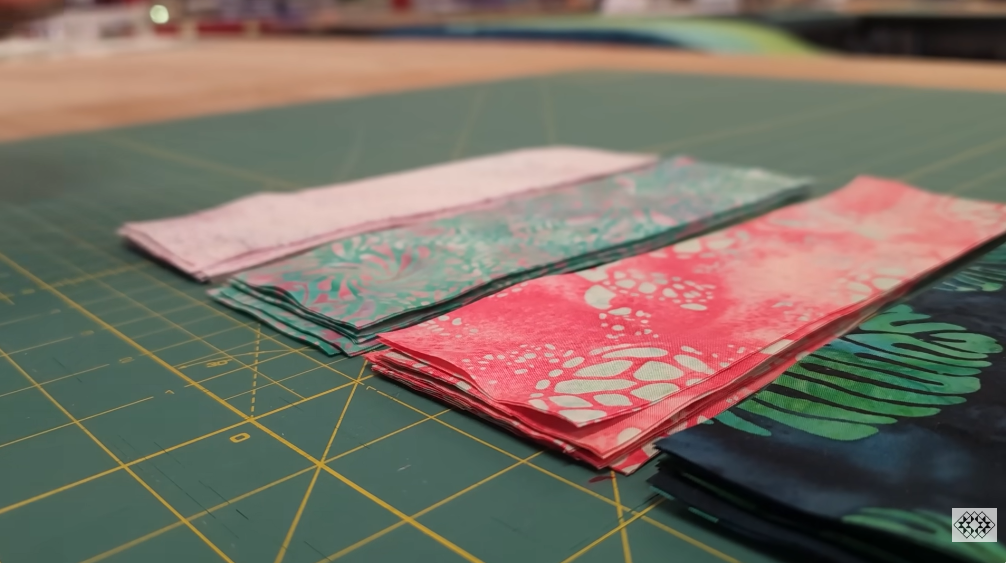
- Strip fabrics (main rails) — jelly roll (40 × 2½” strips) or cut 2½” strips from fat quarters/yardage. Choose scrappy or coordinated; Matt shows both.
- Background / sashing fabric — 2–3 yards (depending on finished size and whether you want large negative space).
- Border fabric — 1–2 yards.
- Backing fabric — about 3.5–6 yards (depends on finished size).
- Batting — a size slightly larger than finished top.
- Thread, rotary cutter, ruler (24″ recommended), cutting mat, sewing machine with ¼” foot, iron and pressing surface, pins/clips.
- Optional: design wall or large floor area to audition layouts. Matt also highlights using premade “hand-cut” bundles when you want quick, coordinated strip sets.
Planning decisions you’ll make first
- Strip width — Matt often uses 2½” (jelly-roll) strips because they’re fast and plentiful. You can also use 3″ or 5″ strips for a bolder rail look.
- Rails per block — common Rail Fence blocks use 3 or 4 strips per block (3-rail or 4-rail). A 3-rail block is narrower and more “woven” looking; a 4-rail block is chunkier.
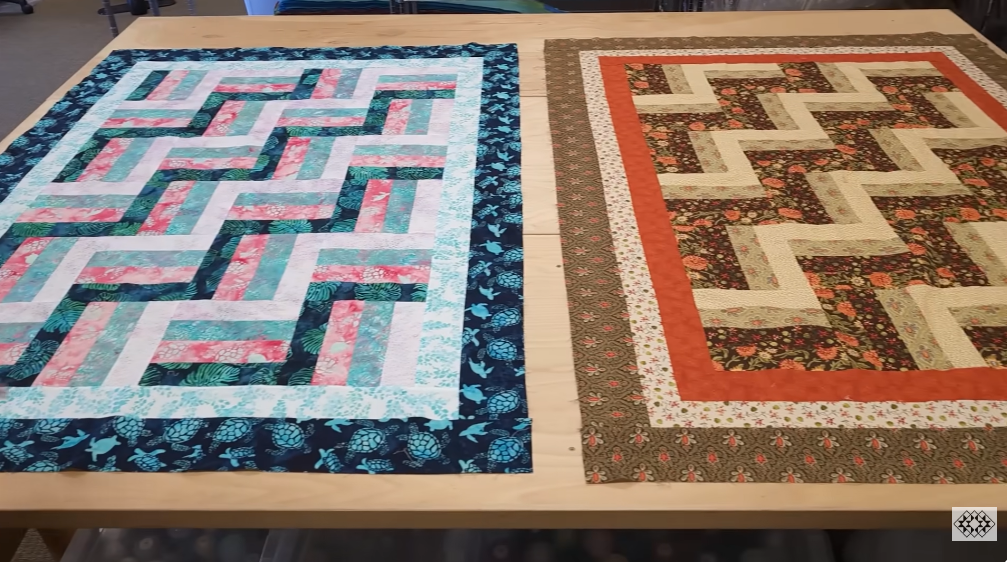
- Layout — straight set (blocks aligned in rows) or alternate/turned set (rotate some blocks 90° for moving diagonal effect). Matt demonstrates a few layouts — pick the one you like.
Example approach (fast, no-math method that matches Matt’s rhythm)
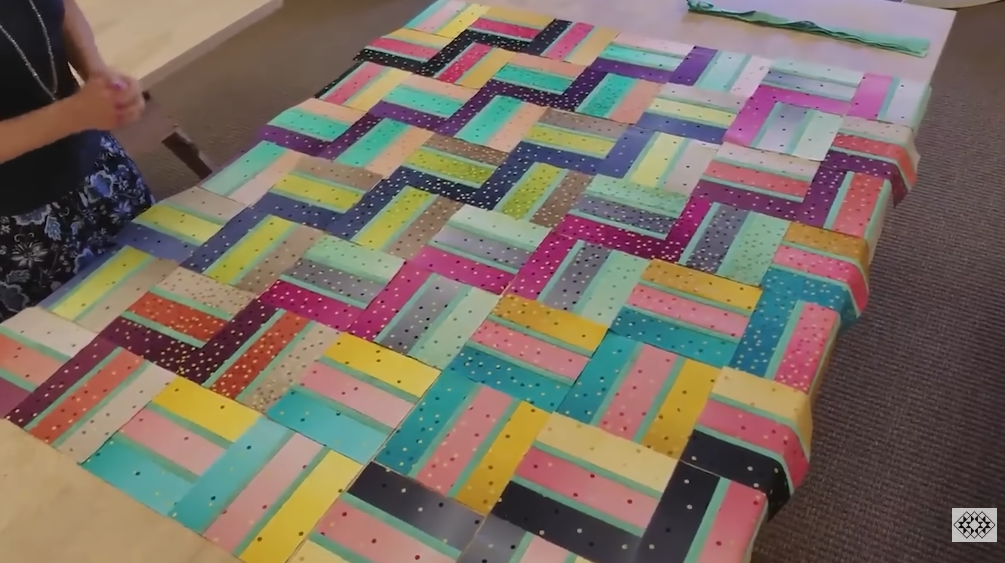
This method uses 2½” strips and makes a scrappy throw/top — it’s the same flow Matt demonstrates (strip-piece many long sets, sub-cut into uniform rectangles, assemble into rows).
Step A — Cut & organize
- Cut or gather your strips. If you’re using jelly-rolls you’re already set (2½” × WOF strips). If using fat quarters, cut several 2½” × WOF strips from each fat quarter.
- Cut background strips if your design uses them (e.g., 2½” background strips for sashing or spacers).
- Organize strips by value or color—light/dark contrast in each rail makes the pattern pop.
Step B — Sew long strip sets
- Choose how many strips you want in each rail group (for example, a 3-rail block = three strips sewn together to form one block blank).
- Stack the three strips in the order you want them to read (top → middle → bottom) and sew them together longwise with a consistent ¼” seam allowance to make a long strip set. Press seams flat or open (consistent pressing helps later). Chain-piece many sets without cutting threads to speed the work.
Step C — Sub-cut into block blanks
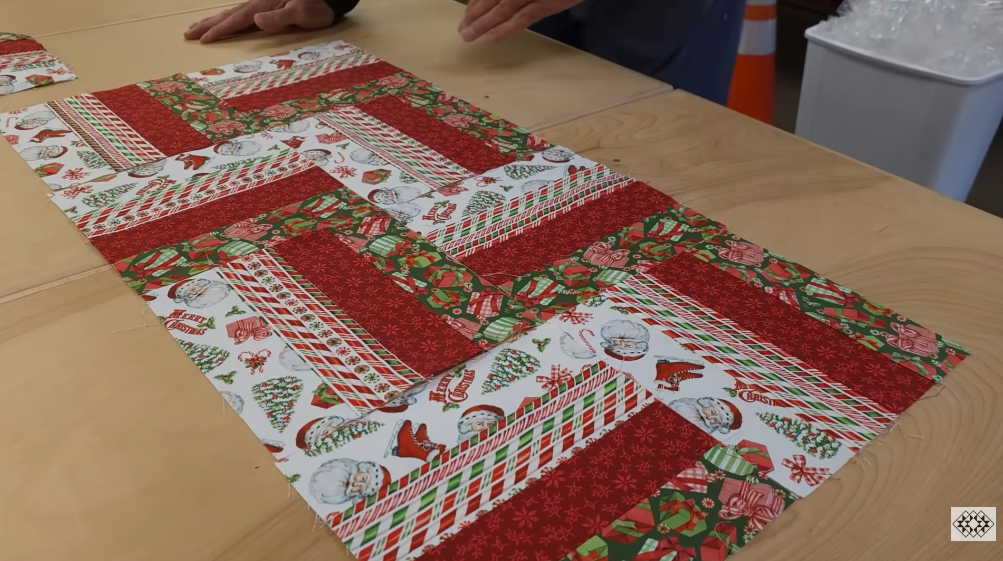
- From each sewn strip set (long), sub-cut the same length segments to create your block blanks. Common practical lengths:
- For a block that finishes about 6″–7″ you might sub-cut 6½”–7½” long (unfinished) segments — but you don’t have to memorize numbers; instead: choose a rectangle size that gives the scale you like and cut all blanks the same length.
- The key is consistency—every blank from your strip sets should be identical in length. Matt demonstrates cutting many identical blanks and keeping them stacked for fast assembly.
Step D — Assemble blocks
- Each blank becomes a Rail Fence block by itself (if you cut a strip set of 3 strips, the blank is the block) or you can pair/stack blanks and rotate alternate blocks 90° to create diagonal movement. Lay out a row of blanks with alternating direction as desired and sew the blanks together with a ¼” seam to make rows. Press after each seam.
Step E — Join rows into the quilt top
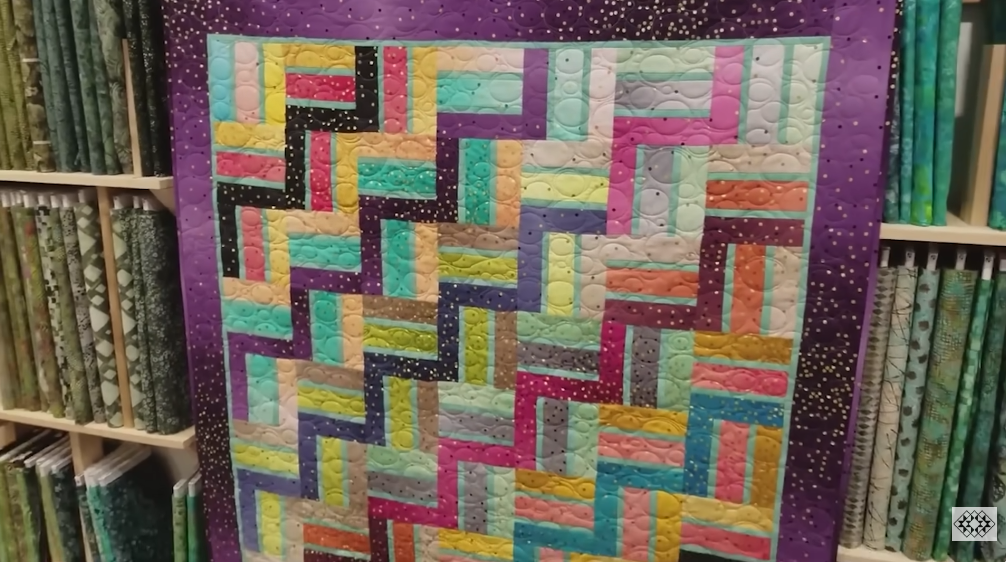
- Sew rows together, nesting seams where you can, and press. Continuously check the width of the joined rows so borders will fit straight later. If you used alternating rotated blocks, the diagonal pattern will begin to appear as you join rows. Matt shows a lot of layout-shuffling at this stage to balance color.
Step F — Add borders
- When the top is assembled and measured, add inner and outer borders as you like to finish the edges — a narrow inner frame accentuates the rail field; a wider outer border finishes the quilt. Matt often adds a simple neutral border to make the rails read cleanly.
Step G — Baste, quilt, bind
- Baste the top + batting + backing using pins, spray, or a long-arm baster.
- Quilting suggestions Matt shows that suit Rail Fence:
- Straight-line quilting following the rails enhances the linear look.
- Diagonal echo quilting works especially well if you rotated blocks to create diagonals.
- All-over meander keeps the scrappy texture soft and quick.
- Trim and attach binding (machine or hand finish), and label your quilt.
Accuracy & pressing tips (from the video)
- Quarter-inch seam: keep it steady. Rail Fence multiplies any seam inconsistency. Matt emphasizes accurate ¼” sewing for tidy blocks.
- Chain-piecing: sew many strip sets and blanks in a continuous chain to save time — Matt uses this technique repeatedly.
- Press consistently (either all seams to one side or open) so seams nest when joining blocks — this reduces bulk where multiple seams meet.
- Keep blanks stacked and labeled as you cut — it’s much faster to sew grouped blanks into rows than to hunt for matching pieces. Matt shows stacks and batch sewing in the video.
Design choices Matt highlights
- Make many smaller quilts: Rail Fence is perfect for using pre-cut bundles (jelly rolls) to quickly produce multiple small quilts or runners — Matt often demonstrates making several sizes from the same strip sets.
- Try variations: alternate the direction of every other block for a diagonal “zig-zag”; use a background spacer between rails for a more gridlike look; or make rail blocks wider for a chunky modern feel. Matt shows a few of these variants during the video.
Quick checklist before you sew
- Decide strip width (2½” recommended).
- Cut/gather strips and background.
- Sew long strip sets in the order you want the rails to read.
- Sub-cut identical blanks from each strip set.
- Chain-sew blanks into rows; press and assemble rows.
- Add borders, baste, quilt, bind.
VIDEO: