 by
by King’s Crown — step-by-step tutorial
(How to recreate the “KINGS CROWN CONCERTO! MUSIC TO MY QUILTING EARS!” quilt shown by Jordan Fabrics)
Below is a clear, workshop-style, follow-along text tutorial that mirrors the Jordan Fabrics video and the shop’s King’s Crown layouts/pattern approach. I’ve written it so you can start at the machine right away — materials, cutting strategy, precise assembly workflow, trimming notes, and finishing tips are included.
Sources used: Jordan Fabrics video demonstration and Jordan Fabrics King’s Crown layouts/pattern guidance.
Quick project summary
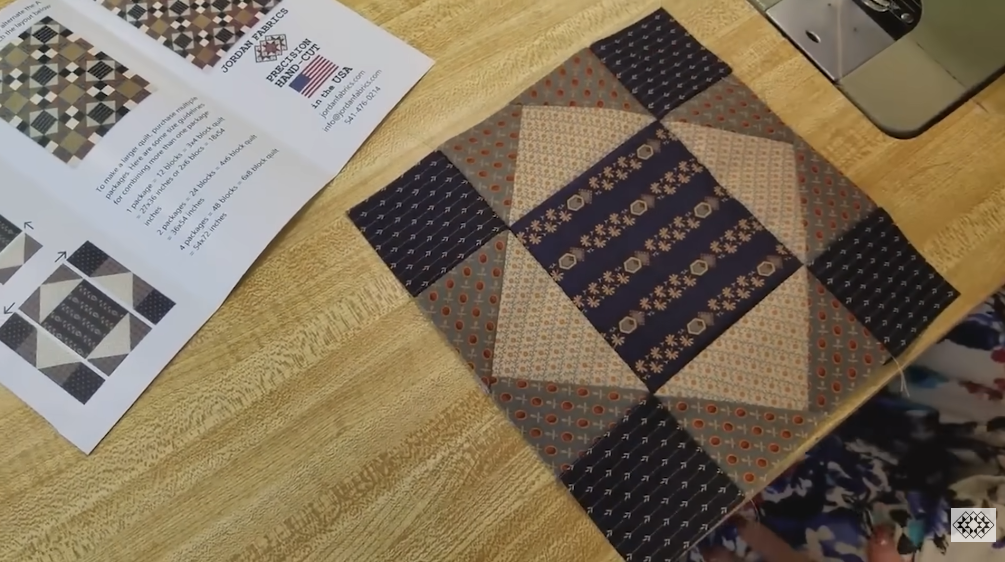
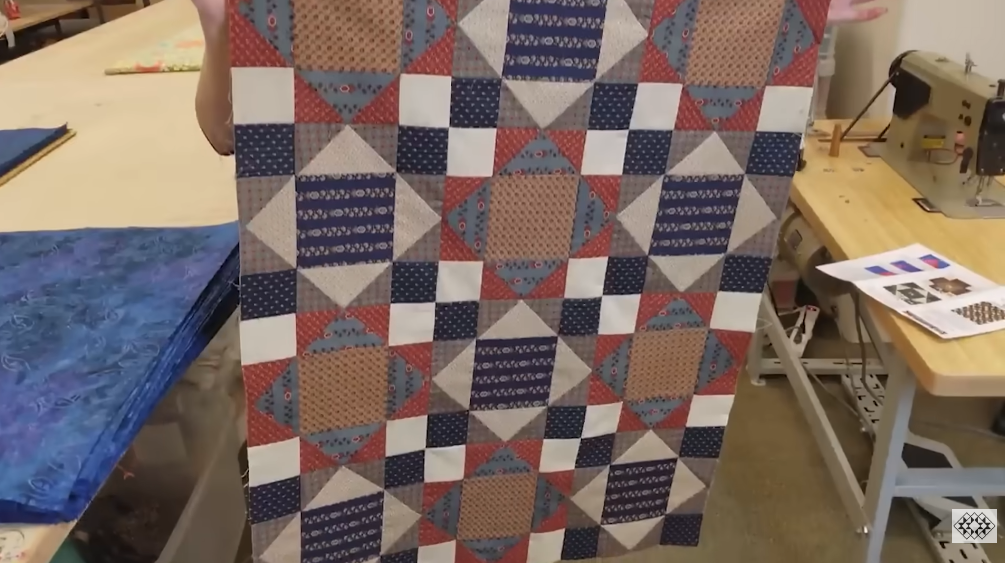
- Pattern name: King’s Crown (the video demonstrates Jordan Fabrics’ King’s Crown variation/kits and layouts). The pattern is versatile — make a wall hanging, throw, or larger bed-sized quilt by following the size options in the pattern.
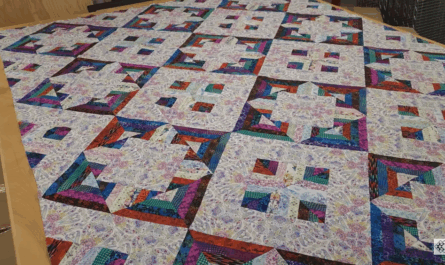
- Construction style used in the video: strip-piecing and focused sub-cutting to produce the diamond/crown units, with flying-geese / triangle/set units to create the crown points; then trimmed and joined into the medallion with background setting pieces.

Materials & tools (workshop-ready)
- Assorted fabrics for crown points — fat quarters, strips, or pre-cut kits (scrappy or planned colorway). The video shows pre-cut kits and hand-cuts being used for speed.
- Background / setting fabric — a neutral or low-value print for the field and setting triangles.
- Border fabric — coordinating fabric for inner/outer borders.
- Backing fabric — enough to cover finished quilt + 4–6″ ease.
- Batting slightly larger than finished top.
- Standard tools: rotary cutter & mat, long ruler (24″+), square ruler (6″–9″), 45° triangle or flying-geese ruler (optional), sewing machine with accurate ¼” foot, iron/pressing surface, pins/clips.
- Optional: King’s Crown pre-cut kits (Jordan Fabrics sells 12-block kit options that match the video samples).
Preparation & planning
- Choose finished size — the King’s Crown pattern/layouts support multiple sizes; decide wall/throw/bed before cutting. The official layout page shows common border/layout choices.
- Decide piecing approach — the video uses strip-piecing for speed: sew long strip sets, sub-cut into blanks, then trim into diamond/triangle units. That approach keeps seams consistent and is fast for many repeating units.

Cutting (strategy — strip-based, scalable)
The exact cut list depends on the finished size you choose (pattern gives full cut lists). The video workflow uses the following scalable strategy you can apply to any size:
- Cut colored strips — cut several long strips (common widths: 2½”, 3″, or 5″ depending on scale) from the fabrics you want in the crown points. If you’re using pre-cuts or fat quarters, cut strip widths that make the most of your fabric (2½” strips are jelly-roll friendly).
- Cut background strips & squares — cut WOF (width-of-fabric) background strips and some large squares for setting triangles/cornerstones that will be sub-cut later. The pattern lists the precise triangle/square sizes; cut a few extras if you want room to trim.
Core construction steps — detailed, numbered
Step 1 — Make long strip sets (strip-piecing)
- Stack the strips for a crown point in the order you want them to read (for instance: dark → medium → light → medium → dark). Chain-piece the strips together longwise with a consistent ¼” seam allowance to make long strip sets. Press seams consistently (toward darker fabrics or open) to control bulk. The video emphasizes chain-piecing many sets before sub-cutting.
Step 2 — Sub-cut strip sets into blanks

- From each strip set, sub-cut repeating-length rectangles or squares that will become diamond/point blanks. The video shows cutting identical blanks stacked so trimming is fast and uniform. Keep blanks grouped by colorway so assembly is quick.
Step 3 — Produce diamond / crown point units
There are two common ways (both used in King’s Crown approaches):
A. Flying-geese / HST method (fast & flexible)
- Use the 4-at-a-time flying-geese or half-square-triangle (HST) techniques to make the triangular units that form the crown tips. Sew background squares to colored blanks and trim on the diagonal to turn sub-cuts into triangles or flying-geese units. The video demonstrates trimming and pressing to produce neat units.
B. Direct diamond trimming (strip-to-diamond)
- Use a diamond ruler or square-on-the-diagonal trimming method: cut strip-set rectangles into oversized diamond blanks and trim each to the pattern’s diamond size. Sewing diamond points tip-to-tip or edge-to-edge creates the long tapered crown points. The Jordan Fabrics layouts page shows examples of diamond trimming and multiple layout/border options.
Pick one method you’re comfortable with (the video uses strip sub-cuts and trimming methods that are fast and accurate).
Step 4 — Assemble crown points
- Join the triangular/diamond sub-units into the full crown point segments (each point is a tapered column of triangles/diamonds). Press seams carefully. Make the number of points needed for your chosen King’s Crown layout — typical medallion has multiple symmetrical points arranged around a center. The video demonstrates making many identical points then joining them into the medallion.
Step 5 — Trim and square each point
- Trim each assembled point to the exact length/width the pattern calls for (or to a consistent measurement if you’re scaling). Accurate trimming prevents gaps and puckers when points meet in the center. The video shows careful trimming as a recurring tip.
Step 6 — Join points into the crown medallion
- Arrange the trimmed points around the central axis in the order/color progression you want. Pin very carefully at the center and sew points together — sewing pairs first, then joining pairs to make the full medallion helps control the center bulk. Match seam intersections at the center so the point tips meet cleanly. The Jordan Fabrics demonstration emphasizes pinning/slow sewing at the center for a crisp finish.
Step 7 — Add background setting pieces
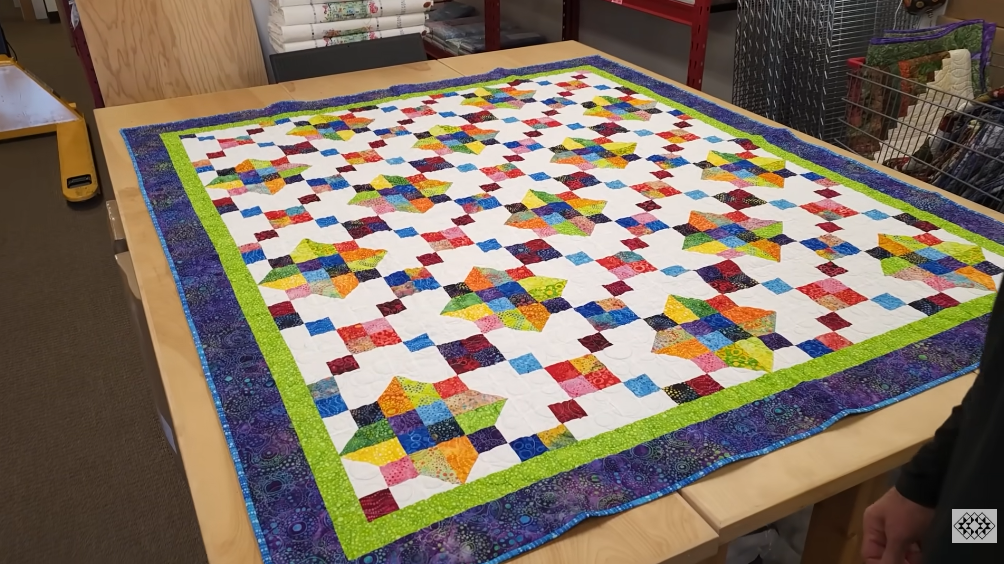
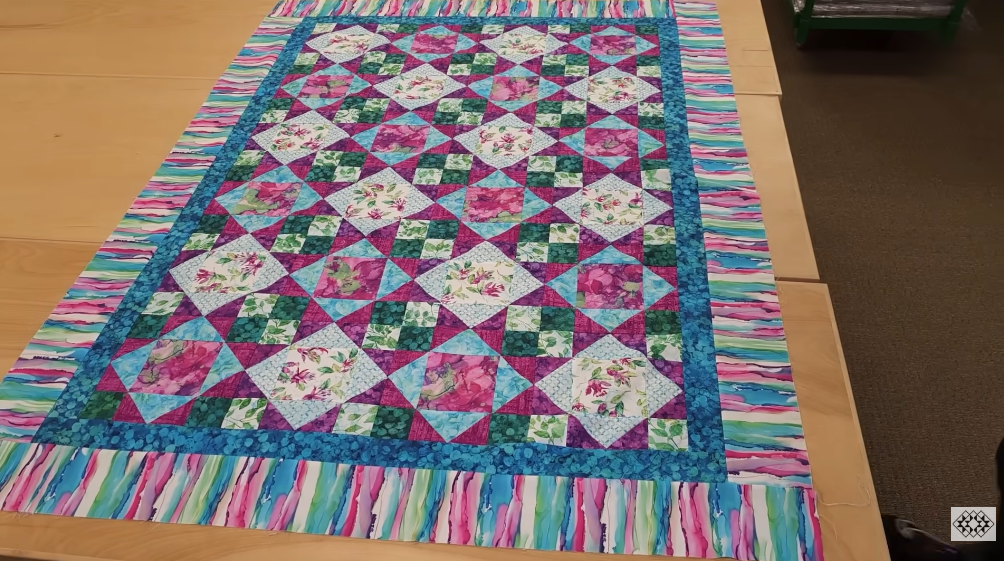
- With the star/medallion formed, add the background wedges, side triangles, and corner pieces to frame the medallion into a square (or rectangular) quilt center per the King’s Crown layout you picked. Trim and square the center unit. The King’s Crown layouts gallery shows multiple ways the medallion can be framed with setting triangles and inner borders.
Step 8 — Add borders & optional frames
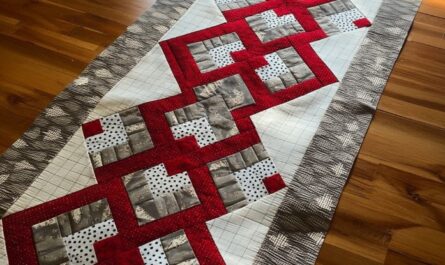
- Sew any inner framing strips, piano-strip borders, or log-cabin style framing if you want to echo the crown; then add outer borders to reach your final desired dimensions. Press and square the quilt top after each border. The video demonstrates both simple border treatments and more elaborate framed looks in different samples.
Basting, quilting & finishing
- Baste the sandwich (top + batting + backing) using spray basting or safety pins.
- Quilting choices that work especially well for King’s Crown:
- Radiating echo quilting from the medallion center (emphasizes the crown shape).
- Straight-line quilting following the diamond bands for a graphic modern finish.
- Simple all-over meander if you prefer texture without adding visual competition to the piecing.
The video sample shows gentle echo quilting that keeps the crown as the visual focus.
- Bind the quilt with 2½” (or preferred width) binding strips, sew to the front, fold to the back, and finish by hand or machine.
Accuracy & pressing tips (from the video)
- Quarter-inch seam: maintain a steady ¼” seam allowance — consistency is the key to matching many small triangles/diamonds.
- Chain-piece & sub-cut in batches: make many strip sets and sub-cut them stacked to save time and keep pieces uniform. The video shows this exact rhythm.
- Trim early & trim often: trim sub-units and points to final sizes before joining large numbers together to avoid cumulative error.
- Pin the center: when all points meet at the center, take time to pin and match seam intersections — slow sewing at this point yields a neat centre.
Variations & styling ideas
- Use a pre-cut kit to match the exact look shown in the video (Jordan Fabrics shows 12-block King’s Crown kit options in several fabric lines).
- Make the points scrappy (many fabrics per point) for a vintage/folk look, or make each point a controlled gradient for an ombré medallion.
- Add framed log-cabin-style surrounding blocks to turn the medallion into a larger bed-sized quilt — the Jordan Fabrics layouts gallery shows several framing/layout choices.
Quick checklist before you sew
- Pick finished size and follow the pattern’s cut list for exact measurements.
- Cut strips and background pieces; make several strip sets.
- Sub-cut blanks and assemble triangular/diamond units.
- Trim units, join points, form medallion, add setting pieces.
- Baste, quilt, bind.
VIDEO: