 by
by Roundabout — step-by-step tutorial
(How to recreate “Roundabout” as demonstrated in MATT’S ROUNDABOUT CUT IT OUT! — Jordan Fabrics)
Nice pick — Matt’s video walks through a fat-quarter/strip-friendly medallion-style quilt called Roundabout. Below is a practical, sew-at-the-machine, numbered tutorial that follows the workflow Matt uses in the video and the way Jordan Fabrics presents the pattern: prep, strip-piecing, sub-cutting, block assembly, on-point / medallion setting, trimming, borders, quilting and finishing.
Quick facts (what you’ll be making)
- Pattern / project name: Roundabout by Jordan Fabrics.
- Project style: medallion / on-point units built from strip sets and fat-quarter / pre-cut friendly pieces — fast to make using fat quarters, jelly-roll strips, or hand-cuts.
Materials & tools (workshop-ready — make a throw / adjust as needed)
- Fabrics: assortment of fat quarters (or a jelly roll / hand-cut strips) for the colorful rings/roundabout pieces; a contrasting background/setting fabric (light or dark depending on your look); border fabric; backing and batting. The pattern is fat-quarter friendly.
- Estimated yardage (example throw-ish): ~3–4 yd background, 1–3 yd borders, 4–5 yd backing (adjust by final size). If you use fat quarters, plan for ~18–30 fat quarters depending on how many rings/rounds you want.
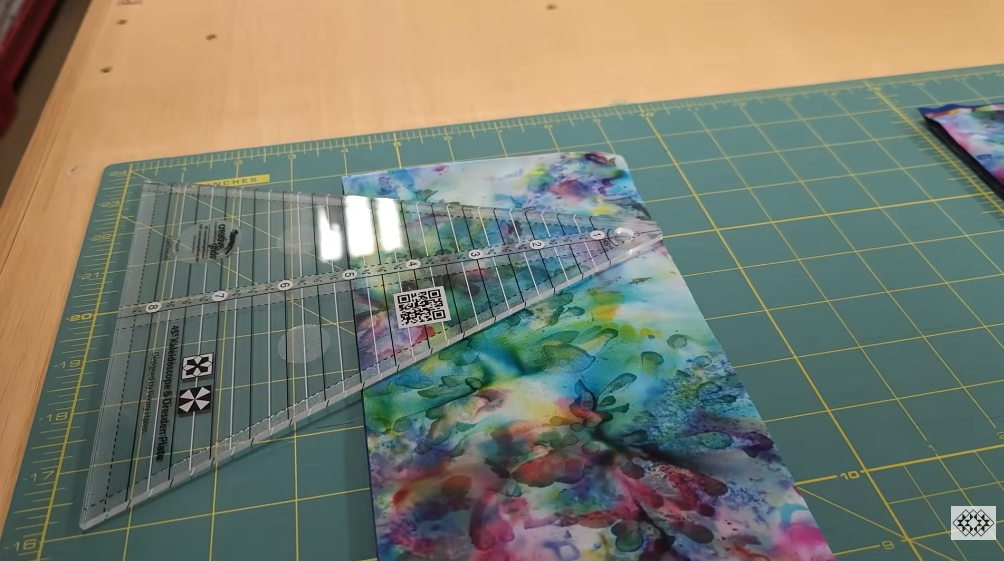
- Tools: rotary cutter & mat, long ruler (24″), square ruler (6½” or 9″), 45° line or triangle ruler, sewing machine with accurate ¼” foot, iron/pressing surface, pins/clips, spray baste or safety pins for basting.
- Optional: design wall or large floor area for layout.
How the quilt is constructed (overview)
- Sew long strip sets from your chosen colorful fabrics and background strips.
- Sub-cut those strip sets into identical rectangles/squares that become the “ring” segments.
- Construct ring/round units (often by assembling small sub-units into larger octagonal/round shapes or by setting blocks on point around a center).
- Square and trim each unit for accuracy.
- Join units into larger medallion rows, add setting triangles and borders, quilt and bind.
Matt’s demo emphasizes batch work (make many strip sets, sub-cut stacked pieces, trim, then assemble), which is the fastest route.
Step-by-step tutorial
1) Watch the demo once (mental prep)
Watch Matt’s video through once to get the rhythm — he shows the exact order he sews, how he stacks cut piles, and how he trims units before assembly. This makes following the steps below much smoother.
2) Choose fabrics & plan scale
- Pick fat quarters or strips for the colorful rings. Decide whether you want a bold contrast (dark background) or soft vintage look (light background). The Roundabout pattern is written to be flexible — fat quarters are a common choice.
3) Cut strips & background pieces
- Cut long strips from your fabrics (common working widths Matt uses are 2½”, 3″, or 5″, depending on desired scale). If you’re using fat quarters, cut multiple strips from each fat quarter (for example, two or three 2½”×WOF strips each).
- Cut background strips and larger background squares for setting pieces/triangles per your planned layout. Keep a stack of identical background strips ready. The pattern and video show using repeated widths so everything lines up when sub-cut.
4) Make your strip sets (batch processing)
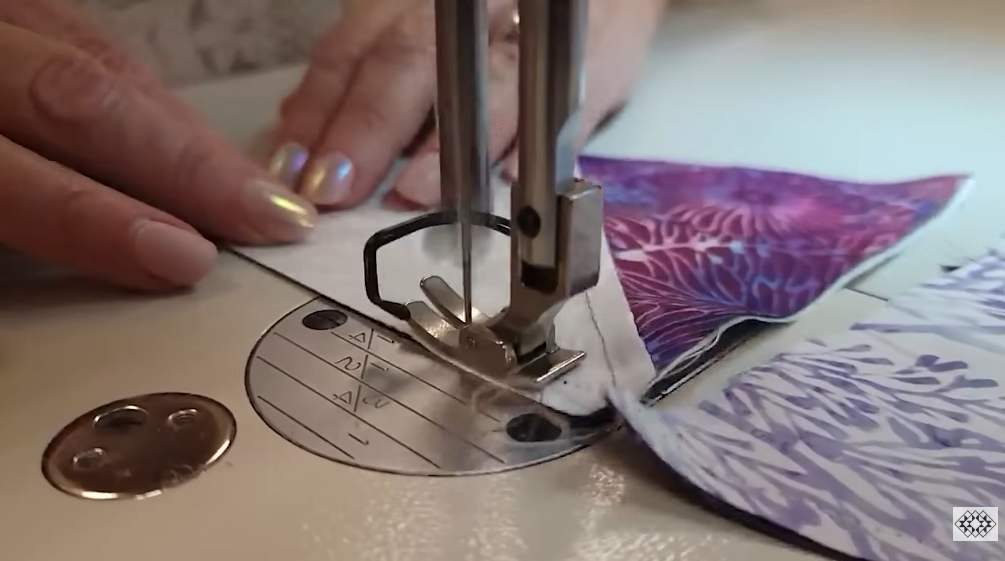
- Lay the strips in the order you want the color progression to read in the ring (for example, dark → medium → light → medium → dark). Chain-piece many strip sets: sew the strips together longwise using a consistent ¼” seam allowance. Press seams consistently (either toward darker fabrics or open). Create as many long strip sets as you’ll need for all the ring segments. Matt demonstrates making lots of strip sets before cutting.
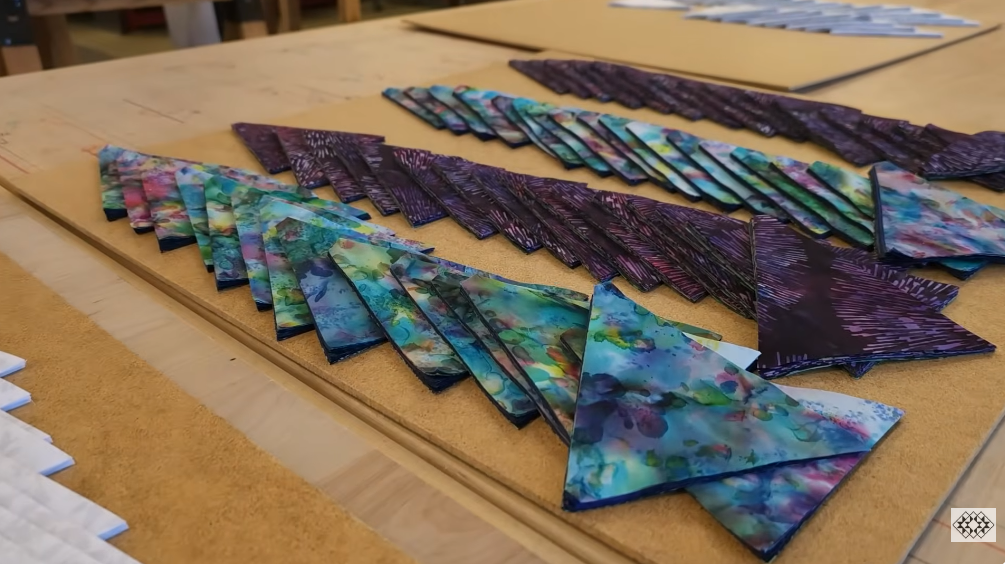
5) Sub-cut strip sets into blanks
- From each long strip set, sub-cut identical rectangles or squares (stack and cut to speed up). These blanks are what you’ll sew into the ring segments — cutting them stacked keeps them consistent. For accuracy, cut a few extras to allow for trimming.
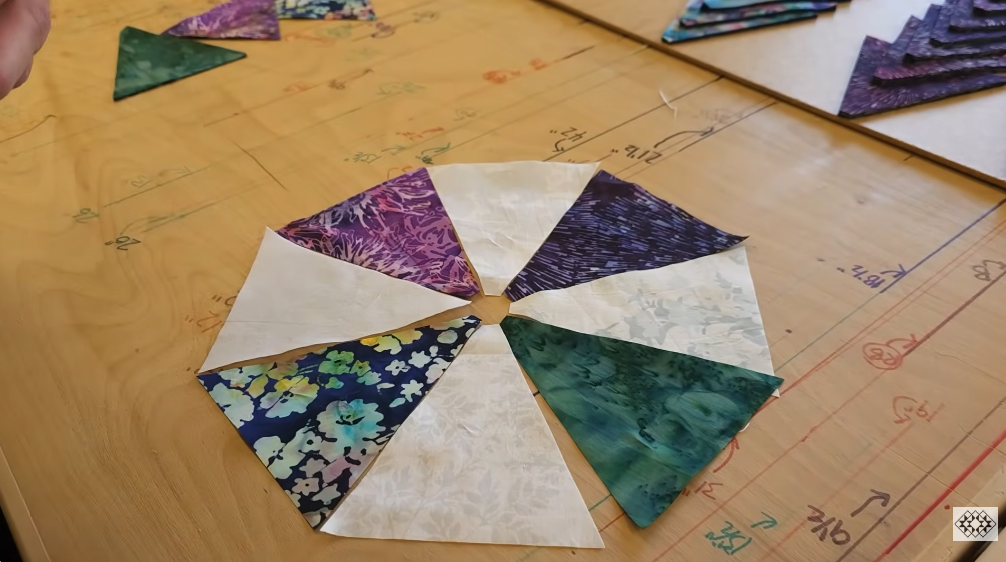
6) Make ring/round units (assemble sub-units)
- Sew the blanks together into the small sub-units that form each ring segment. Depending on the Roundabout layout, you’ll either:
- join short strip blocks into wedge-like units that form concentric rings when pieced together, or
- sew small blocks and set them on-point around the center to create the circular illusion.
- Work in batches: sew identical sub-units and press them as you go so you have stacks ready for the next step. The video shows assembling many identical pieces and then joining them into the larger ring rows.
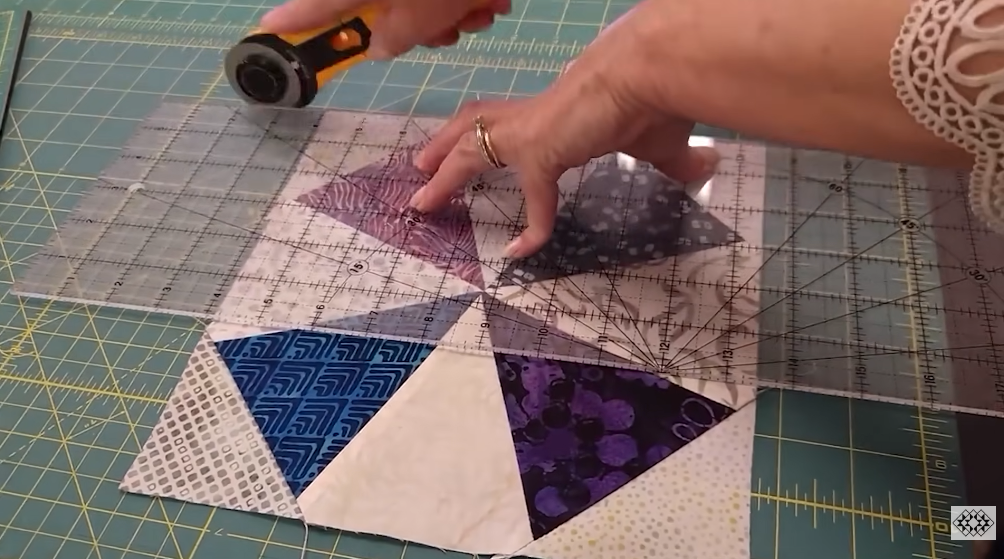
7) Trim & square units exactly
- After assembling the sub-units, trim each one to the pattern’s unit size (or to one consistent size you choose). Accurate trimming at this stage is vital — small discrepancies add up when you join the concentric rows. Use a square ruler and a 45° line if working on-point.
8) Lay out medallion rows
- On your design wall or floor, lay out the trimmed units in the order they will be joined to form the rings/roundabout rows. This is the fun part — shuffle units until color balance feels right. The Roundabout look comes from the repeating banded rows built up around the center.
9) Join rows into the quilt center
- Sew the units together to make the inner ring, then continue joining subsequent rings outward. If working on-point, you’ll add setting triangles at the edges of rows so the outer rings form a square/rectangular top. Keep checking for 90° squareness as the medallion grows. Matt demonstrates sewing rows and checking alignment often.
10) Add setting triangles & borders
- Cut and attach the background setting triangles (these fill the sides when the medallion is set on-point). Then add inner and outer borders to finish the quilt top to your desired dimensions. Press and square after each border.
11) Baste the quilt sandwich
- Baste top + batting + backing using spray, pins, or a long arm. Make sure the top lays flat and the circular bands aren’t distorted during basting.
12) Quilting suggestions
- Quilting that emphasizes the round bands works great:
- Echo quilting that follows the concentric rings (echo the bands at regular intervals).
- Circular/spiral motifs (if you or your machine quilter prefer them) echo the roundabout concept.
- All-over meander if you want quick, cozy quilting that won’t compete with the patterned rings.
- Choose quilting density based on batting type and how much texture you want. Matt often uses echoing or simple all-over quilting on similar projects.
13) Trim, bind & finish

- Trim the sandwich even with the quilt top, make binding strips (2½” is common), attach binding, and finish by hand or machine. Label your quilt and enjoy your Roundabout!
Practical tips & shortcuts (Matt’s workshop style)
- Batch everything: chain-piece strip sets, sub-cut stacked pieces, trim stacked units and then stitch — big time saver. YouTube
- Use fat quarters or a jelly roll if you want a fast, coordinated kit look — the pattern and Jordan Fabrics product pages show fat-quarter/jelly-roll friendly options.
- Cut extras of frequently used sub-units so you don’t run short midway through an outer ring.
- Trim early and often — squaring units before assembly keeps the rings flat and the seams tidy.
VIDEO: