 by
by Jelly Roll Adventure — step-by-step tutorial
(How to recreate the quilt Matt makes in “MATT’S JELLY ROLL ADVENTURE!”)
This is a jelly-roll-friendly, strip-pieced project Matt teaches in the video — fast, repeatable, and perfect for using a prepacked jelly roll or a stash of 2½” strips. Below is a practical, sew-at-the-machine, numbered tutorial that follows the exact workflow Matt uses: prep → strip-piecing → sub-cut → assemble → trim → set → borders → quilt & bind. (I watched the Jordan Fabrics demo to make these instructions match the video’s rhythm and tips.)
Quick facts (what you’re making)
- Project style: Jelly-roll friendly strip quilt (uses 2½” strips, strip-piecing and sub-cutting).
- Typical workflow Matt uses: chain-piece long strip sets, sub-cut stacked blanks, assemble in batches, trim to size, set blocks into rows and add borders.
Materials & tools (for a throw-sized sample)
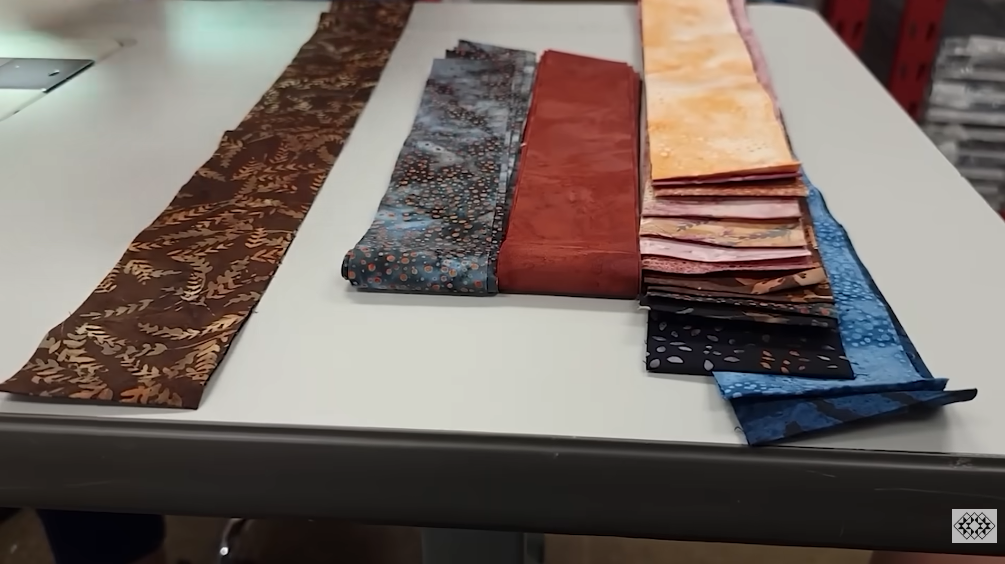
- 1 jelly roll (40 × 2½” strips) — assorted coordinated prints (or about the equivalent in fat quarters / cut strips).
- Background/setting fabric — ~2–3 yards (for sashing/frames, setting triangles, borders).
- Border fabric — ~1 yard.
- Backing — ~4–5 yards (or piece backing to size).
- Batting — about 70″ × 90″ (a little larger than finished top).
- Binding fabric — ~½–1 yard (or make from scraps).
- Tools: rotary cutter & mat, long ruler (24″), square ruler (6½” or 9″), sewing machine with ¼” foot, iron/pressing surface, pins/clips, safety pins or spray basting.
Before you start (prep)
- Press all strips lightly so they lie flat. Sort into rough color/value groups (dark → medium → light) if you want a gradated look, or leave assorted for a scrappy effect.
- Decide the block scale you want (Matt demonstrates building several scale examples). This tutorial assumes a medium-scale throw — adjust sub-cut lengths if you want smaller or larger blocks.
Step-by-step construction
1) Decide block structure & strip grouping
- Choose how many strips will make one “rail” or band in your block (common choices: 3-strip or 4-strip bands). Matt often uses groups of 3 or 4 strips sewn together to make a block blank. Group strips into piles of the same count so you can chain-piece quickly.
2) Sew long strip sets (chain-piecing)
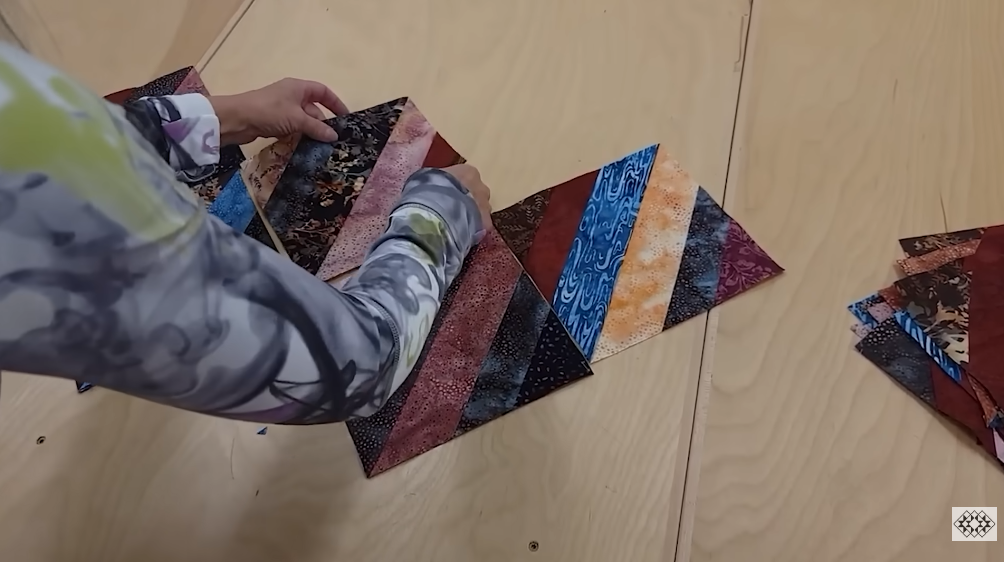
- Stack the strips for one block in the order you want them to read (top → middle → bottom).
- Sew the strips together along the long edges with a consistent ¼” seam to create long strip sets. Chain-piece many sets without cutting threads between seams to save time. Press seams toward the darker fabrics or open — be consistent.
3) Sub-cut your strip sets into identical blanks
- From each sewn strip set, sub-cut identical length blanks (for a medium throw a common unfinished blank length is about 6½”–8″ — pick one length and cut all blanks the same). Stack multiple strip sets and cut them together to keep all blanks uniform. Cut a few extra blanks to allow for trimming/any mismatches.
4) Assemble block units
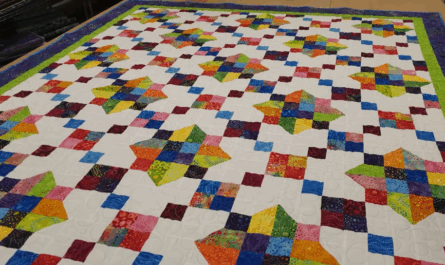
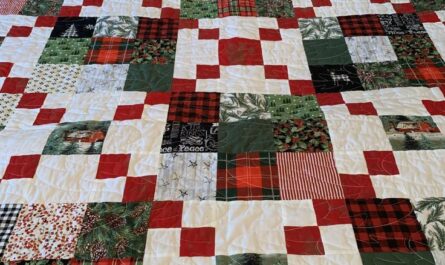
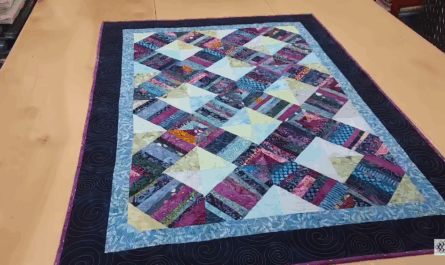
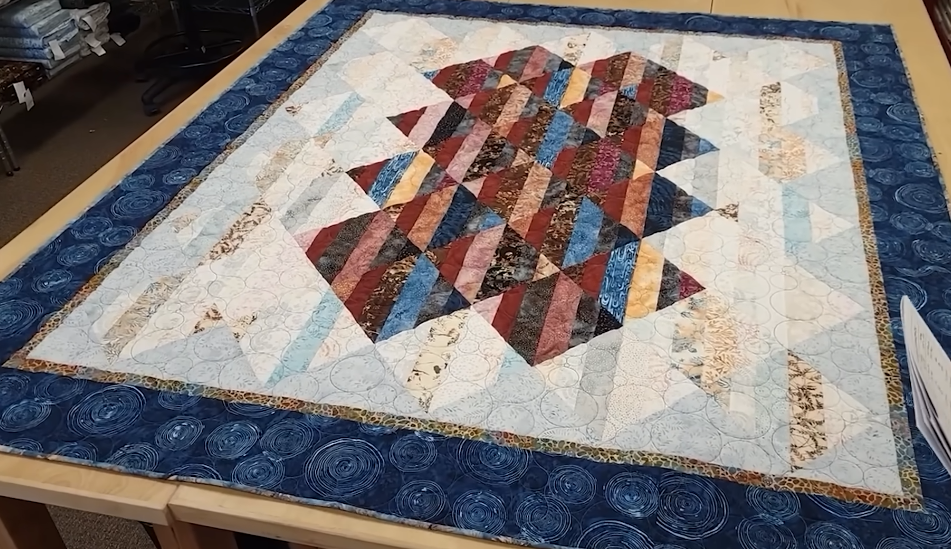
- Each blank becomes a block (or a half of a block depending on your layout). Lay out blanks into the block arrangement Matt demonstrates (for example: alternate rotated blanks to create diagonal movement, or place all blanks the same direction for a striped field). Sew blanks into rows — press seams so they nest when joining rows.
5) Trim & square (crucial)
- After sewing small sub-units/blocks, trim them to a uniform size using your square ruler so rows join cleanly. Matt strongly encourages trimming units before final assembly to prevent cumulative error. Trim each block to the chosen unfinished block size (e.g., if you sub-cut at 7½” unfinished, trim to that measurement exactly).
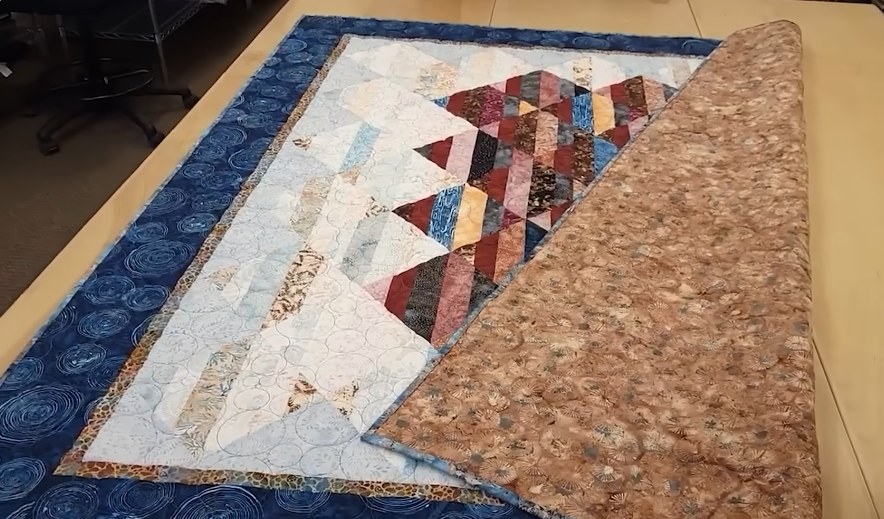
6) Layout the quilt top
- Lay out trimmed blocks/rows on a design wall or floor. This is where you balance color and value — shuffle until the overall look pleases you. If you used alternating rotations, the diagonal effect will start to appear when you place rows. Matt walks through layout adjustments in the video; mimic his balancing by stepping back often and moving groups until the color flow reads well.

7) Join rows to build the quilt top
- Sew rows together with a ¼” seam, taking care to match seams at intersections. Press rows; measure the top width and height to ensure borders will fit. Square the top if needed.
8) Add borders
- Add inner and outer borders per your chosen look. A narrow inner border in background fabric helps frame the strip field; a wider outer border finishes the quilt to final size. Cut border strips to the measured lengths plus seam allowances and sew on (sides first, then top/bottom, or vice versa).
9) Baste the sandwich
- Baste quilt top + batting + backing with spray or safety pins. Smooth and check for any puckers. Matt uses pin basting in his demos for even tension.
10) Quilting suggestions
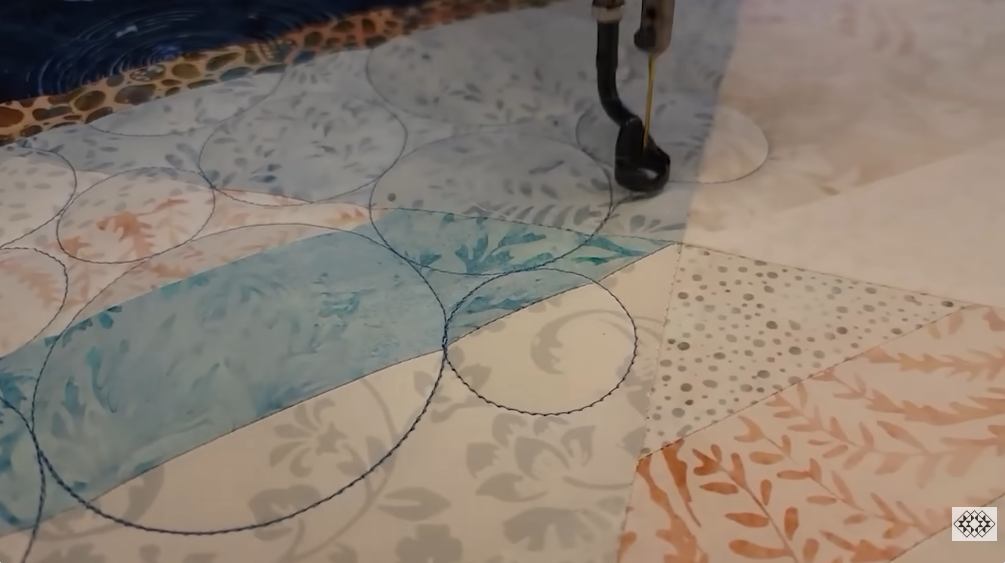
- Quilting styles that work great with jelly-roll strip quilts:
- Straight-line quilting following the strip direction (accentuates linear look).
- Echo quilting to highlight bands/blocks.
- All-over meander for a cozy textured finish that’s quick to stitch.
- Choose thread and quilting density to suit batting and desired drape — Matt often uses a moderate echo or straight-line quilting to keep the strips as the visual star.
11) Trim, bind & finish
- Trim the quilt sandwich even with the top, make binding strips (2½” is common), attach binding, fold to the back and stitch down by hand or machine. Label your quilt and enjoy!
Tips & shortcuts Matt shows in the video
- One jelly roll → one quilt: a single jelly roll can often make the entire top (Matt demonstrates jelly-roll economies in his demos).
- Batch everything: chain-piece many strip sets, sub-cut stacked blanks, then sew blocks in batches — huge time savings.
- Keep a consistent ¼” seam — accuracy here makes the whole top fit together neatly. Use a ¼” foot and test on scraps.
- Trim early — trim sub-units and blocks before final assembly so errors don’t accumulate. Matt repeats this practical tip throughout the demo.
VIDEO: