 by
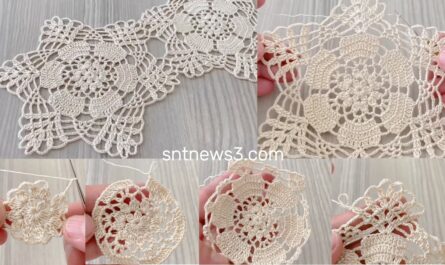
by 🌟 Gorgeous Lace Square Motif — Step-by-Step Text Tutorial
(inspired by “Gorgeous‼️ Crochet Lace Square Motif Pattern — Crochet with Nese” — written so you can crochet it straight away)
Finished (blocked) size: ≈ 10–13 cm / 4–5 in with DK yarn + 3.5–4.0 mm hook (adjust yarn/hook to change size).
Skill: beginner → intermediate (uses basic stitches, clusters, and simple shaping).
Terminology: US crochet terms.
Materials
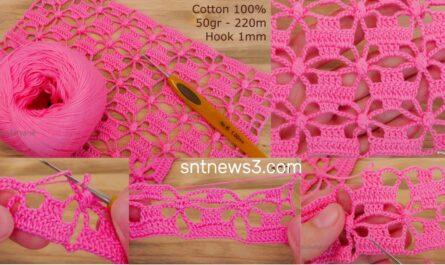
- Yarn: DK / sport (cotton for crisp lace; cotton-blend or acrylic for softer drape)
- Hook: 3.5–4.0 mm (or match yarn label)
- Tapestry needle, scissors, blocking pins/mat
Abbreviations
- ch = chain
- sl st = slip stitch
- sc = single crochet
- hdc = half double crochet
- dc = double crochet
- tr = treble crochet
- pic = picot (ch 3, sl st into base)
- sp = space
- st(s) = stitch(es)
Pattern concept (short)
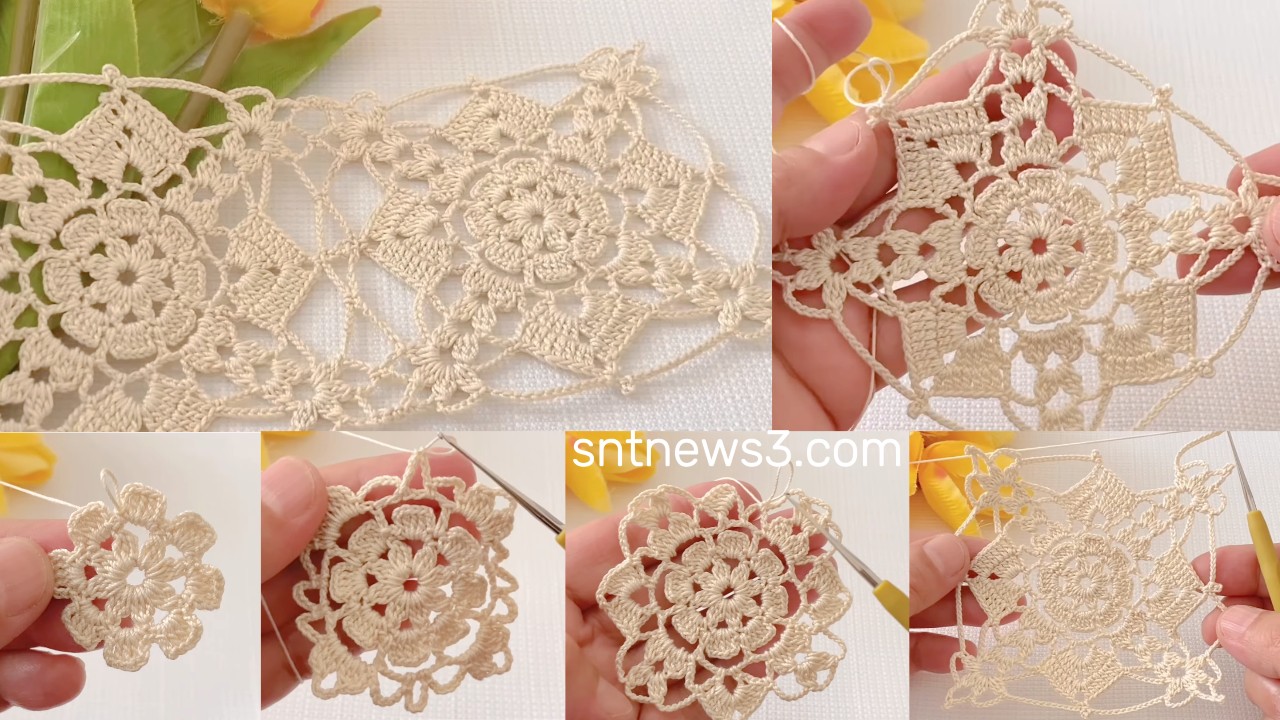
Worked from center out: tight center → petal round → tidy sc round → lacy arches → convert circle → square corner loops → scalloped picot edge. Counts are included so you can check your work after each round.
Round-by-round (exact)
Round 1 — Center ring
- Make a magic ring.
- ch 3 (counts as dc), work 15 dc into ring. (ch-3 + 15 dc = 16 dc).
- Pull ring closed. sl st to top of ch-3 to join.
Check: 16 dc.
Round 2 — Loop foundation (petal bases)
- ch 4, skip next dc, sc in next dc — repeat around.
You will have 8 ch-4 loops and 8 sc between them. Join with sl st.
Check: 8 ch-4 spaces.
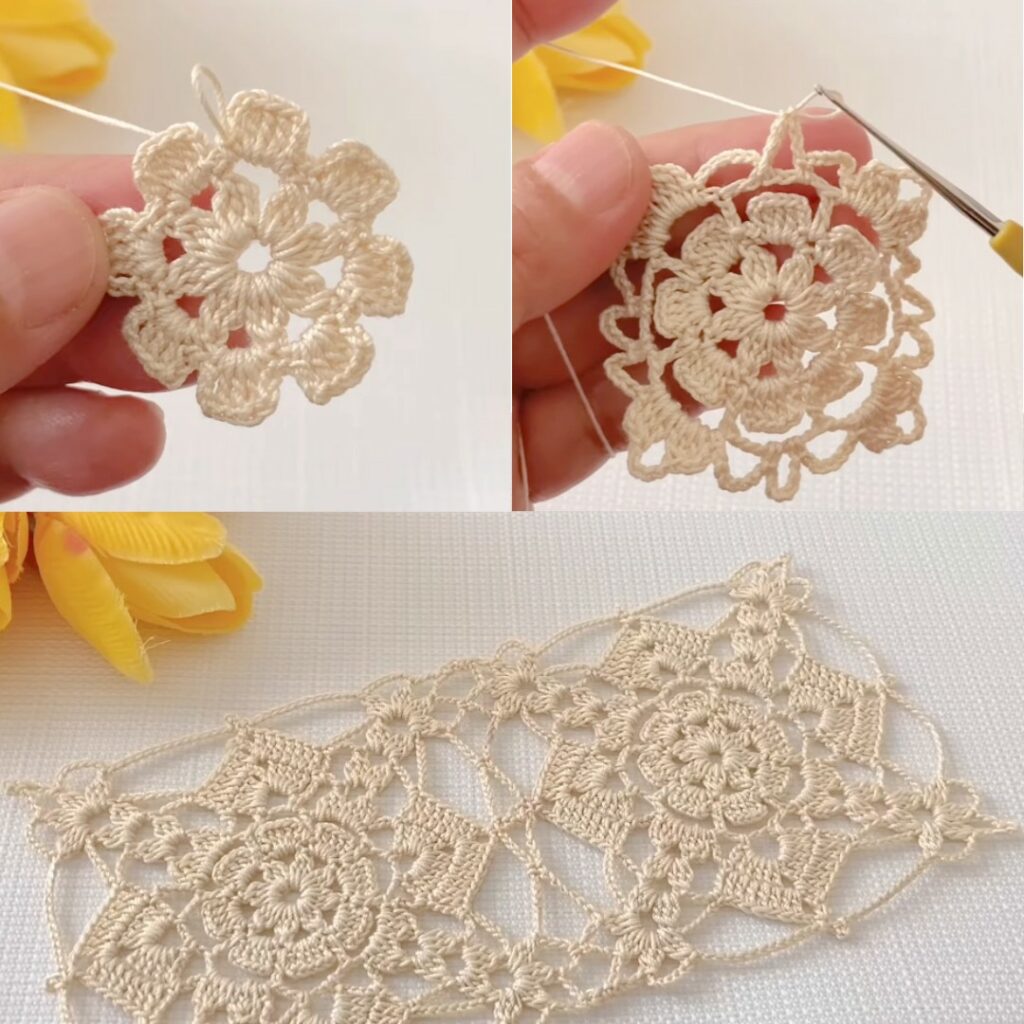
Round 3 — Puffy petals (8 petals)
- In each ch-4 loop work: (sc, hdc, 7 dc, hdc, sc) — all into the same loop.
- Sl st to next ch-4 loop and repeat for all 8. Join.
Check: 8 petals (notice a raised petal effect).
Round 4 — Tidy base (sc round)
- Rejoin between petals. Work sc evenly around the petal bases to flatten and even the motif — aim for ~10 sc distributed per petal area (adjust ±1–2 so motif sits flat).
- Join with sl st.
Check: outer boundary should be nearly circular and flat.
Round 5 — Lacy tall arches (frame)
- From each petal tip: sl st to outer tip → ch 7 → anchor into the sc round between the next petals with
(tr, ch 2, tr, ch 2, tr)worked into that sc or small space → sl st back to the next petal tip. - Repeat for all petals to produce 8 large arches. If ch-7 looks too long/short for your yarn/hook, use ch-6 or ch-8. Join.
Check: 8 evenly spaced arches bridging petals.
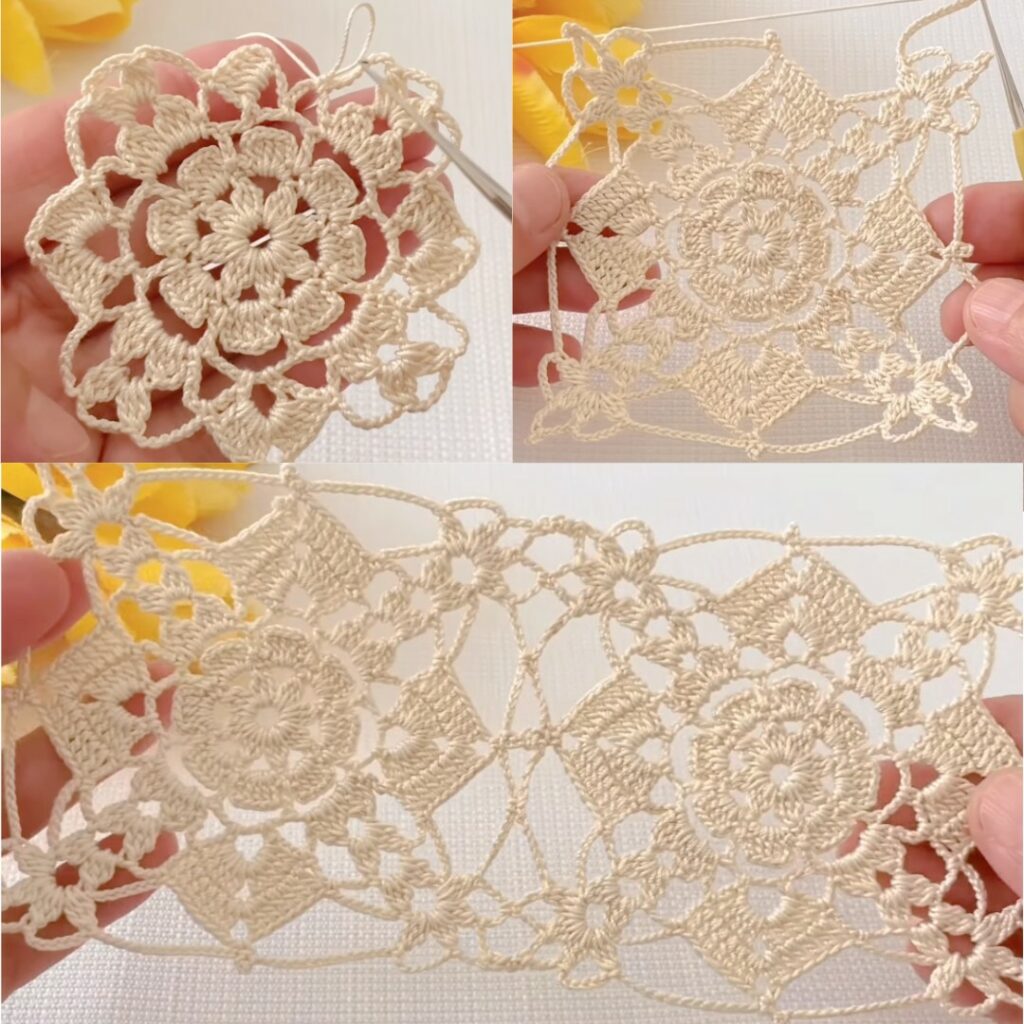
Round 6 — Arch decoration (3 ribs)
- Into each ch-arch work: sl st into arch base → ch 3 → dc into top of first tr → ch 1 → dc into top of middle tr → ch 1 → dc into top of last tr → ch 3 → sl st into arch base.
- Repeat for all 8 arches and join. (Simpler alternative: 3 dc separated by ch-1 inside each arch.)
Check: each arch has three slender ribs or decorative dc groups.
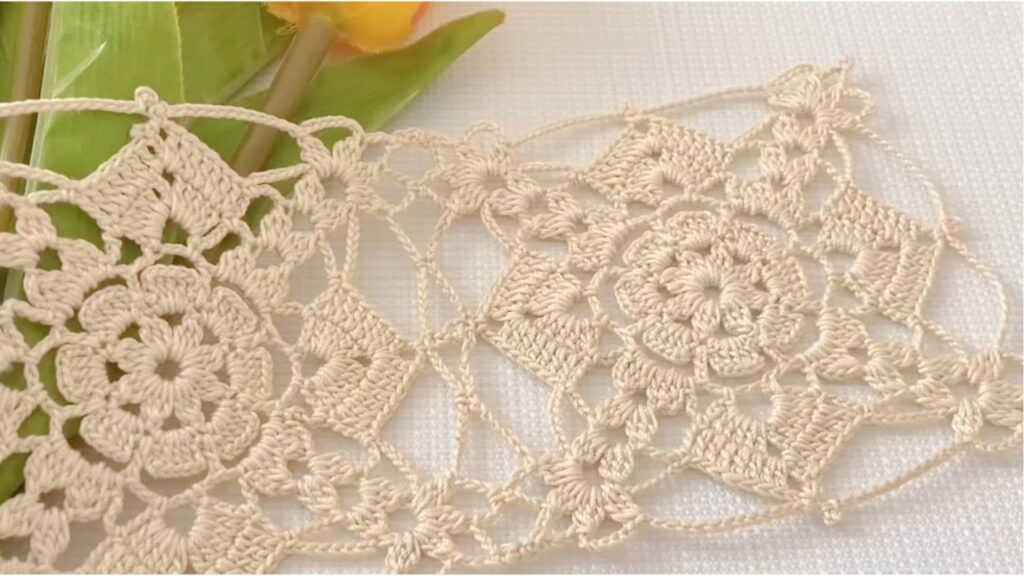
Round 7 — Turn circle → square (corner loops & side loops)
- Mark four quarter points (every 2 petals = 90° apart). Rejoin at a quarter marker.
- Work across each side between corners as: [sc X, (sc, ch 4, sc) repeated Y times] then at the corner make ch 6 to form a corner loop, continue the side to the next corner.
- Practical approach: distribute about 12 sc + 3 side loops (sc,ch4,sc) per side (adjust so all 4 sides have the same counts). The important thing is consistency so motifs align when joined.
- Join and fasten off.
Check: motif now has 4 corner ch-6 loops and evenly spaced side loops — it will block to a square/diamond.
Round 8 — Outer scallop & picot finish
- Rejoin at any outer sc. Work an edge repeat around the outside, for example: sc 3, (pic: ch 3 sl st in same st), sc 4 — adjust sc counts to keep the scallop flat.
- Place a picot at each scallop peak for that dotted decorative look. Join, fasten off, weave in ends.
Check: even scalloping and picots; motif lies flat after blocking.
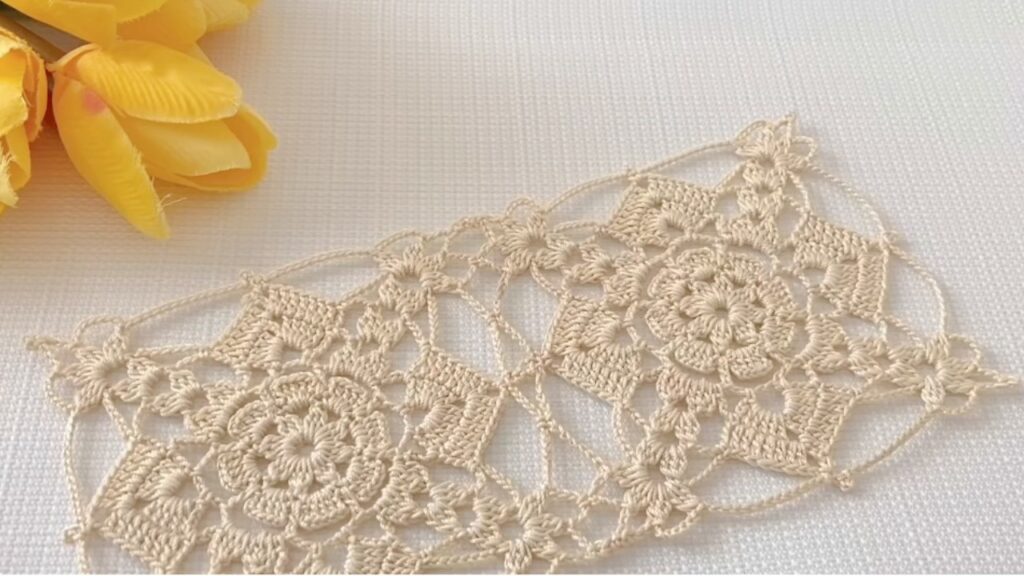
Blocking
- Pin motif to blocking mat into square: pull each corner loop outward to form crisp corners and pin picots to be pointy. Spray lightly with water/steam and allow to dry completely. Blocking is key for square geometry and neat joins.
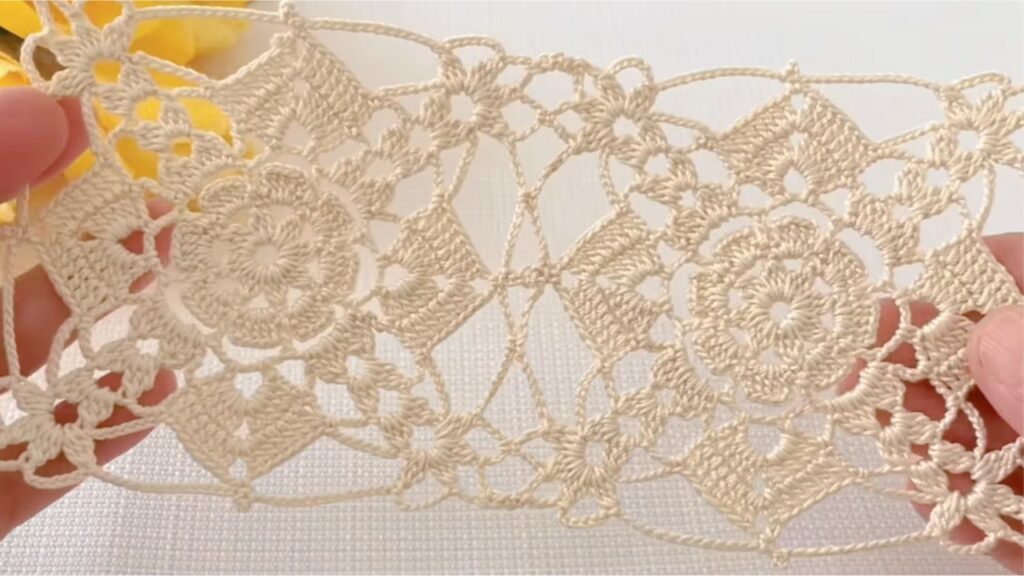
Joining motifs
Two methods:
1) Join-As-You-Go (JAYG) — recommended (flat seams)
- Make first motif completely. For the next motif work through Round 7. On Round 8 (outer edge) when you reach a place that meets an adjacent finished motif, replace that sl st/edge stitch with a sl st into the corresponding stitch or picot of the finished motif. Attach at side loops and corner loops. This produces very flat, neat seams—ideal for garments and runners.
2) Sew-after (traditional)
- Make and block motifs. Pin into layout, then sew with tapestry needle and yarn using mattress stitch or invisible whipstitch through Round 4/5 or side loop points. This gives flexibility to reposition before joining.
Project ideas & motif counts (estimates)
(Measure one blocked motif width M then compute; examples assume M ≈ 12 cm)
- Table runner: 1 × 8 motifs → ~96 cm long (narrow), or 2 × 8 → 96 × 24 cm (wider).
- Throw / blanket: 10 × 12 motifs → 120 × 144 cm.
- Blouse front panel (S): 3 × 3 motifs (adjust for fit). Two panels (front & back) plus sleeves/edging.
- Shawl (rectangle): 6 × 10 motifs → 72 × 120 cm.
Troubleshooting & tips
- Motif cups upward: loosen tension or go up one hook size for petals/arch rounds; re-block.
- Motif ripples/waves: shorten arch chains (ch-7 → ch-6) or reduce sc in Round 4.
- Joins gap: add extra sl st at join points or block motifs before joining. JAYG works best when joining motifs are blocked first.
- Sides mismatch: ensure the same sc/side-loop counts on each side so adjacent motifs align perfectly.
Variations
- Two-color motifs: change color after Round 3 for petals vs outer frame.
- Larger motif: increase 7 dc → 9 dc in petals and ch-7 → ch-9 in arches.
- Simpler beginner version: replace Round 5–6 archwork with ch-5 loops and 3 dc across each loop for an easier lacy look.
- Denser block (runner): reduce chain lengths and replace dc ribs with hdc for less openness.
VIDEO: