 by
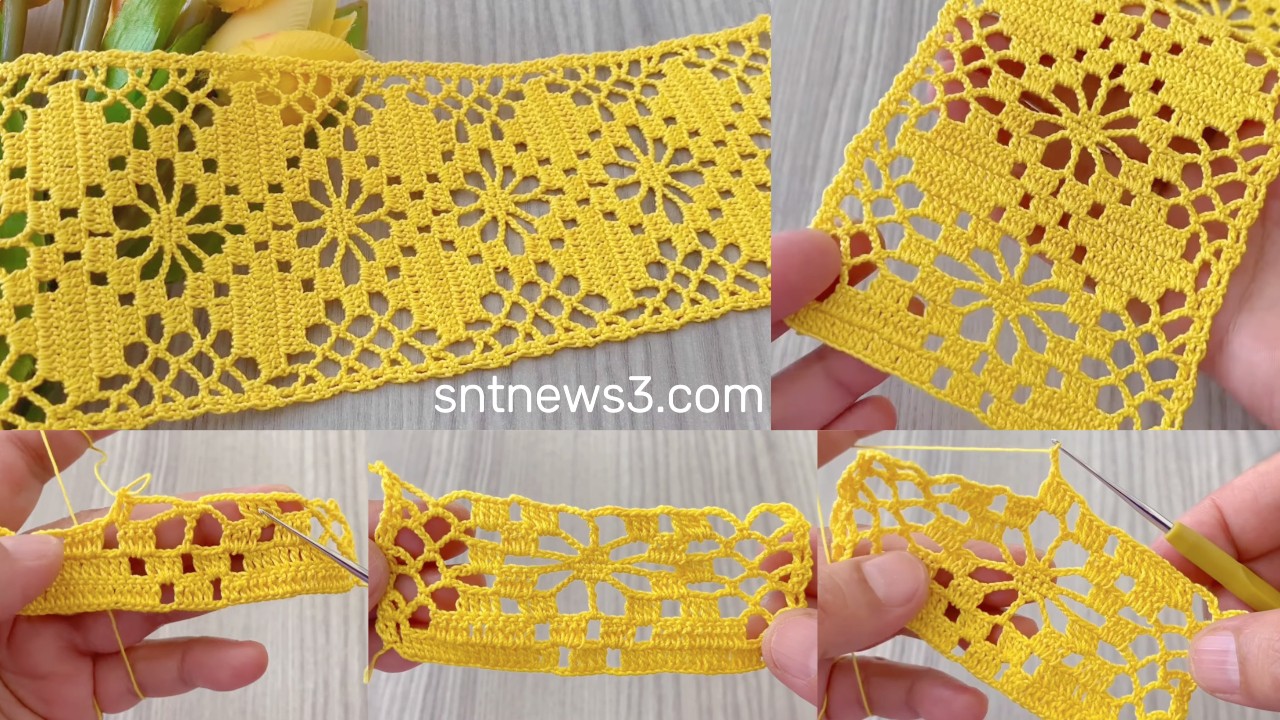
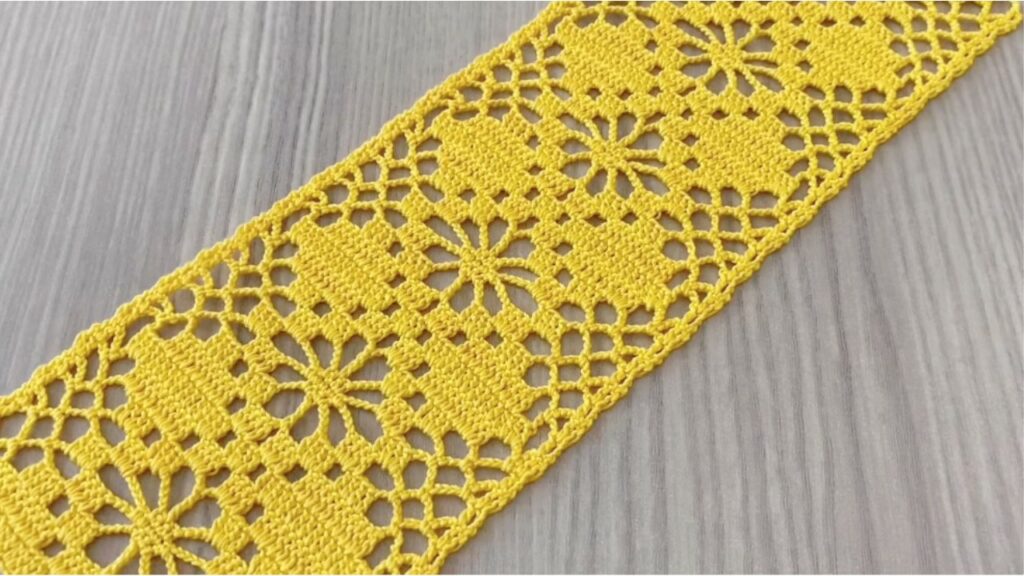
by This pattern makes a spidery medallion that converts to a square tile — dramatic radiating spokes, lacy arches and a textured outer frame. It’s built so you can join tiles into blouses, runners, shawls or use motifs alone. I give exact round instructions and checks so you can follow without looking at the video.
Materials & finished size
- Yarn: Sport / DK (cotton or cotton-blend for crisp tiles; softer blend for drapey garments)
- Hook: 3.0–4.5 mm (match yarn & desired drape)
- Notions: tapestry needle, blocking pins/mat, scissors, stitch markers (optional)
- Finished motif (blocked): ≈ 10–13 cm / 4–5 in (varies with yarn & hook)
US crochet terms used.
Abbreviations
- ch = chain
- sl st = slip stitch
- sc = single crochet
- hdc = half double crochet
- dc = double crochet
- tr = treble crochet
- dtr = double treble (optional)
- pic = picot (ch 3, sl st into base)
- sp = space
- rep = repeat
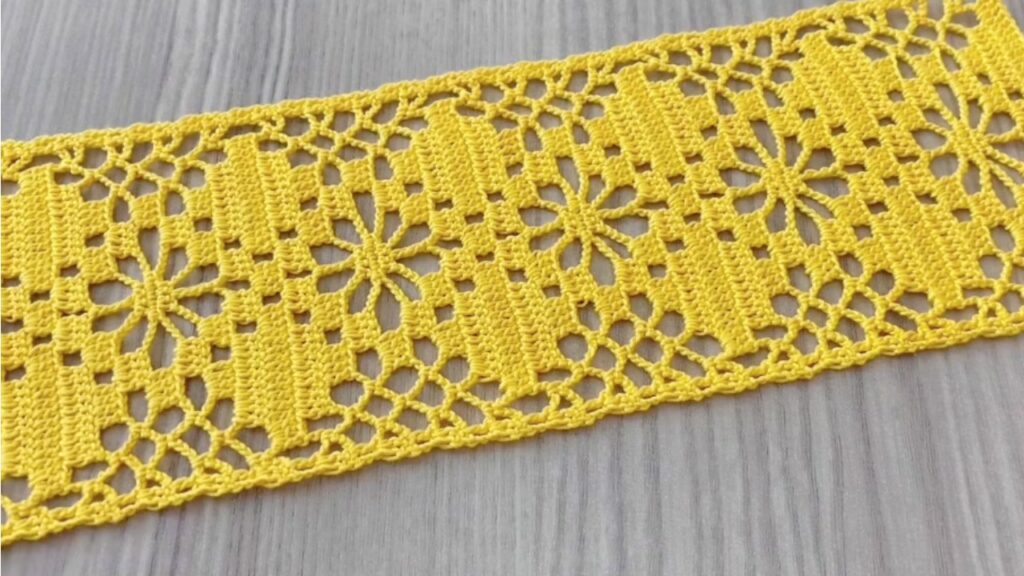
Pattern concept (short)
- Center wheel of tall spokes (the “spider”).
- Arches linking spokes create lace.
- Petal-like ribs decorate each arch.
- Square conversion (side loops + corner loops) so tiles join cleanly.
- Picot scallop outer edge — ready for join-as-you-go.
Count/check marks included.
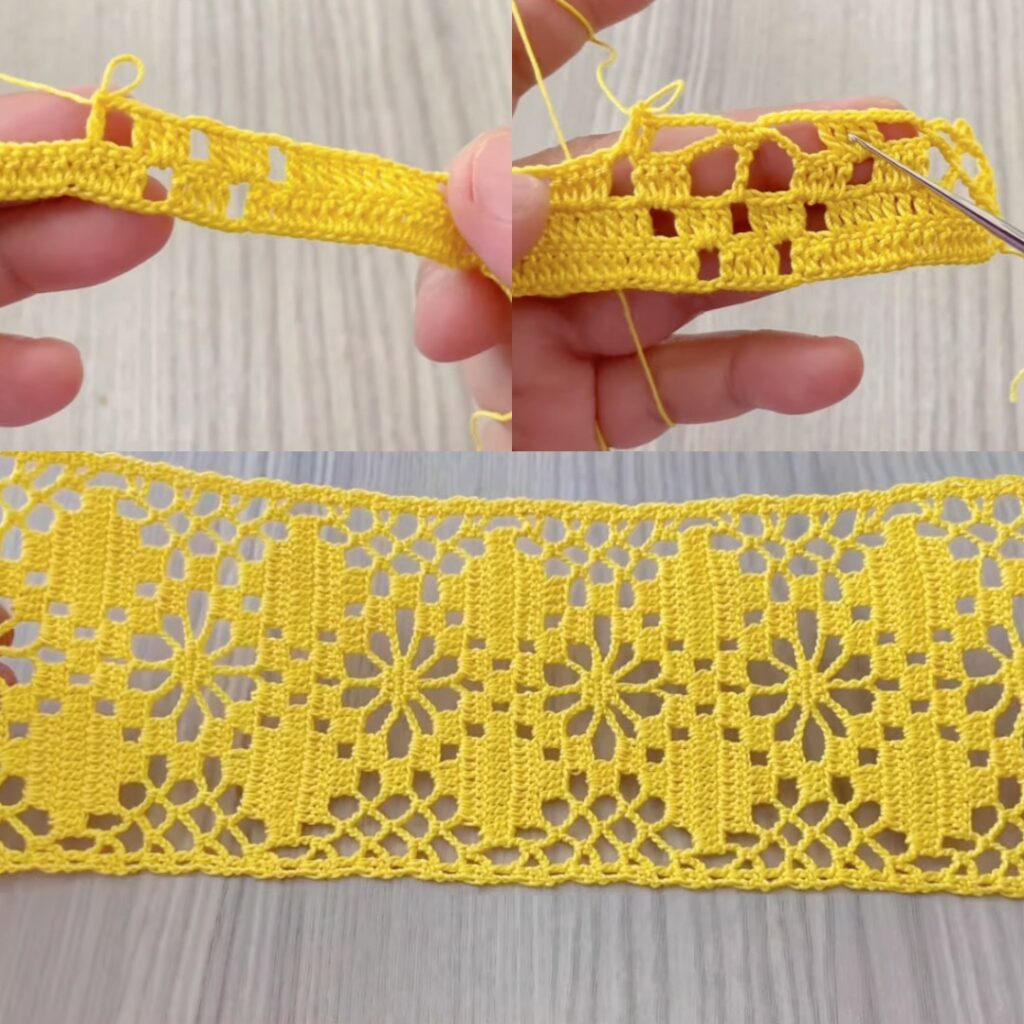
Round-by-round — Tile & Spider Motif
Round 1 — magic ring center (spoke base)
- Make a magic ring.
- ch 3 (counts as dc), work 15 dc into ring. (ch-3 + 15 dc = 16 dc total.)
- Pull ring closed. sl st to top of ch-3 to join.
Check: 16 dc.
Round 2 — create 8 spokes (wheel spokes)
- ch 5, skip next 1 dc, sl st in next dc — repeat around.
- You will make 8 ch-5 loops (because 16 dc → every other dc becomes an anchor).
- Join with sl st to first sl st.
Check: 8 evenly spaced ch-5 spokes.
These long chains are the look of the spider legs — keep them loose but even.
Round 3 — anchor spokes & form inner ring
- Into each ch-5 loop: (sc, ch 3, sc) all in same loop (this anchors the spoke and forms a small decorative loop).
- Between anchors work sc into the slipped dc anchors as needed so you have alternating anchored loops and sc. Join.
Check: 8 small anchored loops around center.
Round 4 — spider ribs (taller posts)
- Rejoin at any anchor. For each anchor/ spoke area work: (ch 2, tr) into the next base sc (i.e., make a tall post leaning outward) — repeat 3 times so each spoke area gets a small fan of 3 tall posts leaning into the arch area.
- Sl st to next anchor and repeat around. Join.
Check: 8 small fan groups of 3 tall posts around the center.
Round 5 — large chain arches (connect spokes)
- From the top of a fan group: sl st to outermost post → ch 8 → sl st into outermost post of the next fan group (across one spoke group) → ch 8 → sl st back into the next fan group — continue so you form 8 large chain arches that bridge every second fan group and create a lacy web.
- Join with sl st.
Check: 8 large arches forming a ring.
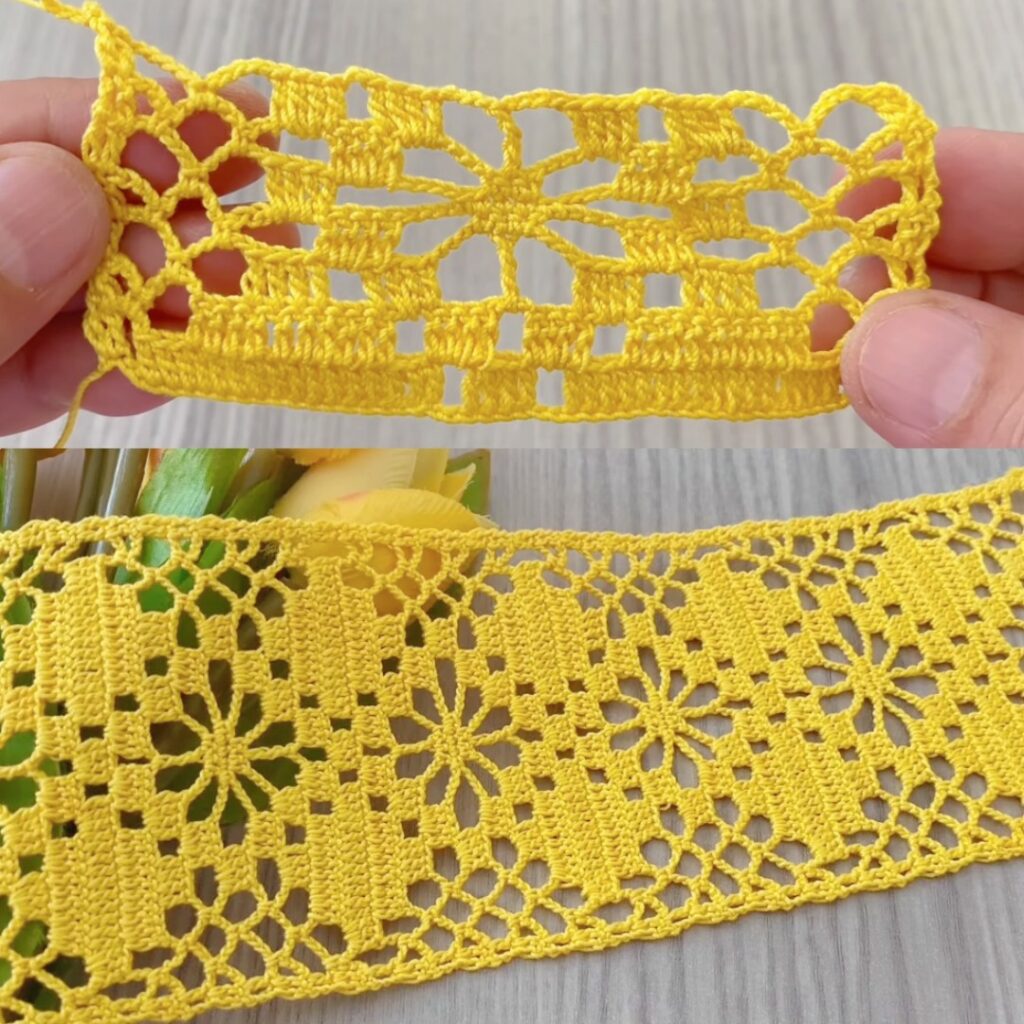
Round 6 — fill arches with decorative ribs
- Into each ch-8 arch work: sl st into arch base → ch 3 → (dc, ch 1, dc, ch 1, dc) across the arch anchored to 3 positions (or into the tall posts) → ch 3 → sl st into arch base.
- Repeat for all 8 arches. This gives each arch 3 inner ribs — spider-web texture. Join.
Check: each arch has 3 inner ribs or 3 dc groups.
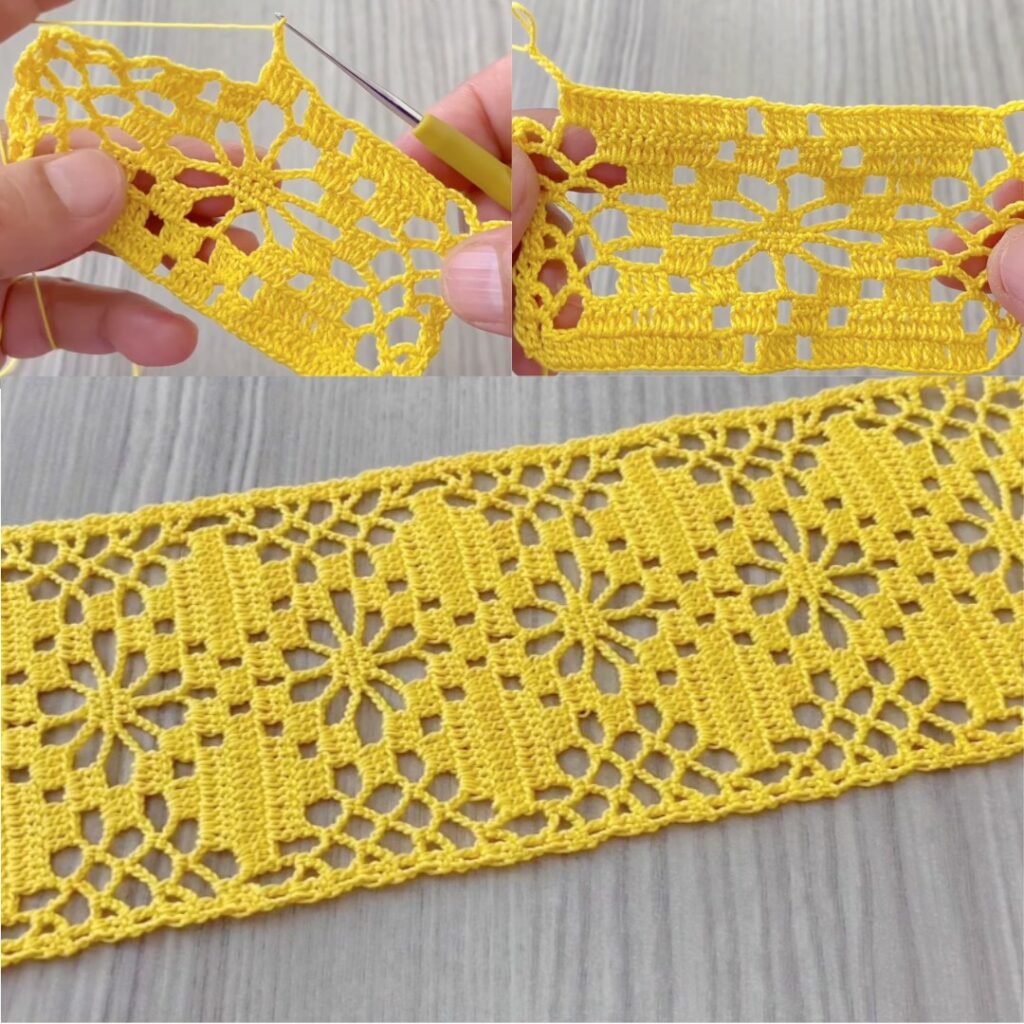
Round 7 — form petal frame & convert to square
- Mark quarter points (every 2 arches = 90°). Rejoin at one quarter.
- Work along each side between corners: sc 10 (adjust to your motif size), (sc, ch 4, sc) × 3 (side loops), sc 10, then at corner make ch 6 (corner loop). Important: keep the same counts for all 4 sides.
- Join and fasten off.
Check: 4 corner ch-6 loops and equal side loops on each side — motif blocks to a square.
Round 8 — scallop & picot outer edge (optional JAYG round)
- Rejoin and work: sc 3 across a small outer curve, (pic: ch 3 + sl st into same st), sc 4 — repeat and adjust counts so edge sits flat. Place picots evenly.
- This last round is perfect for Join-As-You-Go: when you meet a neighbor motif, replace the picot or sl st with sl st into the corresponding stitch/picot of the finished tile to join. Fasten off and weave ends.
Check: scallops evenly spaced; motif blocks to square.
Blocking & finishing
- Pin tile to blocking board/towel into a true square; pull corner loops outwards and pin picots for crisp points. Mist or steam lightly and let dry fully. Blocking opens the web and sets the square geometry — don’t skip it.
Join methods & projects
Join-As-You-Go (JAYG) — recommended
- Make the first tile fully. For the next tile, work through Round 7 and start Round 8. Whenever a stitch/picot meets a finished tile, sl st into the corresponding stitch/picot of the neighbor instead of finishing the picot. Attach at side loops and corners. This produces flat seams and fast assembly for one-piece garments.
Sew-after
- Make & block tiles. Pin layout. Use tapestry needle & yarn to mattress-stitch through side-loop anchors or whipstitch through the outer sc round. This gives freedom to rearrange.
Projects
- Runner: join tiles in long strips (1×N or 2×N). Add a scalloped border.
- Blouse / tunic (one-piece): top-down: build yoke row(s) then add rows downwards, leaving center gaps for neck and side gaps for armholes. JAYG to assemble with minimal sewing.
- Shawl / stole: join tiles into rectangle; add picot edge around. For triangular shawl, build triangular arrangement or cut/trims.
Stitch counts & quick checks
- Round 1: 16 dc.
- Round 2: 8 ch-5 spokes.
- Round 3: 8 anchored loops.
- Round 5: 8 large arches.
- Round 7: 4 corner ch-6 loops and identical side loop counts per side.
If any count is off, undo to the last correct round and adjust.
Troubleshooting & tips
- Arches sag or look uneven: adjust ch length (ch-8 → ch-7 or ch-9) until spacing looks right for your yarn/hook. Keep same change across motif.
- Tile cups: use slightly larger hook for arches/petals or block stronger.
- Ruffles/ruffling: shorten arch chains or reduce sc count in Round 7 so there isn’t extra fabric.
- Joining gaps: add extra sl st at join points or make the JAYG attachment with a tighter tension; block tiles before joining.
- Sides not matching when joining: verify Round 7 side counts are identical for every tile.
Variations & style ideas
- Make it lacy: use fingering yarn + smaller hook, lengthen arch chains for an airy web.
- Bold tile: use thicker yarn + larger hook and increase the fan posts from 3 → 5 for a fuller center.
- Spider accent: add small beads at arch centers or at picots for sparkle.
- Two-color tile: work center rounds in Color A and switch to Color B at Round 5 for contrast between spokes and frame.
- Alternate outer edge: use shells (5 dc) instead of picot scallops for a softer border.
VIDEO: