 by
by 🧶 MATERIALS
- Medium weight yarn (cotton or acrylic recommended for structure)
- Crochet hook suitable for yarn (usually 3.5mm – 4.5mm)
- Scissors
- Tapestry needle
- Stitch marker (optional but helpful)
📚 STITCH ABBREVIATIONS (US TERMS)
- ch = chain
- sl st = slip stitch
- sc = single crochet
- dc = double crochet
- sp = space
- st = stitch
- rep = repeat
🔵 BEFORE YOU BEGIN (Important for Intermediate Level)
This motif builds in layers:
- Solid center
- Chain arches
- Petal clusters
- Lace expansion rounds
- Final shaping & edging
Maintain:
- Even tension (not tight, not loose)
- Clear stitch placement
- Accurate stitch counting each round
If your motif curls → tension too tight.
If it ripples → too many stitches or loose tension.
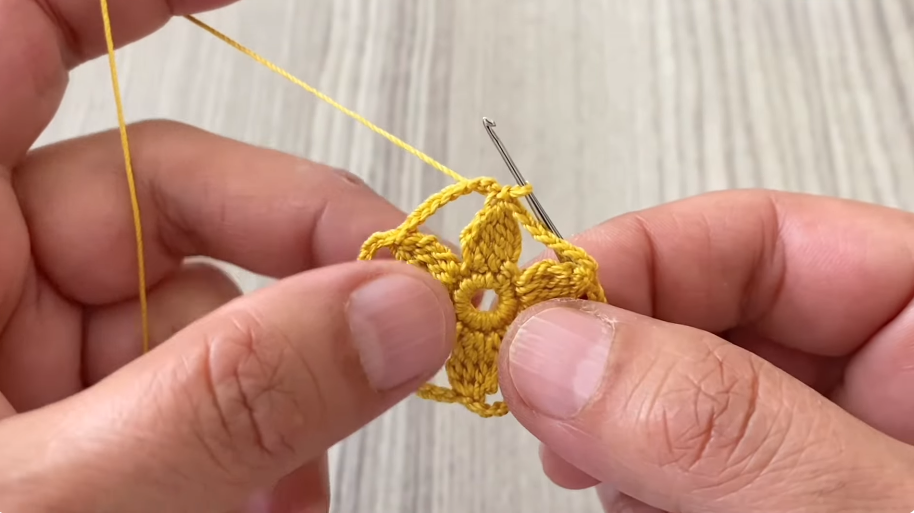
🟡 ROUND 1 — CENTER FOUNDATION
Step 1: Create a Magic Ring
- Wrap yarn around fingers to form a loop.
- Insert hook into loop.
- Yarn over, pull through.
- Chain 1 to secure.
Step 2: Work Double Crochets into Ring
- Ch 3 (counts as first dc).
- Work 11 dc into the ring.
- Pull the yarn tail tightly to close the circle.
- Sl st into the top of beginning ch-3.
✔ You now have 12 dc total forming a flat circle.
Tip:
Make sure your stitches sit evenly and the ring is fully tightened so no hole remains.
🟡 ROUND 2 — CREATE ARCH SPACES
This round builds the base for petals.
- Ch 1 (does NOT count as stitch).
- Sc into same stitch.
- Ch 5.
- Skip next stitch.
- Sc into next stitch.
- Ch 5.
- Repeat (skip 1, sc, ch 5) around entire circle.
- Join with sl st to first sc.
✔ You should have 6 chain-5 loops around the circle.
These loops are the petal foundation arches.
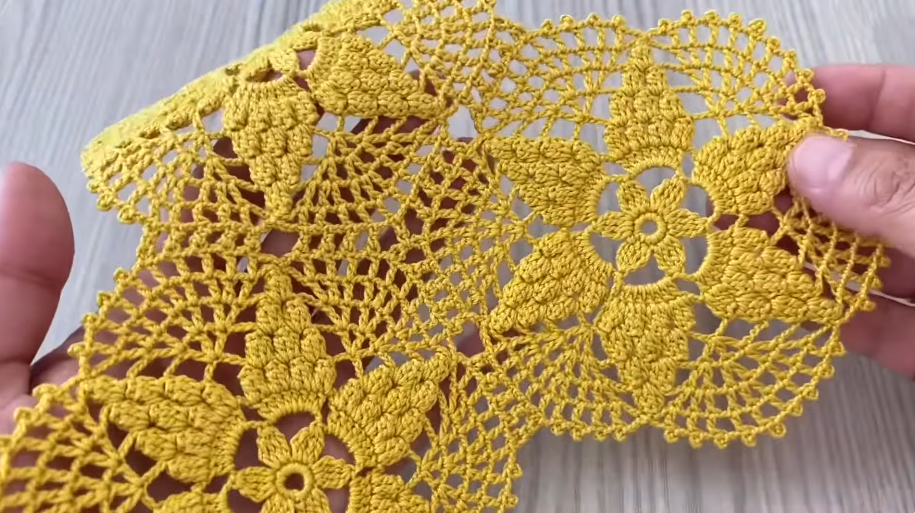
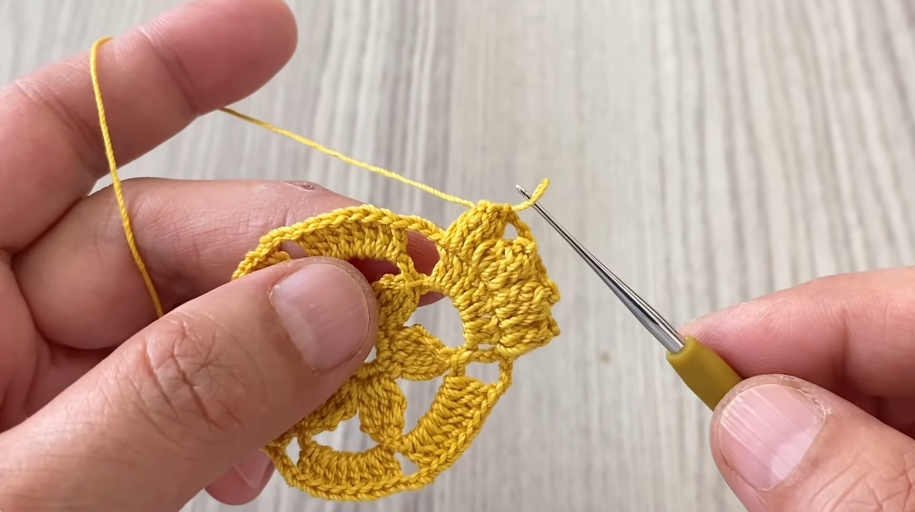
🟡 ROUND 3 — FORM PETAL CLUSTERS
- Sl st into first ch-5 space.
- Ch 3 (counts as first dc).
- Work 4 dc into same space (5 dc total in space).
- Sc into next ch-5 space.
- Work 5 dc into next ch-5 space.
- Repeat around.
- Join with sl st to top of beginning ch-3.
✔ You now have 6 rounded petal clusters.
Important:
Do not pull too tightly between dc groups — petals need room to expand.
🟡 ROUND 4 — LACE FOUNDATION ROUND
This round creates decorative spacing.
- Ch 1.
- Sc in first dc.
- Ch 4.
- Skip 2 stitches.
- Sc in next stitch.
- Ch 4.
- Continue across petal tops.
- Join with sl st to first sc.
You are now building chain bridges across petals.
Check your work:
Your motif should still lay flat.
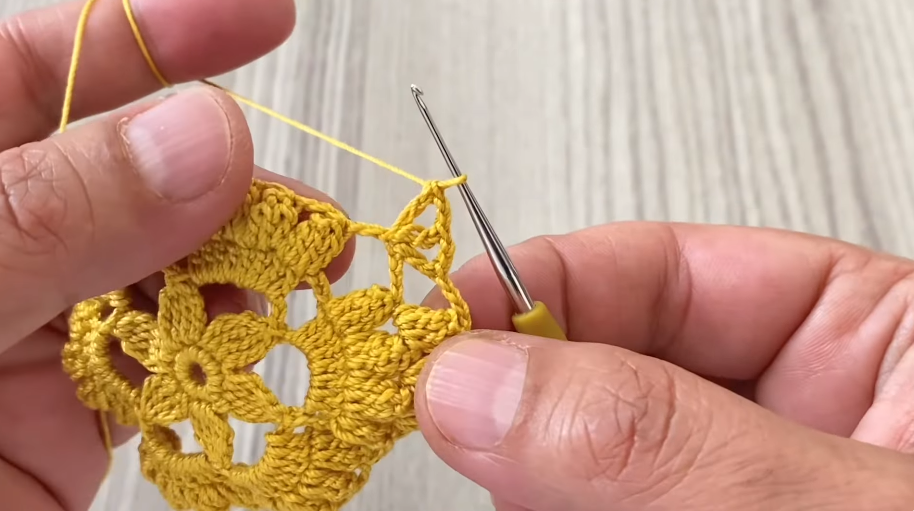
🟡 ROUND 5 — SECOND LAYER PETAL BUILD
- Sl st into first ch-4 space.
- Ch 3 (counts as dc).
- Work 4 dc in same space.
- Ch 3.
- Sc in next ch-4 space.
- Ch 3.
- Work 5 dc in next ch-4 space.
- Repeat around.
- Join with sl st.
✔ The motif is now clearly floral.
🟡 ROUND 6 — STRUCTURE & HEIGHT
This round strengthens the motif.
- Ch 3.
- Dc in next 4 stitches.
- Ch 3.
- Sc into ch-3 space between clusters.
- Ch 3.
- Dc into next 5 stitches.
- Repeat around.
- Join with sl st.
You are creating height while keeping symmetry.
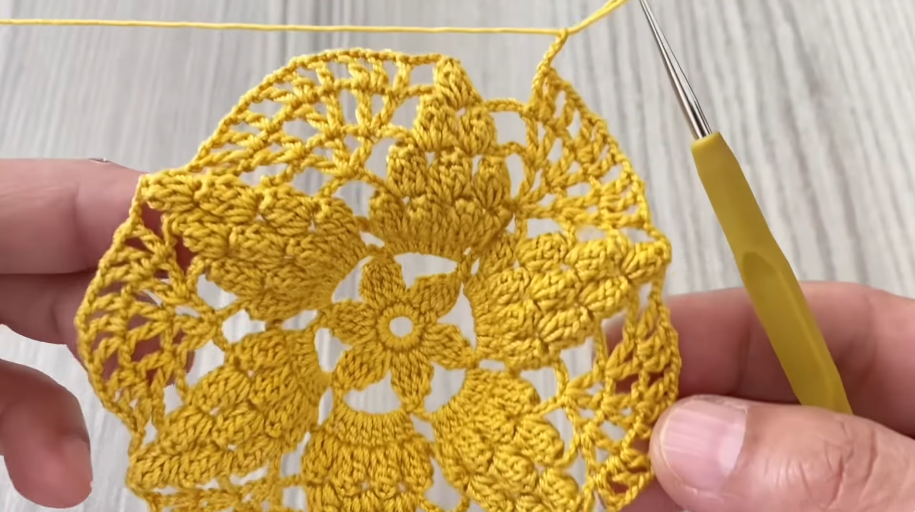
🟡 ROUND 7 — EXTENDED LACE
- Ch 3.
- Dc across next 4 stitches.
- Ch 5.
- Sc into next chain space.
- Ch 5.
- Dc across next 5 stitches.
- Repeat.
- Join with sl st.
The motif begins to open beautifully here.
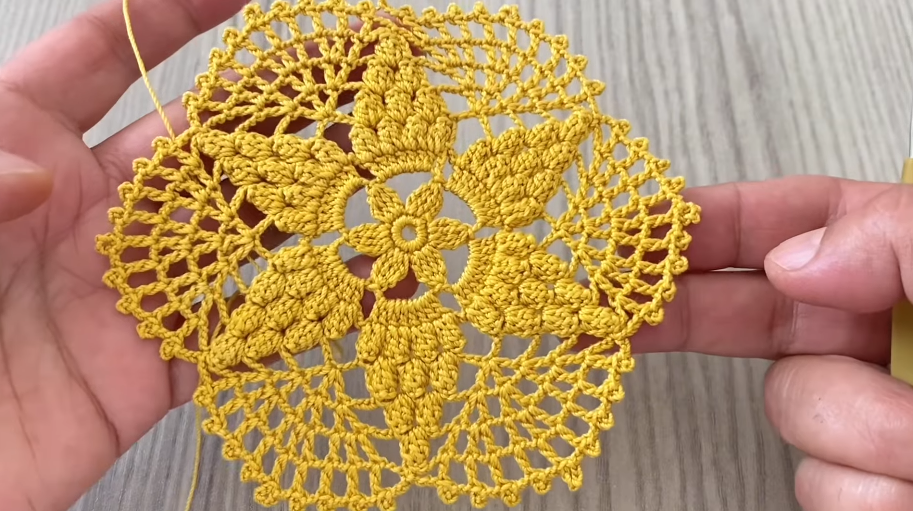
🟡 ROUND 8 — FINAL PETAL EXPANSION
- Ch 3.
- Dc across petal.
- Ch 7.
- Sc into center chain space.
- Ch 7.
- Dc across next petal.
- Repeat.
- Join with sl st.
✔ The lace is now dramatic and decorative.
🟡 FINAL ROUND — DECORATIVE EDGE
Option: Picot edging
- Ch 1.
- Sc in stitch.
- Ch 3.
- Sl st into first chain (picot made).
- Skip 1 stitch.
- Sc in next stitch.
- Repeat around.
Fasten off.
Cut yarn.
Pull through.
🧵 FINISHING
Weaving Ends
- Thread tapestry needle.
- Weave tail through several stitches on back.
- Trim excess.
Blocking (Highly Recommended)
- Lightly dampen motif.
- Pin each petal evenly.
- Allow to dry completely.
Blocking makes lace patterns shine beautifully.
💡 INTERMEDIATE TECHNIQUE NOTES
✔ Keep stitch height consistent.
✔ Always count dc in each petal cluster.
✔ Maintain even chain tension.
✔ Use stitch marker at start of each round.
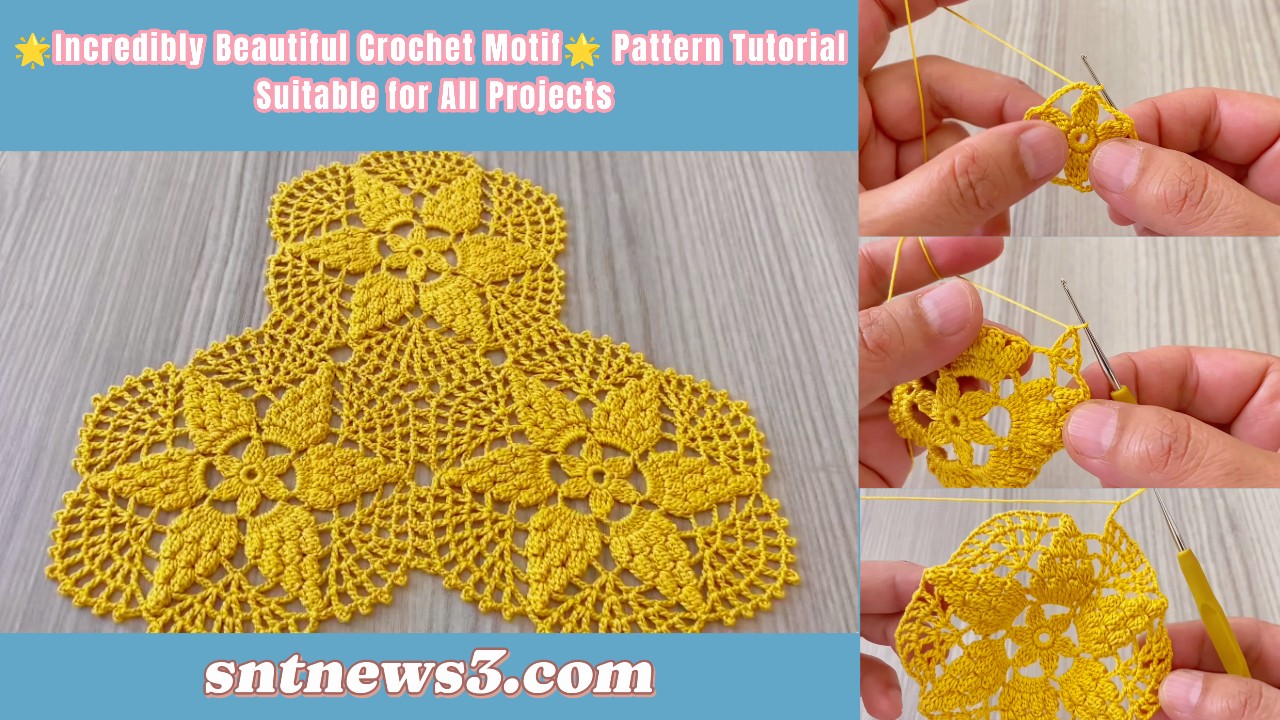
🧶 HOW TO USE THIS MOTIF
You can:
- Join multiple motifs for blankets
- Use as table runner segments
- Create shawls
- Make bags
- Add as garment embellishment
VIDEO: