 by
by 🧶 Materials
- Yarn: Light / DK / fingering weight cotton or acrylic
- Hook: Match to yarn (3.0 mm – 4.5 mm recommended)
- Tapestry needle (for weaving ends)
- Scissors
- Blocking pins & mat (optional but makes lace look neat)
📌 Abbreviations (US Terms)
| Abbrev | Meaning |
|---|---|
| ch | chain |
| sl st | slip stitch |
| sc | single crochet |
| hdc | half-double crochet |
| dc | double crochet |
| tr | treble crochet |
| sp | space |
| rep | repeat |
| st(s) | stitch(es) |
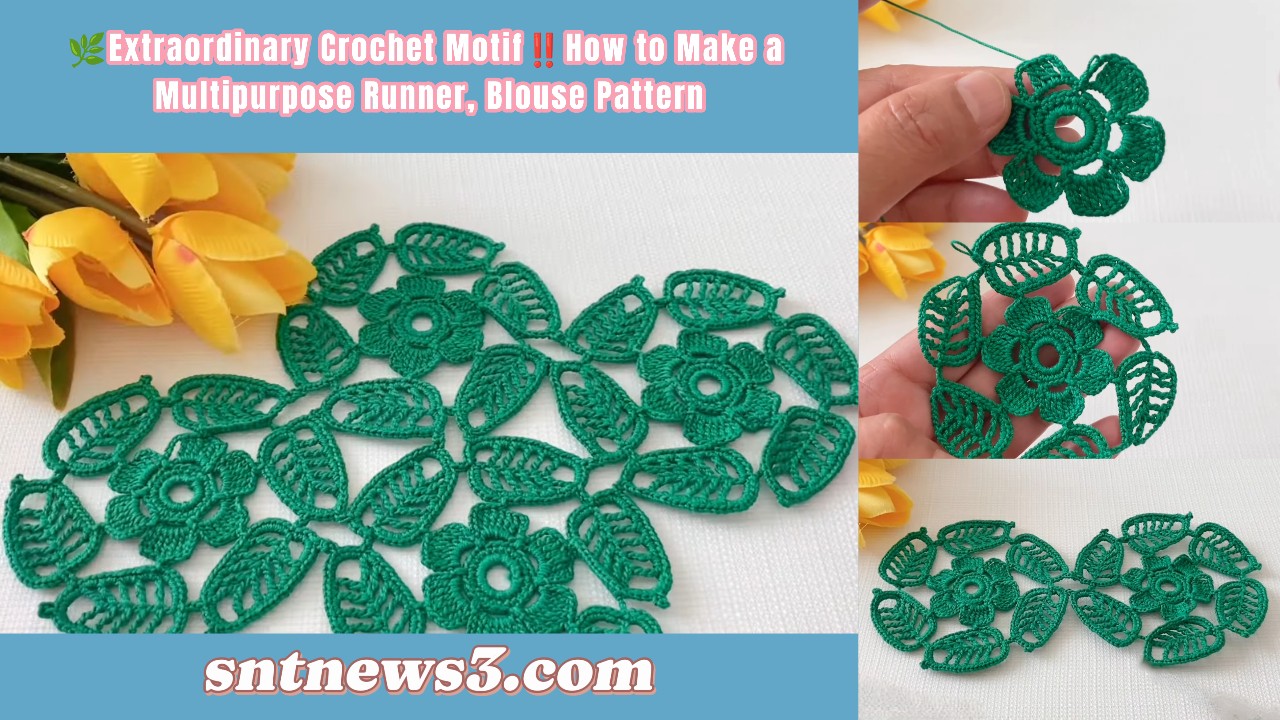
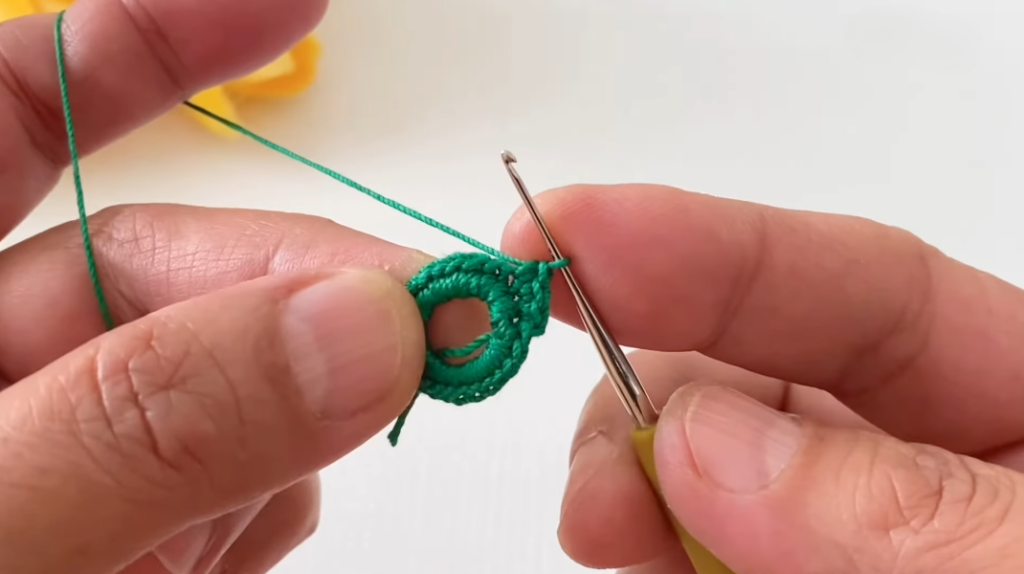
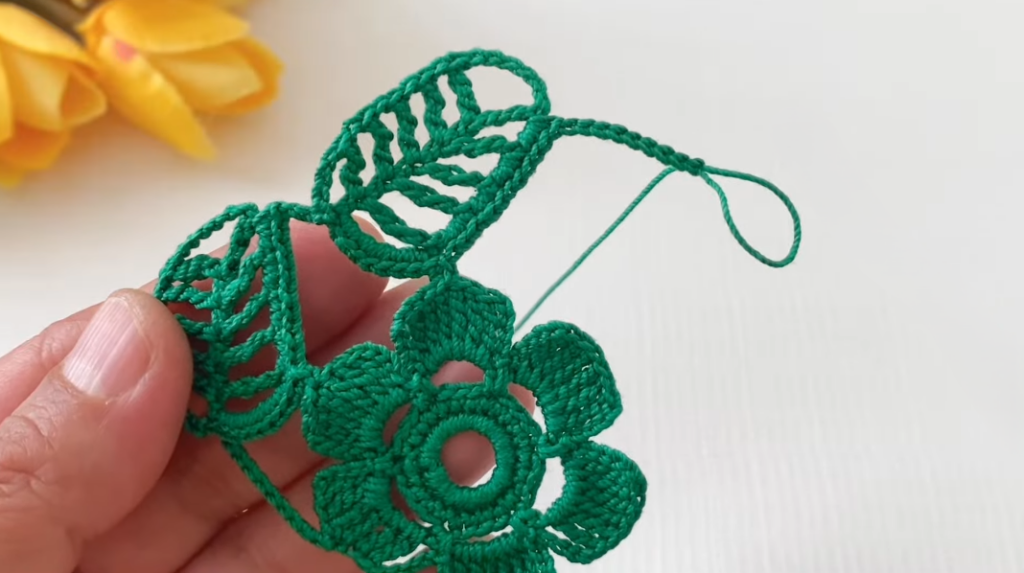
🟡 ROUND 1 — CENTER RING
- Make a Magic Ring.
This gives a neat center that can be tightened later. - Ch 3 (counts as first dc).
- Work 11 dc into ring.
- Pull the tail to close the ring firmly.
- Join with sl st to the top of beginning ch-3.
✔ You now have a small, stable circle of 12 dc — the heart of your motif.
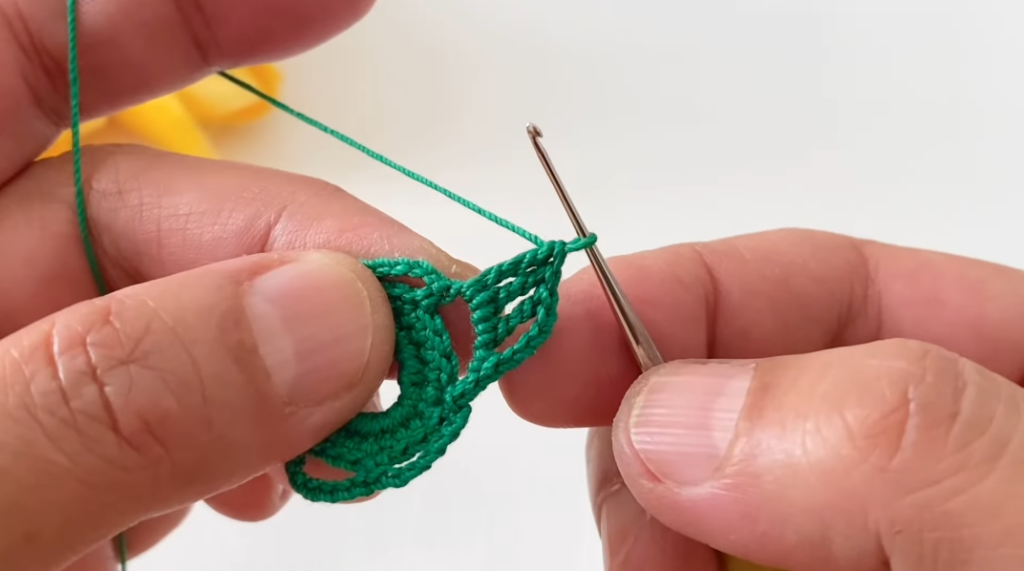
🟢 ROUND 2 — ARCH BASE FOR MOTIF
- Ch 1 (does not count as a stitch).
- Sc in same st.
- Ch 5, skip next dc, sc in next dc.
- Ch 5, skip 1 dc, sc — repeat around entire circle.
- Join with sl st into first sc.
✔ You should have 6 ch-5 loop spaces around the circle — these become the framework for petals or shells.
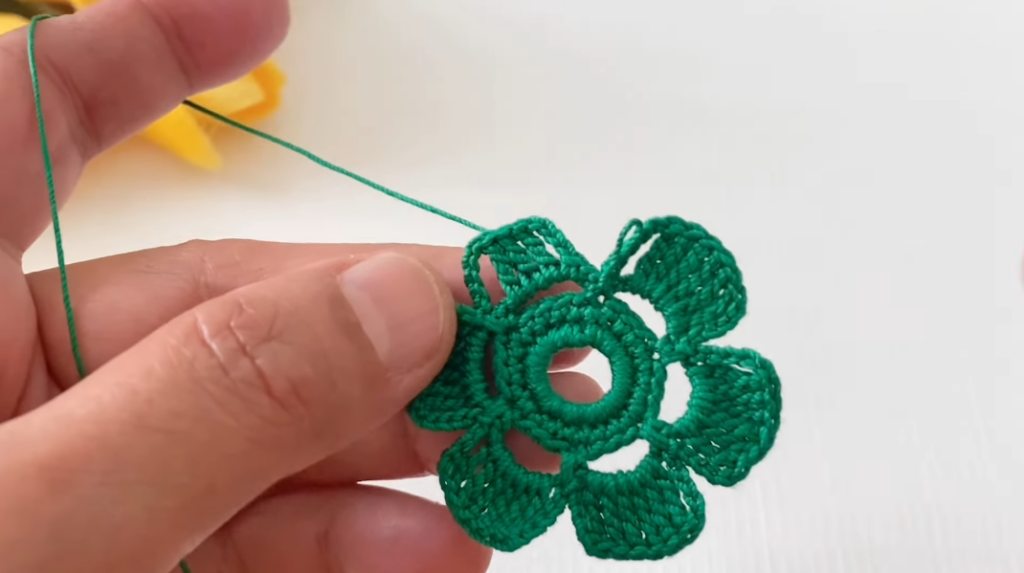
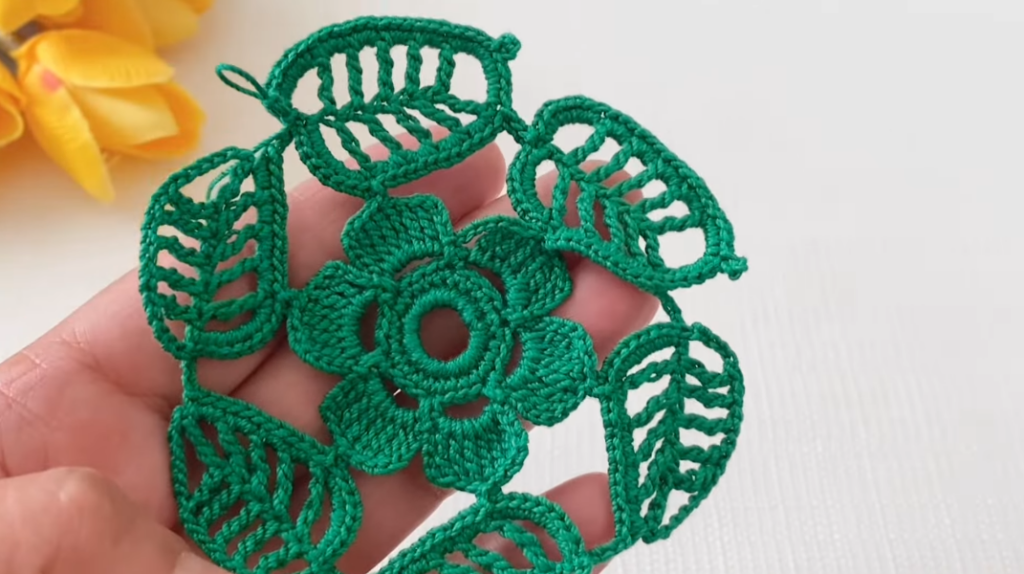
🔵 ROUND 3 — PETAL OR SHELL CLUSTERS
- Sl st into first ch-5 space.
- Ch 3 (counts as dc), work 4 dc in same ch-5 space (shell of 5 dc).
- Sc in next ch-5 space.
- Work 5 dc in next ch-5 space.
- Repeat alternating sc + 5 dc cluster around.
- Join with sl st at top of first ch-3.
✔ This creates a layer of rounded clusters that look like little petals.
🟠 ROUND 4 — LACY CURVED SPACES
- Ch 1, sc in first dc of Round 3.
- Ch 4, skip next 2 dc, sc in next dc.
- Ch 4, skip 2, sc — continue around.
- Join with sl st into the starting sc.
These chain-4 arches open up spaces that make the motif lace-like and airy.
🟣 ROUND 5 — SECOND MOTIF LAYER
- Sl st into first ch-4 space.
- Ch 3 (counts as dc), work 4 dc into same space.
- Ch 3, sc in next ch-4 space.
- Ch 3, work 5 dc into next ch-4 space.
- Repeat dc cluster + sc around.
- Join with sl st.
✔ The motif now builds outward with more structure and surface texture.
🟡 ROUND 6 — OUTER FORMING
- Ch 3, dc across next 4 sts.
- Ch 3, sc into next chain space.
- Ch 3, dc into next 5 sts.
- Repeat around.
- Join with sl st.
This round expands the motif and helps keep it flat and square.
🔷 ROUND 7 — EXTENDED LACE
- Ch 3, dc across next 4 sts.
- Ch 5, sc in next chain space.
- Ch 5, dc into next 5 sts.
- Repeat around.
- Join with sl st.
This creates longer lacy spaces for a delicate finish.
🔶 ROUND 8 — FINAL EXPANSION
- Ch 3, dc across next 4 sts.
- Ch 7, sc in next chain space.
- Ch 7, dc into next 5 sts.
- Repeat around.
- Join with sl st.
Your motif should now show a beautifully expanded lace square shape.
✨ OPTIONAL BORDER — SC & PICOT
To give a neat edge suitable for joining:
- Ch 1, sc in next stitch.
- Ch 3, sl st into 2nd ch from hook (picot made).
- Sl st in next stitch, sc in next.
- Repeat picot edge around.
- Fasten off, leaving a tail to weave in.
This gives a gentle scalloped picot edge that also helps motifs join.
🧵 WEAVING & BLOCKING
Weave in all loose ends
Use a tapestry needle and thread tails through the back of the motif.
Blocking (highly recommended)
- Lightly dampen motif.
- Pin into shape — stretch gently if needed so edges align.
- Let dry completely.
Blocking helps lace open and motifs align perfectly for joining.
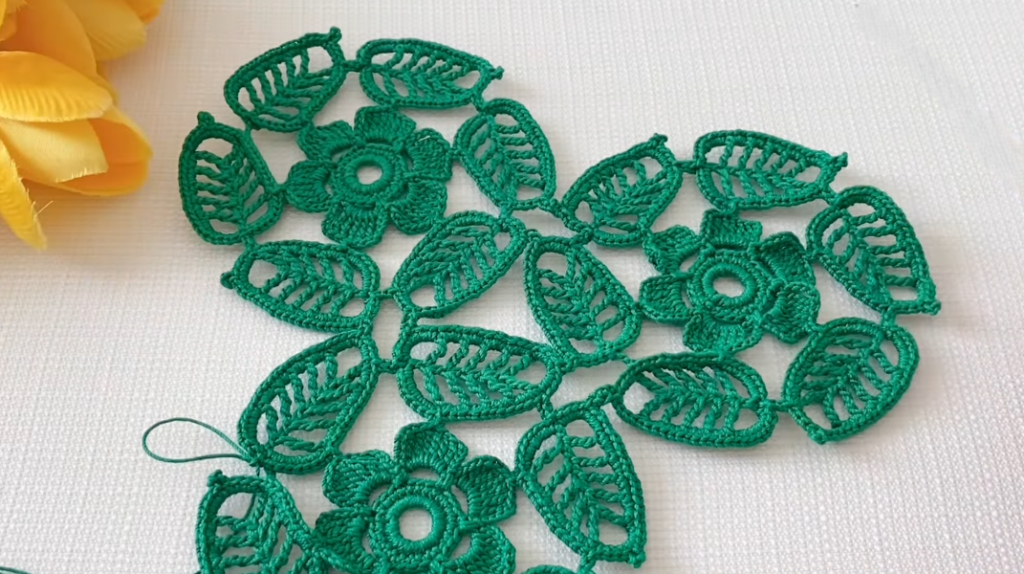
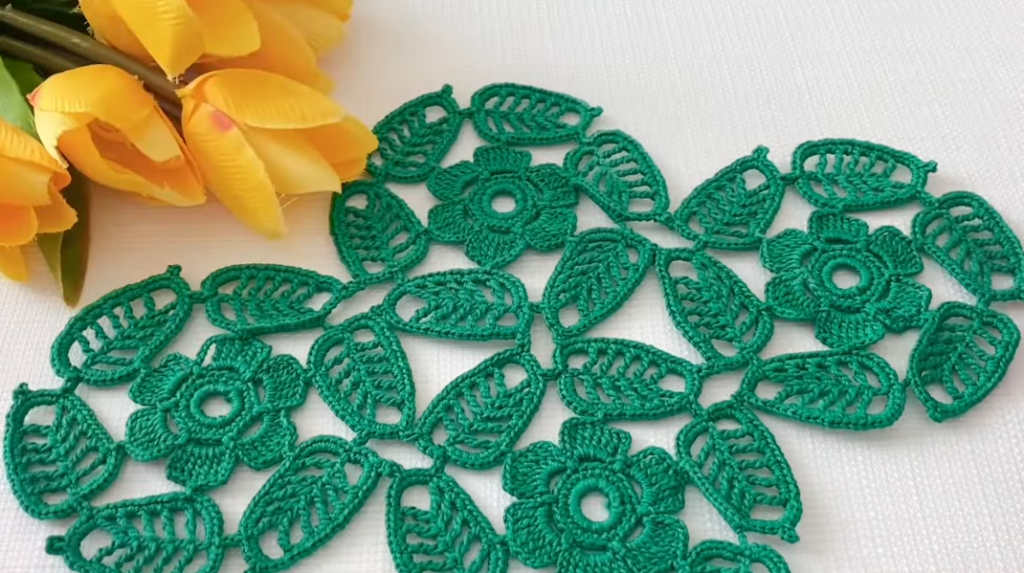
📌 USING THE MOTIF (Project Ideas)
🔹 Runner: Work multiple motifs in a row and join with sc or slip stitch seams.
🔹 Blouse / Top: Make panels of motifs and join vertically/horizontally; add straps or shaped edges.
🔹 Shawl or Scarf: Lacy panel work repeats motifs with open border edges.
🔹 Blanket / Throw: Join motifs grid-style and add border.
💡 JOINING MOTIFS
When joining motifs:
- Align motifs so centers match.
- Join with sc or slip stitch through picot edges.
- Optionally use join-as-you-go technique — join motifs in final round while crocheting.
VIDEO: