by
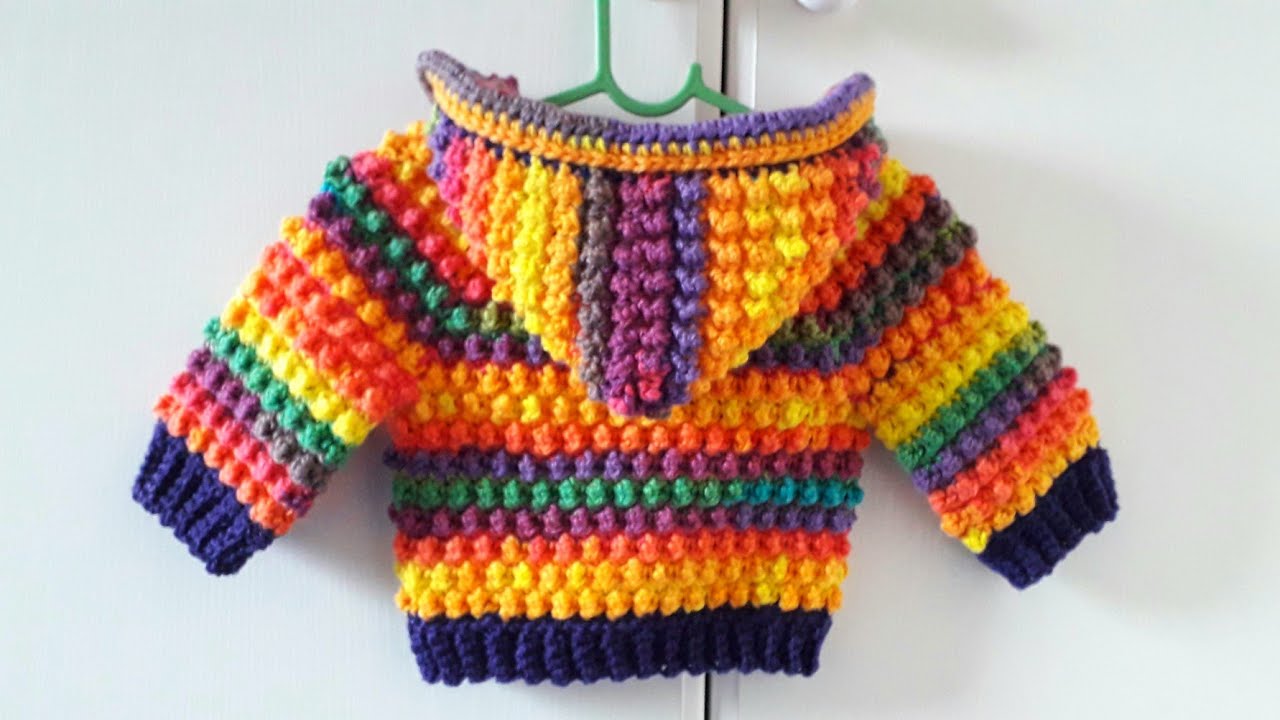
by There’s something incredibly special about dressing a little one in a handmade garment, especially when it’s made with love and care. A crocheted baby hoodie isn’t just adorable; it’s a practical and cozy piece that can be treasured for years. While it might seem like a daunting project for a beginner, this detailed guide will break down the process, making it accessible and enjoyable.
We’ll focus on a classic, top-down raglan style hoodie, which is popular for baby garments because it’s seamless and allows for easy size adjustments as you go. Get ready to create a beautiful, warm, and utterly charming hoodie for the precious baby in your life!
Why Crochet a Baby Hoodie?
- Heartfelt Gift: A handmade hoodie is a truly unique and personal gift for baby showers, birthdays, or just because.
- Practical & Cozy: Provides warmth and comfort, perfect for cooler weather or an extra layer.
- Customizable: Choose your own colors, yarn textures, and add personal touches like ears for a whimsical touch.
- Skill Builder: This project introduces several key crochet techniques (working in the round, increasing for raglan, shaping a hood) that are valuable for future garment making.
- Economical: Often more cost-effective than buying high-quality baby clothes, especially if you use yarn from your stash.
Key Considerations Before You Start:
- Size: Baby sizes can be tricky! Refer to a standard baby sizing chart. For a first hoodie, aiming for a 6-12 month size is often a good starting point, as babies grow quickly. The pattern will include guidelines for adapting size.
- Typical Head Circumference & Chest Measurements:
- Newborn: 13-14″ head, 16-17″ chest
- 3-6 Months: 15-17″ head, 18-19″ chest
- 6-12 Months: 17-18″ head, 19-20″ chest
- 12-18 Months: 18-19″ head, 20-21″ chest
- Typical Head Circumference & Chest Measurements:
- Yarn Choice: This is crucial for baby items!
- Fiber: Look for soft, washable yarns. Acrylic, superwash merino wool, cotton, or blends are excellent choices. Avoid scratchy wools or fibers that are difficult to care for.
- Weight: Light Worsted (DK/Light 3) or Worsted (Aran/Medium 4) are common. DK creates a lighter garment, while Worsted makes a warmer, denser fabric.
- Quantity: Approximately 300-500 yards, depending on size and yarn weight. It’s always better to have a little extra.
- Hook Size: Match your hook to your yarn weight, but also consider your personal tension. Aim for a fabric that is soft and drapes well, but not so loose that it’s gappy.
- For DK yarn: E/4 (3.5 mm) to G/6 (4.0 mm)
- For Worsted yarn: H/8 (5.0 mm) to I/9 (5.5 mm)
- Gauge (Crucial for Garments!): This determines the final size of your hoodie.
- Make a swatch: Ch 15, then work 10 rows of your chosen stitch (e.g., half double crochet). Measure a 4×4 inch (10×10 cm) square. Compare your stitch and row count to the pattern’s suggested gauge.
- Adjust if necessary: If your swatch is larger, go down a hook size. If it’s smaller, go up a hook size.
Materials You’ll Need:
- Yarn: Soft, washable worsted weight (Category 4) yarn (approx. 400 yards for 6-12 months). Choose your favorite color!
- Crochet Hook: Size H/8 (5.0 mm) or I/9 (5.5 mm) – adjust based on your gauge.
- Stitch Markers (4): Essential for marking raglan increase points.
- Yarn Needle (Tapestry Needle): For weaving in ends and seaming.
- Scissors: For cutting yarn.
- Buttons (3-4): For the front opening (optional, or use ties).
- Measuring Tape: For checking dimensions.
Crochet Abbreviations:
- ch: chain
- sl st: slip stitch
- sc: single crochet
- hdc: half double crochet
- dc: double crochet
- inc: increase (e.g., 2 sc in one st)
- hdc2tog: half double crochet 2 together (decrease)
- st(s): stitch(es)
- sp: space
- BLO: back loop only
- FLO: front loop only
- (): indicates the number of stitches at the end of the round/row
- ***…***: repeat instructions within asterisks
Pattern Instructions: Top-Down Raglan Baby Hoodie (6-12 Months)
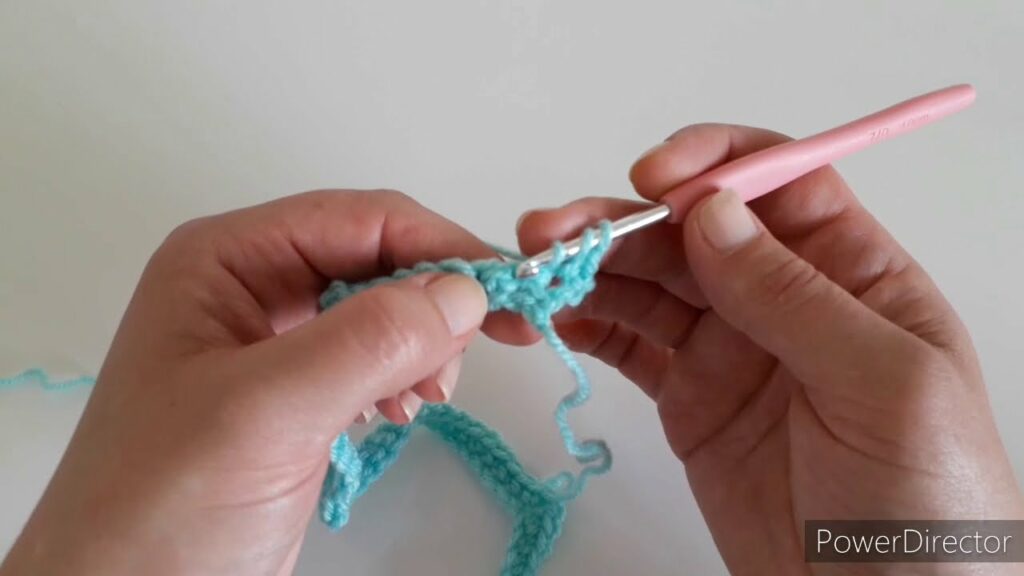
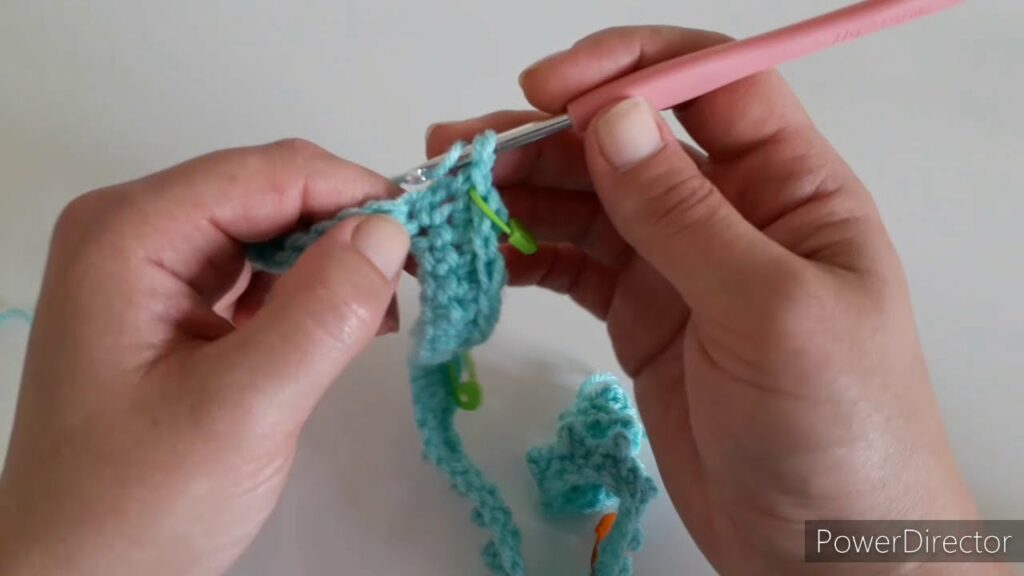
This pattern uses half double crochet (hdc) as the main stitch for its good drape and quick work-up. The hoodie is worked in rounds from the neck down.
Part 1: The Yoke (Raglan Construction)
The yoke is the top part of the hoodie that forms the neck, shoulders, and chest. We’ll work it in rows, turning at the end, to create a front opening.
Starting Chain & Setup Row (Foundation Chain):
- Ch 54. (This forms the neckline. Adjust this initial chain in multiples of 4 + 2 for different sizes and desired neck opening.)
- Row 1: Hdc in the 3rd ch from hook (counts as first hdc). Hdc in the next 7 ch (Front Right section).
- Place a stitch marker in the next ch (Raglan Corner 1).
- Hdc in the next 10 ch (Sleeve 1).
- Place a stitch marker in the next ch (Raglan Corner 2).
- Hdc in the next 16 ch (Back).
- Place a stitch marker in the next ch (Raglan Corner 3).
- Hdc in the next 10 ch (Sleeve 2).
- Place a stitch marker in the next ch (Raglan Corner 4).
- Hdc in the last 8 ch (Front Left section).
- ** (52 hdc)**
- Ch 2 (counts as first hdc), turn.
Raglan Increase Rows:
We will increase at each of the 4 stitch markers in every row.
- Increase Method: For each raglan corner, you will work:
(hdc, ch 1, hdc)all into the marked stitch (or ch-sp if previous row used ch 1). Move your stitch marker to the ch-1 space.
- Row 2: Hdc in each st until 1 st before the first marker. (Hdc, ch 1, hdc) in the marked st. Move marker to the ch-1 sp. Hdc in each st until 1 st before the next marker. (Hdc, ch 1, hdc) in the marked st. Move marker. Repeat for all 4 markers. Hdc in each remaining st to end.
- Ch 2, turn. (You will now have 8 increases per row – 2 for each raglan corner).
- Rows 3 – 10 (or until desired yoke length): Repeat Row 2. Continue increasing in this manner until the yoke measures approximately 5.5 – 6.5 inches from the neck to the underarm (the widest point of the sleeve section). Try to lay it flat and measure.
- For a 6-12 month size, typically 8-10 increase rows are sufficient.
- At the end of your last increase row, DO NOT turn. We will now join in the round.
Part 2: Separating Body and Sleeves
Now we’ll form the body of the hoodie and leave openings for the arms.
- Next Round (Joining): Ch 2. Hdc in each st across the first Front section.
- Skip all stitches of the first Sleeve section.
- Hdc in each st across the Back section.
- Skip all stitches of the second Sleeve section.
- Hdc in each st across the second Front section.
- Join with a sl st to the top of the beginning ch 2.
- (You have now joined your work into a large loop for the body.)
Part 3: The Body
The body of the hoodie is worked in continuous rounds.
- Next Round: Ch 2 (counts as first hdc). Hdc in each st around. Join with a sl st to the top of the beginning ch 2.
- Continue: Repeat the previous round until the body of the hoodie measures approximately 6-8 inches from the underarm down, or to your desired length.
- Optional Ribbing for Bottom Edge:
- Ribbing Round 1: Ch 1 (does NOT count as a st). Sc in BLO of each st around. Join with a sl st to first sc.
- Ribbing Round 2: Ch 1. Sc in each st around. Join with a sl st to first sc.
- Fasten off and weave in ends.
Part 4: The Sleeves (Repeat for both sleeves)
Attach yarn at the center of the underarm opening.
- Round 1: Ch 2 (counts as first hdc). Hdc evenly around the sleeve opening. Aim for approximately 25-35 hdc stitches, ensuring an even count. Join with a sl st to the top of the beginning ch 2.
- Rounds 2 – 10 (or to desired length): Ch 2. Hdc in each st around. Join with a sl st. Continue until the sleeve measures approximately 6-8 inches from the underarm, or to your desired length.
- Optional Cuff Ribbing:
- Ribbing Round 1: Ch 1. Sc in BLO of each st around. Join with a sl st to first sc.
- Ribbing Round 2: Ch 1. Sc in each st around. Join with a sl st to first sc.
- Fasten off and weave in ends.
Part 5: The Hood
The hood is worked directly onto the neckline opening.
- Attach Yarn: Attach yarn with a sl st to the bottom corner of one of the front opening sections (where the front opening meets the body).
- Row 1: Ch 2. Hdc evenly around the entire neckline opening. Aim to pick up one hdc in each st of the previous row. (Your stitch count should match your initial starting chain, e.g., 52 hdc).
- Ch 2, turn.
- Row 2 – 15 (or to desired hood depth): Hdc in each st across.
- Ch 2, turn.
- Continue until the hood is deep enough to cover the baby’s head comfortably (approximately 8-9 inches from the neck edge to the top of the hood for 6-12 months).
- Seaming the Hood:
- Fold the hood in half, bringing the last row you crocheted together.
- Either sl st the two edges together, working through both loops of each stitch, or sc them together for a sturdier seam.
- Fasten off and weave in ends.
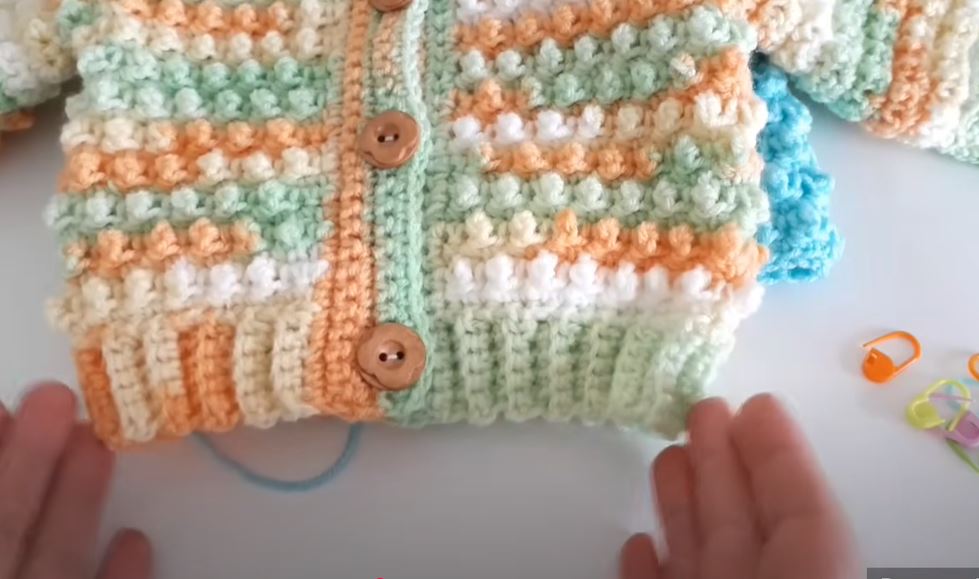
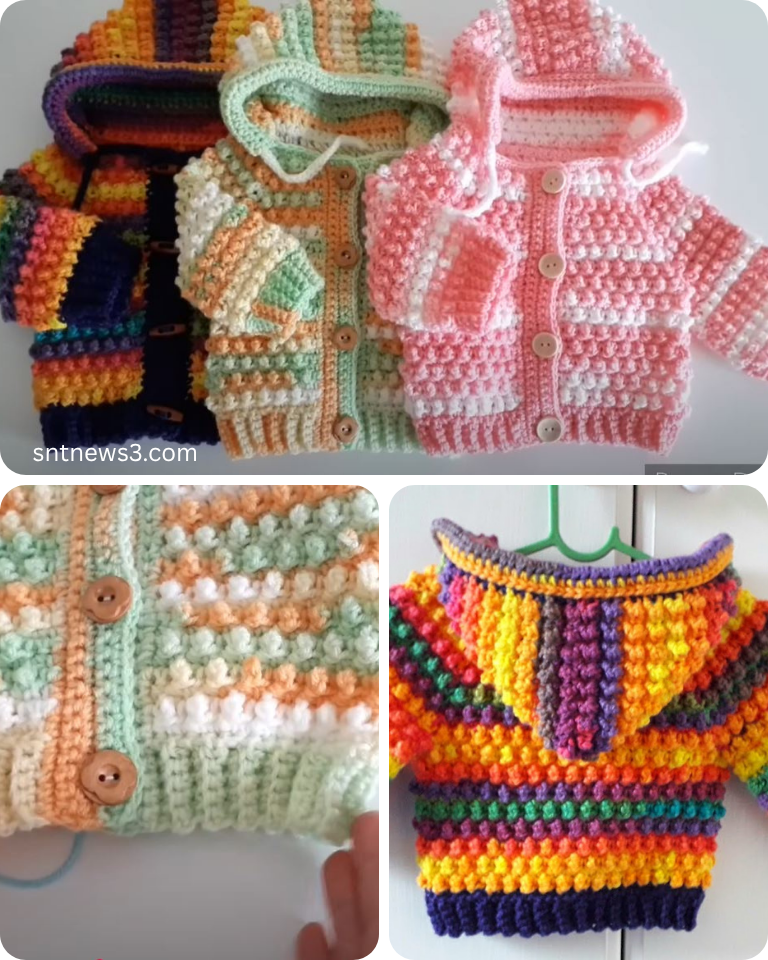
Part 6: Front Opening Edging & Buttonholes (Optional)
This creates a neat finish for the front opening.
- Attach Yarn: Attach yarn to the bottom corner of one front opening panel.
- Edging: Ch 1. Sc evenly up the front edge, around the top of the hood, and down the other front edge. You’ll work into the side of the hdc stitches. Aim for 2 sc per hdc row.
- Buttonholes (on one side, if desired):
- Decide where you want your buttonholes. Usually 3-4 evenly spaced down one front band.
- On the return row (sc back down the other side of the opening), when you reach a buttonhole spot: Ch 2, skip 2 sc. Continue sc to the next buttonhole. This creates a small gap for the button.
- On the final row, sc normally, working 2 sc into each ch-2 sp.
- Fasten off and weave in all remaining ends.
- Sew on Buttons: Sew your buttons to the opposite front band, aligning them with the buttonholes.
Finishing Touches & Care:
- Weave in ALL ends securely. This is crucial for a tidy and durable garment.
- Blocking (Optional but Recommended): Gently wet the hoodie, shape it to the correct dimensions, and let it air dry flat. This helps to even out stitches and improve drape.
- Care: Follow the care instructions on your yarn label. Most acrylics are machine washable and dryable, making them ideal for baby items.
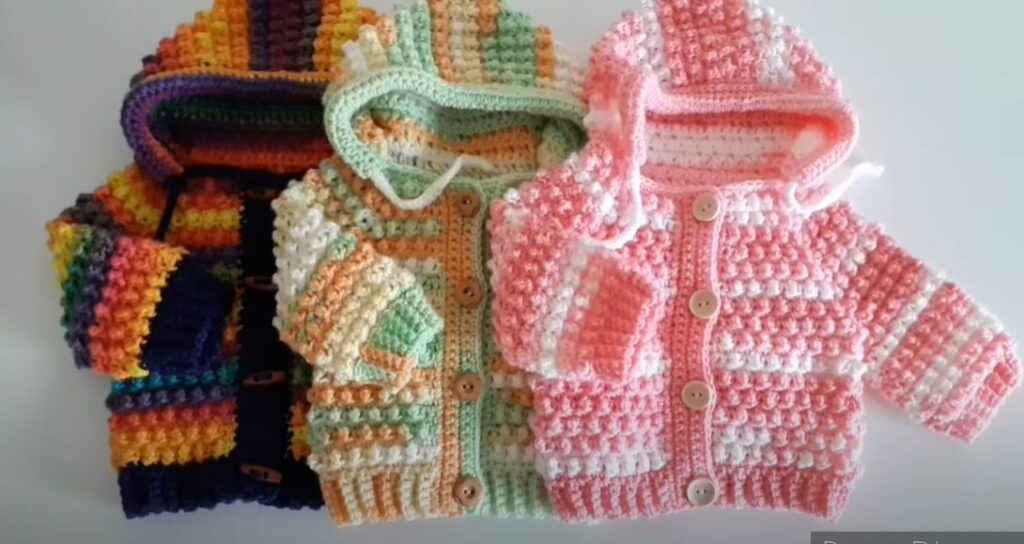
Customization Ideas:
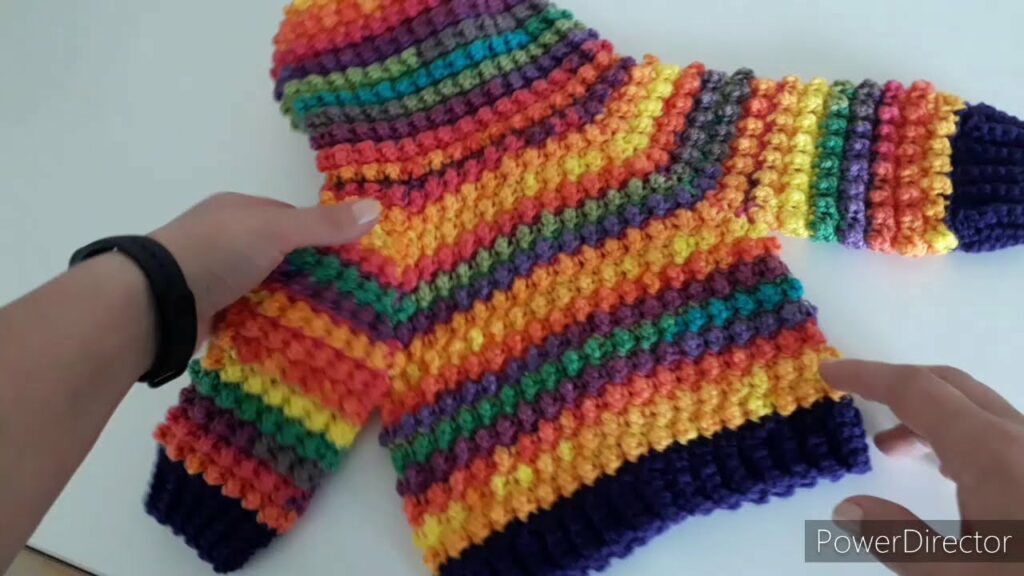
- Color Blocking: Use multiple colors for stripes, or contrasting colors for the hood and cuffs.
- Ears: Crochet two small circles or semi-circles and sew them to the top of the hood for a bear or bunny look.
- Pocket: Crochet a small square or rectangle and sew it onto the front of the hoodie.
- Drawstring: Chain a long cord and weave it through the last row of the hood for a functional drawstring.
- Different Stitches: Once comfortable, try using double crochet (dc) for a faster work-up, or alternating sc and hdc for a different texture.
Crocheting a baby hoodie is a rewarding project that results in a beautiful, personalized garment. Take your time, enjoy the process, and soon you’ll have a cozy creation ready to welcome a little one with handmade warmth. Happy crocheting!
Video tutorial: