 by
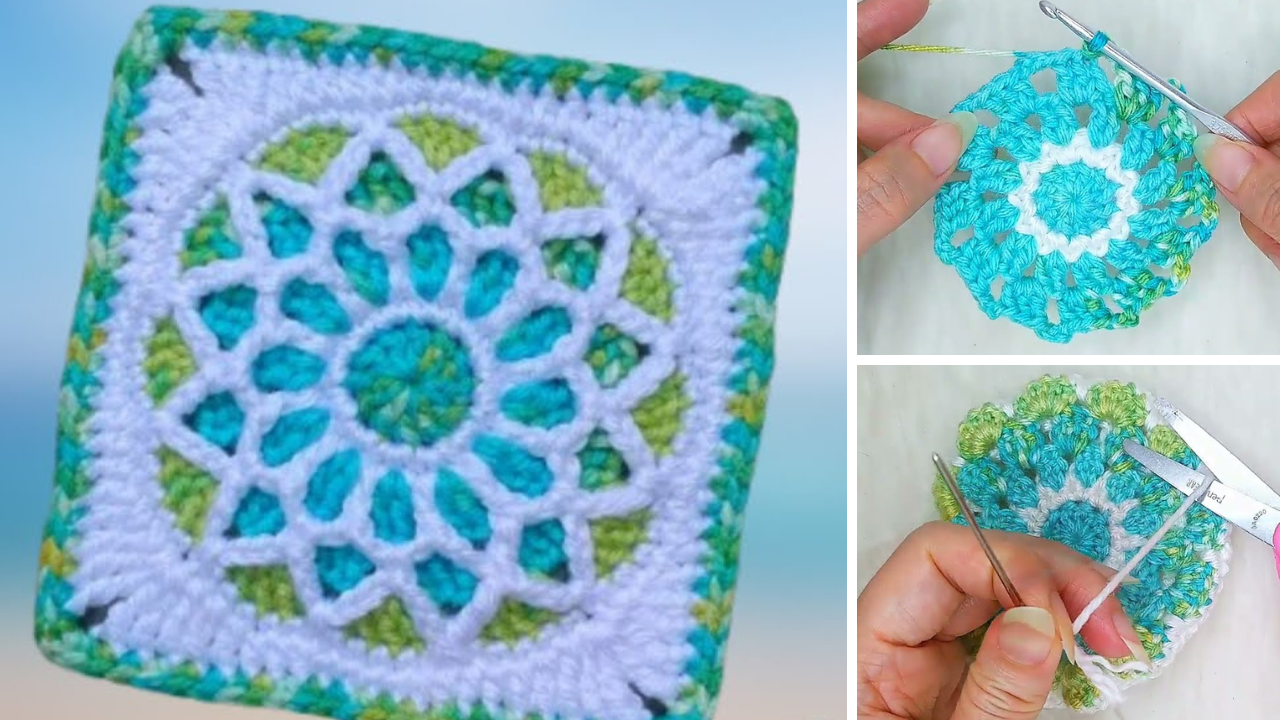
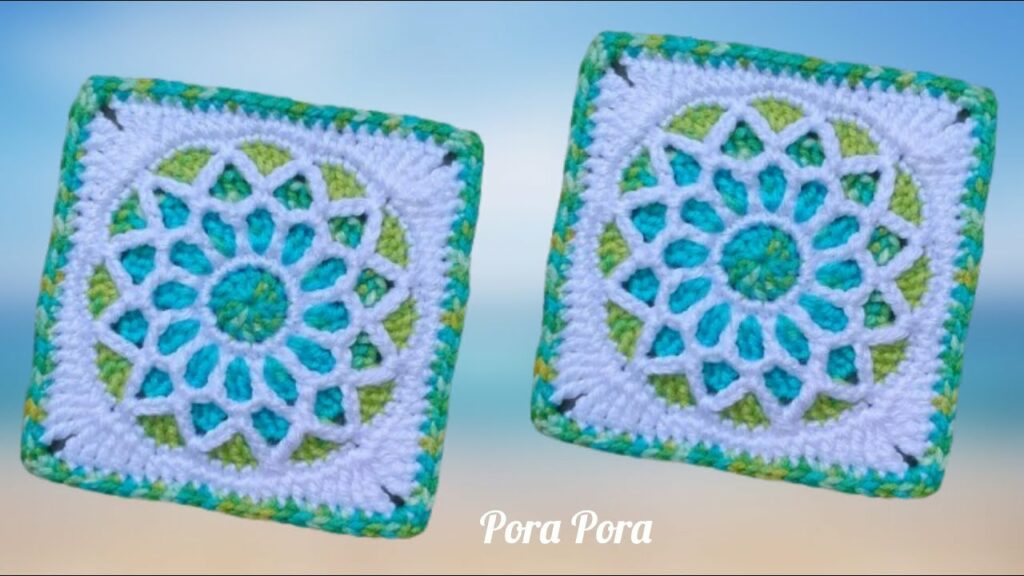
by The granny square is a timeless classic in the crochet world, but what if we could elevate its charm with a touch of artistic brilliance? The “stained glass” granny square does exactly that, transforming a simple motif into a vibrant, jewel-toned masterpiece. By strategically incorporating a contrasting color (often black or a deep hue) to outline individual stitches, this technique creates the illusion of intricate leaded glass, making each square a miniature work of art.
Whether you’re looking to add a dramatic flair to a blanket, create stunning cushion covers, or even design a unique garment, the stained glass granny square offers a captivating visual appeal that is surprisingly approachable. This detailed tutorial will guide you through each step, helping you master this beautiful technique and unlock a new dimension of creativity in your crochet projects.
Why Crochet a Stained Glass Granny Square?
- Visually Stunning: The contrasting outline truly makes your colors pop, creating a striking stained glass effect.
- Skill Builder: It introduces the concept of working around stitches and changing colors frequently, which are valuable techniques.
- Scrap Buster: Perfect for using up small amounts of colorful yarn for the “glass” sections, while the “leading” color can be a consistent main skein.
- Versatile: Can be used for blankets, scarves, bags, cushion covers, garments, and more.
- Meditative: The repetitive nature of the granny square, combined with the satisfying reveal of the stained glass effect, can be very calming.
- Modern Twist on a Classic: It’s a fresh take on the beloved granny square, appealing to both traditionalists and those seeking a contemporary look.
Key Considerations Before You Start:
- Yarn Choice:
- “Leading” Color (Outline): Choose a dark, contrasting color like black, charcoal gray, dark navy, or deep brown. This yarn should be the same weight as your other colors.
- “Glass” Colors (Inner Sections): Select a variety of bright, vibrant, or jewel-toned colors. Acrylic or cotton yarns are generally recommended for their stitch definition and ease of care.
- Weight: Worsted weight (Category 4) is common for granny squares and creates a good-sized, manageable square. DK (Light Worsted/Category 3) will result in a smaller, finer square. Consistency in yarn weight is key.
- Quantity: You’ll need more of your “leading” color than your “glass” colors. A standard 6-inch square might use 10-15 yards of each “glass” color and 20-30 yards of the “leading” color.
- Hook Size:
- Match your hook to your yarn weight, aiming for a hook size that creates a fabric that isn’t too stiff but also not too gappy.
- For Worsted Weight yarn: H/8 (5.0 mm) or I/9 (5.5 mm) are good starting points.
- For DK Weight yarn: G/6 (4.0 mm) or H/8 (5.0 mm) are common.
- Tension: Consistent tension is crucial for a flat, even square and a well-defined stained glass effect.
- Color Management: You’ll be dropping and picking up your “leading” color frequently. Practice carrying yarn loosely if you prefer not to cut, or be prepared to weave in more ends if you cut at each change.
Materials You’ll Need:
- Yarn:
- “Leading” Color: Worsted Weight (e.g., Black)
- “Glass” Colors: 3-4 different Worsted Weight colors (e.g., jewel tones like ruby, emerald, sapphire, amethyst)
- Crochet Hook: Size H/8 (5.0 mm)
- Yarn Needle (Tapestry Needle): For weaving in ends.
- Scissors: For cutting yarn.
- Stitch Marker (optional but helpful): To mark the beginning of rounds or corners.
Essential Crochet Abbreviations:
- ch: chain
- sl st: slip stitch
- sc: single crochet
- dc: double crochet
- tr: treble crochet (sometimes used for taller stitches in the outline, but we’ll stick to dc for simplicity here)
- st(s): stitch(es)
- sp: space
- ch-sp: chain space
- [ ]: indicates stitch counts or repeats
- ***…***: repeat instructions within asterisks
The Stained Glass Granny Square Pattern: Detailed Steps
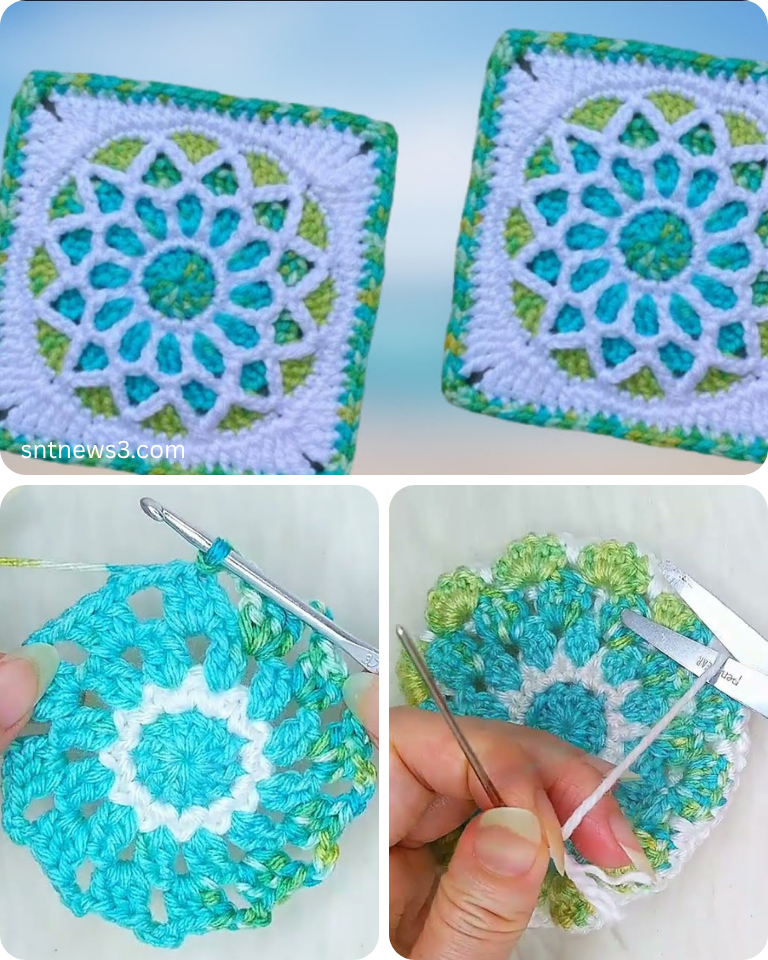
This pattern will create a basic 4-round granny square with the stained glass effect. We will be working the outline around the post of the stitches and into the chain spaces.
Note: For each round, you will use one “Glass” color for the main part and the “Leading” color for the outline. The “Leading” color will be worked after the “Glass” color for that round.
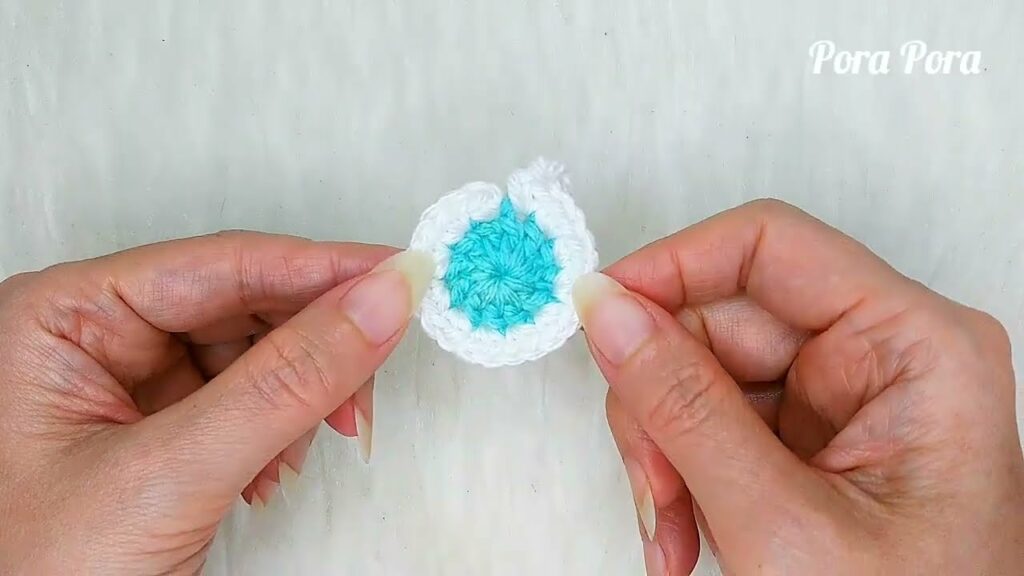
Starting with “Leading” Color (e.g., Black)
- Foundation: Ch 4, sl st into the first ch to form a ring. (Alternatively, use a magic ring for a tighter center.)
Round 1: First “Glass” Color (e.g., Ruby)
- Attach Color: Join your first “Glass” color into the center ring with a sl st.
- Make Clusters: Ch 3 (counts as first dc). Dc 2 into the ring. [Ch 2, dc 3 into the ring] three times.
- Join: Ch 2, sl st to the top of the beginning ch 3.
- [4 dc clusters, 4 ch-2 corner spaces]
- DO NOT fasten off “Glass” color. Leave the loop on your hook, or pull it up large to avoid unraveling.
Round 1 Outline: “Leading” Color (e.g., Black)
- Attach Color: Join your “Leading” color with a sl st into any ch-2 corner space of Round 1.
- Work Outline:
- Ch 1 (does NOT count as a st).
- Work
(sc, ch 2, sc)into the same ch-2 corner space. - Now, work around the posts of the dc stitches: Sc around the post of the next dc, sc around the post of the next dc, sc around the post of the next dc. (These are the 3 dc stitches of the cluster).
- Work
(sc, ch 2, sc)into the next ch-2 corner space. - Repeat from * to * two more times, outlining each cluster and working into the corners.
- Join: Sl st to the first sc of the round.
- [4 corners with (sc, ch 2, sc), 12 sc around dc posts]
- Fasten off “Leading” color. This ensures a crisp outline. You can weave in ends later or carry very loosely if comfortable.
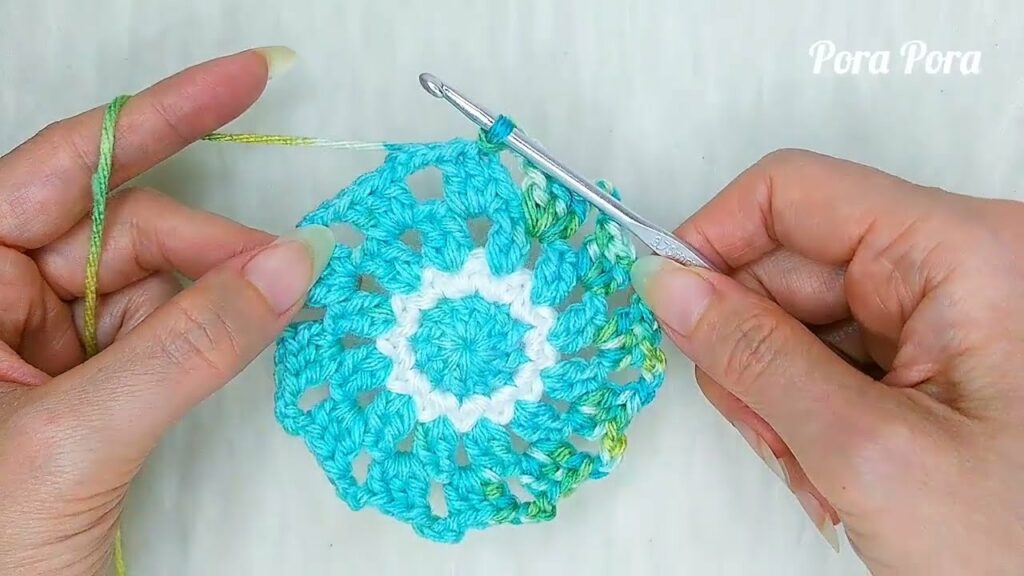
Round 2: Second “Glass” Color (e.g., Emerald)
- Attach Color: Join your second “Glass” color with a sl st into any ch-2 corner space of the outline from Round 1.
- Make Clusters:
- Ch 3 (counts as first dc). Dc 2 into the same ch-2 corner space.
- Work dc 3 into the next space (the space between the sc outlines of the previous round’s clusters).
- Work
(dc 3, ch 2, dc 3)into the next ch-2 corner space. - Repeat from * to * two more times, ending with a final
dc 3in the last space.
- Join: Ch 2, sl st to the top of the beginning ch 3.
- [8 dc clusters (4 corner, 4 side), 4 ch-2 corner spaces]
- DO NOT fasten off “Glass” color.
Round 2 Outline: “Leading” Color (e.g., Black)
- Attach Color: Join your “Leading” color with a sl st into any ch-2 corner space of Round 2 (Glass color).
- Work Outline:
- Ch 1. Work
(sc, ch 2, sc)into the same ch-2 corner space. - Work sc around the post of the next 3 dc (first cluster). Work sc around the post of the next 3 dc (second cluster).
- Work
(sc, ch 2, sc)into the next ch-2 corner space. - Repeat from * to * two more times.
- Ch 1. Work
- Join: Sl st to the first sc of the round.
- [4 corners with (sc, ch 2, sc), 24 sc around dc posts]
- Fasten off “Leading” color.

Round 3: Third “Glass” Color (e.g., Sapphire)
- Attach Color: Join your third “Glass” color with a sl st into any ch-2 corner space of the outline from Round 2.
- Make Clusters:
- Ch 3 (counts as first dc). Dc 2 into the same ch-2 corner space.
- Work dc 3 into the next space. Work dc 3 into the next space. (These are the spaces between the outlines, along the sides).
- Work
(dc 3, ch 2, dc 3)into the next ch-2 corner space. - Repeat from * to * two more times, ending with two final
dc 3in the last two spaces.
- Join: Ch 2, sl st to the top of the beginning ch 3.
- [12 dc clusters (4 corner, 8 side), 4 ch-2 corner spaces]
- DO NOT fasten off “Glass” color.
Round 3 Outline: “Leading” Color (e.g., Black)
- Attach Color: Join your “Leading” color with a sl st into any ch-2 corner space of Round 3 (Glass color).
- Work Outline:
- Ch 1. Work
(sc, ch 2, sc)into the same ch-2 corner space. - Work sc around the post of the next 3 dc (first cluster). Work sc around the post of the next 3 dc (second cluster). Work sc around the post of the next 3 dc (third cluster).
- Work
(sc, ch 2, sc)into the next ch-2 corner space. - Repeat from * to * two more times.
- Ch 1. Work
- Join: Sl st to the first sc of the round.
- [4 corners with (sc, ch 2, sc), 36 sc around dc posts]
- Fasten off “Leading” color.
Optional Round 4 (for a larger square): Fourth “Glass” Color (e.g., Amethyst)
- The pattern continues as before, adding one more
dc 3cluster on each side between the corners. - Attach “Glass” Color: Sl st into any ch-2 corner space of the Round 3 Outline.
- Make Clusters: Ch 3, dc 2 into same ch-2 corner space. [Dc 3 in next 3 spaces]. (Dc 3, ch 2, dc 3) in next corner. Repeat from * to * two more times, ending with a final
dc 3in the last 3 spaces. Ch 2, sl st to top of ch 3. - Outline with “Leading” Color: Work as before, sc around each dc post cluster and (sc, ch 2, sc) in the corners. Fasten off.
Finishing Your Square:
- Weave in All Ends: This is the most crucial step for a neat and professional-looking stained glass granny square. Take your time to weave all those short tails into the corresponding color sections, making them invisible.
- Blocking (Recommended): For a truly flat and perfectly shaped square, blocking is a game-changer.
- Gently wet your square (or mist it with water).
- Pin it out to your desired dimensions on a foam mat or cork board, making sure the corners are sharp and the sides are straight.
- Allow it to air dry completely.
Tips for Success & Customization:
- Practice Color Changes: Get comfortable attaching new yarn and securing ends.
- “Working Around the Post”: When outlining, ensure you are inserting your hook around the entire post of the double crochet stitch from the “glass” round, not into the top of the stitch. This is what creates the defined outline.
- Don’t Pull Outlines Too Tight: Work your outlining single crochets with a consistent, relaxed tension. If they are too tight, your square will pucker.
- Experiment with Colors: Try monochromatic schemes (different shades of one color with a dark outline), or go wild with a rainbow!
- Join-As-You-Go (JAYG): If you plan to make a blanket, consider learning the Join-As-You-Go method for granny squares. This will save you a lot of seaming time and create a beautiful continuous look.
- Different Stitches for Outline: While single crochet is straightforward, some patterns use slip stitch or even surface crochet for the outline. Single crochet around the post generally gives the most pronounced effect.
- Mix and Match: Use a variety of stained glass squares and solid granny squares in coordinating colors within the same project for added visual interest.
The stained glass granny square is a rewarding project that combines the charm of a classic with a striking modern twist. Embrace the color, enjoy the process, and watch as your crochet creations take on the brilliant luminescence of stained glass!
Video tutorial: