 by
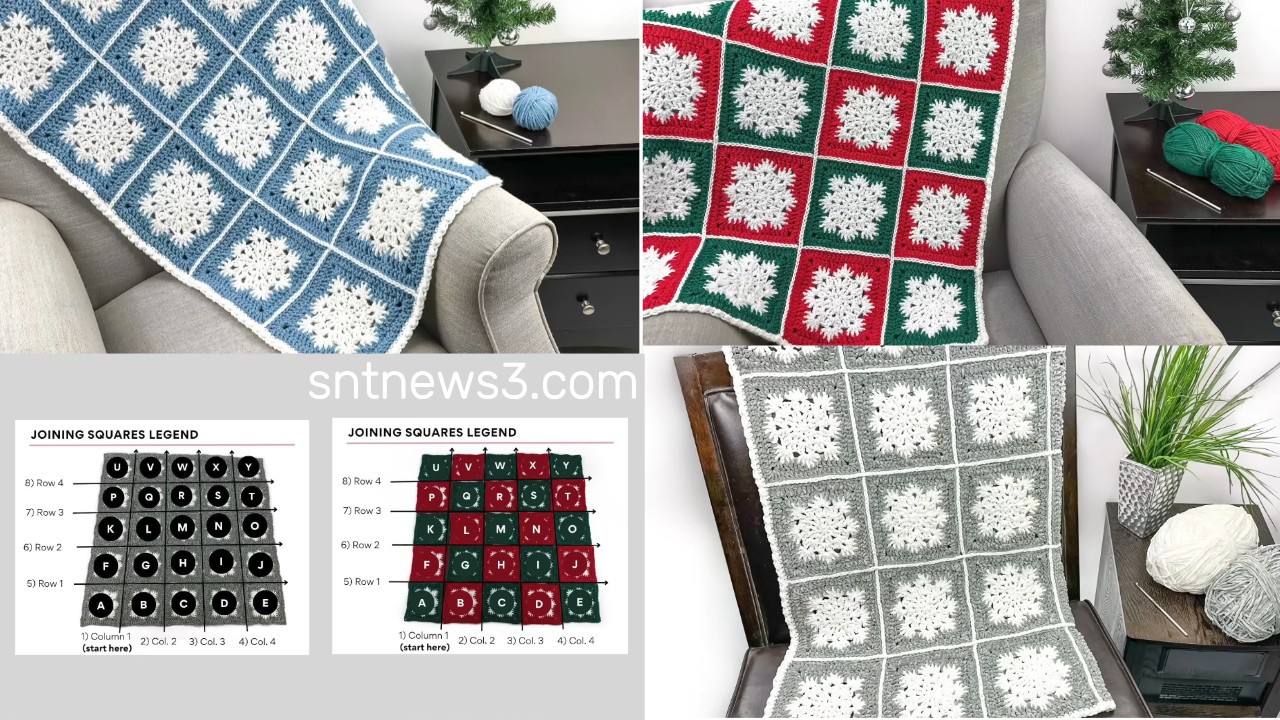
by Snowflake Granny Square Blanket — Step-by-Step Tutorial
Skill: intermediate (basic crochet + simple puff/tr clusters)
Finished motif size (sample): ~14 cm / 5½” square (using worsted weight yarn + 4.0 mm hook) — change yarn/hook for different scale.
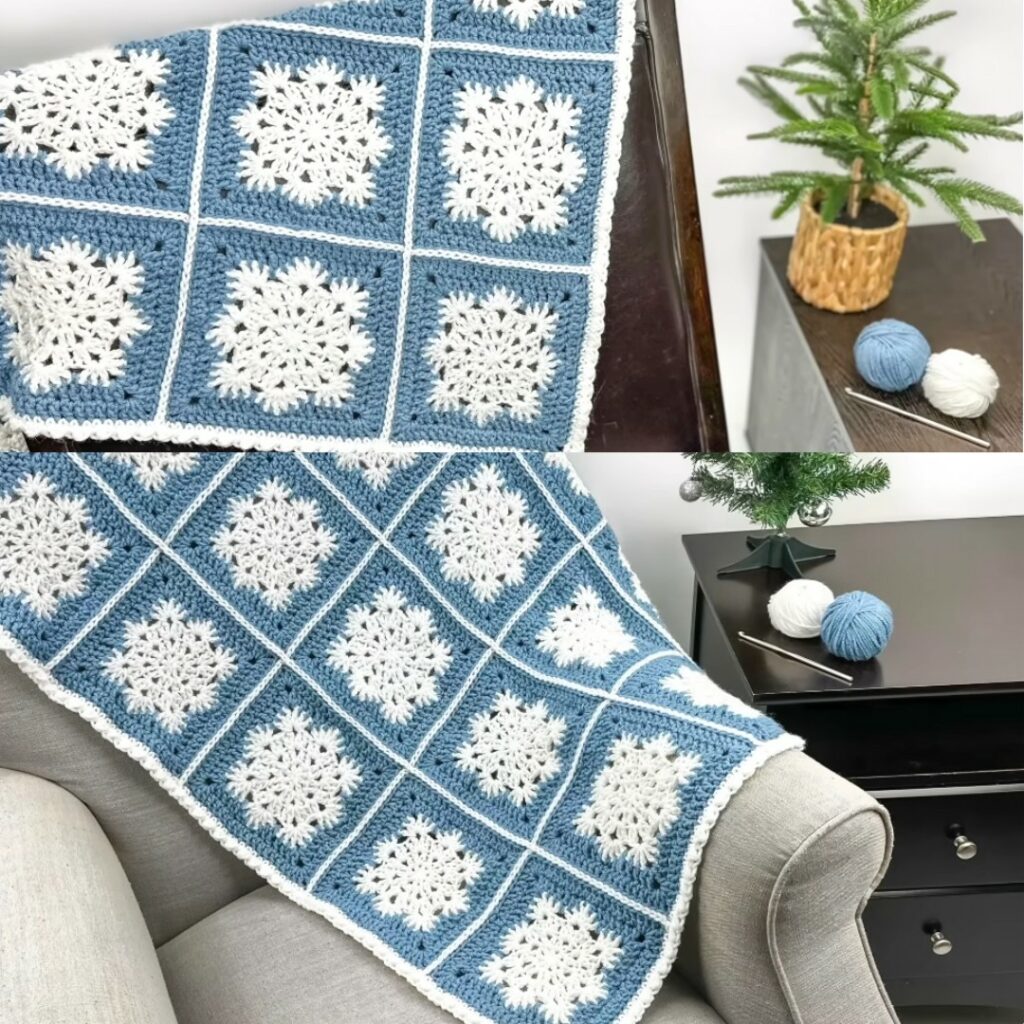
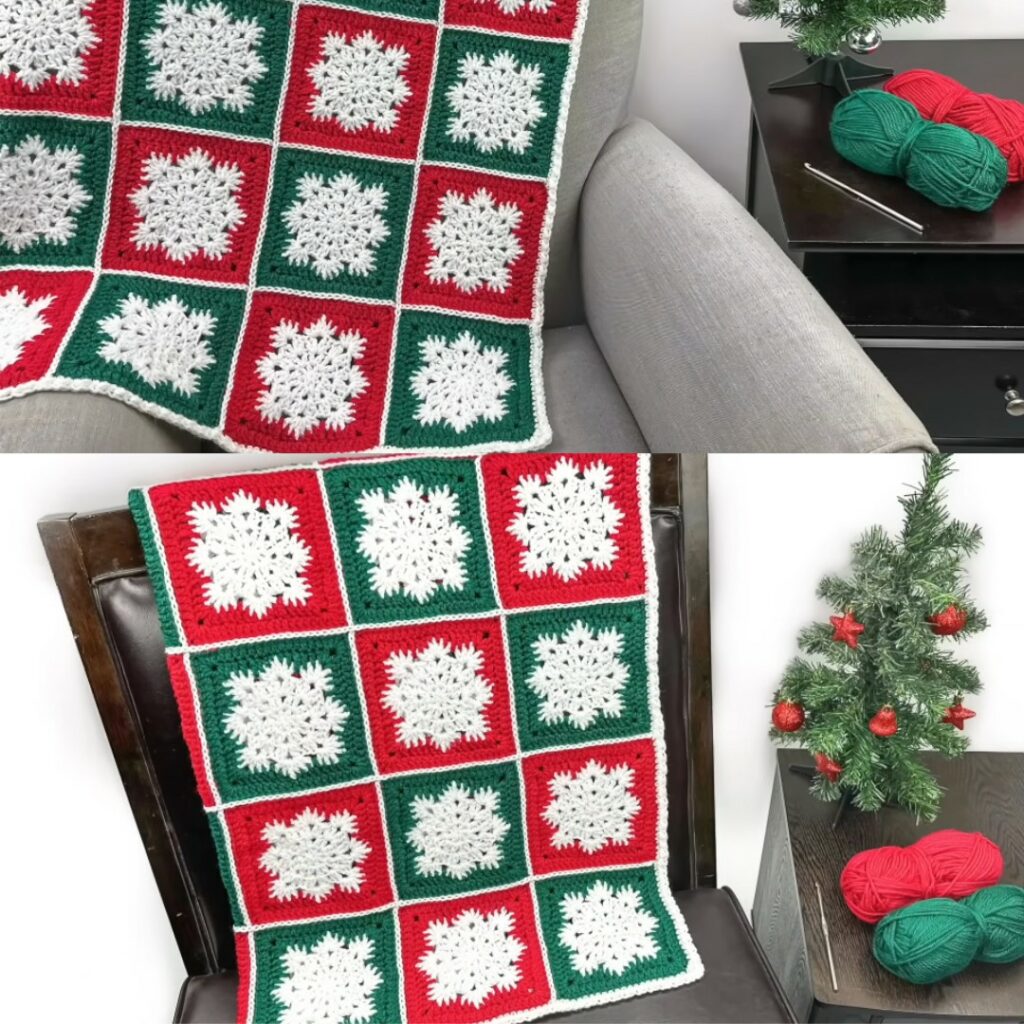
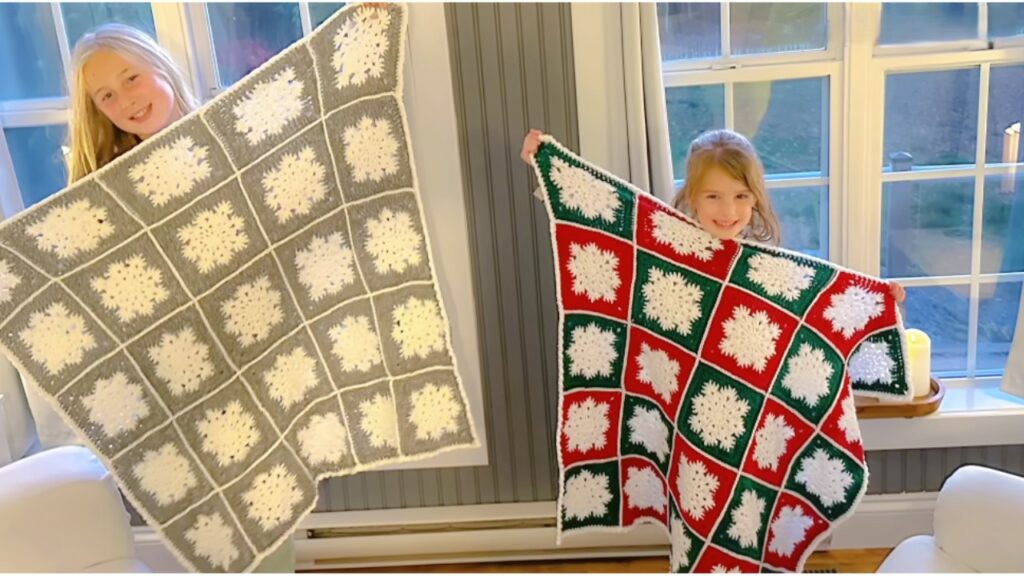
What you’ll make: many snowflake-center granny squares joined into a blanket and finished with a scallop border.
Materials
- Main color (MC) — e.g., off-white or pale blue (for snowflakes / background)
- Contrast color (CC) — optional (for borders or applied detail)
- Yarn weight (sample): worsted/aran (4) — adjust hook for drape. You can also use DK or cotton thread for lacy smaller squares.
- Crochet hook: 4.0 mm (G) recommended for worsted sample (use hook appropriate to your yarn to get desired size)
- Tapestry needle, scissors, blocking pins & mat
- Stitch markers (optional)
Abbreviations (US)
- ch = chain
- sl st = slip stitch
- sc = single crochet
- hdc = half double crochet
- dc = double crochet
- tr = treble (UK: treble = US tr)
- sp = space
- st = stitch
- [] = work instructions in brackets as directed

Design notes (pattern logic)
- The snowflake is worked in the center as fan/petal points, made from treble fans (gives tall points).
- There are 12 snowflake points around the center; we convert these 12 points into a square by grouping them 3 per side (12 → 4 sides).
- The square is then grown outward with standard granny-style rounds, adding corners (3 dc, ch 3, 3 dc) so motifs block squarely and join easily.
Gauge / test
Make one motif and block it to confirm size. Change hook if you want bigger/smaller motifs. Use your test square to calculate how many motifs you’ll need for the finished blanket.
MOTIF — one Snowflake Granny Square
(Each motif = 7 rounds in this recipe: center snowflake rounds then square rounds + one finishing round.)
Rnd 1 — Magic ring center
- Make a magic ring (or ch 4 and join to form a ring).
- Ch 3 (counts as dc), work 11 dc into the ring — 12 dc total including starting ch-3.
- Pull ring tight. Join with sl st to top of ch-3.
Result: small round of 12 dc (foundation for 12 snowflake points).
Rnd 2 — Loops for snowflake arms
- Ch 1. Sc in next dc, ch 3.
- Repeat sc, ch 3 around — you should have 12 sc and 12 ch-3 loops.
- Join with sl st to first sc.
The ch-3 loops define each snowflake arm placement.
Rnd 3 — Snowflake arms (petal/fan)
We build tall fans that look like snowflake points.
- Sl st into first ch-3 loop to position.
- In the ch-3 loop work: sc, ch 2, (3 tr), ch 2, sc — that is: sc into loop, chain 2, 3 treble crochet in the same loop, chain 2, sc into loop.
- The 3-tr fan makes the pointed arm; the ch-2 on both sides opens it.
- Repeat sc, ch2, 3 tr, ch2, sc into every ch-3 loop around (12 times).
- Join with sl st to first sc.
Result: 12 tall snowflake arms rising from the center.
Rnd 4 — Small stabilizing round (bridge loops)
- Ch 1. Sc in the first sc (the base of the first arm).
- Ch 4, sc in next sc (base of next arm). Repeat around — you’ll make 12 ch-4 spaces between the arm bases.
- Join with sl st to first sc.
These ch-4 loops are the anchors we’ll use to form the square.
Rnd 5 — Turn circle into square (make corners)
We convert 12 ch-4 loops into 4 sides (3 loops per side) and create corners.
Principle: Work 3 dc into each ch-4 loop to build side shells. At every 3rd loop place a corner cluster instead.
- Ch 3 (counts as dc), work 2 more dc in same ch-4 loop → you have 3 dc in that loop.
- Move to the next ch-4 loop: work 3 dc.
- Move to the third ch-4 loop of the trio (i.e., after 2 loops): instead of 3 dc only, work a corner: (3 dc, ch 3, 3 dc) into that third ch-4 loop. (This corner will turn to next side.)
- Continue the pattern: [3 dc in loop, 3 dc in loop, (3 dc, ch3, 3 dc) in loop] — repeat this sequence 4 times total, which uses all 12 ch-4 loops and produces 4 corners.
- Join with sl st to top of starting ch-3.
You will now see a rough squared outline — each side has two regular 3-dc groups and a corner cluster.
Rnd 6 — Build the square side rows (even and tidy)
- Ch 1 (does not count). Work sc in the top of each dc across the sides and 3 sc in each corner ch-3 space (this evens edges and readies the motif for larger rounds).
- Practically: sc in each dc across side groups; when you reach the corner ch-3, work (sc, ch 1, sc, ch 1, sc) or simply 3 sc (your choice) to keep corner fullness.
- Join with sl st.
This round flattens the motif into a true square and stabilizes the corners.
Rnd 7 — Outer decorative round (shell/arch)
This round makes an attractive outer edge and gives a consistent join round for JAYG or whipstitch.
- Ch 3 (counts as dc). Skip the next sc, in next sc work 5 dc (shell), skip next sc, sc in next sc. Repeat across each side.
- In corner sc clusters, work (3 dc, ch 3, 3 dc) to keep corners full.
- Join and fasten off. Weave in ends.
Optional variant: instead of 5-dc shells, do 3-dc shells for a subtler look.
You’ve finished one Snowflake Granny Square. Make as many as you need for your blanket.
LAYOUT & SIZING
- Count your motif size after blocking. Example: if one motif = 14 cm (5½”), a 5 × 6 layout = 70 × 84 cm (27½” × 33″).
- Plan layout to fit bed/table/sofa: common blanket sizes (approx):
- Baby: ~6 × 8 motifs (depending on motif size)
- Throw/lapghan: ~7 × 9 or 8 × 10 motifs
- Twin/Full/Queen need many more motifs — use motif size × number to plan.
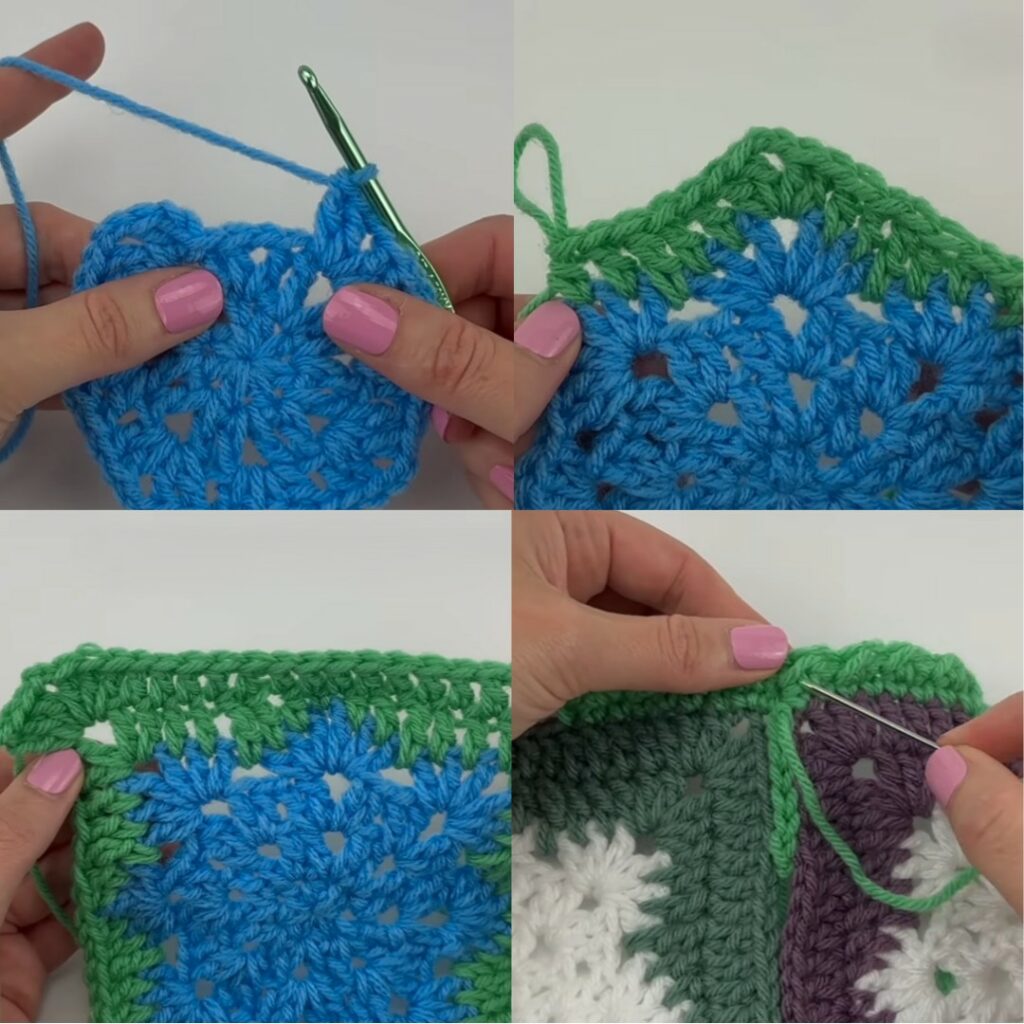
JOINING MOTIFS
You can join motifs after all are made (sewing/joining) or join-as-you-go (JAYG) on the final round.
Option A — Join-as-you-go (recommended for neat joins)
When you make Rnd 7 (outer round) of a new motif and you approach a side that touches an existing motif:
- Instead of completing the shell normally for a stitch that aligns with a neighbor motif, work: sc in your new motif’s st, ch 1, sl st through the corresponding st or chain space on the finished motif, ch 1 then continue the rest of the shell.
- Use this method to attach one side at a time; it creates a neat, slightly lacy seam.
This method slightly changes the stitch count where motifs meet and creates a continuous fabric with fewer ends.
Option B — Sew / Whipstitch after blocking
- Block all motifs flat.
- Place motifs right sides up in your layout.
- With tapestry needle and matching yarn, whipstitch through back loops only, or use mattress stitch for invisible seam.
- Join all rows, then join rows together.
Both methods look lovely — JAYG reduces sewing.
BORDER (sample cozy scallop border)
Work the border after all motifs are joined and blanket is blocked.
Border Round 1 — even single crochet
Join MC at any point:
- Round 1: sc evenly all around, working 3 sc in each motif corner to keep edges flat. Join with sl st.
Border Round 2 — shell row
- Ch 3 (counts dc), skip 2 sc, work 5 dc in next sc (shell), skip 2 sc, sc in next sc. Repeat all around. In corners: work shell into corner cluster so corner remains full. Join.
Border Round 3 — arch row
- Ch 1, sc in first dc, ch 4, sc in center dc of shell around. Join.
Border Round 4 — big scallops
- In each ch-4 arch work: (sc, ch 3, 7 dc, ch 3, sc) to make large scallops. Join.
Border Round 5 — picot tidy (optional)
- Into each scallop work: sc, (ch 3, sl st in ch-3 to form picot), sc for tiny decorative points. Join and fasten off. Weave in ends.
Block border gently to shape scallops.
BLOCKING
- Wet-block the entire blanket (or steam) to open the snowflake arms and flatten squares.
- Pin each corner and scallop outward to get crisp snowflake points and uniform squares. Let dry fully.
YARN & AMOUNT ESTIMATES (approx)
(NOTE: yarn needs vary a lot — make one blocked motif, weigh it, then multiply for best accuracy. These are rough guides.)
- Sample motif (worsted, 4.0 mm hook): ~15–20 g per motif.
- For a 7 × 9 throw (63 motifs) → ~63 × 18 g ≈ 1134 g → about 12 × 100 g skeins of main color.
- For baby blanket (6 × 8 = 48 motifs) → ~48 × 18 g ≈ 864 g → 9–10 skeins.
- Border + extra = add ~1–2 skeins.
Always swatch one motif and weigh to calculate.
TROUBLESHOOTING & TIPS
- Points not sharp: use a smaller hook on the snowflake rounds or block more aggressively (pin points outward).
- Squares uneven: block each square before joining. Blocking evens small differences and makes joining easier.
- Blanket puckers at joins: try joining in back loops only, or switch to join-as-you-go to reduce bulk.
- Want fewer arms (8 instead of 12)? Use 8 dc in Round 1 and proceed with the same logic (group them 2 per side to make a square). Pattern would need small adjustments.
Variations & ideas
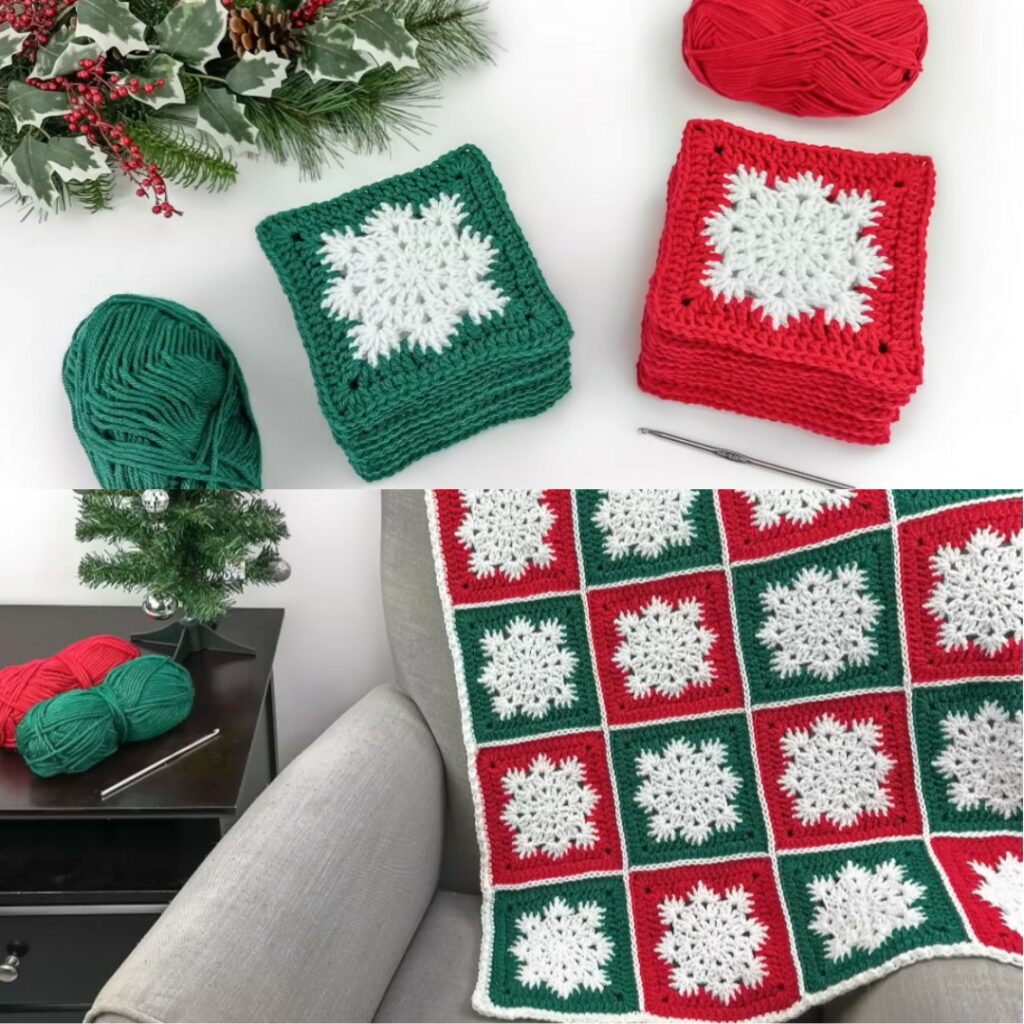
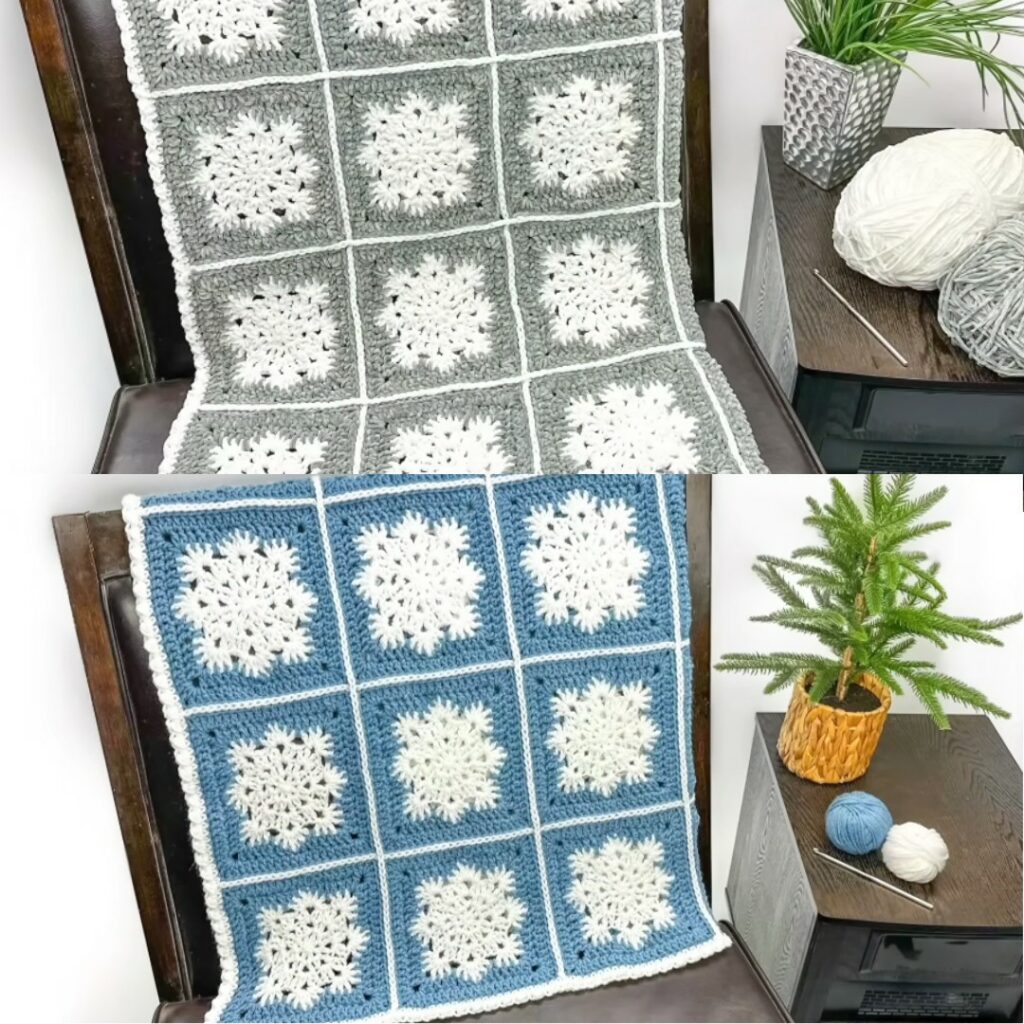
- Make two colors: snowflake (white) on a colored background or vice versa.
- Add beads at the tip of each arm (seed beads sewn on after blocking) for sparkle.
- Make a center medallion then surround with plain granny rounds for an oversized snowflake center.
- Use fingering/sport yarn + small hook for a delicate lace heirloom throw.
Quick reference — Motif cheat sheet
- Rnd1: Magic ring → 12 dc.
- Rnd2: sc, ch3 ×12 (12 loops).
- Rnd3: In each ch-3 loop: sc, ch2, (3 tr), ch2, sc (12 arms).
- Rnd4: sc in arm bases, ch4, sc ×12 (12 ch4 spaces).
- Rnd5: 3 dc per ch4; every 3rd ch4 → corner (3 dc, ch3, 3 dc).
- Rnd6: sc around to tidy & stabilize.
- Rnd7: shell round (5 dc shells) — finish & fasten off.
VIDEO: