by
by Boots are a timeless wardrobe staple, offering both function and flair. However, not all boots are created equal—some come with zippers, laces, high heels, or stiff materials that make them hard to wear or maintain. If you’re new to boots or simply looking for a no-hassle option, you might be wondering: what’s the easiest boot shoe to wear, style, and care for?
This guide explores what makes a boot shoe “easy” and highlights the best types for comfort, versatility, and simplicity.

✅ What Makes a Boot Shoe “Easy”?
An “easy” boot shoe should check several boxes:
- Easy to Put On/Take Off
Slip-on styles or boots with zippers or elastic panels are ideal. - Minimal Break-In Time
Soft materials and cushioned soles prevent blisters and foot fatigue. - Low Maintenance
Water-resistant or wipe-clean materials make life simpler. - Versatile Design
Neutral colors and simple styles go with everything. - Comfortable Fit
A wide toe box, low heel, and arch support are crucial.
🧶 How to Make the Easiest Boot Shoe (Slipper Boot Style)
We’ll cover two simple methods:
- Sewing (using fabric or upcycled materials)
- Crocheting (if you prefer yarn work)

👟 Method 1: Sew Easy Fabric Boot Shoes (No Pattern Needed)
🧵 Materials:
- Fleece, felt, or an old sweatshirt (soft, warm fabric)
- Scissors
- Sewing needle and thread or a sewing machine
- Pins or clips
- Anti-slip fabric or rubber for soles (optional)
- Paper and pen to trace your foot
✂️ Step-by-Step Instructions:
1. Trace Your Foot
- Stand on a piece of paper.
- Trace around your foot to create a sole template.
- Add 0.5 inch for seam allowance.
2. Cut Fabric
- Cut 2 soles from your fabric.
- Cut 4 side pieces shaped like socks or boot tops (2 per foot).
- These should go from your toes to just above your ankle.
3. Sew Boot Tops
- Sew each pair of boot-top pieces together along the top edge (like a sock).
4. Attach to Soles
- Pin the bottom edge of each boot top around the matching sole piece.
- Sew all around, slowly and evenly.
5. Finish Edges
- Hem the top edge (ankle opening), or fold it outward for a cuffed look.
- Optionally, add grip fabric or puff paint on the bottom to prevent slipping.
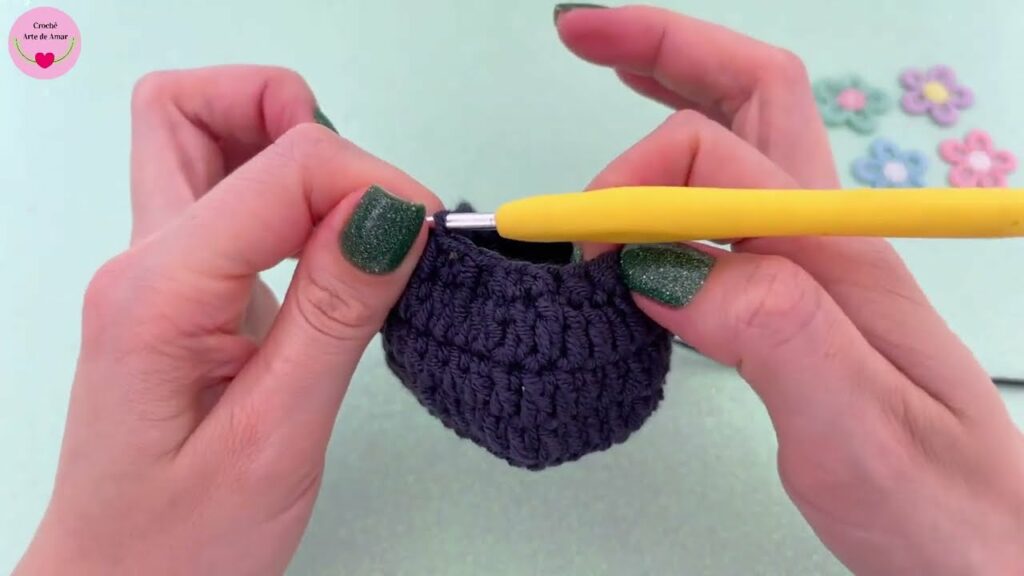
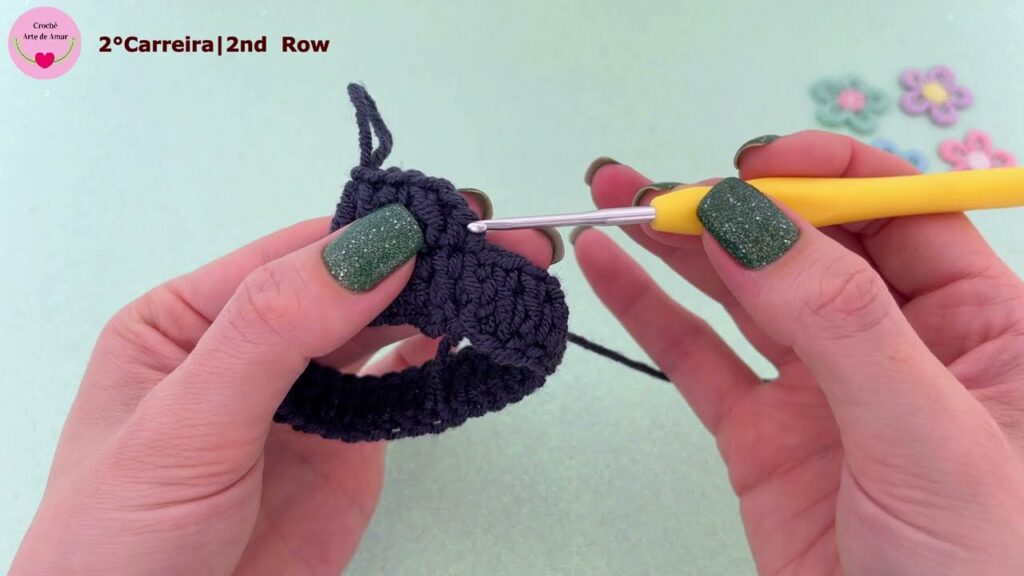
🧶 Method 2: Crochet Slipper Boot Shoes
This method is great if you’re familiar with basic crochet stitches.
🧶 Materials:
- Chunky yarn (1–2 skeins)
- 6.5mm to 8mm crochet hook
- Yarn needle
- Stitch markers (optional)
✨ Beginner Bootie Pattern:
1. Sole
Make a chain about the length of your foot (e.g., 20 chains).
Round 1: SC in 2nd ch from hook and across. At end, make 3 SC in last ch to turn.
Continue on opposite side of chain. Join with slip stitch.
Round 2–3: SC around, increasing at the toe and heel ends to form an oval sole.
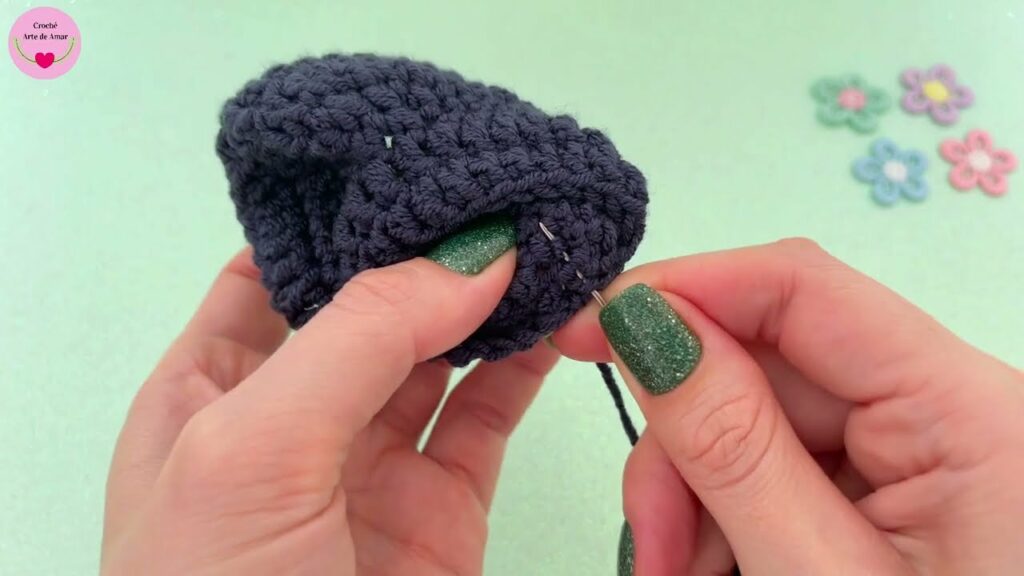
2. Body of the Boot
Round 4–6: SC in each stitch around (no increases) to build sides.
Switch to HDC or DC to speed up if desired.
3. Ankle/Leg Part
Continue stitching up, making the leg part as high as you want (e.g., 4–5 inches).
Optional: Use ribbing or FP/BP stitches for texture and snugness.
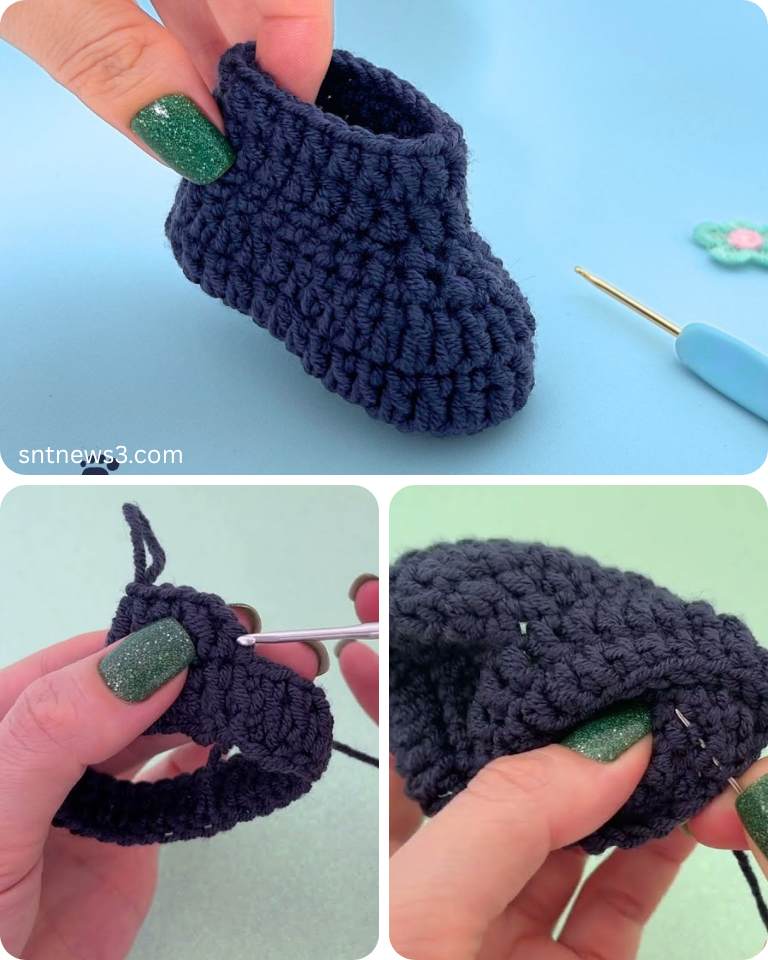
4. Finishing Touches
- Fasten off and weave in all yarn ends.
- Add buttons, ties, or pom-poms if desired!
🧍♀️ Who Should Try Easy Boot Shoes?
- People with mobility issues
- Seniors
- Kids or teens new to boots
- Busy professionals
- Minimalist dressers
- Anyone who wants comfort over complexity
Video tutorial:
🧩 Final Thoughts
The easiest boot shoe is one that fits your lifestyle without causing stress. Whether you’re looking for slip-on Chelsea boots, cozy slipper boots, or zip-up ankle boots, comfort and simplicity should always come first. With the right pick, you’ll enjoy the style and function of boots—without the struggle.