by
by Hello crochet friends! Today, I’ll recreate a complete, beginner-friendly, step-by-step written tutorial for “First in Crochet Projects — Favorite Blouse for Beginners” .
This is a practical, easy-to-follow pattern in US terms you can crochet straight from the text — includes materials, gauge, exact stitch repeat, full panel instructions, how to calculate chain counts from your measurements/gauge, shoulder/neck/sleeve finishing, edging, yarn estimates, troubleshooting, and simple variations.
I’ll assume a classic, open lacy stitch that beginners love (an easy fan/mesh repeat) and give examples for sizes S / M / L. If you want me to convert to exact chain counts for your measurements, tell me your gauge (stitches per 10 cm) and desired finished bust (cm or in) and I’ll calculate it for you.
Favorite Beginner Blouse — Step-by-Step (US terms)
Summary (what you’ll make)
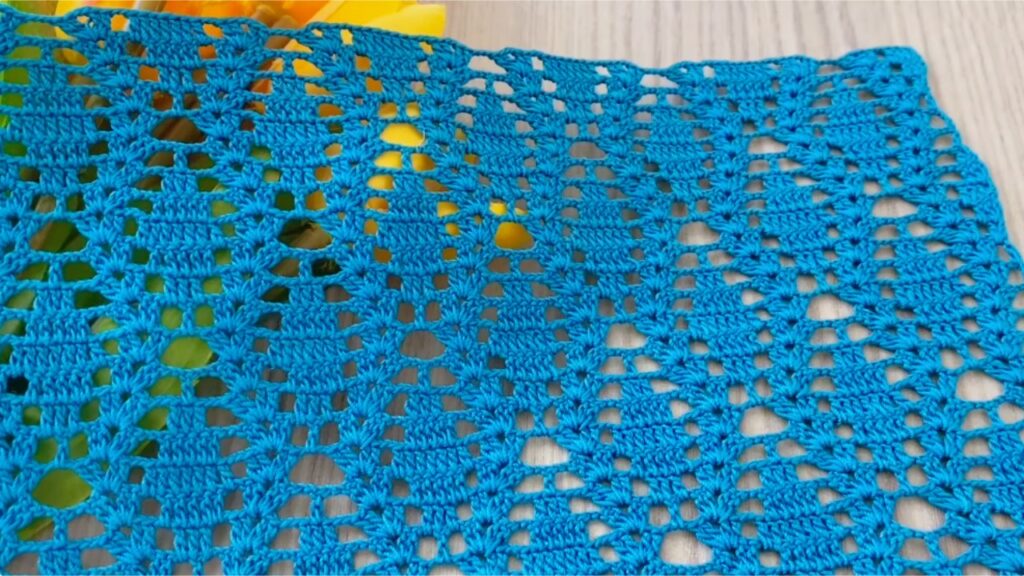
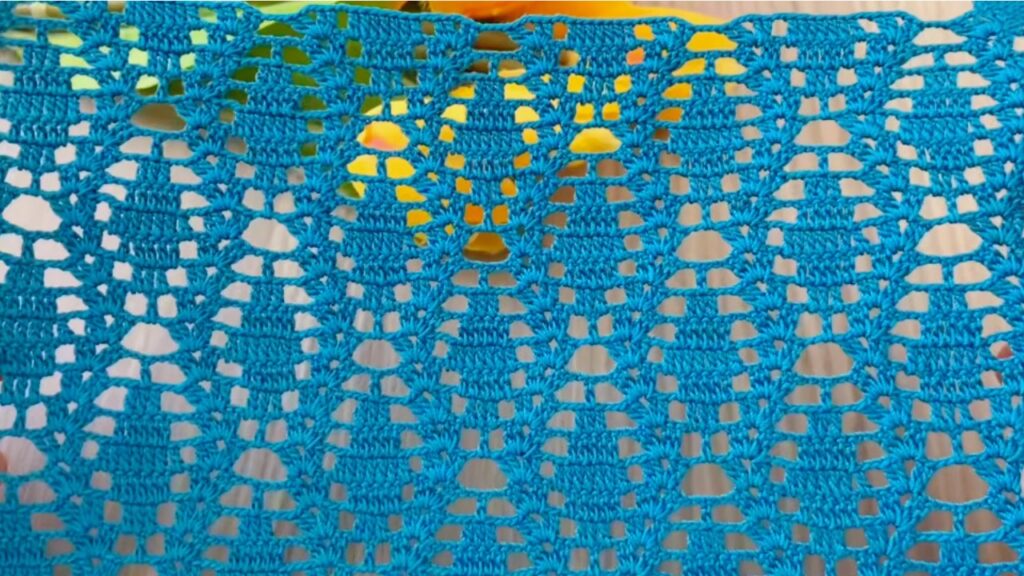
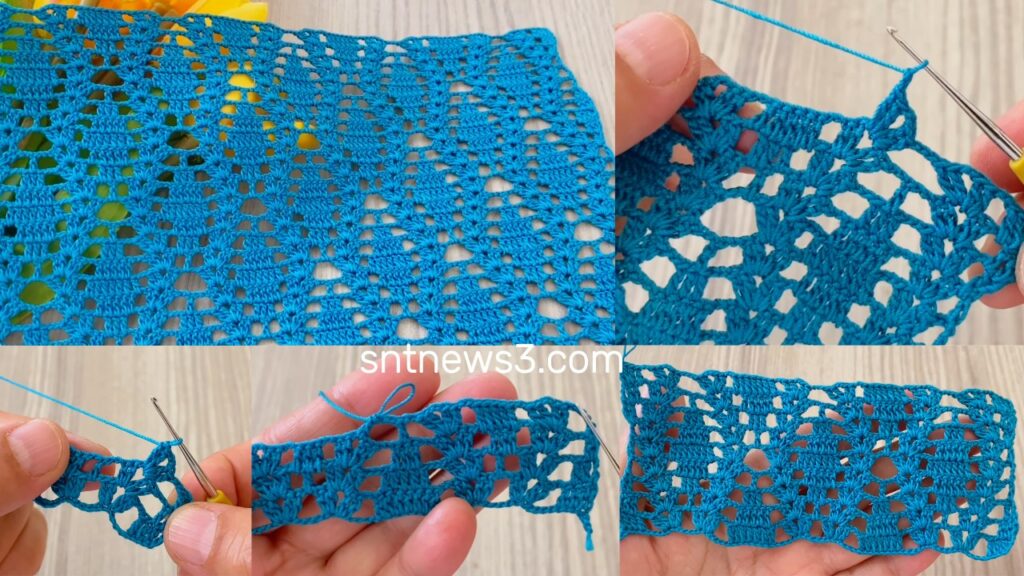
An open, drapey blouse worked as two rectangular panels (front + back), seamed at shoulders and sides, with a neat single-crochet neck/armband and short cap sleeves. Comfortable, flattering, and beginner-friendly.
Skill level: Beginner → Easy
Suggested yarn: DK / light worsted (cotton or cotton blend recommended for warm seasons)
Sample hook: 3.5 mm (adjust to match your gauge and desired drape)
Materials
- Yarn: DK weight — approx amounts below (estimate; see yarn estimate section for better accuracy).
- Hook: 3.5 mm (or the hook that gives you the sample gauge)
- Tapestry needle, scissors, measuring tape, blocking pins.
- Optional: 5 small buttons if you want a button band (pattern is open-front optional).
Sample yarn amounts (approx):
- Size S: 400–550 g DK
- Size M: 550–750 g DK
- Size L: 750–900 g DK
Abbreviations (US)
- ch — chain
- sc — single crochet
- hdc — half double crochet
- dc — double crochet
- tr — treble crochet
- sl st — slip stitch
- sp — space
- st — stitch
- rep — repeat
- RS — right side
Gauge (very important)
Make a 10 × 10 cm swatch in the pattern repeat and block it.
Sample target gauge (example): 18 stitches = 10 cm (in the sample stitch with DK & 3.5 mm).
If your gauge differs, change hook size — the pattern below gives formulas so you can calculate chains from your actual gauge.
Pattern notes & stitch idea
- The body is worked flat as a simple repeating Lace Repeat (two-row repeat):
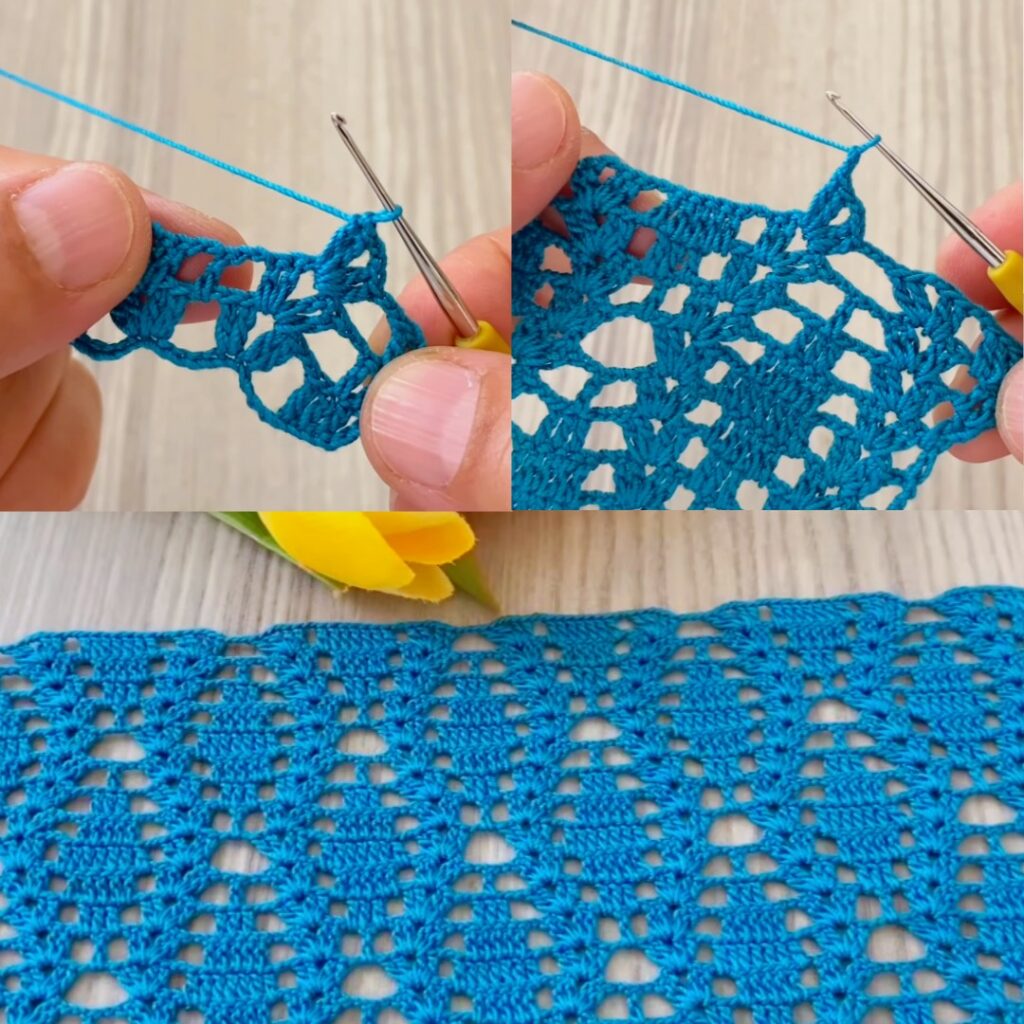
Row A (Fan row): creates small fans/shells.
Row B (Mesh/V-st row): builds chain arches and V-stitches that align vertically forming a leafy/fan column. - The repeat is multiple of 8 + 1 chains (easy to remember).
- Make two panels identical (back + front) and seam shoulders & sides. Leave a neck opening in the front center by not seaming a few center stitches (or make the front as two halves to leave an opening).
Lace stitch (exact repeat)
Multiple: 8 + 1
Row A — Fan row (works into previous row dc)
- ch 3 (counts as dc), dc in next st (so you start with 2 dc anchored at edge).
- skip 2 sts, 5 dc in next st (shell), skip 2 sts, dc in next 2 sts — repeat across. End with dc in top of turning ch. Turn.
Row B — Arch + V-st row (anchors into shell centers)
- ch 3 (counts as dc), dc in next st.
- ch 3, V-st (dc, ch1, dc) into the center (3rd dc) of the 5-dc shell below, ch 3, dc in next 2 dc — repeat across. End with dc in top of turning ch. Turn.
Repeat Rows A–B for body length.
Make a swatch (do this first)
- Chain 49 (8×6 + 1) or any multiple 8 +1 about 20–30 chains to make a 10 cm swatch.
- Work Rows A–B for 8–12 rows, block and measure 10 cm swatch. Count stitches across 10 cm to get stitches per 10 cm and rows per 10 cm.
Save that to compute exact chains for your size.
How to calculate starting chain for your size (formula + worked example)
You need:
- desired finished bust (F) in cm (include desired ease, e.g., +6–8 cm for a relaxed fit)
- your stitches per 10 cm from swatch (call it S10)
Steps:
- Compute stitches per cm:
Spercm = S10 / 10. - Compute total stitches for bust width:
Total_sts = round(F × Spercm) - Round
Total_ststo the nearest number that fits the multiple: make it the nearest multiple of 8, then +1. (We use multiple-of-8 + 1.)
Example (worked) — using sample gauge S10 = 18 stitches / 10 cm, target finished bust F = 96 cm (M):
- Spercm = 18 / 10 = 1.8 stitches/cm
- Total_sts = 96 × 1.8 = 172.8 → round to 173 stitches
- Nearest multiple of 8 = 172 (8×21 = 168, 8×22 = 176; 172 is not a multiple; better compute precisely): 173 round to 176 (since 176 is divisible by 8). Then +1 → ch 177 (176 + 1).
(Instead of overcomplicating: pick the nearest multiple of 8 then add 1.)
For convenience you can make back panel width = full back width and front panels split into two halves; or simply make one full-width back and one full-width front that will be folded/seamed center.
Construction overview (straightforward)
We’ll make two identical rectangular panels (front and back) of the same width and length:
- Front = half of bust each OR one full front if you plan a center seam or button band. (Easiest: make two identical panels and seam them together leaving the neck opening.)
- Back: same width as front or adjust as you like.
- Seam shoulders (leave neck opening) and sides (leave armholes as you prefer).
- Add edging around neck and armholes.
I’ll give a concrete example for Size M and then how to adapt.
Worked example — Size M (example numbers)
Using sample gauge (18/10 cm) and finished bust 96 cm, front half = 48 cm (but we used Total_sts for whole width earlier). To keep things simple here we’ll demonstrate making two panels each 48 cm wide (so combined front+back would be 96 cm around — adjust as you like).
Panel chain for one panel (48 cm) with sample gauge:
- Spercm = 1.8 sts/cm
- Stitches needed = 48 × 1.8 = 86.4 → round to 86 → nearest multiple of 8 = 88 → +1 = ch 89 (multiple-of-8 + 1).
So chain 89 for each panel (front and back). (If you want full single-piece front/back, chain double that accordingly.)
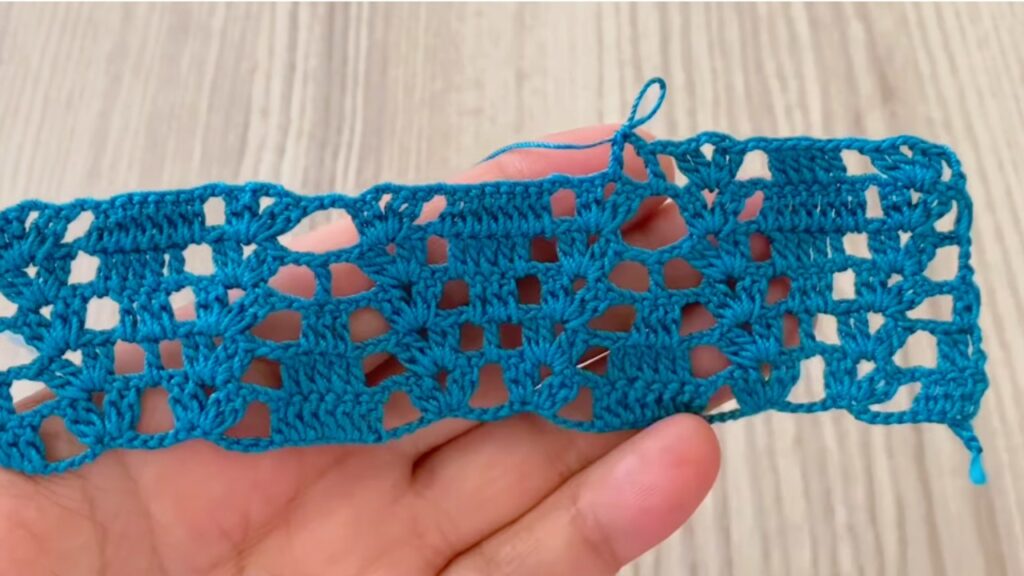
Work panel:
- Foundation: ch 89 (or your computed chain).
- Row 0 (optional stabilizer): ch 3, dc in each ch across. Turn.
- Row 1 (Row A — Fan row): ch 3 (counts as dc), dc in next st; skip 2, 5 dc in next st, skip 2, dc in next 2 dc — repeat across; end dc in top of turning ch. Turn.
- Row 2 (Row B — Arch + V row): ch 3, dc in next dc; ch 3, V-st (dc, ch1, dc) into center (3rd dc) of the 5-dc shell below, ch 3, dc in next 2 dc — repeat across; end dc in top turning ch. Turn.
- Repeat Rows 1–2 until the panel reaches desired length (example body length from shoulder to hem ~ 56 cm; for a crop shorten to ~44 cm). For Size M, aim for body length about 56 cm from shoulder to hem OR 40 cm from underarm (depends on style). Because we are making rectangles with no shaping, count rows to reach desired finished length using your rows-per-10cm swatch.
- Make two identical panels.
Shoulder join & neck opening
Option A — simple neck opening (no shaping):
- Align front & back at shoulders; mark shoulder seam width (typical adult shoulder seam ≈ 10–12 cm depending on size). For a straightforward approach, leave center front neck opening by not seaming the middle X cm of the top edge: e.g., for a round neck leave 18–20 cm at center unseamed. Alternatively split front into two halves and seam sides only.
Practical steps:
- Fold panels RS together; measure from outer shoulder edge inwards the shoulder seam width on both sides and pin. For example, mark 11 cm from each outer edge — the middle (neck) remains unseamed.
- Seam shoulders with mattress stitch or single crochet seam neatly.
Side seam & armholes
- With RS together, seam from bottom up to the start of the armhole (leave 16–18 cm open for adult sizes for a short sleeve or ~20–22 cm for deeper armhole if you want a looser fit). Alternatively seam entire side if you want sleeve holes closed and add sleeves later.
If you prefer small short sleeves, add a couple of rows of the pattern or a small sc cuff at the armhole after seaming.
Neckline finishing (very easy)
- With RS facing, join yarn at center front of neck (or at a shoulder seam if front is one piece).
- Pick up loops evenly around neck opening with single crochet: Round 1: sc evenly around, place 3 sc in each corner to keep curves smooth. Join with sl st.
- Round 2 (optional decorative): skip 2 sc, 5 dc in next sc (shell), skip 2, sc in next sc — repeat for a small scallop. Fasten off and weave ends.
This produces a neat, beginner-friendly neckline.
Sleeve options (pick one)
Option 1 — Cap sleeve (very easy)
- After side seams, pick up sts along armhole and work 2–4 rounds sc to make a neat cuff, or work 1–2 rounds of pattern rows to form short motif sleeves. This is the simplest and beginner friendly.
Option 2 — Short worked sleeve (rectangle)
- Make a small rectangle in same stitch of width = armhole circumference ÷ 2 (plus seam), and length = desired sleeve length; seam it into the armhole.
Option 3 — Set-in sleeve (advanced)
- Use picked-up stitches and work in the round decreasing to shape — not necessary for a beginner.
Hem & bottom edging
- For a neat edge, work 1 round sc evenly around bottom hem.
- Optional second round: scallop (shell) round: skip 2 sc, 5 dc in next sc, skip 2 sc, sc in next sc — repeat for scalloped hem.
Buttons / Open Front (optional)
If you want an open-front blouse or buttoned cardigan:
- Work one panel as left front and the other as right front. Add a 3–4 cm band by picking up stitches and working 3 rounds of sc; add buttonholes by chaining 3–4 and sl st to form loops, spacing evenly. Sew buttons on opposite band.
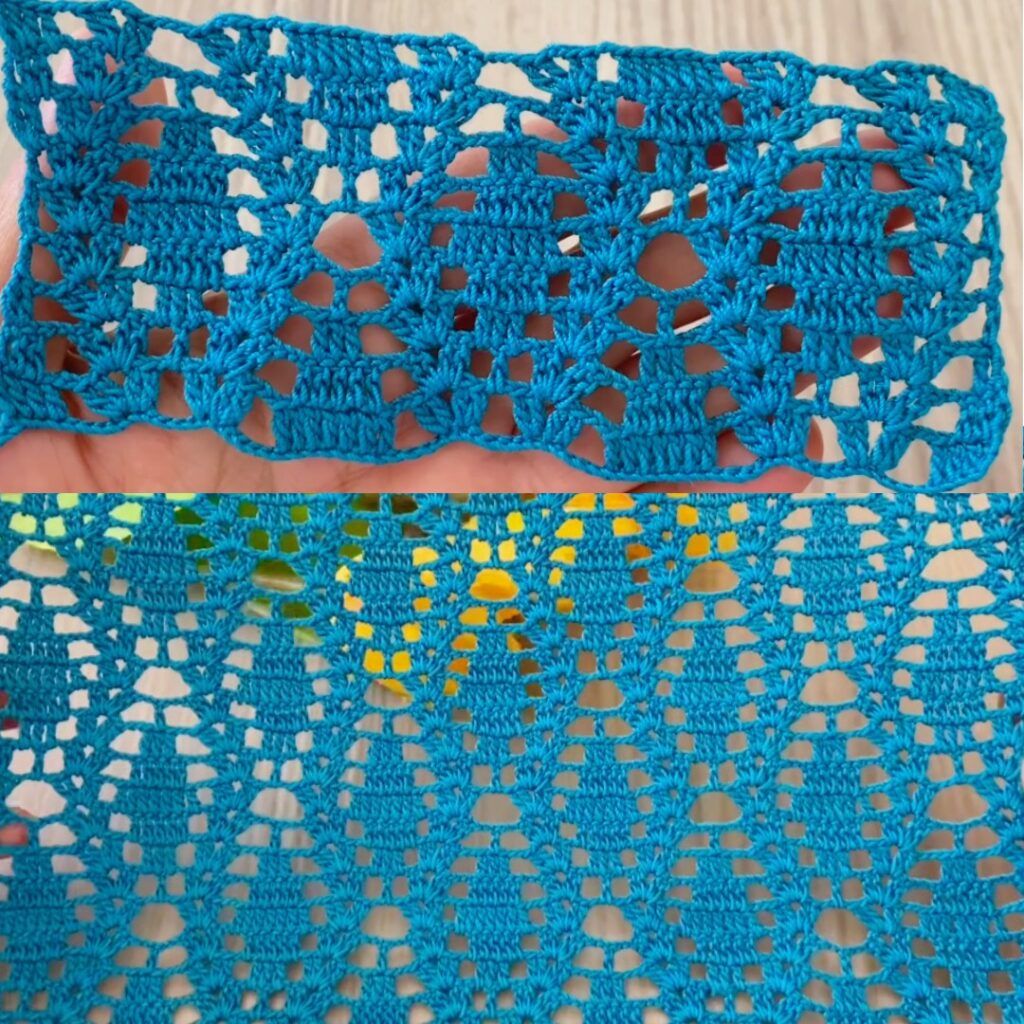
Blocking & finishing
- Block each panel flat to final measurements — blocking opens the lace pattern and improves drape. Pin to correct dimensions while damp and let dry.
- After seams and edging, give final light block.
Yarn estimate (more accurate method)
- Make a small swatch motif or a 1-panel sample and weigh it.
- Better: make one panel for your size partially and weigh; or weigh a known number of rows to extrapolate.
Rough estimates (DK):
- S: 400–550 g
- M: 550–750 g
- L: 750–900 g
Always buy 10–15% extra to match dye lot differences and allow for adjustments.
Troubleshooting & tips
- If blouse is too wide or narrow: change hook size or adjust starting chain using the formula provided.
- If pattern looks uneven at sides: always block panels to the same size before seaming; add an extra sc round to a smaller panel to match.
- If seams pucker: join more loosely or use mattress stitch for flatter seams.
- If V-sts or fans misalign: ensure the V-st in Row B is always worked into the center (3rd dc) of the 5-dc shell in Row A. Count carefully on the first few repeats.
- If edges ripple: add a stabilizing dc row at the start (Row 0) or a sc round before the scallop border.
- Want more drape? Use a softer yarn (bamboo blend) or a slightly larger hook.
Quick size cheat sheet (approx motif counts) — using sample gauge S10 = 18/10 cm
(You should recalc with your own gauge.)
- Size S (finished bust ~ 86 cm): half = 43 cm → 43 × 1.8 = 77.4 → nearest multiple of 8 = 80 → +1 = ch 81 for each panel.
- Size M (finished bust ~ 96 cm): half = 48 cm → 48 × 1.8 = 86.4 → nearest multiple of 8 = 88 → +1 = ch 89.
- Size L (finished bust ~ 106 cm): half = 53 cm → 53 × 1.8 = 95.4 → nearest multiple of 8 = 96 → +1 = ch 97.
(Those are example starting chains per panel. You can make front + back from these or double for a full single-piece front/back.)
Variations & styling ideas
- Longer tunic: add more rows to panel length.
- Crop top: shorten panel height (2 rows less) for a cropped fit.
- Add a center decorative band: use a different color for the neckline band or hem.
- Make sleeves fuller: add 1–2 motif repeats for a flutter sleeve look.
- Convert to cardigan: split front panels and add button band as described.
Final checklist before you start
- Make a swatch and measure stitches per 10 cm.
- Use the formula to compute your required starting chain (multiple of 8 + 1).
- Crochet two identical panels, block them, then seam shoulders and sides leaving neck/arm openings as desired.
- Pick up and finish neck & armholes with sc and optional scallops.
- Final block, weave in ends — enjoy your new beginner blouse!
VIDEO: