by
by Cosmic Jewels Revisited — step-by-step tutorial
(How to recreate the “VERY EASY ‘COSMIC JEWELS REVISITED’ quilt shown in the Jordan Fabrics video)
Nice pick — this version of Cosmic Jewels is a strip-friendly, jewel/diamond-style medallion that’s easy to speed-piece using strip sets, sub-cuts, and simple trimming. Below is a practical, sew-at-the-machine tutorial you can follow start-to-finish. I keep each step actionable so you can work in batches like Matt does in the video.
Project overview (what you’re making)
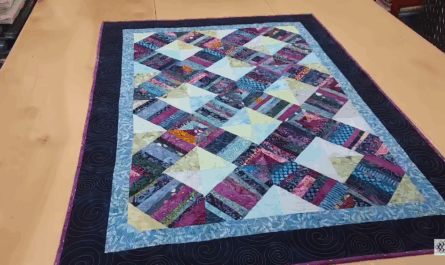
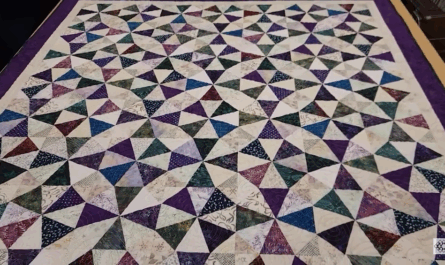
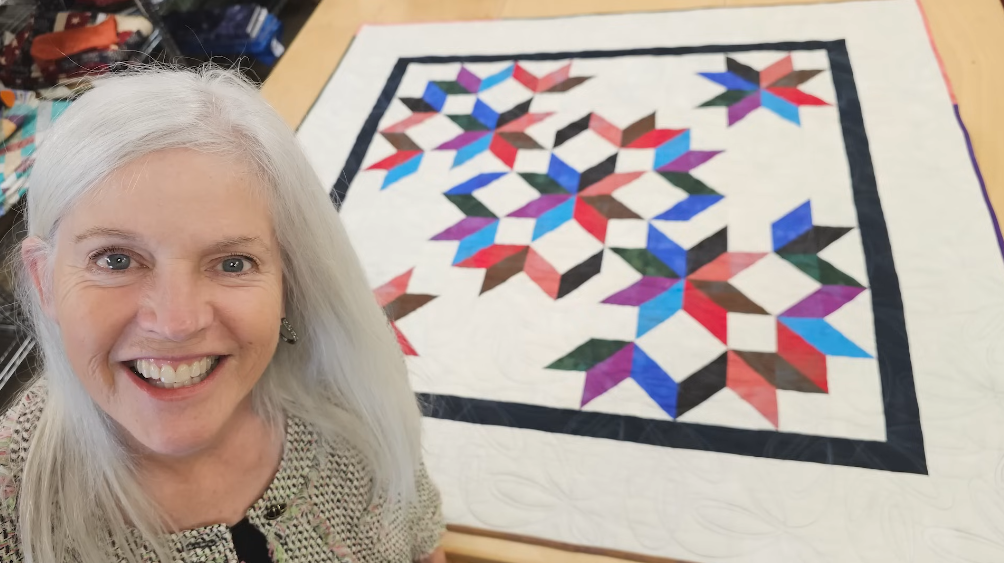
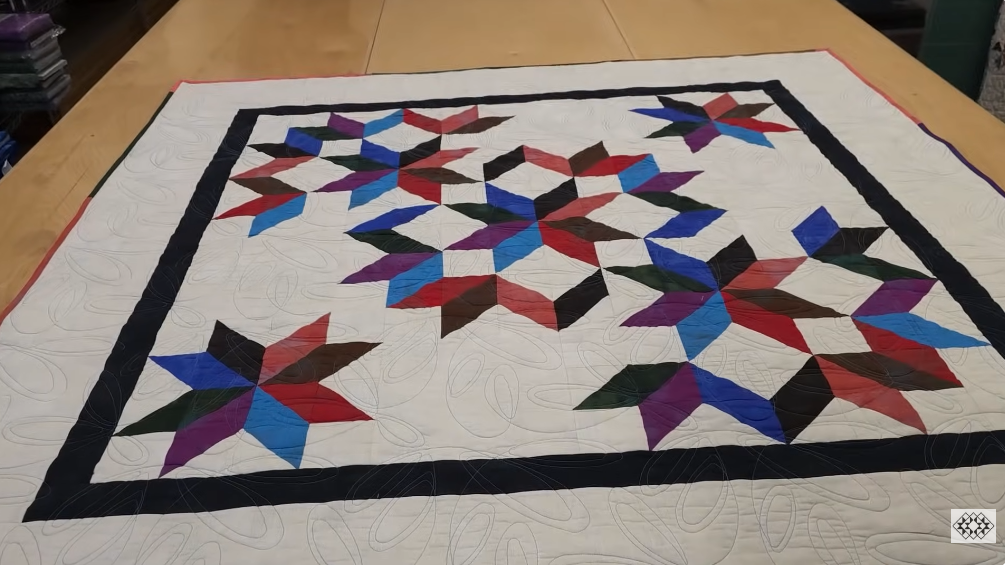
- Visual: repeated jewel/diamond units that read like faceted gems arranged in a field or medallion.
- Construction style: strip-piecing → sub-cut → trim → assemble diamonds → set with background triangles → add borders → quilt & bind.
- Scale: instructions are given so you can easily make a small wall quilt or scale up to a throw/bed size by adding rows and borders.
Materials & tools (recommended for a throw ~60″×72″ — scale up or down)
- Assorted feature fabrics (fat quarters, 2½” strips, or a jelly roll). Choose 8–20 different prints for a “jewel” look.
- Background/setting fabric (solid or low-value print) — about 3–4 yards for a throw, less for smaller sizes.
- Border fabric — 1–2 yards depending on final size.
- Backing fabric — large enough to cover finished quilt + 4–6″ (estimate 4–5 yards for a throw).
- Batting — slightly larger than finished top.
- Thread, rotary cutter & mat, long ruler (24″), square ruler (6½” or 9″), 45° line on ruler or triangle ruler (helpful for squaring diamond units), sewing machine with a ¼” foot, iron/pressing surface, pins/clips, basting pins or spray.
Basic measurements & the approach (keeps things flexible)
- Work in strip sets — sew feature strips and small background strips into multi-strip units, then sub-cut into blanks that become the faces of the jewels.
- Typical working widths that give a nice jewel scale: 2½” (jelly-roll width) or 3″ if you want slightly larger facets. Use the same width for all strips so sub-cuts line up.
- Plan your block unit so each finished diamond/jewel is an even, square-based diamond after trimming (this makes layout and setting easy).
Step 0 — Prep
- Press all fabrics lightly so strips and squares lie flat.
- Sort your feature fabrics into a “jewel” pile and group by value (dark → medium → light) if you want gradation, or leave scrappy for a lively run.
- Decide your working strip width (I’ll use 2½” examples below — adjust numbers if you use 3″).
Step 1 — Cut strips
- From feature fabrics: cut several 2½” × WOF strips (how many depends on how many different jewels you want — 20–40 strips for a throw gives a rich scrappy field).
- From background fabric: cut 2½” × WOF strips (lots — these are used as spacers, small corner/triangle components, and for setting). Cut a few wider background strips (5″–7″) if you plan a wide inner border or sashing.
Step 2 — Make strip sets (batch)
- For each jewel band you want, sew a small background strip to one or both sides of a feature strip to make a feature + bg + feature or bg + feature + bg (the Jordan Fabrics video shows a few band combinations — pick the look you like).
- Example fast construction: sew BG (2½”) + Feature (2½”) + BG (2½”) to create a 7½” wide strip set. Chain-piece many of these strip sets at once. Press seams consistently.
Step 3 — Sub-cut blanks for diamonds
- From each strip set, sub-cut squares the height of the strip set (if using the 7½” example, cut 7½” squares). Stack and cut multiple strip sets together for uniformity.
- Each square will be trimmed on the diagonal or cut into diamonds — this is the raw “jewel face.”
Step 4 — Make diamond/jewel units
There are two common, reliable methods — use the one you prefer.
A) Square-on-point diamond method (easy, accurate)
- Take a 7½” square (strip set) and place it on your ruler so the 45° line crosses corner-to-corner. Trim to the diamond measurement the pattern/formula calls for (for example, trim to a diamond that will finish at 6″ across the widest point). Use a consistent diamond size for every unit.
- Repeat, trimming all diamonds stacked together for speed.
B) Diamond ruler or template method
- Use a diamond/lozenge ruler. Place the ruler on your strip set and cut diamonds directly. This is very fast if you have the ruler.
Whichever method you use, aim to produce many identical diamonds (jewel facets) so assembly is consistent.
Step 5 — Add small background corner triangles (square up if needed)
- If your diamonds are to be set in square blocks (so four diamonds form a square block), add small background corner triangles or frames per the layout you want. A common approach: place 4 diamonds tip-to-tip to make a square block; sew short background corner squares/triangles into the block corners to make a neat square that’s easy to set in rows.
- Make these corner triangles with background squares cut on the diagonal (HST method) or with small background strips as spacers — whichever matches your aesthetic.
Step 6 — Trim & square every block
- After assembling each diamond block (diamond(s) + background corners if used), trim the finished block to uniform size (for example, trim to a 9½” unfinished square). Trimming now prevents accumulated error when joining many blocks.
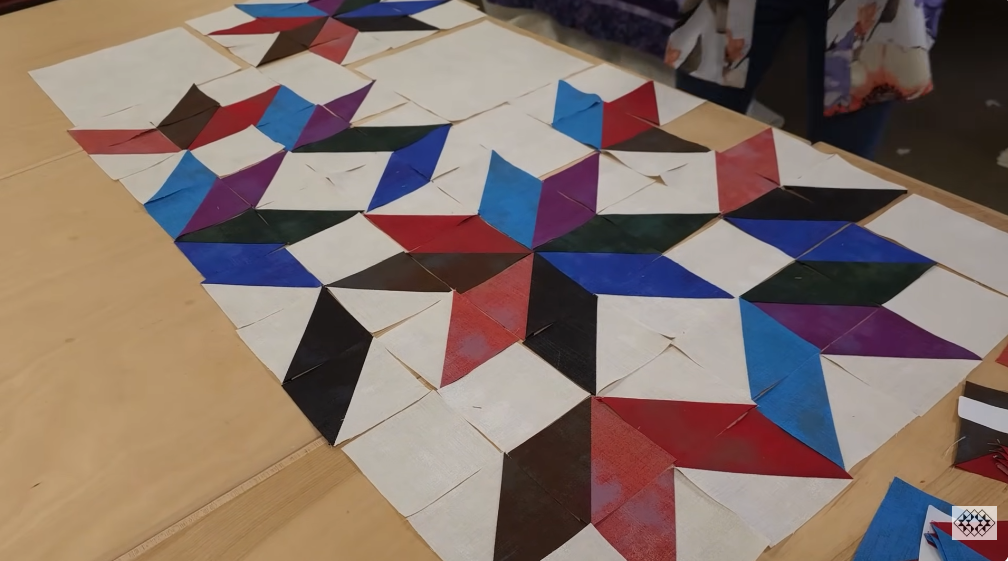
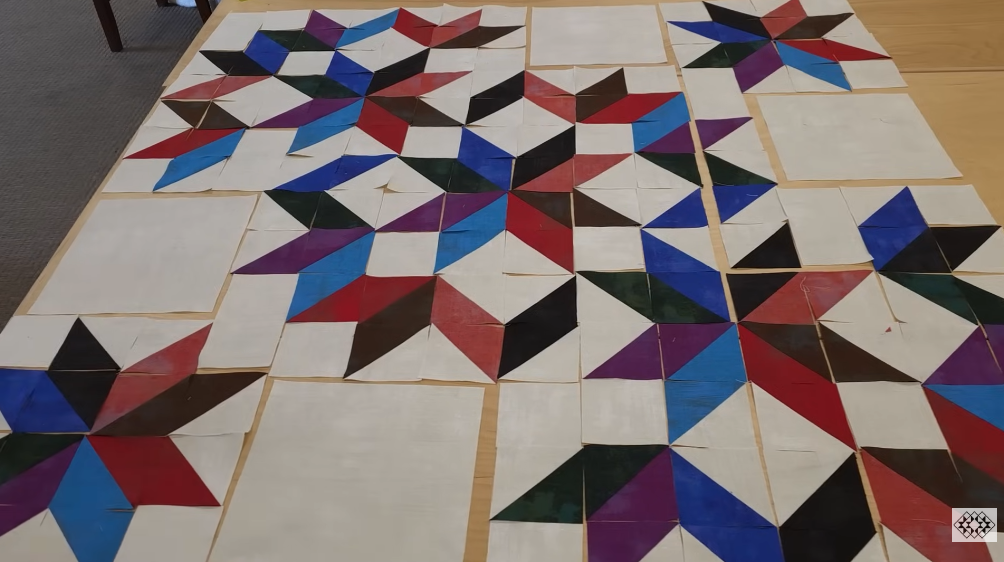
Step 7 — Layout — balance your jewels
- On a design wall or floor, lay out your trimmed units in the arrangement shown in the video (often a regular grid or medallion with center focus).
- Shuffle units until color/value balance feels right — move darker jewels evenly across the field so the eye flows. The video emphasizes stepping back and moving pieces for balance.
Step 8 — Add setting triangles if on-point / set blocks
- If you set diamond blocks on-point, you’ll need background triangles at the edges: cut background squares (slightly oversized), then cut on the diagonals to create setting triangles. Attach them to edge blocks per the pattern and trim the outer shape square.
- If you straight-set the diamonds (blocks aligned), you can add narrow background sashing or simply sew blocks together in rows.
Step 9 — Join rows to make the quilt top
- Sew blocks into rows, press and then sew rows together. If you used alternating seams/nesting, press accordingly so intersections match neatly. Check across the width for straightness and adjust if needed. Square the top.
Step 10 — Add borders
- Add an inner narrow background frame first if you like; then add an outer border in the fabric you chose. Borders finish the composition and give you the exact final dimensions. Measure the top and cut borders to length (remember ¼” seam allowance).
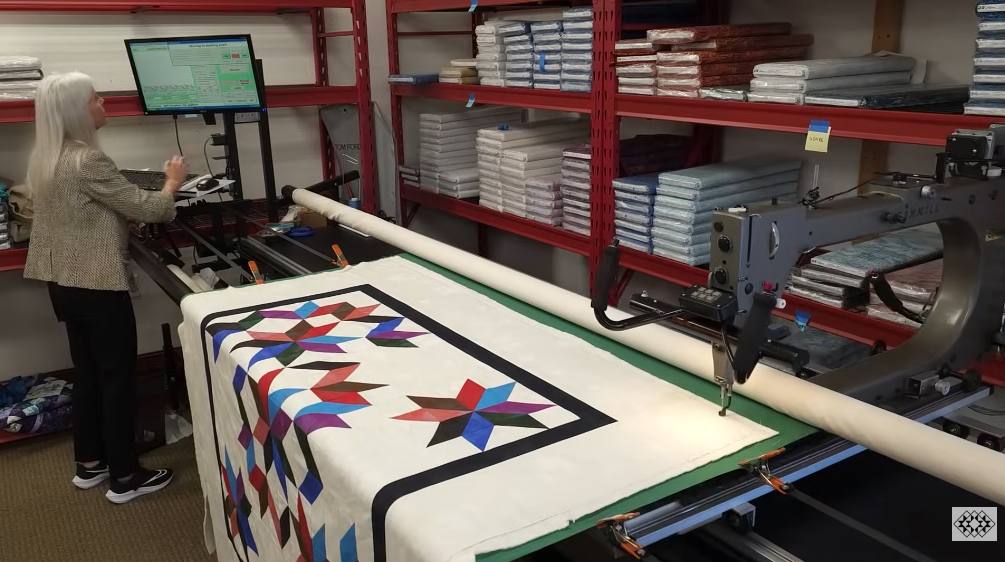
Step 11 — Baste the quilt sandwich
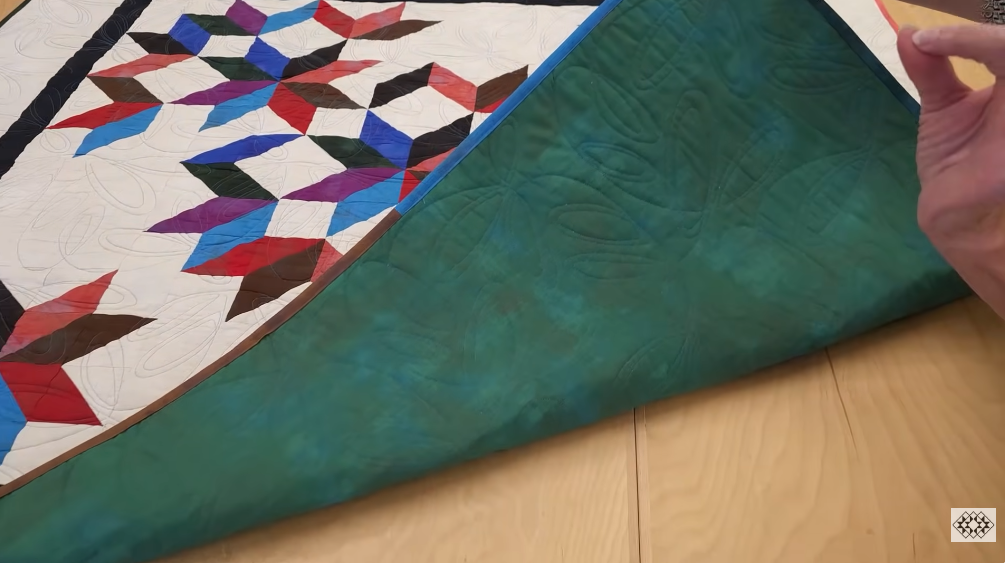
- Layer backing + batting + top. Baste with spray or safety pins. Smooth well so your concentric jewel bands lie flat.
Step 12 — Quilting (choices that flatter jewels)
- Echo quilting around each diamond/jewel accentuates the faceted look. Use echo lines at regular spacing around each diamond.
- Straight-line quilting that follows the strip directions also looks modern and crisp.
- For a softer, cozy finish, an all-over meander works and won’t compete with the jewel faces.
- Use a thread color that either blends (for a subtle texture) or contrasts slightly (to emphasize edges), depending on desired look.
Step 13 — Trim, bind & finish
- Trim the quilt sandwich to the top edge. Prepare binding strips (2½” recommended) and attach binding to finish the quilt. Add a label and press.
Finishing tips & troubleshooting (practical reminders from the video style)
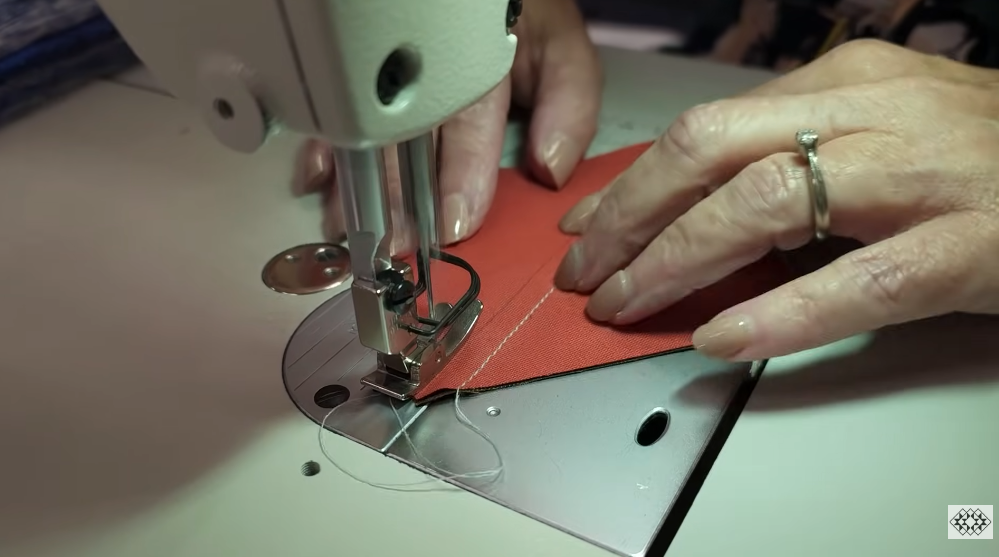
- Consistent ¼” seam is the single most important accuracy control — use your ¼” foot and test first.
- Batch everything: chain-piece strip sets, stack-cut squares, trim stacked diamonds, then assemble — huge speed gains.
- Trim early & often: trim diamond blanks/blocks to size before assembling the full top to avoid cumulative size drift.
- Press strategically: press seams toward darker fabrics to reduce show-through on the background; press open where many seams meet to reduce bulk at centers.
- Cut extras of the most-used sub-units. It’s faster to have a few spares than to stop mid-assembly to make more.
VIDEO: