 by
by RADIANT — Step-by-step sewing tutorial
Notes up front
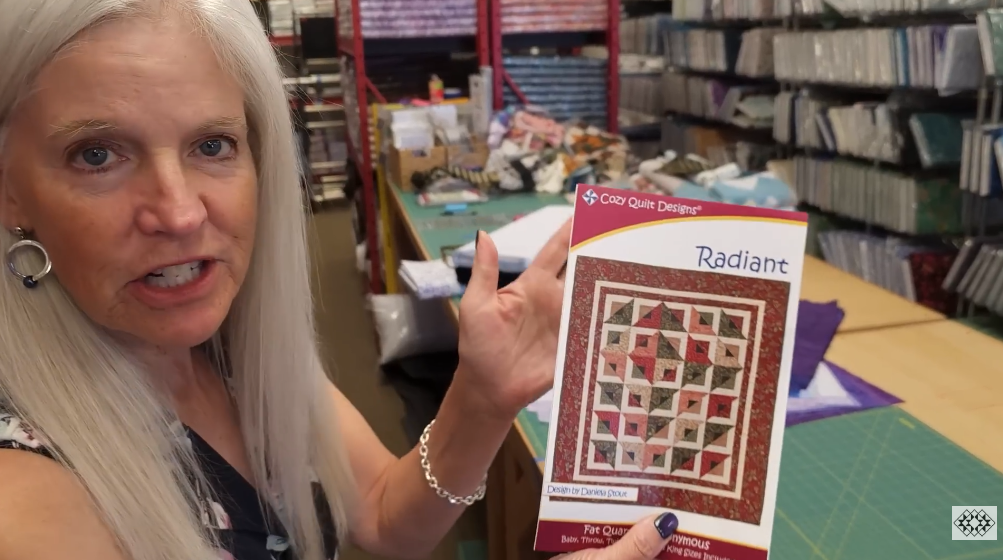
- The Radiant pattern is fat-quarter friendly and includes sizes from baby up to king (throw listed as 62″ × 71″). If you want exact cut lists and block sizes for a specific finished size, buy the Cozy Quilt Designs “Radiant” pattern or the Jordan Fabrics product listing — the pattern gives precise yardage and cutting.
Materials (what to gather)
- Fat quarters: a coordinated set (how many depends on size — typically 12–30 fat quarters for a throw/large throw look). Radiant is designed to showcase fat-quarter collections.
- Background / contrast fabric (light background or neutral): yardage depends on finished size.
- Accent/dark fabric (small amount) — used to define the “radiant” contrast.
- Border fabric, backing, batting, binding fabric.
- Standard tools: rotary cutter, rulers (at least 6½”×24″ and a square ruler), cutting mat, sewing machine (¼” seam allowance), pins or clips, iron/pressing surface, threads.

Overview of construction
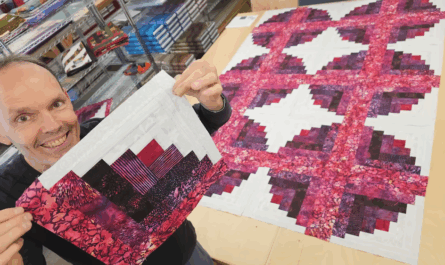
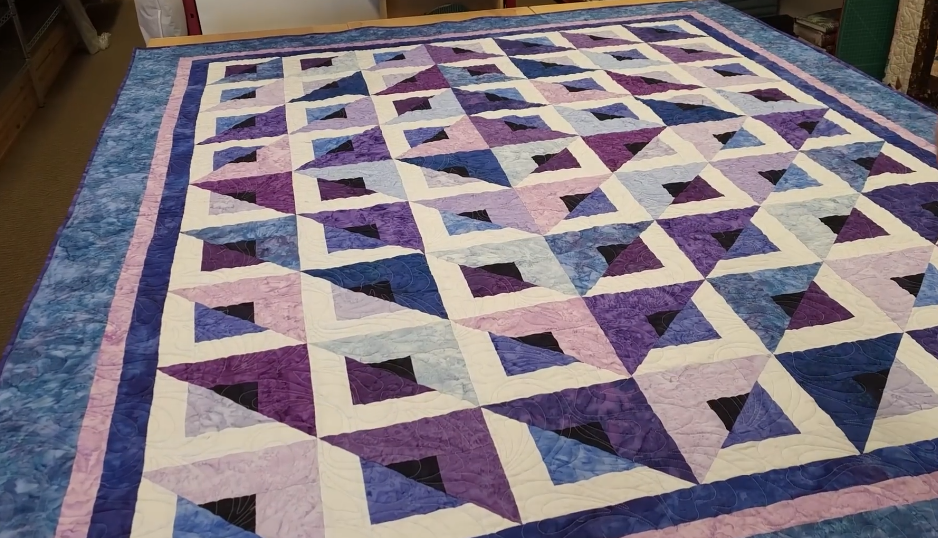
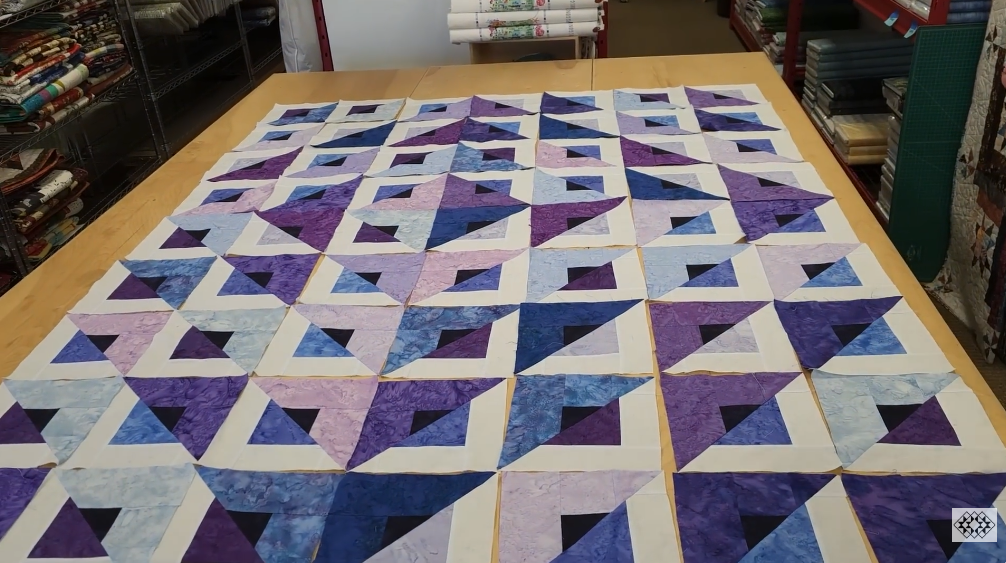
Radiant is a strip/patchwork design that uses fat quarters and background to build repeated units which read as “radiating” shapes across the quilt. Jordan’s video demonstrates strip sewing and assembly in a fast method — you’ll be making multi-strip units, subcutting, assembling block units, squaring, joining blocks into rows, then adding borders. No curved seams — everything is straight seam piecing.
Step 1 — Plan & choose layout
- Choose the finished size you want (baby, throw, twin, queen, king). The throw (62″ × 71″) is a popular size shown in examples.
- Arrange your fat quarters by color/value so the radiating effect is clear — the pattern relies on light/dark contrast. Decide whether you want a gradual shift of color across the quilt or a more random scrappy look.
Step 2 — Cut basics (fat-quarter friendly approach)
(These are the usual, pattern-friendly cutting ideas — for exact cut counts/measurements use the pattern.)
- From each fat quarter cut strips across the width of the fabric. The Radiant design in most demonstrations uses 2½” strips (jelly-roll width) for the strip piecing method, but check the pattern for the exact subcut lengths for the size you choose.
- From background fabric cut the widths called for in the pattern — generally several background strips to frame and separate the radiating elements. Reserve pieces for borders.
Step 3 — Make strip sets / chain-piece
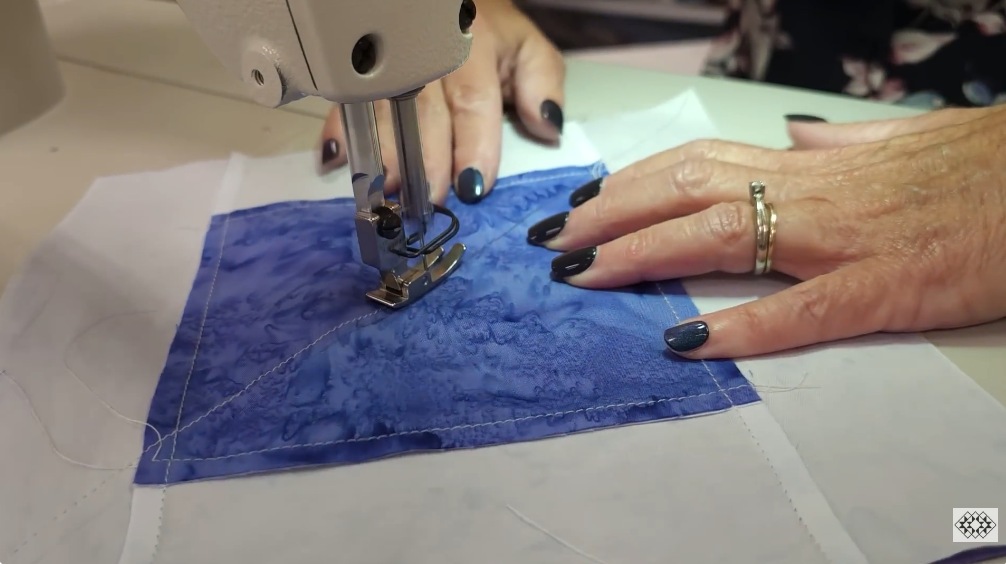
- Pair or group strips (mix lights & darks as you planned) and chain-piece them into multi-strip strip-sets (for speed). Sew with ¼” seams. Press seams either open or to one side (be consistent). Jordan demonstrates chain-piecing to make lots of strip units quickly.
- Press and subcut these strip-sets into the panel units the pattern calls for (subcut widths depend on pattern — e.g., subcut into squares or rectangles that will be assembled into a larger block).
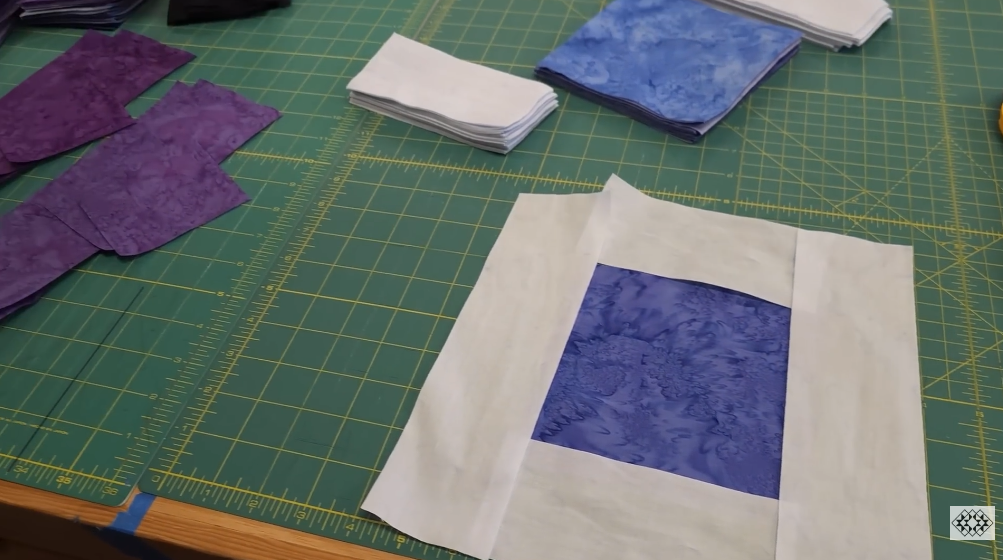
Step 4 — Build Radiant units / blocks
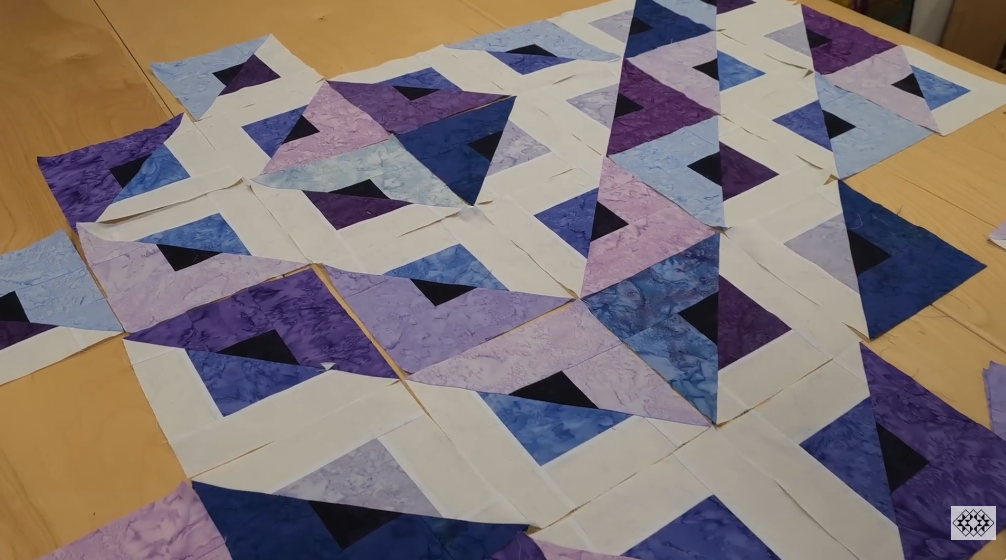
- The Radiant design is constructed from repeating units (blocks or banded sections) that use the fat-quarter strip pieces plus the background and small dark accents. Lay the subcut pieces out to form the radiating motif (you’ll see diagonals/steps that look like light “rays” meeting dark accents).
- Sew pieces together in the order shown in the pattern or the video; press seams as you go. Square each unit to the size specified (trimming accurately is important so the final rows match). Jordan shows lining up and trimming as you assemble to keep the radiating lines crisp.
Step 5 — Arrange & join blocks into rows
- Decide on the placement of your assembled blocks/units on the design wall or floor so the value progression is pleasing. Radiant often uses a mirrored or repeated placement so the eye reads outward from a center or from each block’s dark accent.
- Join blocks into horizontal rows (or into the assembly layout of your chosen size). Match seams carefully; use pins where necessary. Press row seams.
Step 6 — Join rows to make the quilt top
- Lay out completed rows, match seams, and sew rows together. Take time to match intersections as best you can — accurate trimming in prior steps makes this straightforward.
- Add any narrow inner framing strips or sashing called for by the pattern between rows if the pattern includes them.
Step 7 — Add borders
- Measure quilt top and cut border strips to length. Sew borders on in the order recommended (typically side borders first, then top/bottom). Press seams and square corners. The Radiant pattern includes border widths for each size; follow those to keep the overall proportions.
Step 8 — Baste & quilt
- Make the quilt sandwich: backing (wrong side up) → batting → quilt top (right side up). Baste with pins, spray basting, or safety pins.
- Jordan often recommends straight-line quilting or stitch-in-the-ditch to emphasize the radiating stripwork, but you can choose any quilting design that complements the linear effect. Straight vertical/horizontal or echo quilting around the radiating elements works especially well.
Step 9 — Trim, bind, and finish
- Trim the quilt edges even with the top. Make and attach binding (typical method: 2½” binding strips joined to make continuous binding, fold in half, attach to front, fold to back and hand/machine finish).
- Label your quilt with maker/date and press lightly if needed.
Helpful tips from the video & pattern approach
- Use a consistent ¼” seam allowance. That’s essential for the fat-quarter strip method to finish accurately.
- Chain-piecing saves time when making many strip sets.
- Trim as you go. Square units before joining to prevent accumulation of small errors. Jordan trims generously to keep radiant lines crisp.
- Contrast matters. Pick your background and accent fabrics so the “rays” read clearly — the pattern works best with a noticeable difference between lights and darks.

Where to get the exact cutting & quantities
- If you want precise measurements and a complete cut list for throw (62″ × 71″) or other sizes, get the Radiant pattern (Cozy Quilt Designs) — it contains step-by-step cutting diagrams and exact fabric yardage for baby → king. Jordan’s video demonstrates the same construction method; using both together gives the fastest route to an identical quilt.
VIDEO: