by
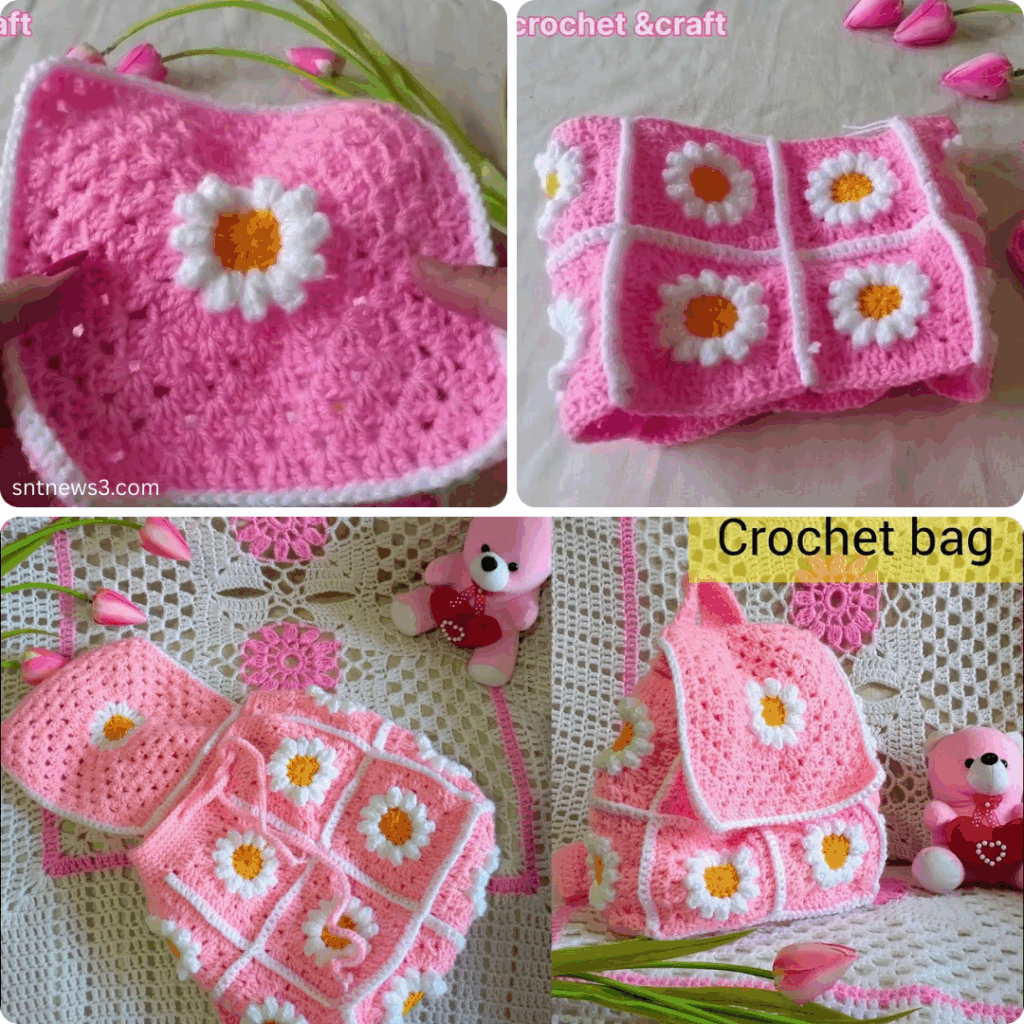
by Looking for an adorable, handmade accessory for a baby girl? A crochet granny square backpack is the perfect combination of cuteness and functionality. Whether it’s used to carry small toys or just as a stylish accessory, this backpack makes a charming gift or keepsake. Best of all, it’s made with classic granny squares, making it beginner-friendly and quick to assemble.
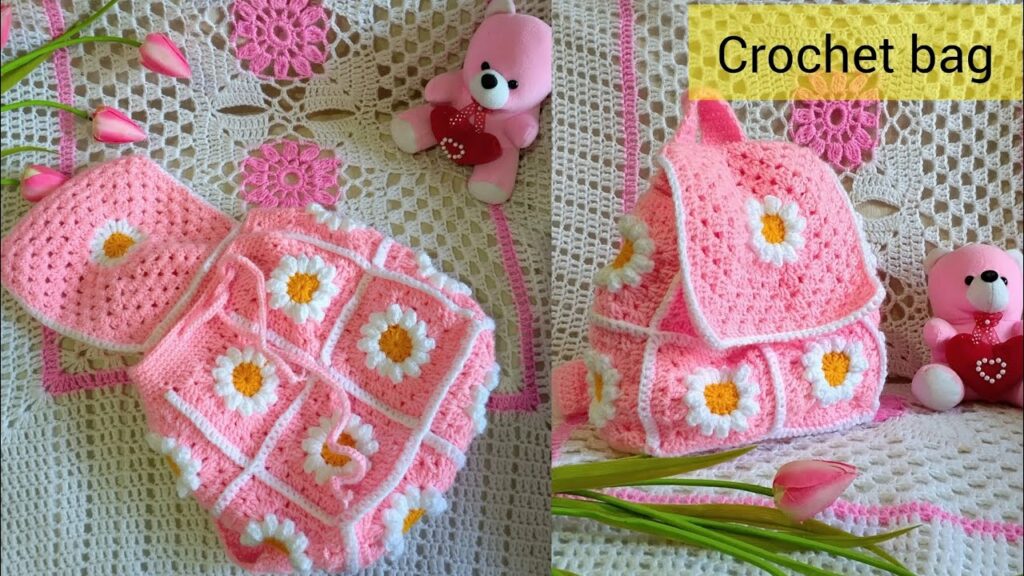
In this article, we’ll walk you through materials, step-by-step instructions, assembly, and customization options to create your very own crochet granny square backpack for a baby girl.
🧶 Materials Needed
- Worsted weight yarn in 2–3 colors (cotton or soft acrylic recommended)
- Suggested colors: pastel pink, white, light grey, lavender, or mint
- Crochet hook size H/5.0 mm
- Yarn needle
- Scissors
- 2 small buttons or toggles for closure
- Optional: ribbon, lace, or applique for decoration
🧵 Stitches and Abbreviations
You only need to know a few basic stitches:
- Ch – Chain
- Sl st – Slip Stitch
- Sc – Single Crochet
- Dc – Double Crochet
- Granny Cluster – 3 double crochets in the same stitch or space
🧸 Finished Size
Approx. 6″ x 6″ backpack body with adjustable straps — ideal for a toddler or baby girl aged 1–3 years.
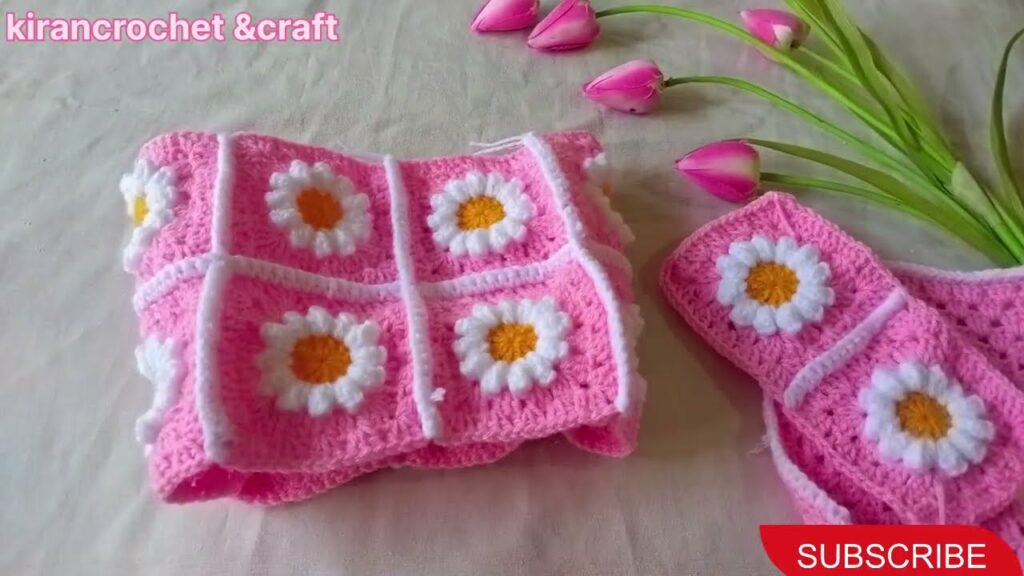
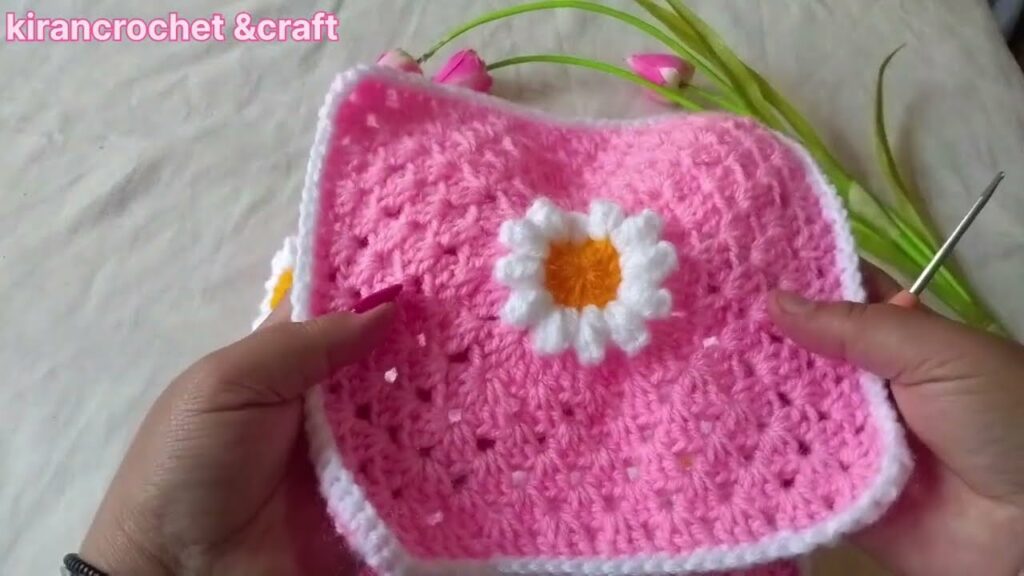
🧩 Step 1: Make 6 Granny Squares
Basic Granny Square Pattern (Make 6)
- Round 1:
- Ch 4, join with sl st to form ring.
- Ch 3 (counts as first dc), 2 dc into ring, ch 2, 3 dc — repeat * 3 more times.
- Join with sl st in top of beginning ch-3.
- Round 2:
- Sl st to next ch-2 space.
- (3 dc, ch 2, 3 dc) in ch-2 space (corner), ch 1 — repeat around.
- Join with sl st.
- Round 3:
- Continue pattern by making (3 dc, ch 2, 3 dc) in corners and 3 dc in each ch-1 space with ch 1 between clusters.
- Fasten off and weave in ends.
You should now have 6 colorful granny squares measuring approximately 3″x3″ each.
🧵 Step 2: Assemble the Bag
Form the Backpack Body:
- Lay out 5 squares in a plus-sign shape (1 center, 4 around it).
- Use slip stitch or whipstitch to sew the sides together to form a cube, leaving the top open.
- Use the 6th square as the flap — attach one side of it to the back upper edge of the backpack.
🎒 Step 3: Add the Straps
Backpack Straps:
- Ch 60–80, depending on child’s size.
- Sc in each ch to make a sturdy strap.
- Make two straps.
- Attach ends of each strap securely to the bottom corners and upper sides of the back panel.

🧷 Step 4: Add the Closure
- Sew a button to the front center square.
- Make a loop (chain 10 and sl st to make a circle) on the flap for a buttonhole.
Optional: Use a snap or Velcro for baby-safe closure instead of buttons.
🎀 Step 5: Customize and Decorate
Here are some cute ideas to personalize your granny square backpack:
- Add crocheted flowers, bows, or hearts
- Sew on lace trim or ribbons
- Use variegated yarn for a multicolor effect
- Embroider the baby’s initial on the flap
✅ Tips for Success
- Block your granny squares before assembling for a clean, polished look.
- Use coordinating colors for a soft, girly theme.
- Reinforce the straps with extra stitching so they don’t stretch or come loose.
- Want a lining? Add a fabric lining inside for extra durability (optional, not necessary).
🎁 Perfect for Gifting
A crochet granny square backpack is:
- Ideal for baby showers
- A sweet first birthday gift
- A memorable handmade keepsake
- Perfect for photoshoots or everyday toddler adventures
Video tutorial:
💬 Conclusion
This granny square backpack combines simplicity with charm. With just a few granny squares and some basic stitches, you can create a beautiful and functional accessory for a baby girl. Whether you’re new to crochet or a seasoned maker, this project is a rewarding and joyful way to bring your craft to life.